High Protein Chickpea Snack Bites (Savory & Oven-Baked) – Easy, Crunchy, Satisfying

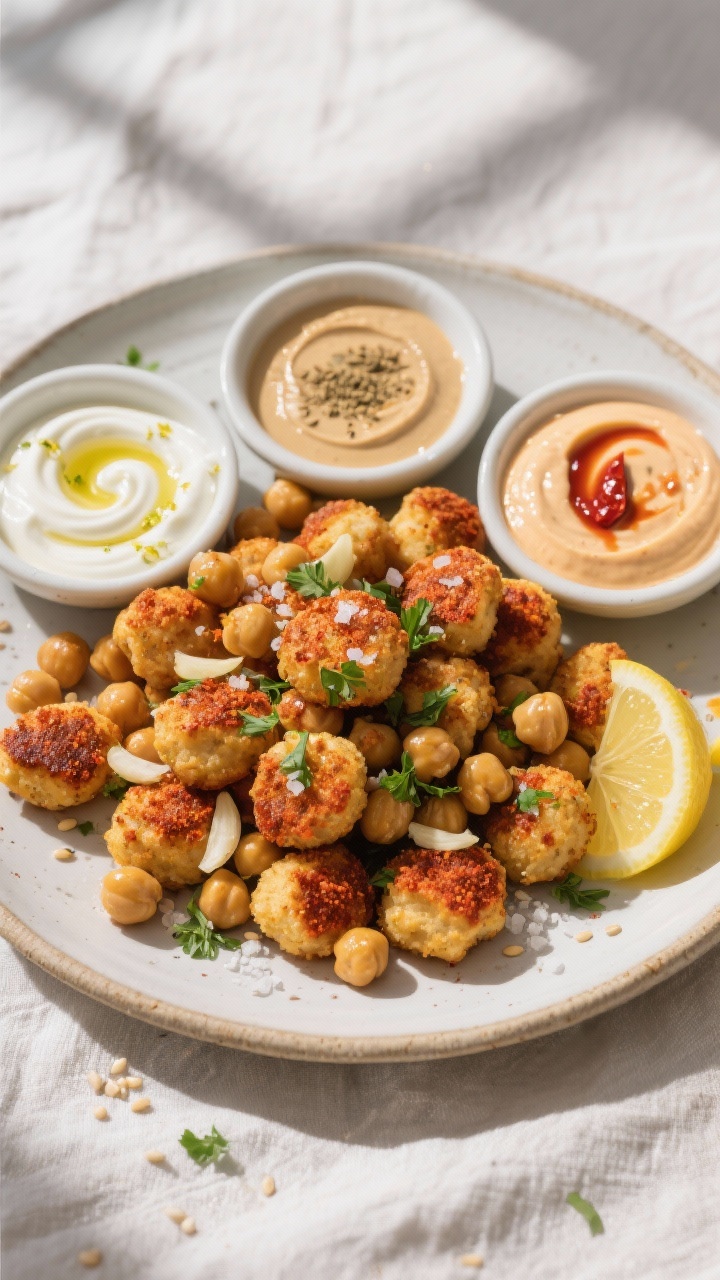
These savory chickpea snack bites hit that crunchy, salty spot without leaving you sluggish. They’re simple to make, baked—not fried—and full of plant-based protein. Think of them as a cross between falafel and a cracker: crisp on the outside, tender inside, and perfect for dipping.

They’re great for lunch boxes, game days, or late-afternoon munchies. If you like make-ahead snacks that feel homemade and wholesome, this one’s a keeper.

Why This Recipe Works

Close-up detail and cooking process: Oven-baked chickpea snack bites on a parchment-lined sheet pan
  • Protein-packed base: Chickpeas and chickpea flour offer a complete, satisfying snack with staying power.
  • Oven-baked for crunch: A hot oven and a light brush of oil give a crispy exterior without deep frying.
  • Flexible seasoning: A simple savory blend—garlic, smoked paprika, cumin—pairs with dips or stands on its own.
  • Quick to prep: Everything mixes in one bowl, rolls into bite-sized balls, and bakes in under 20 minutes.
  • Meal-prep friendly: Stores well and reheats beautifully in the oven or air fryer.

Shopping List

  • 1 can (15 oz) chickpeas, drained and rinsed
  • 1/2 cup chickpea flour (or oat flour as a backup)
  • 1 large egg (or 1 flax egg for vegan: 1 tbsp ground flax + 3 tbsp water)
  • 2 tbsp extra-virgin olive oil, plus more for brushing
  • 1 tbsp lemon juice
  • 1 tsp garlic powder
  • 1 tsp onion powder
  • 1 tsp smoked paprika
  • 1/2 tsp ground cumin
  • 1/2 tsp baking powder
  • 1/2–3/4 tsp fine sea salt (to taste)
  • 1/4 tsp black pepper
  • Optional add-ins: 2 tbsp chopped parsley or cilantro, 2 tbsp grated Parmesan (or nutritional yeast for vegan), pinch of chili flakes

Step-by-Step Instructions

Final plated, tasty top view: Overhead shot of a ceramic platter piled with savory chickpea snack bi
  1. Preheat the oven: Set to 400°F (200°C). Line a baking sheet with parchment and lightly brush with oil.
  2. Mash the chickpeas: In a large bowl, mash chickpeas with a fork or potato masher until mostly smooth with some small bits for texture.
  3. Mix the wet ingredients: Add egg (or flax egg), olive oil, and lemon juice.

    Stir until combined.

  4. Add dry ingredients: Stir in chickpea flour, baking powder, garlic powder, onion powder, smoked paprika, cumin, salt, and pepper. Fold in herbs, Parmesan, or chili flakes if using.
  5. Adjust texture: The mixture should be soft but not sticky. If it’s too wet, add 1–2 tablespoons more chickpea flour.

    If too dry, add 1 teaspoon water or olive oil.

  6. Shape the bites: Scoop about 1 tablespoon per bite. Roll into small balls or press into nugget shapes about 1 inch thick.
  7. Pan setup: Place on the prepared sheet with a little space between. Lightly brush or spray the tops with oil for extra crispness.
  8. Bake: Bake for 14–18 minutes, flipping halfway, until golden and firm at the edges.

    For extra crunch, broil for 1–2 minutes at the end.

  9. Cool slightly: Let sit for 5 minutes to set. Serve warm with yogurt-herb dip, tahini sauce, or hot sauce.

How to Store

  • Fridge: Store in an airtight container for up to 4 days.
  • Freezer: Freeze on a sheet pan until solid, then transfer to a bag; keep up to 2 months.
  • Reheat: Oven or air fryer at 375°F (190°C) for 5–8 minutes until hot and crisp. Avoid microwaving if you want crunch.

Why This is Good for You

  • High protein and fiber: Chickpeas and chickpea flour help keep you full and support steady energy.
  • Better fats: Olive oil adds heart-healthy monounsaturated fats.
  • Low-glycemic carbs: Great for balanced snacking without sugar crashes.
  • Micronutrients: Chickpeas offer iron, folate, and magnesium; herbs add antioxidants.

Common Mistakes to Avoid

  • Over-wet batter: If the mix sticks to your hands, add a bit more chickpea flour.

    Too wet means soggy bites.

  • Skipping oil: A light brush of oil helps browning and crunch. Don’t skip it.
  • Under-seasoning: Chickpeas love bold flavors. Taste the mixture and adjust salt and spices before baking.
  • Crowding the pan: Space them out so they crisp instead of steam.
  • Overbaking: They dry out quickly.

    Pull when golden and firm, not hard.

Recipe Variations

  • Herb & Lemon: Add extra lemon zest and fresh parsley; serve with tzatziki.
  • Spicy Chipotle: Mix in 1 tsp chipotle powder and a squeeze of lime; dip in avocado-lime sauce.
  • Umami Parmesan: Add 2–3 tbsp grated Parmesan and a pinch of Italian seasoning.
  • Curry Crunch: Use 1 tsp curry powder and a pinch of turmeric; pair with mango chutney yogurt.
  • Sesame-Scallion: Add 1 tbsp toasted sesame seeds and 2 chopped scallions; finish with a drizzle of soy-tahini.

FAQ

Can I make these vegan?

Yes. Use a flax egg (1 tbsp ground flax mixed with 3 tbsp water, set for 10 minutes). The bites will be slightly softer but still hold well.

Can I air fry instead of baking?

Absolutely.

Air fry at 375°F (190°C) for 10–12 minutes, shaking or flipping halfway, until golden and crisp.

Do I have to use chickpea flour?

Chickpea flour gives the best texture and extra protein. If needed, use oat flour; add a bit more if the mixture feels wet.

How do I keep them from falling apart?

Make sure the mixture isn’t too dry or too wet. Press the bites firmly when shaping, and don’t skip the egg or flax egg.

What dips go well with these?

Try lemon-garlic yogurt, tahini sauce, harissa mayo, or a simple squeeze of lemon with a sprinkle of sea salt.

Can I add veggies?

Yes—finely grated carrot or minced spinach works.

Squeeze out excess moisture first to keep the texture crisp.

Final Thoughts

These oven-baked chickpea snack bites are easy, nourishing, and endlessly adaptable. Keep a batch in the fridge for quick protein or freeze them for busy weeks. With a short ingredient list and bold flavor, they’re the kind of snack you’ll actually look forward to eating.

Make them once, and they’ll become a go-to in your rotation.

High Protein Chickpea Snack Bites (Savory & Oven-Baked) - Easy, Crunchy, Satisfying

Prep Time 10 minutes
Cook Time 25 minutes
Total Time 35 minutes
Servings 12 servings

Ingredients
  

  • 1 can (15 oz) chickpeas, drained and rinsed
  • 1/2 cup chickpea flour (or oat flour as a backup)
  • 1 large egg (or 1 flax egg for vegan: 1 tbsp ground flax + 3 tbsp water)
  • 2 tbsp extra-virgin olive oil, plus more for brushing
  • 1 tbsp lemon juice
  • 1 tsp garlic powder
  • 1 tsp onion powder
  • 1 tsp smoked paprika
  • 1/2 tsp ground cumin
  • 1/2 tsp baking powder
  • 1/2–3/4 tsp fine sea salt (to taste)
  • 1/4 tsp black pepper
  • Optional add-ins: 2 tbsp chopped parsley or cilantro, 2 tbsp grated Parmesan (or nutritional yeast for vegan), pinch of chili flakes

Instructions
 

  • Preheat the oven: Set to 400°F (200°C). Line a baking sheet with parchment and lightly brush with oil.
  • Mash the chickpeas: In a large bowl, mash chickpeas with a fork or potato masher until mostly smooth with some small bits for texture.
  • Mix the wet ingredients: Add egg (or flax egg), olive oil, and lemon juice.Stir until combined.
  • Add dry ingredients: Stir in chickpea flour, baking powder, garlic powder, onion powder, smoked paprika, cumin, salt, and pepper. Fold in herbs, Parmesan, or chili flakes if using.
  • Adjust texture: The mixture should be soft but not sticky. If it’s too wet, add 1–2 tablespoons more chickpea flour.If too dry, add 1 teaspoon water or olive oil.
  • Shape the bites: Scoop about 1 tablespoon per bite. Roll into small balls or press into nugget shapes about 1 inch thick.
  • Pan setup: Place on the prepared sheet with a little space between. Lightly brush or spray the tops with oil for extra crispness.
  • Bake: Bake for 14–18 minutes, flipping halfway, until golden and firm at the edges.For extra crunch, broil for 1–2 minutes at the end.
  • Cool slightly: Let sit for 5 minutes to set. Serve warm with yogurt-herb dip, tahini sauce, or hot sauce.

Creamy White Bean Chicken Soup (High Protein & Naturally Gluten Free) – Cozy, Satisfying, and Easy

This is the kind of soup you make when you want something comforting but still fresh and nourishing. Tender chicken, creamy white beans, and silky broth come together with simple herbs and bright lemon. It’s hearty without being heavy, and it happens to be naturally gluten free.

One pot, simple ingredients, and big flavor you’ll want on repeat. Perfect for weeknights, meal prep, or sharing with friends.

Why This Recipe Works

Cooking process, close-up detail: Steaming pot of creamy white bean chicken soup mid-simmer, capture
  • High protein, real comfort: Chicken and white beans team up for a filling, satisfying bowl that keeps you full for hours.
  • Creamy without flour: Blending a portion of the beans thickens the soup naturally, so no roux is needed.
  • Everyday ingredients: Pantry staples like canned beans, broth, and onions turn into something special with a few smart steps.
  • Balanced flavor: A squeeze of lemon and fresh herbs brighten the rich, creamy base.
  • Make-ahead friendly: Holds up beautifully in the fridge and freezes well.

What You’ll Need

  • Olive oil – For sautéing and flavor.
  • Onion, celery, and carrots – Classic aromatics for depth.
  • Garlic – Fresh cloves for warmth.
  • Cooked chicken – Shredded rotisserie or poached chicken breasts/thighs.
  • Canned white beans – Cannellini or great northern beans, drained and rinsed.
  • Chicken broth – Low-sodium so you can control seasoning.
  • Coconut milk or half-and-half – For creaminess; use what fits your diet. (Coconut milk keeps it dairy-light and still silky.)
  • Bay leaf – Subtle herbal note.
  • Dried thyme and dried oregano – Reliable, pantry-friendly herbs.
  • Baby spinach or kale – For color and nutrients.
  • Lemon juice and zest – Brightens the finish.
  • Salt and black pepper – Season to taste.
  • Optional boosts: Red pepper flakes, smoked paprika, fresh parsley.

Step-by-Step Instructions

Final dish, tasty top view: Overhead shot of a ladle-served bowl of Creamy White Bean Chicken Soup,
  1. Sauté the aromatics: Warm 1–2 tablespoons olive oil in a large pot over medium heat. Add diced onion, celery, and carrots with a pinch of salt.

    Cook 5–7 minutes until softened. Stir in minced garlic for 30 seconds.

  2. Add seasonings: Sprinkle in dried thyme, dried oregano, and a bay leaf. Toast for 30 seconds to release flavor.
  3. Build the base: Pour in chicken broth and bring to a gentle simmer.
  4. Blend for creaminess: Add half the white beans to the pot.

    Use an immersion blender to partially blend until the broth looks creamy but still has texture. (Or blend 1–2 cups in a blender, then return to the pot.)

  5. Add protein and greens: Stir in the remaining beans and shredded chicken. Simmer 5–10 minutes to warm through and meld flavors.
  6. Finish creamy: Stir in 1/2–3/4 cup coconut milk or half-and-half. Simmer 2–3 minutes.

    Add spinach or chopped kale and cook just until wilted.

  7. Brighten and season: Turn off heat. Add lemon zest and juice to taste. Season with salt and pepper.

    If you like heat, add a pinch of red pepper flakes.

  8. Serve: Ladle into bowls and top with chopped parsley and a drizzle of olive oil. Cracked pepper on top is great.

How to Store

  • Fridge: Cool completely, then store in airtight containers for up to 4 days.
  • Freezer: Freeze up to 3 months. Leave a little headspace for expansion.

    Thaw overnight in the fridge.

  • Reheat: Warm gently on the stovetop over low heat, adding a splash of broth or water if it thickens. Avoid boiling to keep the texture smooth.

Health Benefits

  • Protein-packed: Chicken plus beans delivers a steady, satisfying source of protein.
  • Fiber-rich: White beans support digestion and help with fullness.
  • Naturally gluten free: No flour or pasta needed for creaminess.
  • Nutrient-dense greens: Spinach or kale adds iron, vitamin K, and antioxidants.
  • Balanced fats: Olive oil and coconut milk or dairy provide satiety and flavor.

Pitfalls to Watch Out For

  • Over-salting: Start with low-sodium broth and season at the end after the soup reduces.
  • Boiling dairy: High heat can cause curdling. Keep it at a gentle simmer after adding coconut milk or half-and-half.
  • Skipping the blend: Blending some beans is key for that creamy body.

    Don’t skip it.

  • Dry chicken: Add cooked chicken toward the end so it stays tender.

Variations You Can Try

  • Herb swap: Use Italian seasoning or add fresh rosemary and thyme at the end.
  • Spicy kick: Stir in a teaspoon of smoked paprika or a diced jalapeño with the aromatics.
  • Veggie boost: Add diced zucchini or mushrooms with the carrots and celery.
  • Dairy-free: Use full-fat coconut milk and finish with extra lemon to balance richness.
  • Rotisserie shortcut: Shred a store-bought chicken to cut prep time.
  • No chicken: Make it vegetarian by swapping in vegetable broth and more beans; add a can of chickpeas for extra protein.

FAQ

Can I use dried beans instead of canned?

Yes. Cook 1 to 1 1/2 cups dried white beans until tender before starting the soup. You’ll need about 3 cups cooked beans.

Save some of the bean cooking liquid to blend in for extra creaminess.

What kind of chicken works best?

Leftover roasted chicken or rotisserie is perfect. If cooking from scratch, poach boneless thighs or breasts in salted water with a bay leaf, then shred.

How do I make it thicker?

Blend more of the soup until it reaches your desired consistency, or simmer a bit longer to reduce. You can also mash a handful of beans directly in the pot.

Is this soup freezer-friendly?

Absolutely.

It freezes well for up to 3 months. Reheat gently and add a splash of broth if it’s too thick.

Can I cook this in a slow cooker?

Yes. Add everything except the dairy, greens, and lemon.

Cook on Low 6–7 hours or High 3–4 hours. Stir in coconut milk or half-and-half, greens, and lemon in the last 15 minutes.

Wrapping Up

This creamy white bean chicken soup hits all the marks: cozy, protein-rich, and naturally gluten free. It’s simple to make, customizable, and perfect for leftovers.

Keep the ingredients on hand and you’ll always have an easy, wholesome dinner ready to go.

Creamy White Bean Chicken Soup (High Protein & Naturally Gluten Free) - Cozy, Satisfying, and Easy

Prep Time 10 minutes
Cook Time 25 minutes
Total Time 35 minutes
Servings 6 servings

Ingredients
  

  • Olive oil – For sautéing and flavor.
  • Onion, celery, and carrots – Classic aromatics for depth.
  • Garlic – Fresh cloves for warmth.
  • Cooked chicken – Shredded rotisserie or poached chicken breasts/thighs.
  • Canned white beans – Cannellini or great northern beans, drained and rinsed.
  • Chicken broth – Low-sodium so you can control seasoning.
  • Coconut milk or half-and-half – For creaminess; use what fits your diet. (Coconut milk keeps it dairy-light and still silky.)
  • Bay leaf – Subtle herbal note.
  • Dried thyme and dried oregano – Reliable, pantry-friendly herbs.
  • Baby spinach or kale – For color and nutrients.
  • Lemon juice and zest – Brightens the finish.
  • Salt and black pepper – Season to taste.
  • Optional boosts: Red pepper flakes, smoked paprika, fresh parsley.

Instructions
 

  • Sauté the aromatics: Warm 1–2 tablespoons olive oil in a large pot over medium heat. Add diced onion, celery, and carrots with a pinch of salt.Cook 5–7 minutes until softened. Stir in minced garlic for 30 seconds.
  • Add seasonings: Sprinkle in dried thyme, dried oregano, and a bay leaf. Toast for 30 seconds to release flavor.
  • Build the base: Pour in chicken broth and bring to a gentle simmer.
  • Blend for creaminess: Add half the white beans to the pot.Use an immersion blender to partially blend until the broth looks creamy but still has texture. (Or blend 1–2 cups in a blender, then return to the pot.)
  • Add protein and greens: Stir in the remaining beans and shredded chicken. Simmer 5–10 minutes to warm through and meld flavors.
  • Finish creamy: Stir in 1/2–3/4 cup coconut milk or half-and-half. Simmer 2–3 minutes.Add spinach or chopped kale and cook just until wilted.
  • Brighten and season: Turn off heat. Add lemon zest and juice to taste. Season with salt and pepper.If you like heat, add a pinch of red pepper flakes.
  • Serve: Ladle into bowls and top with chopped parsley and a drizzle of olive oil. Cracked pepper on top is great.

Creamy Tuscan Chicken Skillet (High Protein, Dairy Light) – A Cozy, Weeknight Favorite

This creamy Tuscan chicken is a weeknight hero: rich and comforting without being heavy. The sauce is silky and flavorful, but we keep it dairy light by using broth and a touch of Greek yogurt instead of loads of cream. You’ll get juicy, seared chicken, sun-dried tomatoes, spinach, and garlic all in one skillet.

It tastes restaurant-level, but it’s simple and fast. Pair it with rice, pasta, or roasted veggies and dinner is done.

What Makes This Special

Cooking process, close-up detail: Golden-seared chicken cutlets nestled in a skillet as the creamy T
  • High protein, lighter sauce: Lean chicken plus Greek yogurt gives a creamy finish with less dairy and fewer calories.
  • Big flavor, simple steps: Sun-dried tomatoes, garlic, and herbs build depth fast.
  • One-pan convenience: Minimal cleanup and quick cook time.
  • Versatile: Serve over pasta, cauliflower rice, polenta, or crusty bread.
  • Meal prep friendly: Holds up well for a couple of days and reheats nicely.

Shopping List

  • 1.5–2 pounds boneless, skinless chicken breasts (or thighs), thinly sliced or cut into cutlets
  • 1 teaspoon kosher salt, plus more to taste
  • 1/2 teaspoon black pepper
  • 1 teaspoon paprika (sweet or smoked)
  • 1 tablespoon olive oil (plus more if needed)
  • 3–4 cloves garlic, minced
  • 1/2 cup sun-dried tomatoes in oil, drained and sliced
  • 1 cup low-sodium chicken broth
  • 1 teaspoon Italian seasoning (or 1/2 teaspoon dried oregano + 1/2 teaspoon dried basil)
  • 1/2 teaspoon red pepper flakes (optional, for heat)
  • 1/2 cup plain Greek yogurt (2% or 5%)
  • 1/4 cup grated Parmesan (optional, for extra richness)
  • 3 cups baby spinach
  • Juice of 1/2 lemon
  • Fresh basil, chopped (optional)

How to Make It

Final dish, top view: Overhead shot of Creamy Tuscan Chicken plated over al dente orzo—sliced juic
  1. Prep the chicken: Pat dry and season with salt, pepper, and paprika on both sides.
  2. Sear: Heat olive oil in a large skillet over medium-high. Add chicken in a single layer.

    Cook 3–4 minutes per side until golden and mostly cooked through. Transfer to a plate.

  3. Sauté aromatics: Lower heat to medium. Add a drizzle more oil if needed.

    Stir in garlic and sun-dried tomatoes. Cook 30–60 seconds until fragrant.

  4. Build the sauce: Pour in chicken broth. Stir in Italian seasoning and red pepper flakes.

    Scrape up browned bits. Simmer 2–3 minutes to reduce slightly.

  5. Make it creamy (dairy light): Turn heat to low. In a small bowl, whisk Greek yogurt with a few spoonfuls of hot broth from the pan to temper. Stir the tempered yogurt into the skillet until smooth.

    Do not boil.

  6. Add greens: Stir in spinach until wilted. If using Parmesan, add now and stir until melted.
  7. Finish the chicken: Return chicken and accumulated juices to the skillet. Simmer gently 2–4 minutes until cooked through (165°F internal).

    Squeeze in lemon juice and adjust salt and pepper.

  8. Serve: Top with fresh basil if you like. Spoon over pasta, rice, or roasted veggies.

How to Store

  • Refrigerator: Store in an airtight container for up to 3 days.
  • Reheat gently: Warm over low heat on the stove. Add a splash of broth to loosen the sauce.

    Avoid boiling to prevent yogurt from curdling.

  • Freezing: Not ideal due to the yogurt, which can separate. If you must freeze, thaw overnight and reheat very gently.

Health Benefits

  • High-quality protein: Chicken supports muscle repair and satiety.
  • Lighter dairy choice: Greek yogurt adds creaminess and probiotics with less saturated fat than heavy cream.
  • Greens and tomatoes: Spinach provides iron and folate; sun-dried tomatoes offer lycopene and concentrated flavor.
  • Balanced plate: Pair with whole grains or vegetables for fiber and steady energy.

What Not to Do

  • Don’t boil the sauce after adding yogurt. Heat gently to keep it silky.
  • Don’t overcrowd the pan when searing. You want color, not steaming.
  • Don’t skip seasoning. Taste at the end and adjust salt, pepper, and acid (lemon) to pop the flavors.
  • Don’t add spinach too early. Add near the end so it stays vibrant.

Variations You Can Try

  • Mushroom boost: Sauté sliced cremini mushrooms with the garlic for extra umami.
  • Artichoke hearts: Add a drained can or jar for a tangy twist.
  • Dairy-free: Swap yogurt for a thick, unsweetened plant-based yogurt and skip the Parmesan.
  • Seafood swap: Use shrimp; sear 1–2 minutes per side, remove, then finish in the sauce.
  • Herb-forward: Finish with fresh thyme and basil for a brighter profile.
  • Extra veggies: Add zucchini ribbons or roasted red peppers to bulk it up.

FAQ

Can I use chicken thighs instead of breasts?

Yes. Thighs stay juicy and work beautifully.

Sear a bit longer to render the fat and cook to 175°F for best texture.

How do I prevent the yogurt from curdling?

Temper the yogurt with hot broth, stir it in off or on low heat, and avoid boiling. A splash of lemon goes in at the end, not before simmering.

What can I use instead of sun-dried tomatoes?

Roasted red peppers, cherry tomatoes cooked down in the pan, or a spoonful of tomato paste can fill the gap.

Is Parmesan necessary?

No. It adds savoriness, but the sauce is still creamy and flavorful without it.

You can also use a small pinch of nutritional yeast.

What should I serve this with?

It’s great over orzo, brown rice, mashed potatoes, polenta, or cauliflower rice. A simple green salad on the side rounds it out.

Can I make it spicier?

Increase red pepper flakes or add a pinch of Calabrian chili. Taste as you go.

How do I thicken the sauce more?

Simmer a minute longer before adding yogurt, or whisk 1 teaspoon cornstarch with 1 tablespoon cold water and stir in over low heat until slightly thickened.

Final Thoughts

This Creamy Tuscan Chicken Skillet delivers comfort without the heaviness.

It’s simple enough for a weeknight, special enough for guests, and flexible with what you have on hand. Keep the heat gentle, finish with lemon, and you’ll get a bright, velvety sauce every time. Enjoy it with your favorite base and call dinner a win.

Creamy Tuscan Chicken Skillet (High Protein, Dairy Light) - A Cozy, Weeknight Favorite

Prep Time 10 minutes
Cook Time 25 minutes
Total Time 35 minutes
Servings 4 servings

Ingredients
  

  • 1.5–2 pounds boneless, skinless chicken breasts (or thighs), thinly sliced or cut into cutlets
  • 1 teaspoon kosher salt, plus more to taste
  • 1/2 teaspoon black pepper
  • 1 teaspoon paprika (sweet or smoked)
  • 1 tablespoon olive oil (plus more if needed)
  • 3–4 cloves garlic, minced
  • 1/2 cup sun-dried tomatoes in oil, drained and sliced
  • 1 cup low-sodium chicken broth
  • 1 teaspoon Italian seasoning (or 1/2 teaspoon dried oregano + 1/2 teaspoon dried basil)
  • 1/2 teaspoon red pepper flakes (optional, for heat)
  • 1/2 cup plain Greek yogurt (2% or 5%)
  • 1/4 cup grated Parmesan (optional, for extra richness)
  • 3 cups baby spinach
  • Juice of 1/2 lemon
  • Fresh basil, chopped (optional)

Instructions
 

  • Prep the chicken: Pat dry and season with salt, pepper, and paprika on both sides.
  • Sear: Heat olive oil in a large skillet over medium-high. Add chicken in a single layer.Cook 3–4 minutes per side until golden and mostly cooked through. Transfer to a plate.
  • Sauté aromatics: Lower heat to medium. Add a drizzle more oil if needed.Stir in garlic and sun-dried tomatoes. Cook 30–60 seconds until fragrant.
  • Build the sauce: Pour in chicken broth. Stir in Italian seasoning and red pepper flakes.Scrape up browned bits. Simmer 2–3 minutes to reduce slightly.
  • Make it creamy (dairy light): Turn heat to low. In a small bowl, whisk Greek yogurt with a few spoonfuls of hot broth from the pan to temper. Stir the tempered yogurt into the skillet until smooth.Do not boil.
  • Add greens: Stir in spinach until wilted. If using Parmesan, add now and stir until melted.
  • Finish the chicken: Return chicken and accumulated juices to the skillet. Simmer gently 2–4 minutes until cooked through (165°F internal).Squeeze in lemon juice and adjust salt and pepper.
  • Serve: Top with fresh basil if you like. Spoon over pasta, rice, or roasted veggies.

Creamy Cauliflower Chicken Soup (Low Carb, High Protein) – Cozy, Filling, and Easy

This soup is the kind you want when you need something warm, satisfying, and good for you. It’s rich and creamy without heavy cream, thanks to blended cauliflower. Tender chicken adds plenty of protein, and the flavors are simple and comforting.

You can make it on a busy weeknight, and it reheats beautifully. If you’re watching carbs but still want something hearty, this is a great go-to.

What Makes This Special

Cooking process close-up: A large Dutch oven on the stove with the blended, velvety cauliflower soup
  • Protein-packed and low carb: Lean chicken and cauliflower keep it satisfying without the carb crash.
  • Creamy without cream: Blended cauliflower and a touch of Greek yogurt give a velvety texture.
  • Easy one-pot method: Minimal cleanup and simple steps.
  • Flexible: Works with rotisserie chicken, frozen cauliflower, or dairy-free swaps.
  • Meal prep friendly: Stays good for days and freezes well.

Ingredients

  • 1 tablespoon olive oil or avocado oil
  • 1 medium onion, diced
  • 3 cloves garlic, minced
  • 1 large head cauliflower, cut into florets (about 6–7 cups) or a 2-pound bag of florets
  • 4 cups low-sodium chicken broth
  • 1 cup water (as needed for consistency)
  • 1 pound cooked chicken breast, shredded or diced (rotisserie chicken works)
  • 1/2 cup plain Greek yogurt (or 1/2 cup coconut milk for dairy-free)
  • 1 teaspoon dried thyme
  • 1 teaspoon dried parsley
  • 1/2 teaspoon smoked paprika
  • 1 bay leaf
  • Salt and black pepper to taste
  • Optional: 1/2 cup grated Parmesan for extra richness
  • Optional garnish: chopped chives or parsley, red pepper flakes, lemon zest

How to Make It

Final plated top-down: Overhead shot of a bowl of Creamy Cauliflower Chicken Soup, thick and smooth
  1. Sauté aromatics: Heat oil in a large pot over medium heat. Add onion with a pinch of salt and cook 4–5 minutes until soft.

    Stir in garlic for 30 seconds.

  2. Add cauliflower and seasonings: Toss in cauliflower, thyme, parsley, smoked paprika, bay leaf, and a bit more salt and pepper. Stir to coat for 1 minute.
  3. Simmer: Pour in chicken broth and bring to a gentle boil. Reduce to a simmer, cover, and cook 12–15 minutes until cauliflower is very tender.
  4. Blend the base: Remove the bay leaf.

    Use an immersion blender to puree until smooth. For a blender, carefully blend in batches and return to the pot.

  5. Adjust thickness: Stir in water as needed to reach a creamy, soup-like consistency.
  6. Add chicken and creaminess: Stir in the cooked chicken and Greek yogurt (and Parmesan, if using). Warm over low heat 3–4 minutes.

    Do not boil after adding yogurt.

  7. Taste and finish: Adjust salt and pepper. Add a squeeze of lemon or zest if you like brightness. Garnish and serve hot.

How to Store

  • Fridge: Store in airtight containers for 3–4 days.
  • Freezer: Cool completely, then freeze up to 3 months.

    Leave a little headspace for expansion.

  • Reheat: Warm gently on the stove over low heat, stirring often. If it thickens, add a splash of broth or water.

Why This is Good for You

  • High protein: Chicken supports muscle repair and keeps you full longer.
  • Low carb, high fiber: Cauliflower lowers the carb load while adding fiber for steady energy.
  • Nutrient-dense: Onion, garlic, and herbs bring antioxidants and flavor without extra calories.
  • Lighter creaminess: Greek yogurt boosts protein and creaminess with fewer calories than heavy cream.

What Not to Do

  • Don’t skip seasoning: Taste as you go. Cauliflower needs salt to shine.
  • Don’t boil after adding yogurt: High heat can cause curdling.

    Keep it low and gentle.

  • Don’t rush the cauliflower: If it isn’t fully tender, the texture won’t get silky when blended.
  • Don’t add too much liquid at once: Blend first, then thin gradually to your ideal consistency.

Variations You Can Try

  • Spicy poblano: Add a roasted poblano or a pinch of cayenne for heat.
  • Bacon and chive: Crumble in 2–3 slices of cooked bacon and top with chives.
  • Mushroom umami: Sauté sliced mushrooms with the onion for a deeper flavor.
  • Dairy-free: Swap Greek yogurt with full-fat coconut milk or cashew cream.
  • Extra veggies: Stir in baby spinach or kale at the end until wilted.
  • Herb-forward: Replace dried herbs with fresh thyme and parsley for a brighter finish.

FAQ

Can I use frozen cauliflower?

Yes. Use the same amount by volume. No need to thaw—just add a few extra minutes to the simmer until tender.

How can I make it thicker?

Blend more of the cauliflower and hold back extra liquid.

You can also let it simmer uncovered for a few minutes to reduce.

What’s the best chicken to use?

Shredded rotisserie chicken is quick and flavorful. Poached or leftover roasted chicken breast works well too.

Is this gluten-free?

Yes, as written it’s naturally gluten-free. Just confirm your broth and seasonings are certified gluten-free if needed.

Can I make it in a slow cooker?

Add onion, garlic, cauliflower, broth, and seasonings to the slow cooker.

Cook on Low for 4–5 hours, blend, then stir in chicken and yogurt at the end.

How do I add more protein?

Use extra chicken and swap to 2/3 cup Greek yogurt. A scoop of unflavored collagen peptides also dissolves easily.

What can I use instead of yogurt?

Coconut milk, cashew cream, or a little cream cheese will deliver similar richness with different flavors.

How many carbs are in this soup?

It varies by ingredients, but a typical serving lands around 8–12g net carbs. Using yogurt instead of coconut milk and skipping Parmesan keeps it on the lower end.

Wrapping Up

Creamy Cauliflower Chicken Soup is comfort food that fits a healthy routine.

It’s simple to make, easy to customize, and packed with protein. Keep it in your meal prep rotation, and you’ll always have a cozy, nourishing bowl ready when you need it.

Creamy Cauliflower Chicken Soup (Low Carb, High Protein) - Cozy, Filling, and Easy

Prep Time 15 minutes
Cook Time 30 minutes
Total Time 45 minutes
Servings 6 servings

Ingredients
  

  • 1 tablespoon olive oil or avocado oil
  • 1 medium onion, diced
  • 3 cloves garlic, minced
  • 1 large head cauliflower, cut into florets (about 6–7 cups) or a 2-pound bag of florets
  • 4 cups low-sodium chicken broth
  • 1 cup water (as needed for consistency)
  • 1 pound cooked chicken breast, shredded or diced (rotisserie chicken works)
  • 1/2 cup plain Greek yogurt (or 1/2 cup coconut milk for dairy-free)
  • 1 teaspoon dried thyme
  • 1 teaspoon dried parsley
  • 1/2 teaspoon smoked paprika
  • 1 bay leaf
  • Salt and black pepper to taste
  • Optional: 1/2 cup grated Parmesan for extra richness
  • Optional garnish: chopped chives or parsley, red pepper flakes, lemon zest

Instructions
 

  • Sauté aromatics: Heat oil in a large pot over medium heat. Add onion with a pinch of salt and cook 4–5 minutes until soft.Stir in garlic for 30 seconds.
  • Add cauliflower and seasonings: Toss in cauliflower, thyme, parsley, smoked paprika, bay leaf, and a bit more salt and pepper. Stir to coat for 1 minute.
  • Simmer: Pour in chicken broth and bring to a gentle boil. Reduce to a simmer, cover, and cook 12–15 minutes until cauliflower is very tender.
  • Blend the base: Remove the bay leaf.Use an immersion blender to puree until smooth. For a blender, carefully blend in batches and return to the pot.
  • Adjust thickness: Stir in water as needed to reach a creamy, soup-like consistency.
  • Add chicken and creaminess: Stir in the cooked chicken and Greek yogurt (and Parmesan, if using). Warm over low heat 3–4 minutes.Do not boil after adding yogurt.
  • Taste and finish: Adjust salt and pepper. Add a squeeze of lemon or zest if you like brightness. Garnish and serve hot.

Blender Almond Flour Protein Pancakes (Gluten Free & Fluffy) – Easy, Fast, and Delicious

Light, fluffy, and packed with protein, these almond flour pancakes come together right in the blender. No bowls, no whisk, and no fuss. They’re naturally gluten free, tender in the middle, and golden at the edges.

Make them for a quick weekday breakfast or a slow weekend stack with your favorite toppings. Once you try this method, you’ll never go back to stirring batter by hand.

What Makes This Recipe So Good

Cooking process close-up: A 1/4-cup pour of blender almond flour protein pancake batter forming perf
  • Blender batter = zero lumps. Everything blends smooth in seconds, giving you a consistent, fluffy texture.
  • Protein-packed.

    A scoop of protein powder boosts staying power without drying the pancakes out.

  • Gluten free and grain free. Almond flour keeps them naturally gluten free with a lovely, cake-like crumb.
  • Customizable. Easy to swap milks, sweeteners, and flavors.

    Works with whey or plant-based protein.

  • Freezer-friendly. Make a batch now, and you’ve got breakfast ready all week.

Shopping List

  • Almond flour (finely ground, blanched preferred)
  • Protein powder (vanilla or unflavored; whey or plant-based)
  • Baking powder
  • Fine sea salt
  • Eggs
  • Milk of choice (dairy or unsweetened almond, oat, or soy)
  • Greek yogurt or mashed ripe banana (for moisture)
  • Maple syrup or honey (optional, for sweetness)
  • Vanilla extract
  • Butter, ghee, or neutral oil (for the pan)
  • Optional add-ins: cinnamon, mini chocolate chips, blueberries, lemon zest

How to Make It

Final plated overhead: Tasty top-down shot of a tall stack of gluten-free almond flour protein panca
  1. Preheat the pan. Set a nonstick skillet or griddle over medium heat.

    Lightly grease with butter or oil.

  2. Load the blender. Add 1 1/2 cups almond flour, 1 scoop (about 25–30 g) protein powder, 1 1/2 teaspoons baking powder, and a pinch of salt. Then add 2 large eggs, 3/4 cup milk, 1/4 cup Greek yogurt (or 1/2 mashed banana), 1–2 tablespoons maple syrup, and 1 teaspoon vanilla.
  3. Blend until smooth.

    Blend 15–25 seconds, scraping the sides if needed. The batter should be pourable but not thin. If too thick, add a splash of milk; if too thin, blend in a tablespoon more almond flour.

  4. Rest briefly.

    Let the batter sit 2–3 minutes to let the baking powder activate and the almond flour hydrate.

  5. Cook the pancakes. Pour 1/4-cup portions onto the hot pan. Cook until the edges look set and small bubbles form, 2–3 minutes.

    Flip gently and cook 1–2 minutes more, until golden and springy.

  6. Finish and serve. Keep cooked pancakes warm in a low oven while you finish the batch. Serve with berries, a pat of butter, and warm maple syrup.

Storage Instructions

  • Fridge: Cool completely, then store in an airtight container for up to 4 days.
  • Freezer: Freeze in a single layer, then transfer to a freezer bag for up to 2 months.

    Place parchment between layers to prevent sticking.

  • Reheat: Toast in a toaster or warm in a 300°F (150°C) oven for 8–10 minutes. Microwave 20–30 seconds in a pinch.

Benefits of This Recipe

  • Balanced macros: Protein and healthy fats keep you full and energized.
  • Gentle on digestion: No gluten or refined flour; almond flour provides fiber and vitamin E.
  • Quick cleanup: Everything blends in one container, so dishes stay minimal.
  • Kid-friendly: Soft, slightly sweet, and easy to customize with fruit or chocolate chips.

Pitfalls to Watch Out For

  • Too much protein powder: Can make pancakes dry. Stick to one standard scoop.
  • High heat: Almond flour browns fast.

    Medium heat prevents burning and keeps centers fluffy.

  • Overmixing add-ins: Stir chocolate chips or berries in by hand after blending to avoid bleeding or sinking.
  • Skipping rest time: A short rest helps the batter thicken and rise properly.

Recipe Variations

  • Blueberry Lemon: Fold in 1/2 cup blueberries and 1 teaspoon lemon zest.
  • Cinnamon Roll: Add 1 teaspoon cinnamon to the batter and drizzle with a quick Greek yogurt-maple glaze.
  • Chocolate Chip: Stir in 1/3 cup mini dark chocolate chips and a pinch of flaky salt on top.
  • Banana Bread: Use mashed banana instead of yogurt and add a dash of nutmeg.
  • Dairy-Free: Use almond milk and coconut oil for cooking; choose a dairy-free protein powder.

FAQ

Can I use coconut flour instead of almond flour?

Coconut flour won’t work as a 1:1 swap. It’s far more absorbent and will make the batter dry. If you must use it, you’ll need much less (about 1/3 the amount) and more liquid and eggs.

For best results, stick with almond flour.

Which protein powder works best?

Whey protein isolates blend smoothly and keep pancakes tender. Plant-based blends also work, but you may need an extra tablespoon of milk to maintain a pourable batter. Avoid collagen as the only protein—it won’t provide the same structure.

Do I need xanthan gum or a binder?

No.

Eggs, protein powder, and almond flour create enough structure. If you’re skipping eggs, add 1 tablespoon ground flax mixed with 3 tablespoons water per egg and reduce protein powder slightly.

How do I keep pancakes from falling apart?

Make sure the pan is properly heated and greased, wait for the edges to set before flipping, and use a thin, wide spatula. If they’re fragile, the batter might be too thin—blend in a little more almond flour.

Can I make the batter ahead?

Yes, but for best rise, blend just before cooking.

If making ahead, refrigerate up to 24 hours and whisk in a splash of milk before cooking, as the batter will thicken.

In Conclusion

These Blender Almond Flour Protein Pancakes are fluffy, satisfying, and ready in minutes. They’re easy to customize, simple to freeze, and perfect for busy mornings or slow brunches. Keep a bag of almond flour and a scoop of protein powder on hand, and breakfast practically makes itself.

Enjoy your stack warm with your favorite toppings and a fresh cup of coffee.

Blender Almond Flour Protein Pancakes (Gluten Free & Fluffy) - Easy, Fast, and Delicious

Prep Time 5 minutes
Cook Time 10 minutes
Total Time 15 minutes
Servings 4 servings

Ingredients
  

  • Almond flour (finely ground, blanched preferred)
  • Protein powder (vanilla or unflavored; whey or plant-based)
  • Baking powder
  • Fine sea salt
  • Eggs
  • Milk of choice (dairy or unsweetened almond, oat, or soy)
  • Greek yogurt or mashed ripe banana (for moisture)
  • Maple syrup or honey (optional, for sweetness)
  • Vanilla extract
  • Butter, ghee, or neutral oil (for the pan)
  • Optional add-ins: cinnamon, mini chocolate chips, blueberries, lemon zest

Instructions
 

  • Preheat the pan. Set a nonstick skillet or griddle over medium heat.Lightly grease with butter or oil.
  • Load the blender. Add 1 1/2 cups almond flour, 1 scoop (about 25–30 g) protein powder, 1 1/2 teaspoons baking powder, and a pinch of salt. Then add 2 large eggs, 3/4 cup milk, 1/4 cup Greek yogurt (or 1/2 mashed banana), 1–2 tablespoons maple syrup, and 1 teaspoon vanilla.
  • Blend until smooth.Blend 15–25 seconds, scraping the sides if needed. The batter should be pourable but not thin. If too thick, add a splash of milk; if too thin, blend in a tablespoon more almond flour.
  • Rest briefly.Let the batter sit 2–3 minutes to let the baking powder activate and the almond flour hydrate.
  • Cook the pancakes. Pour 1/4-cup portions onto the hot pan. Cook until the edges look set and small bubbles form, 2–3 minutes.Flip gently and cook 1–2 minutes more, until golden and springy.
  • Finish and serve. Keep cooked pancakes warm in a low oven while you finish the batch. Serve with berries, a pat of butter, and warm maple syrup.

4-Ingredient Peanut Butter Protein Fudge (No Bake) – Simple, Creamy, Satisfying

This fudge tastes like dessert but works like a snack. It’s creamy, rich, and takes just minutes to stir together—no stove or oven needed. With only four pantry-friendly ingredients, you get a sweet bite that’s actually filling.

It sets in the fridge, slices cleanly, and keeps well all week. Perfect for post-workout, lunch boxes, or late-night cravings.

Why This Recipe Works

Overhead shot of the finished peanut butter protein fudge slab just lifted from a parchment-lined 8x
  • No bake, no fuss: Everything mixes in one bowl and sets in the fridge. Clean-up is easy.
  • Balanced macros: Protein powder adds staying power, peanut butter brings healthy fats, and a touch of sweetness keeps it dessert-like.
  • Customizable texture: A splash of milk makes it softer; a little extra protein powder firms it up.
  • Scales well: Double the batch for meal prep or slice smaller pieces for portion control.

Ingredients

  • Creamy natural peanut butter (well-stirred, no added sugar preferred)
  • Vanilla or unflavored protein powder (whey or plant-based)
  • Maple syrup or honey (for sweetness and binding)
  • Milk of choice (dairy or unsweetened non-dairy) just enough to help it come together

How to Make It

Close-up detail, three fudge squares stacked on a small matte white plate, showing ultra-smooth, fud
  1. Line your pan: Use an 8×4-inch loaf pan or small square dish.

    Line with parchment, leaving overhang for easy lifting.

  2. Mix the base: In a medium bowl, stir 1 cup peanut butter with 3–4 tablespoons maple syrup until smooth.
  3. Add protein: Stir in 1/2 to 3/4 cup protein powder. It will look thick and doughy—this is normal.
  4. Adjust with milk: Add 1–3 tablespoons milk, a little at a time, until the mixture is thick but spreadable. You want a soft fudge batter that holds its shape.
  5. Press and smooth: Scrape into the lined pan.

    Press flat with a spatula. For a cleaner top, lay a piece of parchment on the surface and smooth with your hand.

  6. Chill to set: Refrigerate for 1–2 hours, or freeze for 25–35 minutes, until firm.
  7. Slice and serve: Lift out using the parchment and cut into 12–16 squares. Keep chilled for best texture.

How to Store

  • Refrigerator: Store in an airtight container for up to 1 week.
  • Freezer: Freeze up to 2 months.

    Place parchment between layers to prevent sticking. Thaw at room temp for 10–15 minutes before eating.

  • On the go: Pack with an ice pack. The fudge softens at warm temperatures.

Health Benefits

  • Protein for satiety: Protein powder supports muscle repair and helps keep you full.
  • Healthy fats: Peanut butter provides monounsaturated fats that support energy and satisfaction.
  • Lower in added sugar: Using maple syrup or honey keeps the ingredient list short and simple.
  • No baking, minimal processing: You control the ingredients and avoid ultra-processed fillers.

Pitfalls to Watch Out For

  • Dry or crumbly mixture: This means you need more milk.

    Add 1 teaspoon at a time until it just comes together.

  • Too soft to slice: Chill longer or add a tablespoon more protein powder, then re-press and refrigerate.
  • Gritty texture: Some protein powders don’t dissolve smoothly. Choose a fine, high-quality powder.
  • Too sweet or not sweet enough: Taste the mixture before setting. Adjust maple syrup by a teaspoon at a time.
  • Oily separation: Natural peanut butter can separate.

    Stir the jar thoroughly before measuring.

Variations You Can Try

  • Chocolate swirl: Marble in 2 tablespoons melted dark chocolate before chilling.
  • Crunch factor: Fold in chopped peanuts, cacao nibs, or crisped rice cereal.
  • Salty-sweet: Sprinkle flaky sea salt on top after pressing into the pan.
  • Different nut/seed butters: Almond butter, cashew butter, or sunflower seed butter all work.
  • Chocolate version: Use chocolate protein powder and add 1 tablespoon cocoa powder for deeper flavor.
  • Cinnamon latte: Add 1/2 teaspoon cinnamon and a splash of espresso or coffee concentrate.

FAQ

What type of protein powder works best?

Whey blends usually give the smoothest texture and set nicely. Plant-based powders work too but can be drier; you may need extra milk to reach a fudgy consistency.

Can I make this without added sweetener?

Yes. Swap the maple syrup for an equal amount of milk plus a few drops of liquid stevia or monk fruit, then adjust to taste.

Note that the syrup also helps bind, so the texture may be slightly softer.

How do I make it dairy-free?

Use a plant-based protein powder and non-dairy milk such as almond, oat, or soy. Everything else stays the same.

Can I use powdered peanut butter (PB2)?

You can replace part of the peanut butter with PB2 for lower fat, but keep some real peanut butter for structure and richness. Start with 1/2 cup peanut butter plus 1/4 cup reconstituted PB2, then adjust milk.

Why isn’t my fudge setting?

It’s likely too warm or too wet.

Chill longer, or mix in 1–2 tablespoons additional protein powder, press back into the pan, and refrigerate again.

How big should the pieces be?

Cut into 12–16 squares for snack-sized bites. For higher protein per piece, cut into 9 larger squares.

Wrapping Up

This 4-ingredient peanut butter protein fudge is quick, forgiving, and truly satisfying. You get dessert vibes without the oven and a solid protein boost in every square.

Keep a batch in the fridge, slice as needed, and tweak the sweetness and texture to fit your taste. Simple ingredients, big payoff.

4-Ingredient Peanut Butter Protein Fudge (No Bake) - Simple, Creamy, Satisfying

Prep Time 10 minutes
Total Time 10 minutes
Servings 12 servings

Ingredients
  

  • Creamy natural peanut butter (well-stirred, no added sugar preferred)
  • Vanilla or unflavored protein powder (whey or plant-based)
  • Maple syrup or honey (for sweetness and binding)
  • Milk of choice (dairy or unsweetened non-dairy) just enough to help it come together

Instructions
 

  • Line your pan: Use an 8x4-inch loaf pan or small square dish.Line with parchment, leaving overhang for easy lifting.
  • Mix the base: In a medium bowl, stir 1 cup peanut butter with 3–4 tablespoons maple syrup until smooth.
  • Add protein: Stir in 1/2 to 3/4 cup protein powder. It will look thick and doughy—this is normal.
  • Adjust with milk: Add 1–3 tablespoons milk, a little at a time, until the mixture is thick but spreadable. You want a soft fudge batter that holds its shape.
  • Press and smooth: Scrape into the lined pan.Press flat with a spatula. For a cleaner top, lay a piece of parchment on the surface and smooth with your hand.
  • Chill to set: Refrigerate for 1–2 hours, or freeze for 25–35 minutes, until firm.
  • Slice and serve: Lift out using the parchment and cut into 12–16 squares. Keep chilled for best texture.

Gluten Free Dark Chocolate Cherry Protein Cookies – Soft, Chewy, and Satisfying

These cookies hit the sweet spot between a treat and a snack you can feel good about. They’re rich with dark chocolate, studded with tangy dried cherries, and packed with protein to keep you full longer. The texture is soft and chewy, almost brownie-like, with little pockets of melted chocolate.

Whether you want an afternoon pick-me-up or a post-workout bite, these cookies deliver. Plus, they come together with simple pantry staples and bake in under 12 minutes.

Why This Recipe Works

Close-up detail shot: A just-baked gluten-free dark chocolate cherry protein cookie torn in half to
  • Balanced sweetness: Dark chocolate and cherries bring natural depth, so you don’t need lots of sugar.
  • Protein boost: A scoop of protein powder supports satiety without drying out the cookies.
  • Gluten-free done right: Almond flour creates a moist, tender crumb with a gentle chew.
  • Foolproof method: A one-bowl, no-chill approach keeps prep quick and cleanup easy.
  • Customizable: Easily swap mix-ins or adjust sweetness to match your taste.

What You’ll Need

  • 1 1/2 cups blanched almond flour
  • 1/3 cup vanilla or unflavored whey or plant-based protein powder
  • 1/4 cup cocoa powder (unsweetened)
  • 1/2 teaspoon baking soda
  • 1/4 teaspoon fine sea salt
  • 1/3 cup coconut sugar or light brown sugar
  • 1 large egg (room temperature)
  • 1/4 cup melted coconut oil or unsalted butter
  • 2 tablespoons milk (dairy or unsweetened almond milk)
  • 1 teaspoon pure vanilla extract
  • 1/2 cup dark chocolate chips or chunks (60–70% cacao)
  • 1/3 cup dried cherries, chopped
  • Optional: 1–2 tablespoons maple syrup for extra moisture and sweetness

How to Make It

Overhead final presentation: A tidy stack of three gluten-free dark chocolate cherry protein cookies
  1. Preheat and prep: Heat oven to 350°F (175°C). Line a baking sheet with parchment paper.
  2. Mix dry ingredients: In a large bowl, whisk almond flour, protein powder, cocoa, baking soda, salt, and coconut sugar until no lumps remain.
  3. Add wet ingredients: Stir in the egg, melted coconut oil, milk, vanilla, and maple syrup (if using).

    Mix until a thick, slightly sticky dough forms.

  4. Fold in mix-ins: Add dark chocolate and chopped dried cherries. Stir just until evenly distributed.
  5. Portion: Scoop 2-tablespoon mounds onto the baking sheet, spacing 2 inches apart. Gently flatten tops with your fingers; these spread minimally.
  6. Bake: Bake 9–12 minutes, until the edges are set and centers look slightly soft.

    Do not overbake.

  7. Cool: Let cookies rest on the sheet for 10 minutes to firm up, then transfer to a rack to cool completely.

Storage Instructions

  • Room temperature: Store in an airtight container for up to 3 days.
  • Refrigerator: Keeps well for 1 week; the texture becomes fudgier.
  • Freezer: Freeze up to 2 months. Thaw at room temp or warm for 10–15 seconds in the microwave.

Health Benefits

  • Higher protein: Protein powder and almond flour help support fullness and muscle recovery.
  • Healthy fats: Almond flour and coconut oil provide satiating fats and vitamin E.
  • Antioxidants: Dark chocolate and cherries deliver polyphenols that support overall wellness.
  • Lower glycemic impact: Using coconut sugar and almond flour can be gentler on blood sugar than refined alternatives.

Common Mistakes to Avoid

  • Overbaking: These cookies should look slightly underdone when they come out. They set as they cool.
  • Using the wrong protein powder: Some powders absorb more liquid.

    If the dough is crumbly, add 1–2 teaspoons milk until soft.

  • Packing the almond flour: Spoon and level it to avoid dry, dense cookies.
  • Skipping the salt: A pinch of salt sharpens the chocolate and balances sweetness.

Variations You Can Try

  • Double chocolate espresso: Add 1 teaspoon instant espresso powder and extra chocolate chips.
  • Cherry almond crunch: Stir in 1/4 cup chopped toasted almonds for texture.
  • Orange-chocolate twist: Add 1 teaspoon orange zest and a splash of orange extract.
  • No added sugar: Skip coconut sugar and use a few stevia-sweetened chips; add 1–2 tablespoons extra milk for moisture.
  • Vegan option: Use plant-based protein, coconut oil, and a flax egg (1 tablespoon ground flax + 3 tablespoons water, rested 5 minutes).

FAQ

Can I use oat flour instead of almond flour?

Yes, but the texture changes. Start with the same amount by volume and add 1–2 tablespoons milk if the dough is dry. Expect a slightly cakier cookie.

Which protein powder works best?

Whey isolates create a softer, chewier texture.

Plant-based blends (pea/rice) work too but may need an extra splash of milk to prevent dryness.

Can I use fresh cherries?

Use dried cherries for best structure. Fresh cherries add too much moisture and can make the cookies spread or bake unevenly.

How do I make them less sweet?

Reduce coconut sugar to 1/4 cup and use 85% dark chocolate. You can also skip the optional maple syrup.

Do I need to chill the dough?

No.

The dough is thick enough to bake right away. If your kitchen is very warm, a 10-minute chill helps with shaping.

Final Thoughts

These Gluten Free Dark Chocolate Cherry Protein Cookies are the kind you’ll want on repeat: simple to make, rich in flavor, and satisfying without being heavy. Keep a batch in the fridge for quick snacks, post-workout bites, or weeknight desserts.

With a few easy swaps, you can tailor them to your taste and dietary needs while keeping that soft, fudgy bite everyone loves.

Gluten Free Dark Chocolate Cherry Protein Cookies - Soft, Chewy, and Satisfying

Prep Time 15 minutes
Cook Time 10 minutes
Total Time 25 minutes
Servings 12 servings

Ingredients
  

  • 1 1/2 cups blanched almond flour
  • 1/3 cup vanilla or unflavored whey or plant-based protein powder
  • 1/4 cup cocoa powder (unsweetened)
  • 1/2 teaspoon baking soda
  • 1/4 teaspoon fine sea salt
  • 1/3 cup coconut sugar or light brown sugar
  • 1 large egg (room temperature)
  • 1/4 cup melted coconut oil or unsalted butter
  • 2 tablespoons milk (dairy or unsweetened almond milk)
  • 1 teaspoon pure vanilla extract
  • 1/2 cup dark chocolate chips or chunks (60–70% cacao)
  • 1/3 cup dried cherries, chopped
  • Optional: 1–2 tablespoons maple syrup for extra moisture and sweetness

Instructions
 

  • Preheat and prep: Heat oven to 350°F (175°C). Line a baking sheet with parchment paper.
  • Mix dry ingredients: In a large bowl, whisk almond flour, protein powder, cocoa, baking soda, salt, and coconut sugar until no lumps remain.
  • Add wet ingredients: Stir in the egg, melted coconut oil, milk, vanilla, and maple syrup (if using).Mix until a thick, slightly sticky dough forms.
  • Fold in mix-ins: Add dark chocolate and chopped dried cherries. Stir just until evenly distributed.
  • Portion: Scoop 2-tablespoon mounds onto the baking sheet, spacing 2 inches apart. Gently flatten tops with your fingers; these spread minimally.
  • Bake: Bake 9–12 minutes, until the edges are set and centers look slightly soft.Do not overbake.
  • Cool: Let cookies rest on the sheet for 10 minutes to firm up, then transfer to a rack to cool completely.

Gluten Free Chocolate Chip Protein Cookies With Almond Butter – Soft, Chewy, and Satisfying

These cookies taste like a bakery classic, but with a wholesome twist. They’re soft, chewy, and packed with chocolate chips, yet made with almond butter and protein powder for a balanced snack. If you want something sweet that won’t leave you sluggish, this recipe hits the spot.

No gluten, no complicated steps, and you only need one bowl. Perfect for meal prep, lunch boxes, or an afternoon pick-me-up with coffee.

What Makes This Recipe So Good

Close-up detail shot of freshly baked gluten-free chocolate chip protein cookies cooling on a parchm
  • Soft and chewy texture: Almond butter keeps these cookies moist without any gluten or dairy.
  • Protein boost: A scoop of protein powder helps make each cookie more filling and satisfying.
  • Naturally gluten-free: No wheat flour needed. You’ll use almond butter, almond flour, and simple pantry staples.
  • One-bowl, no-fuss: Minimal cleanup and consistent results.
  • Customizable: Use dark chocolate chips, chopped nuts, or a pinch of cinnamon to make them your own.

Ingredients

  • 1 cup creamy almond butter (well-stirred, room temperature)
  • 1/3 cup coconut sugar (or light brown sugar)
  • 2 tablespoons maple syrup or honey
  • 1 large egg (room temperature)
  • 1 teaspoon vanilla extract
  • 1/2 cup fine almond flour
  • 1/3 cup vanilla or unflavored protein powder (whey or plant-based)
  • 1/2 teaspoon baking soda
  • 1/4 teaspoon fine sea salt
  • 1/2 cup dark chocolate chips (plus extra for topping)
  • Optional: 1–2 tablespoons milk (dairy or almond) if dough seems dry
  • Optional: flaky sea salt for finishing

Instructions

Overhead final presentation of almond butter chocolate chip protein cookies arranged on a matte cera
  1. Preheat your oven to 350°F (175°C).

    Line a baking sheet with parchment paper.

  2. In a large bowl, whisk the almond butter, coconut sugar, maple syrup, egg, and vanilla until smooth and glossy.
  3. Add almond flour, protein powder, baking soda, and salt. Stir with a spatula until a thick dough forms. If the dough looks crumbly, add 1 tablespoon of milk and fold again.

    Add the second tablespoon only if needed.

  4. Fold in the chocolate chips, reserving a few for pressing on top.
  5. Scoop heaping tablespoons of dough onto the baking sheet, spacing about 2 inches apart. Gently press each mound to about 3/4-inch thick. Press extra chips on top for that bakery look.
  6. Bake for 8–10 minutes, until the edges are set and the centers look slightly soft. Do not overbake.
  7. Cool on the sheet for 5 minutes, then transfer to a rack to cool fully.

    Sprinkle with flaky sea salt while warm if you like.

Storage Instructions

  • Room temperature: Store in an airtight container for 2–3 days.
  • Refrigerator: Keeps well for up to 1 week. The texture gets a bit fudgier.
  • Freezer: Freeze baked cookies for up to 2 months. Thaw at room temp or warm in a low oven for a few minutes.
  • Freeze the dough: Scoop portions onto a tray, freeze, then bag.

    Bake from frozen at 350°F, adding 1–2 extra minutes.

Benefits of This Recipe

  • Balanced snack: Protein and healthy fats help curb hunger and cravings.
  • Gluten-free without special blends: No need for gums or complicated mixes.
  • Lower in refined sugar: Coconut sugar and maple syrup keep sweetness gentle and warm.
  • Quick to make: From bowl to oven in about 10 minutes.
  • Kid-friendly: Familiar flavor, better ingredients.

Pitfalls to Watch Out For

  • Overbaking: These cookies firm up as they cool. Pull them when the centers still look soft.
  • Dry dough: Protein powder absorbs moisture. If your dough crumbles, mix in 1–2 tablespoons of milk until it holds.
  • Using cold almond butter: Cold, stiff nut butter won’t mix well.

    Bring it to room temp and stir until smooth.

  • Overmixing: Stir just until combined after adding the dry ingredients to keep the texture tender.

Alternatives

  • Nut-free: Swap almond butter for sunflower seed butter and almond flour for oat flour (certified gluten free). Note: Sunflower seed butter can turn green with baking soda; it’s harmless.
  • Dairy-free: Use dairy-free chocolate chips and a plant-based protein powder.
  • No protein powder: Replace with an extra 1/4 cup almond flour; add 1–2 tablespoons milk if needed.
  • Flavor twists: Add 1/2 teaspoon cinnamon, orange zest, or a handful of chopped walnuts or pecans.
  • Sweetness swap: Use brown sugar instead of coconut sugar for a classic cookie flavor.

FAQ

Which protein powder works best?

Whey protein blends usually give the softest texture. If using plant-based powders (pea, brown rice), start with a little less and add milk as needed, since they can make the dough thicker.

Can I make these vegan?

Yes.

Use a flax egg (1 tablespoon ground flax + 3 tablespoons water, rest 5 minutes), plant-based protein, and dairy-free chocolate chips. The cookies may be slightly denser but still tasty.

Do I need a mixer?

No. A whisk and spatula are enough.

Just make sure your almond butter is smooth and at room temperature for easy mixing.

How do I keep them chewy?

Pull them from the oven when the edges set and the centers look soft. Let them finish on the hot baking sheet for 5 minutes before moving to a rack.

Can I reduce the sugar?

You can cut the coconut sugar to 1/4 cup. The cookies will be less sweet and slightly softer.

Avoid removing the maple syrup entirely, as it helps with moisture and binding.

In Conclusion

These Gluten Free Chocolate Chip Protein Cookies with Almond Butter are simple, satisfying, and crowd-pleasing. You get the comfort of a classic cookie with a bit more staying power. Keep a batch in the freezer for quick snacks, and tweak the add-ins to match your cravings.

Once you try them, they’ll likely become a regular in your baking rotation.

Gluten Free Chocolate Chip Protein Cookies With Almond Butter - Soft, Chewy, and Satisfying

Prep Time 10 minutes
Cook Time 12 minutes
Total Time 22 minutes
Servings 12 servings

Ingredients
  

  • 1 cup creamy almond butter (well-stirred, room temperature)
  • 1/3 cup coconut sugar (or light brown sugar)
  • 2 tablespoons maple syrup or honey
  • 1 large egg (room temperature)
  • 1 teaspoon vanilla extract
  • 1/2 cup fine almond flour
  • 1/3 cup vanilla or unflavored protein powder (whey or plant-based)
  • 1/2 teaspoon baking soda
  • 1/4 teaspoon fine sea salt
  • 1/2 cup dark chocolate chips (plus extra for topping)
  • Optional: 1–2 tablespoons milk (dairy or almond) if dough seems dry
  • Optional: flaky sea salt for finishing

Instructions
 

  • Preheat your oven to 350°F (175°C).Line a baking sheet with parchment paper.
  • In a large bowl, whisk the almond butter, coconut sugar, maple syrup, egg, and vanilla until smooth and glossy.
  • Add almond flour, protein powder, baking soda, and salt. Stir with a spatula until a thick dough forms. If the dough looks crumbly, add 1 tablespoon of milk and fold again.Add the second tablespoon only if needed.
  • Fold in the chocolate chips, reserving a few for pressing on top.
  • Scoop heaping tablespoons of dough onto the baking sheet, spacing about 2 inches apart. Gently press each mound to about 3/4-inch thick. Press extra chips on top for that bakery look.
  • Bake for 8–10 minutes, until the edges are set and the centers look slightly soft. Do not overbake.
  • Cool on the sheet for 5 minutes, then transfer to a rack to cool fully.Sprinkle with flaky sea salt while warm if you like.

Gluten Free Salted Caramel Chocolate Bark – Sweet, Crunchy, and Easy

This Gluten Free Salted Caramel Chocolate Bark is the kind of treat that feels fancy but takes almost no effort. It’s rich, salty-sweet, and perfect for gifting or keeping in the freezer for a quick dessert. You’ll get smooth chocolate, buttery caramel, and a crisp snap with every bite.

No special tools or tricky techniques—just a simple, reliable method. If you love a treat that looks impressive and tastes even better, this one hits the mark.

What Makes This Special

Overhead shot of freshly set Gluten Free Salted Caramel Chocolate Bark on parchment-lined baking she

This bark balances textures and flavors: silky chocolate, chewy caramel, and a sprinkle of flaky salt for contrast. It’s naturally gluten free when you choose safe ingredients, so it works for mixed crowds.

The recipe is fast—most of the time is waiting for the bark to set. It’s also flexible, so you can add nuts, seeds, or a drizzle of extra chocolate without complicating things.

What You’ll Need

  • 12 oz (340 g) dark or semi-sweet chocolate (use certified gluten-free; chips or chopped bars)
  • 1/2 cup (120 ml) gluten-free caramel sauce (store-bought or homemade)
  • 2 tbsp unsalted butter (for homemade caramel or enriching store-bought)
  • 1 tsp pure vanilla extract
  • Flaky sea salt (such as Maldon)
  • Optional mix-ins: toasted pecans or almonds, pumpkin seeds, crushed gluten-free pretzels, toasted coconut, mini chocolate chips
  • Tools: baking sheet, parchment paper, microwave-safe bowl or double boiler, small saucepan (if heating caramel), spatula, toothpick or skewer

Step-by-Step Instructions

Close-up detail of broken shards of Gluten Free Salted Caramel Chocolate Bark stacked on a matte bla
  1. Prep the pan. Line a baking sheet with parchment paper. Clear a spot in your fridge or freezer for quick setting.
  2. Melt the chocolate. In a microwave-safe bowl, heat chocolate in 20–30 second bursts, stirring each time, until smooth and glossy.

    Or use a double boiler over low heat. Do not overheat.

  3. Spread the base. Pour melted chocolate onto the parchment and spread into a rectangle about 1/4 inch thick. Keep it even for a clean snap.
  4. If using jarred caramel, warm it gently with butter in a small saucepan until pourable.

    Stir in vanilla. If making caramel from scratch, ensure it’s thick but fluid—not runny.

  5. Swirl it in. Dollop spoonfuls of warm caramel over the chocolate. Use a toothpick or skewer to gently swirl, creating ribbons.

    Don’t overmix or you’ll lose the marbled look.

  6. Add texture. Sprinkle flaky sea salt over the surface. Add any optional toppings while the chocolate is still soft so they adhere.
  7. Set the bark. Refrigerate for 30–45 minutes or freeze for 15–20 minutes, until fully firm.
  8. Break into pieces. Lift the parchment and snap the bark into shards. Aim for hand-held sizes for easy serving.
  9. Store properly. Keep in an airtight container.

    Layer with parchment to prevent sticking.

Keeping It Fresh

Store the bark in the fridge for up to two weeks. For longer storage, freeze for up to two months. Keep it tightly sealed to prevent moisture and odors from affecting the chocolate.

If frozen, let pieces sit at room temperature for 5–10 minutes before serving to soften the caramel slightly.

Health Benefits

  • Gluten free by design, which makes it a safer option for those with celiac disease or gluten sensitivity.
  • Dark chocolate offers antioxidants and a lower sugar profile than milk chocolate.
  • Portion-friendly treat: thin bark and small shards help with mindful snacking.
  • Customizable add-ins like nuts or seeds add healthy fats, fiber, and crunch.

What Not to Do

  • Don’t overheat the chocolate. It can seize or burn quickly; gentle heat is key.
  • Don’t use runny caramel. If it’s too thin, it will bleed and prevent the bark from setting cleanly.
  • Don’t skip the salt. A light sprinkle lifts the flavors and balances the sweetness.
  • Don’t swirl too much. Over-mixing turns the bark muddy instead of marbled.
  • Don’t leave it at room temp for hours. Warm kitchens can soften the caramel and dull the chocolate’s snap.

Recipe Variations

  • Nutty Crunch: Add toasted pecans or almonds for richness and texture.
  • Sweet & Salty Pretzel: Sprinkle crushed gluten-free pretzels over the top.
  • Coconut Caramel: Add toasted coconut flakes and a drizzle of white chocolate.
  • Mocha Twist: Stir 1 tsp espresso powder into the melted chocolate.
  • Spiced Caramel: Add a pinch of cinnamon or smoked sea salt for a gourmet edge.
  • Seed Lover’s Bark: Pumpkin and sunflower seeds for a nut-free crunch.

FAQ

Is all chocolate gluten free?

Pure chocolate is typically gluten free, but some brands add flavorings or are made in facilities with gluten. Choose chocolate labeled gluten free or check the manufacturer’s allergen statement.

Can I make this dairy free?

Yes. Use dairy-free chocolate and a dairy-free caramel (such as coconut milk caramel).

Swap butter for coconut oil in the caramel step.

What if my chocolate seizes?

If chocolate turns grainy and thick, a few drops of neutral oil can sometimes loosen it. If it’s badly seized, it’s best to start over and heat more gently.

How thick should the bark be?

About 1/4 inch is ideal. Too thin and it shatters; too thick and the caramel-to-chocolate ratio feels heavy.

Can I make it ahead for gifts?

Absolutely.

Make it up to a week in advance and store it chilled. Package in cellophane bags or tins with parchment between layers.

How do I get clean shards?

Chill until fully set, then use your hands to snap or tap a chef’s knife to score and break. Work quickly to avoid melting.

In Conclusion

Gluten Free Salted Caramel Chocolate Bark is simple, stylish, and endlessly adaptable.

With a handful of pantry ingredients and a few easy steps, you’ll have a treat that feels bakery-level without the fuss. Keep a batch on hand for last-minute desserts, gifts, or your own sweet cravings—no oven, no stress, all flavor.

Gluten Free Salted Caramel Chocolate Bark - Sweet, Crunchy, and Easy

Prep Time 10 minutes
Cook Time 10 minutes
Total Time 20 minutes
Servings 12 servings

Ingredients
  

  • 12 oz (340 g) dark or semi-sweet chocolate (use certified gluten-free; chips or chopped bars)
  • 1/2 cup (120 ml) gluten-free caramel sauce (store-bought or homemade)
  • 2 tbsp unsalted butter (for homemade caramel or enriching store-bought)
  • 1 tsp pure vanilla extract
  • Flaky sea salt (such as Maldon)
  • Optional mix-ins: toasted pecans or almonds, pumpkin seeds, crushed gluten-free pretzels, toasted coconut, mini chocolate chips
  • Tools: baking sheet, parchment paper, microwave-safe bowl or double boiler, small saucepan (if heating caramel), spatula, toothpick or skewer

Instructions
 

  • Prep the pan. Line a baking sheet with parchment paper. Clear a spot in your fridge or freezer for quick setting.
  • Melt the chocolate. In a microwave-safe bowl, heat chocolate in 20–30 second bursts, stirring each time, until smooth and glossy.Or use a double boiler over low heat. Do not overheat.
  • Spread the base. Pour melted chocolate onto the parchment and spread into a rectangle about 1/4 inch thick. Keep it even for a clean snap.
  • Swirl it in. Dollop spoonfuls of warm caramel over the chocolate. Use a toothpick or skewer to gently swirl, creating ribbons.Don’t overmix or you’ll lose the marbled look.
  • Add texture. Sprinkle flaky sea salt over the surface. Add any optional toppings while the chocolate is still soft so they adhere.
  • Set the bark. Refrigerate for 30–45 minutes or freeze for 15–20 minutes, until fully firm.
  • Break into pieces. Lift the parchment and snap the bark into shards. Aim for hand-held sizes for easy serving.
  • Store properly. Keep in an airtight container.Layer with parchment to prevent sticking.

Maple Cinnamon Quinoa Breakfast Bake Gluten Free and Easy – Cozy, Simple, and Satisfying

This breakfast bake is the kind of comfort food that also happens to be nourishing. It’s warm, lightly sweet, and naturally gluten free, with maple syrup and cinnamon doing the heavy lifting on flavor. Quinoa bakes up tender and custardy in the oven, almost like a cross between oatmeal and bread pudding.

It’s easy enough for busy weekdays and special enough for slow weekends. Serve it warm with a splash of milk or a dollop of yogurt, and you’re set.

Why This Recipe Works

Close-up detail/cooking process: A custardy quinoa breakfast bake just out of the oven in an 8x8 gla
  • Quinoa absorbs flavor: Baking quinoa in milk with maple and cinnamon infuses every bite with warm, cozy notes.
  • Hands-off cooking: No stovetop babysitting—mix, pour, and bake.
  • Protein-packed: Quinoa and eggs make this breakfast satisfying without being heavy.
  • Versatile base: Add fruit, nuts, or chocolate chips and it still turns out great.
  • Gluten free by design: No swaps or special flours needed.

What You’ll Need

  • 1 cup quinoa, rinsed well
  • 2 cups milk (dairy or unsweetened almond/oat milk)
  • 1/3 cup pure maple syrup
  • 2 large eggs
  • 1 teaspoon vanilla extract
  • 1 1/2 teaspoons ground cinnamon
  • 1/4 teaspoon ground nutmeg (optional)
  • 1/2 teaspoon fine sea salt
  • 2 tablespoons melted coconut oil or butter
  • 1 cup chopped apples or pears (or 3/4 cup blueberries)
  • 1/4 cup chopped walnuts or pecans (optional)
  • 2 tablespoons chia seeds or ground flax (optional, for extra texture and fiber)
  • Extra maple syrup and milk or yogurt for serving

Instructions

Final plated/overhead: Overhead shot of a warm slice of Maple Cinnamon Quinoa Breakfast Bake in a sh
  1. Heat the oven to 350°F (175°C). Grease an 8×8-inch baking dish with coconut oil or butter.
  2. Rinse the quinoa in a fine-mesh sieve under cold water for 30–60 seconds. Don’t skip this step; it removes bitterness.
  3. In a large bowl, whisk together milk, maple syrup, eggs, vanilla, cinnamon, nutmeg, and salt until smooth.
  4. Stir in the rinsed quinoa, melted coconut oil or butter, fruit, nuts, and chia or flax if using.

    Mix well so the quinoa is evenly distributed.

  5. Pour the mixture into the prepared dish. Give it a gentle stir in the pan to prevent the quinoa from settling.
  6. Bake for 40–50 minutes, until the center is set and the edges are golden. A slight jiggle is fine, but it shouldn’t be liquid.
  7. Let it rest for 10 minutes before serving.

    This helps it firm up for clean slices.

  8. Serve warm with a splash of milk, a spoonful of yogurt, and a drizzle of maple syrup if you like a sweeter bowl.

Keeping It Fresh

Cool completely, then cover and refrigerate for up to 5 days. Reheat individual portions in the microwave with a splash of milk for 30–60 seconds. For longer storage, freeze slices in an airtight container for up to 2 months.

Thaw overnight in the fridge and warm gently before serving.

Why This is Good for You

  • Complete protein: Quinoa offers all nine essential amino acids, which helps keep you full.
  • Steady energy: Fiber from quinoa, fruit, and seeds supports stable blood sugar.
  • Healthy fats: Nuts and coconut oil provide satiety and flavor.
  • No refined sugar: Maple syrup adds sweetness with a touch of minerals and a cleaner taste.

Pitfalls to Watch Out For

  • Skipping the rinse: Unrinsed quinoa can taste bitter due to saponins.
  • Uneven distribution: Stir the mixture once in the pan so the quinoa doesn’t sink to the bottom.
  • Underbaking: If it’s still liquid in the center, bake 5–10 minutes longer and tent with foil if browning too fast.
  • Too little liquid: Don’t reduce the milk; quinoa needs it to cook properly and stay custardy.

Recipe Variations

  • Banana Bread Style: Mash 1 ripe banana into the wet ingredients and add 1/2 teaspoon extra cinnamon.
  • Berry Almond: Use blueberries or raspberries, swap in almond extract for vanilla, and top with sliced almonds.
  • Pumpkin Spice: Add 1/2 cup pumpkin puree and 1 teaspoon pumpkin spice; reduce milk by 1/4 cup.
  • Chocolate Chip: Stir in 1/3 cup dark chocolate chips and a pinch of flaky salt.
  • Dairy Free: Use almond or oat milk and coconut oil; the bake will still set beautifully.
  • No-Egg Option: Replace eggs with 3 tablespoons ground flax mixed with 6 tablespoons warm water (rest 5 minutes). Texture will be slightly softer.

FAQ

Do I need to cook the quinoa first?

No. The quinoa cooks in the oven as it absorbs the milk and maple mixture, which keeps the process simple and the texture tender.

Can I make this the night before?

Yes.

Mix everything, pour into the dish, cover, and refrigerate overnight. Stir gently before baking and add 5–10 minutes to the bake time if it’s going into the oven cold.

What size pan works best?

An 8×8-inch dish is ideal. A 9×9 will bake a bit faster, while a loaf pan will take longer.

Check doneness at 40 minutes and adjust as needed.

How do I keep it from being too sweet?

Use 1/4 cup maple syrup and add fresh fruit on top when serving. You can also increase cinnamon for more flavor without extra sugar.

Can I use steel-cut oats instead of quinoa?

Not in this exact recipe. Steel-cut oats absorb liquid differently and need a longer cook time.

If you want to combine them, use half quinoa and half rolled oats and add 1/4 cup more milk.

In Conclusion

This Maple Cinnamon Quinoa Breakfast Bake is simple, flexible, and reliably delicious. It’s an easy way to get a warm, protein-rich breakfast on the table without fuss. Keep it classic with apples and walnuts or make it your own with the variations.

Either way, you’ll have a cozy, gluten free breakfast that works for busy mornings and lazy weekends alike.

Maple Cinnamon Quinoa Breakfast Bake Gluten Free and Easy - Cozy, Simple, and Satisfying

Prep Time 10 minutes
Cook Time 35 minutes
Total Time 45 minutes
Servings 6 servings

Ingredients
  

  • 1 cup quinoa, rinsed well
  • 2 cups milk (dairy or unsweetened almond/oat milk)
  • 1/3 cup pure maple syrup
  • 2 large eggs
  • 1 teaspoon vanilla extract
  • 1 1/2 teaspoons ground cinnamon
  • 1/4 teaspoon ground nutmeg (optional)
  • 1/2 teaspoon fine sea salt
  • 2 tablespoons melted coconut oil or butter
  • 1 cup chopped apples or pears (or 3/4 cup blueberries)
  • 1/4 cup chopped walnuts or pecans (optional)
  • 2 tablespoons chia seeds or ground flax (optional, for extra texture and fiber)
  • Extra maple syrup and milk or yogurt for serving

Instructions
 

  • Heat the oven to 350°F (175°C). Grease an 8x8-inch baking dish with coconut oil or butter.
  • Rinse the quinoa in a fine-mesh sieve under cold water for 30–60 seconds. Don’t skip this step; it removes bitterness.
  • In a large bowl, whisk together milk, maple syrup, eggs, vanilla, cinnamon, nutmeg, and salt until smooth.
  • Stir in the rinsed quinoa, melted coconut oil or butter, fruit, nuts, and chia or flax if using.Mix well so the quinoa is evenly distributed.
  • Pour the mixture into the prepared dish. Give it a gentle stir in the pan to prevent the quinoa from settling.
  • Bake for 40–50 minutes, until the center is set and the edges are golden. A slight jiggle is fine, but it shouldn’t be liquid.
  • Let it rest for 10 minutes before serving.This helps it firm up for clean slices.
  • Serve warm with a splash of milk, a spoonful of yogurt, and a drizzle of maple syrup if you like a sweeter bowl.