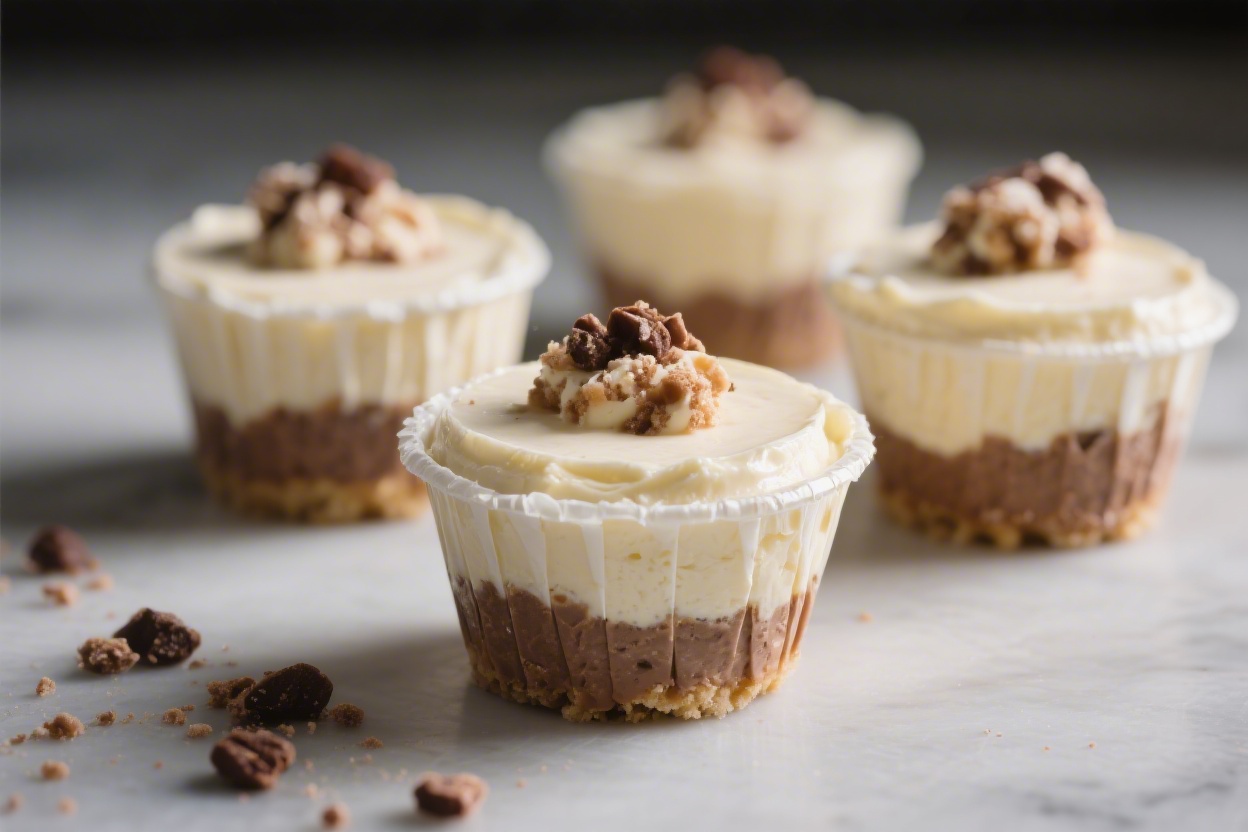
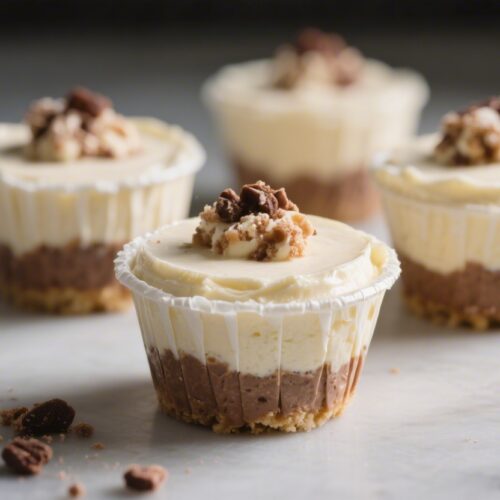
No Bake Protein Cheesecake Cups – Creamy, Fast, and High-Protein
These no-bake cheesecake cups are creamy, satisfying, and easy enough for a weeknight treat. You get the rich flavor of cheesecake without turning on the oven or waiting hours for a traditional bake. They’re balanced with protein, lightened up with Greek yogurt, and built on a simple, buttery crust.
Make a batch on Sunday and you’ve got grab-and-go desserts or snacks all week. No fuss, just a silky, dessert-like bite that actually fits your goals.
What Makes This Recipe So Good
- No baking required: Everything sets in the fridge—perfect for warmer days or busy schedules.
- High in protein: Protein powder and Greek yogurt make these cups filling and macro-friendly.
- Customizable: Change the crust, flavor the filling, or add toppings to match your taste.
- Portion-controlled: Individual cups help you keep servings simple and consistent.
- Creamy texture: You still get that classic cheesecake feel without heavy ingredients.
What You’ll Need
- For the crust:
- 1 cup graham cracker crumbs (or oat/almond cookie crumbs)
- 2 tablespoons melted butter (or coconut oil)
- 1 tablespoon maple syrup or honey (optional for sweetness)
- Pinch of salt
- For the cheesecake filling:
- 8 ounces reduced-fat cream cheese, softened
- 1 cup plain Greek yogurt (2% or 0%)
- 1/2 cup vanilla or unflavored whey/casein protein powder
- 1/4 cup powdered sweetener of choice (powdered sugar, allulose, or erythritol), to taste
- 1–2 teaspoons vanilla extract
- 1–2 tablespoons lemon juice (optional, for brightness)
- Pinch of salt
- For topping (optional):
- Fresh berries or sliced fruit
- Crushed nuts or dark chocolate shavings
- Berry compote or a drizzle of honey
- Equipment:
- 12-cup muffin tin or reusable ramekins
- Paper liners or silicone liners (recommended)
- Mixing bowls, whisk or hand mixer, spatula
Step-by-Step Instructions

- Prep your cups: Line a muffin tin with 10–12 liners. For larger servings, use 10; for smaller bites, use 12.
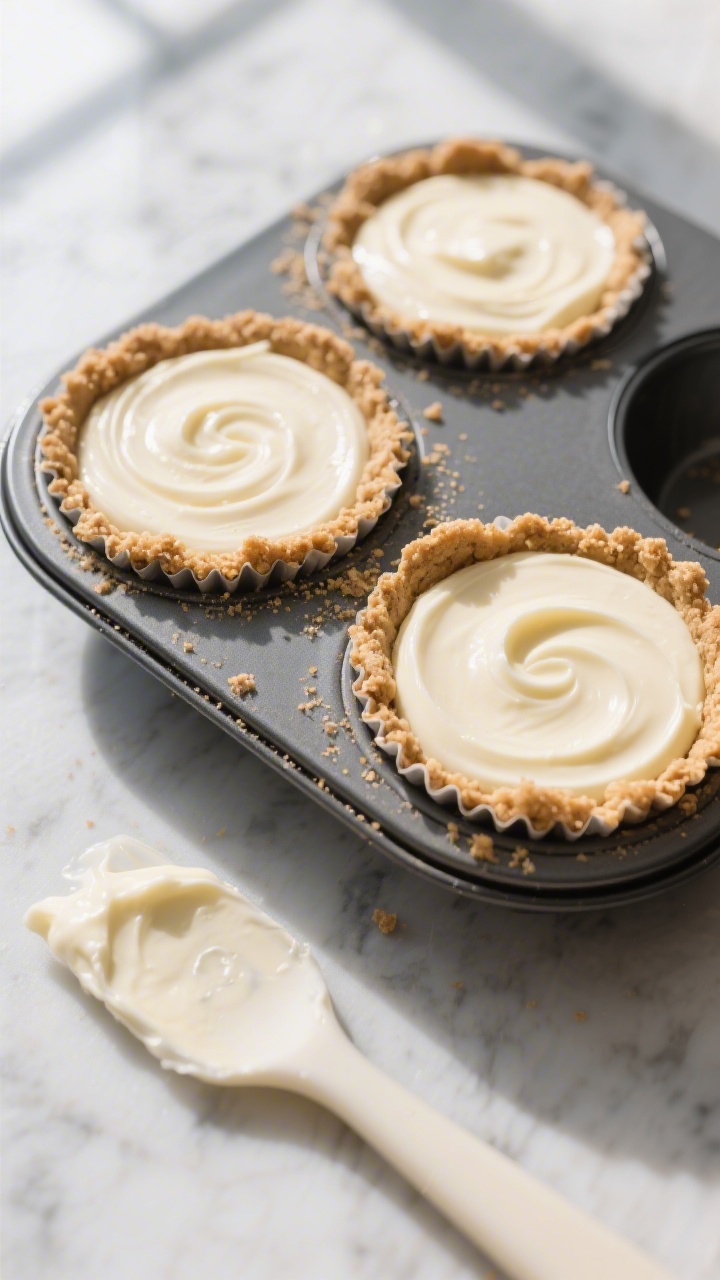
- Make the crust: In a bowl, mix graham crumbs, melted butter, maple syrup, and a pinch of salt until sandy and evenly moistened.
- Press the base: Divide the crust mixture among the liners.
Press down firmly with the back of a spoon. Place the tray in the fridge while you make the filling.
- Beat the cream cheese: In a large bowl, beat softened cream cheese until smooth and fluffy, about 1–2 minutes.
- Add yogurt and flavor: Whisk in Greek yogurt, vanilla, lemon juice, and salt until silky.
- Incorporate protein powder: Sift or sprinkle in protein powder gradually, mixing until no lumps remain. Taste and adjust sweetness with powdered sweetener.
- Fill the cups: Spoon the filling over the chilled crusts, smoothing the tops with a spatula.
Tap the tray lightly to level.
- Chill to set: Refrigerate for at least 2–3 hours, or until firm enough to peel away the liner cleanly. For best texture, chill 4+ hours.
- Add toppings: Before serving, top with berries, a dusting of crumbs, nuts, or a light drizzle of honey.
- Serve: Keep chilled until ready to eat. These are best cold for the creamiest bite.
Storage Instructions
- Refrigerator: Store covered for up to 5 days.
Keep toppings separate until serving to prevent sogginess.
- Freezer: Freeze without fresh fruit toppings for up to 2 months. Thaw in the fridge overnight before eating.
- Meal prep tip: Use silicone liners for easy removal and less mess.
Benefits of This Recipe
- Higher protein, fewer cravings: Protein helps keep you fuller longer and supports recovery.
- No oven: Quick to make and summer-friendly.
- Flexible macros: Adjust ingredients to fit low-carb, lower-fat, or higher-calorie goals.
- Balanced flavor: The lemon and vanilla keep it bright, not heavy.
What Not to Do
- Don’t skip softening the cream cheese: Cold cream cheese stays lumpy and won’t blend smoothly.
- Don’t add protein too fast: Dumping it in at once can cause clumps. Sprinkle and mix gradually.
- Don’t over-sweeten early: Protein powders vary in sweetness.
Taste as you go.
- Don’t skip chilling: The cups need time to set or they’ll be loose and messy.
- Don’t use watery yogurt: Excess liquid makes the filling runny. Strain if needed.
Alternatives
- Crust swaps: Use crushed oats, almond flour with a bit of butter, or a gluten-free cookie crumb.
- Dairy-free: Use dairy-free cream cheese and a thick coconut yogurt; pick a plant-based protein powder.
- Low-carb: Almond flour crust with butter and a low-carb sweetener; use unflavored whey isolate and a sugar-free sweetener.
- Flavor twists: Add cocoa powder and chocolate protein for a chocolate version, or swirl in a spoon of peanut butter or berry compote.
- Toppings: Try toasted coconut, a square of dark chocolate, or a small spoon of sugar-free jam.
FAQ
Can I use only Greek yogurt and skip the cream cheese?
Yes, but the texture will be tangier and less rich. For a closer cheesecake feel, keep at least some cream cheese or use a thicker dairy-free cream cheese if avoiding dairy.
What type of protein powder works best?
Whey-casein blends create the creamiest texture.
Whey isolate works but can be looser; start with a little less and adjust. Plant-based powders can be chalky, so add extra vanilla and a splash of milk only if needed.
How do I fix a runny filling?
Whisk in a bit more protein powder, one teaspoon at a time, or chill longer. If yogurt was watery, fold in a spoon of softened cream cheese or a small amount of powdered gelatin bloomed in hot water.
Can I make this in a pie dish instead of cups?
Absolutely.
Press the crust into an 8- or 9-inch pie dish, add filling, and chill. Slice once fully set. Allow extra chilling time for clean slices.
How do I make it sweeter without grit?
Use powdered sweeteners rather than granulated.
You can also blend granulated sweetener in a high-speed blender to make it powdery.
In Conclusion
These Protein Cheesecake No Bake Protein Cheesecake Cups are fast, creamy, and packed with protein. They come together with simple ingredients, no oven, and plenty of flavor options. Keep a batch in the fridge for a smarter dessert or a satisfying snack that actually hits the spot.
Protein Cheesecake No Bake Protein Cheesecake Cups - Creamy, Fast, and High-Protein
Ingredients
- For the crust: 1 cup graham cracker crumbs (or oat/almond cookie crumbs)
- 2 tablespoons melted butter (or coconut oil)
- 1 tablespoon maple syrup or honey (optional for sweetness)
- Pinch of salt
- For the cheesecake filling: 8 ounces reduced-fat cream cheese, softened
- 1 cup plain Greek yogurt (2% or 0%)
- 1/2 cup vanilla or unflavored whey/casein protein powder
- 1/4 cup powdered sweetener of choice (powdered sugar, allulose, or erythritol), to taste
- 1–2 teaspoons vanilla extract
- 1–2 tablespoons lemon juice (optional, for brightness)
- Pinch of salt
- For topping (optional): Fresh berries or sliced fruit
- Crushed nuts or dark chocolate shavings
- Berry compote or a drizzle of honey
- Equipment: 12-cup muffin tin or reusable ramekins
- Paper liners or silicone liners (recommended)
- Mixing bowls, whisk or hand mixer, spatula
Instructions
- Prep your cups: Line a muffin tin with 10–12 liners. For larger servings, use 10; for smaller bites, use 12.
- Make the crust: In a bowl, mix graham crumbs, melted butter, maple syrup, and a pinch of salt until sandy and evenly moistened.
- Press the base: Divide the crust mixture among the liners.Press down firmly with the back of a spoon. Place the tray in the fridge while you make the filling.
- Beat the cream cheese: In a large bowl, beat softened cream cheese until smooth and fluffy, about 1–2 minutes.
- Add yogurt and flavor: Whisk in Greek yogurt, vanilla, lemon juice, and salt until silky.
- Incorporate protein powder: Sift or sprinkle in protein powder gradually, mixing until no lumps remain. Taste and adjust sweetness with powdered sweetener.
- Fill the cups: Spoon the filling over the chilled crusts, smoothing the tops with a spatula.Tap the tray lightly to level.
- Chill to set: Refrigerate for at least 2–3 hours, or until firm enough to peel away the liner cleanly. For best texture, chill 4+ hours.
- Add toppings: Before serving, top with berries, a dusting of crumbs, nuts, or a light drizzle of honey.
- Serve: Keep chilled until ready to eat. These are best cold for the creamiest bite.
Printable Recipe Card
Want just the essential recipe details without scrolling through the article? Get our printable recipe card with just the ingredients and instructions.