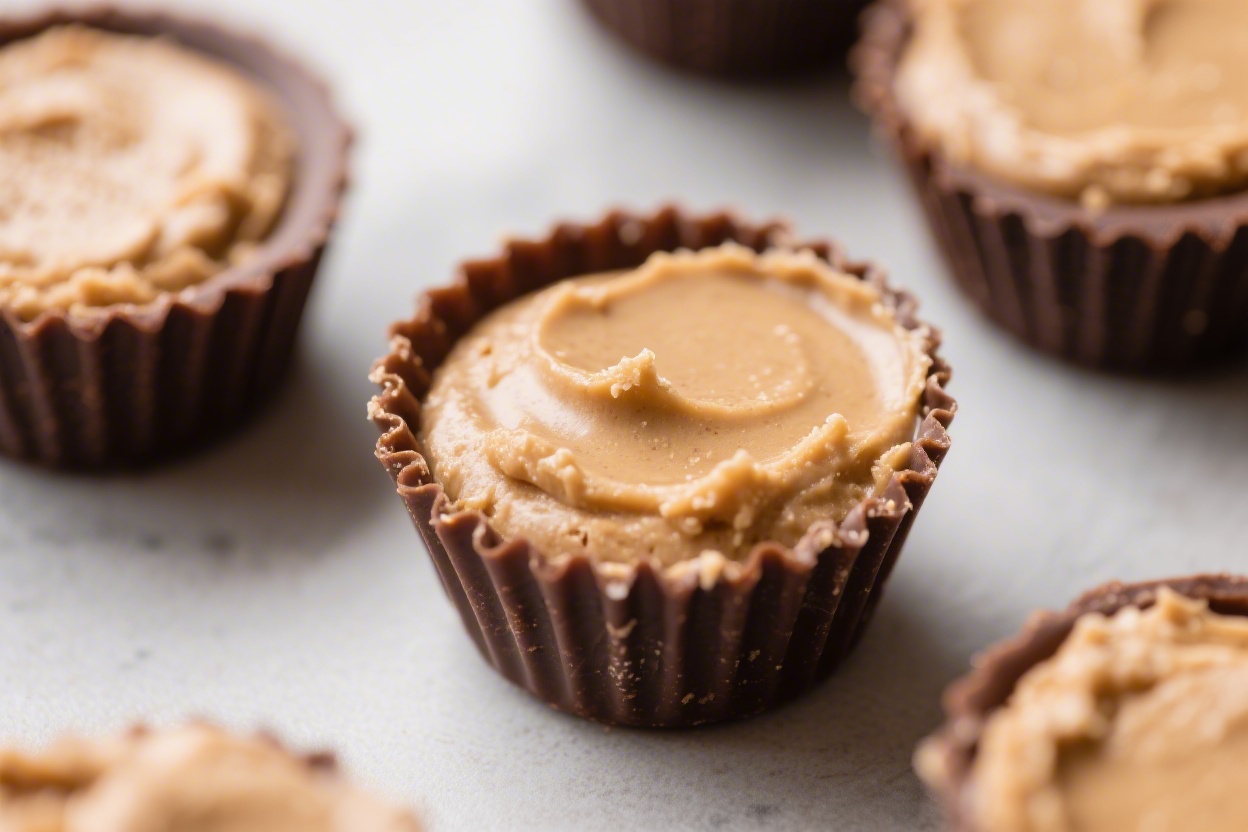
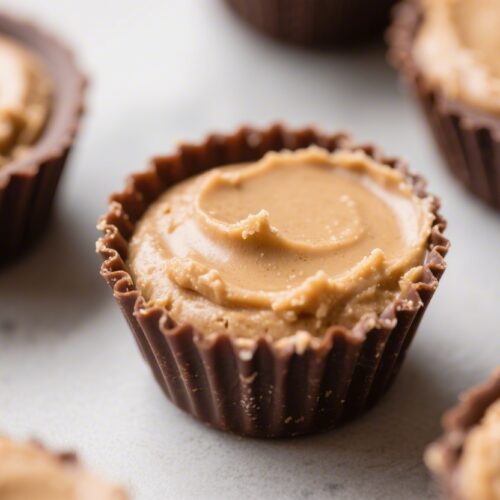
Protein Peanut Butter Cups (3 Ingredients, Freezer Friendly) – Easy, Satisfying, and Sweet
These protein peanut butter cups taste like the classic treat but pack a little boost that keeps you fuller longer. You only need three ingredients, and there’s no baking involved. They’re simple enough for a weeknight craving and sturdy enough to stash in the freezer for later.
Keep a batch on hand for post-workout snacks, lunchbox treats, or late-night sweets that don’t derail your day.
What Makes This Special

There’s beauty in keeping things simple. With just chocolate, peanut butter, and protein powder, you get rich flavor, a creamy center, and a touch of staying power. The steps are quick, and clean-up is minimal. These are freezer friendly, which means you can make once and enjoy for weeks.
They also scale easily, so double the recipe if you’ve got snackers in the house.
Shopping List
- Chocolate chips (semi-sweet or dark; dairy-free if needed)
- Creamy peanut butter (natural or no-stir, your choice)
- Vanilla or peanut butter protein powder (whey or plant-based)
Optional but nice: a pinch of flaky sea salt for the tops, a teaspoon of coconut oil to thin the chocolate, and paper muffin liners.
Instructions
- Prep your pan. Line a standard muffin tin with 10–12 paper liners. Mini pans work too; you’ll get more cups.
- Melt the chocolate. In a microwave-safe bowl, heat chocolate chips in 20–30 second bursts, stirring between each, until smooth. If it’s thick, stir in 1 teaspoon coconut oil.
- Make the protein filling. In a small bowl, mix peanut butter with protein powder until thick, scoopable, and not crumbly.
If it’s too dry, add 1–2 teaspoons peanut butter. If it’s too runny, sprinkle in a bit more protein powder.
- Form the base. Spoon about 1–2 teaspoons melted chocolate into each liner and tilt to coat the bottom. Freeze for 5 minutes to set.
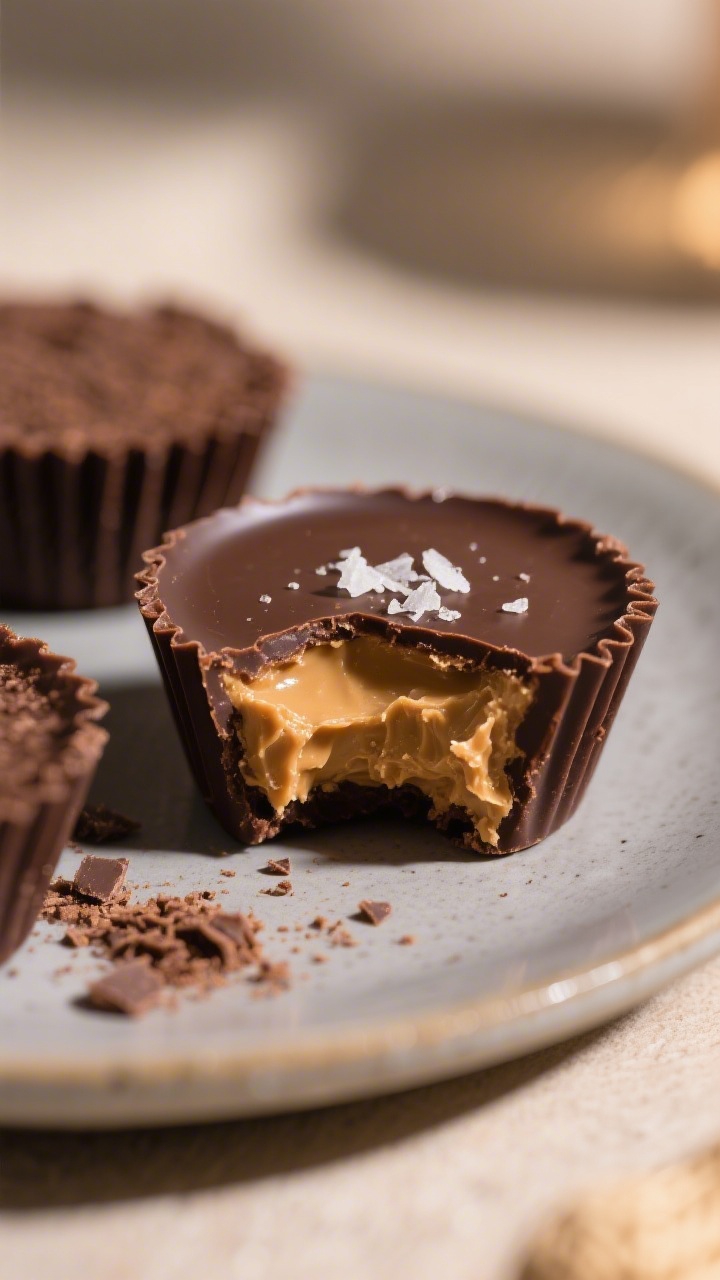
- Add the filling. Roll or press a small disk of the peanut butter mixture (roughly 1 tablespoon) and place it on top of the set chocolate, leaving a little space around the edges.
- Seal with chocolate. Spoon more melted chocolate over each cup to fully cover the filling.
Tap the pan gently to smooth the tops. Sprinkle with flaky salt if using.
- Chill. Freeze for 15–20 minutes, or refrigerate for 30–45 minutes, until completely set.
- Serve and store. Enjoy right away or transfer to an airtight container. See storage tips below.
Keeping It Fresh
Refrigerator: Store in an airtight container for up to 2 weeks.
They’ll be firm but biteable.
Freezer: Freeze for up to 2–3 months. Keep them in a sealed container or freezer bag to prevent frost. Let sit at room temperature for 5–10 minutes before eating for the best texture.
Layering tip: Add parchment between layers so the tops don’t stick to the bottoms.
Benefits of This Recipe
- Three ingredients. No fuss, no endless shopping list.
- Protein boost. Helps curb hunger and makes a sweet snack more satisfying.
- Make-ahead friendly. Batch once, enjoy many times.
- Customizable. Works with different chocolates, nut butters, and protein types.
- No baking. Perfect for warm days or quick prep.
Common Mistakes to Avoid
- Too thin a base layer. If the bottom chocolate layer is whisper-thin, the filling can break through.
Aim for a solid coat.
- Runny filling. Overly loose peanut butter won’t hold shape. Adjust with more protein powder until thick and doughy.
- Overheating chocolate. Chocolate burns fast. Short bursts and stirring prevent grainy, seized chocolate.
- Skipping the set time. If you don’t chill between layers, the filling can slide around and show through the top.
Alternatives
- Nut-free: Use sunflower seed butter or soy nut butter.
- Different chocolate: Try milk chocolate for sweeter cups or 70% dark for a bolder bite.
- Flavor twist: Add a pinch of cinnamon to the filling or a drop of vanilla extract to the chocolate.
- Textural add-ins: Mix in crushed rice cakes, crisped quinoa, or chopped peanuts to the top layer for crunch.
- Sweetness control: If your protein powder is unsweetened, add 1–2 teaspoons maple syrup or a few drops of liquid stevia to the filling.
FAQ
Can I use natural peanut butter?
Yes.
If it’s very drippy, stir well and chill for 10 minutes before mixing with protein powder. You may need a little extra powder to thicken it into a moldable filling.
Which protein powder works best?
Whey blends usually mix smoothly and taste familiar. Plant-based powders also work but can be more absorbent, so start with less and add as needed until you get a thick, dough-like texture.
Do I need coconut oil in the chocolate?
No.
It’s optional. A small amount can make the chocolate glossier and easier to pour, but the cups will set just fine without it.
How many cups does this make?
Expect 10–12 standard cups depending on how thick you like the layers. Mini muffin tins can yield 20–24 bite-size cups.
How do I prevent chocolate from cracking?
Let the base set fully, but not for too long in a very cold freezer.
A slightly thicker top layer and a gentle tap on the counter help smooth out air pockets that lead to cracks.
Can I make these without liners?
Yes, but liners make release and storage easier. If skipping, lightly grease the tin or use silicone molds for a clean pop-out.
Wrapping Up
These three-ingredient protein peanut butter cups are simple, reliable, and seriously good. They’re easy to customize and even easier to stash in the freezer for when a sweet moment strikes.
Keep the ingredients on hand, and you’ll always have a better-for-you treat ready to go.
Protein Peanut Butter Cups (3 Ingredients, Freezer Friendly) - Easy, Satisfying, and Sweet
Ingredients
- Chocolate chips (semi-sweet or dark; dairy-free if needed)
- Creamy peanut butter (natural or no-stir, your choice)
- Vanilla or peanut butter protein powder (whey or plant-based)
Instructions
- Prep your pan. Line a standard muffin tin with 10–12 paper liners. Mini pans work too; you’ll get more cups.
- Melt the chocolate. In a microwave-safe bowl, heat chocolate chips in 20–30 second bursts, stirring between each, until smooth. If it’s thick, stir in 1 teaspoon coconut oil.
- Make the protein filling. In a small bowl, mix peanut butter with protein powder until thick, scoopable, and not crumbly.If it’s too dry, add 1–2 teaspoons peanut butter. If it’s too runny, sprinkle in a bit more protein powder.
- Form the base. Spoon about 1–2 teaspoons melted chocolate into each liner and tilt to coat the bottom. Freeze for 5 minutes to set.
- Add the filling. Roll or press a small disk of the peanut butter mixture (roughly 1 tablespoon) and place it on top of the set chocolate, leaving a little space around the edges.
- Seal with chocolate. Spoon more melted chocolate over each cup to fully cover the filling.Tap the pan gently to smooth the tops. Sprinkle with flaky salt if using.
- Chill. Freeze for 15–20 minutes, or refrigerate for 30–45 minutes, until completely set.
- Serve and store. Enjoy right away or transfer to an airtight container. See storage tips below.
Printable Recipe Card
Want just the essential recipe details without scrolling through the article? Get our printable recipe card with just the ingredients and instructions.