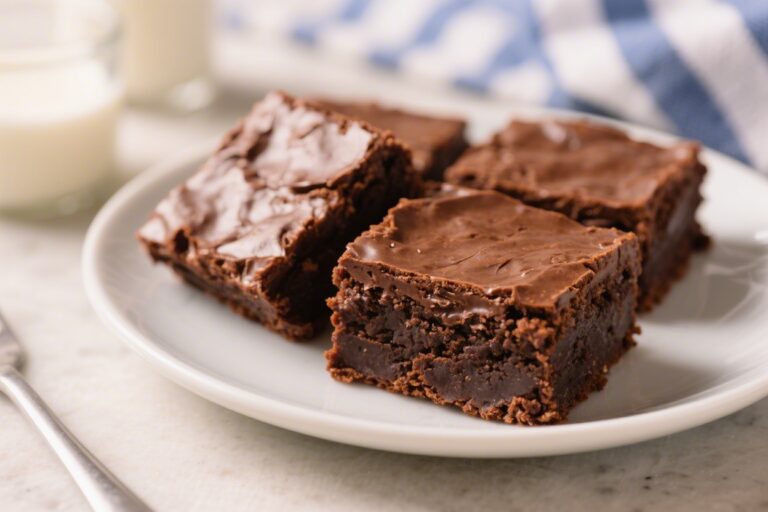
Gluten Free Salted Caramel Chocolate Bark – Sweet, Crunchy, and Easy

This Gluten Free Salted Caramel Chocolate Bark is the kind of treat that feels fancy but takes almost no effort. It’s rich, salty-sweet, and perfect for gifting or keeping in the freezer for a quick dessert. You’ll get smooth chocolate, buttery caramel, and a crisp snap with every bite.

No special tools or tricky techniques—just a simple, reliable method. If you love a treat that looks impressive and tastes even better, this one hits the mark.

What Makes This Special

Overhead shot of freshly set Gluten Free Salted Caramel Chocolate Bark on parchment-lined baking she

This bark balances textures and flavors: silky chocolate, chewy caramel, and a sprinkle of flaky salt for contrast. It’s naturally gluten free when you choose safe ingredients, so it works for mixed crowds.

The recipe is fast—most of the time is waiting for the bark to set. It’s also flexible, so you can add nuts, seeds, or a drizzle of extra chocolate without complicating things.

What You’ll Need

  • 12 oz (340 g) dark or semi-sweet chocolate (use certified gluten-free; chips or chopped bars)
  • 1/2 cup (120 ml) gluten-free caramel sauce (store-bought or homemade)
  • 2 tbsp unsalted butter (for homemade caramel or enriching store-bought)
  • 1 tsp pure vanilla extract
  • Flaky sea salt (such as Maldon)
  • Optional mix-ins: toasted pecans or almonds, pumpkin seeds, crushed gluten-free pretzels, toasted coconut, mini chocolate chips
  • Tools: baking sheet, parchment paper, microwave-safe bowl or double boiler, small saucepan (if heating caramel), spatula, toothpick or skewer

Step-by-Step Instructions

Close-up detail of broken shards of Gluten Free Salted Caramel Chocolate Bark stacked on a matte bla
  1. Prep the pan. Line a baking sheet with parchment paper. Clear a spot in your fridge or freezer for quick setting.
  2. Melt the chocolate. In a microwave-safe bowl, heat chocolate in 20–30 second bursts, stirring each time, until smooth and glossy.

    Or use a double boiler over low heat. Do not overheat.

  3. Spread the base. Pour melted chocolate onto the parchment and spread into a rectangle about 1/4 inch thick. Keep it even for a clean snap.
  4. If using jarred caramel, warm it gently with butter in a small saucepan until pourable.

    Stir in vanilla. If making caramel from scratch, ensure it’s thick but fluid—not runny.

  5. Swirl it in. Dollop spoonfuls of warm caramel over the chocolate. Use a toothpick or skewer to gently swirl, creating ribbons.

    Don’t overmix or you’ll lose the marbled look.

  6. Add texture. Sprinkle flaky sea salt over the surface. Add any optional toppings while the chocolate is still soft so they adhere.
  7. Set the bark. Refrigerate for 30–45 minutes or freeze for 15–20 minutes, until fully firm.
  8. Break into pieces. Lift the parchment and snap the bark into shards. Aim for hand-held sizes for easy serving.
  9. Store properly. Keep in an airtight container.

    Layer with parchment to prevent sticking.

Keeping It Fresh

Store the bark in the fridge for up to two weeks. For longer storage, freeze for up to two months. Keep it tightly sealed to prevent moisture and odors from affecting the chocolate.

If frozen, let pieces sit at room temperature for 5–10 minutes before serving to soften the caramel slightly.

Health Benefits

  • Gluten free by design, which makes it a safer option for those with celiac disease or gluten sensitivity.
  • Dark chocolate offers antioxidants and a lower sugar profile than milk chocolate.
  • Portion-friendly treat: thin bark and small shards help with mindful snacking.
  • Customizable add-ins like nuts or seeds add healthy fats, fiber, and crunch.

What Not to Do

  • Don’t overheat the chocolate. It can seize or burn quickly; gentle heat is key.
  • Don’t use runny caramel. If it’s too thin, it will bleed and prevent the bark from setting cleanly.
  • Don’t skip the salt. A light sprinkle lifts the flavors and balances the sweetness.
  • Don’t swirl too much. Over-mixing turns the bark muddy instead of marbled.
  • Don’t leave it at room temp for hours. Warm kitchens can soften the caramel and dull the chocolate’s snap.

Recipe Variations

  • Nutty Crunch: Add toasted pecans or almonds for richness and texture.
  • Sweet & Salty Pretzel: Sprinkle crushed gluten-free pretzels over the top.
  • Coconut Caramel: Add toasted coconut flakes and a drizzle of white chocolate.
  • Mocha Twist: Stir 1 tsp espresso powder into the melted chocolate.
  • Spiced Caramel: Add a pinch of cinnamon or smoked sea salt for a gourmet edge.
  • Seed Lover’s Bark: Pumpkin and sunflower seeds for a nut-free crunch.

FAQ

Is all chocolate gluten free?

Pure chocolate is typically gluten free, but some brands add flavorings or are made in facilities with gluten. Choose chocolate labeled gluten free or check the manufacturer’s allergen statement.

Can I make this dairy free?

Yes. Use dairy-free chocolate and a dairy-free caramel (such as coconut milk caramel).

Swap butter for coconut oil in the caramel step.

What if my chocolate seizes?

If chocolate turns grainy and thick, a few drops of neutral oil can sometimes loosen it. If it’s badly seized, it’s best to start over and heat more gently.

How thick should the bark be?

About 1/4 inch is ideal. Too thin and it shatters; too thick and the caramel-to-chocolate ratio feels heavy.

Can I make it ahead for gifts?

Absolutely.

Make it up to a week in advance and store it chilled. Package in cellophane bags or tins with parchment between layers.

How do I get clean shards?

Chill until fully set, then use your hands to snap or tap a chef’s knife to score and break. Work quickly to avoid melting.

In Conclusion

Gluten Free Salted Caramel Chocolate Bark is simple, stylish, and endlessly adaptable.

With a handful of pantry ingredients and a few easy steps, you’ll have a treat that feels bakery-level without the fuss. Keep a batch on hand for last-minute desserts, gifts, or your own sweet cravings—no oven, no stress, all flavor.

Gluten Free Salted Caramel Chocolate Bark - Sweet, Crunchy, and Easy

Prep Time 10 minutes
Cook Time 10 minutes
Total Time 20 minutes
Servings 12 servings

Ingredients
  

  • 12 oz (340 g) dark or semi-sweet chocolate (use certified gluten-free; chips or chopped bars)
  • 1/2 cup (120 ml) gluten-free caramel sauce (store-bought or homemade)
  • 2 tbsp unsalted butter (for homemade caramel or enriching store-bought)
  • 1 tsp pure vanilla extract
  • Flaky sea salt (such as Maldon)
  • Optional mix-ins: toasted pecans or almonds, pumpkin seeds, crushed gluten-free pretzels, toasted coconut, mini chocolate chips
  • Tools: baking sheet, parchment paper, microwave-safe bowl or double boiler, small saucepan (if heating caramel), spatula, toothpick or skewer

Instructions
 

  • Prep the pan. Line a baking sheet with parchment paper. Clear a spot in your fridge or freezer for quick setting.
  • Melt the chocolate. In a microwave-safe bowl, heat chocolate in 20–30 second bursts, stirring each time, until smooth and glossy.Or use a double boiler over low heat. Do not overheat.
  • Spread the base. Pour melted chocolate onto the parchment and spread into a rectangle about 1/4 inch thick. Keep it even for a clean snap.
  • Swirl it in. Dollop spoonfuls of warm caramel over the chocolate. Use a toothpick or skewer to gently swirl, creating ribbons.Don’t overmix or you’ll lose the marbled look.
  • Add texture. Sprinkle flaky sea salt over the surface. Add any optional toppings while the chocolate is still soft so they adhere.
  • Set the bark. Refrigerate for 30–45 minutes or freeze for 15–20 minutes, until fully firm.
  • Break into pieces. Lift the parchment and snap the bark into shards. Aim for hand-held sizes for easy serving.
  • Store properly. Keep in an airtight container.Layer with parchment to prevent sticking.

Maple Cinnamon Quinoa Breakfast Bake Gluten Free and Easy – Cozy, Simple, and Satisfying

This breakfast bake is the kind of comfort food that also happens to be nourishing. It’s warm, lightly sweet, and naturally gluten free, with maple syrup and cinnamon doing the heavy lifting on flavor. Quinoa bakes up tender and custardy in the oven, almost like a cross between oatmeal and bread pudding.

It’s easy enough for busy weekdays and special enough for slow weekends. Serve it warm with a splash of milk or a dollop of yogurt, and you’re set.

Why This Recipe Works

Close-up detail/cooking process: A custardy quinoa breakfast bake just out of the oven in an 8x8 gla
  • Quinoa absorbs flavor: Baking quinoa in milk with maple and cinnamon infuses every bite with warm, cozy notes.
  • Hands-off cooking: No stovetop babysitting—mix, pour, and bake.
  • Protein-packed: Quinoa and eggs make this breakfast satisfying without being heavy.
  • Versatile base: Add fruit, nuts, or chocolate chips and it still turns out great.
  • Gluten free by design: No swaps or special flours needed.

What You’ll Need

  • 1 cup quinoa, rinsed well
  • 2 cups milk (dairy or unsweetened almond/oat milk)
  • 1/3 cup pure maple syrup
  • 2 large eggs
  • 1 teaspoon vanilla extract
  • 1 1/2 teaspoons ground cinnamon
  • 1/4 teaspoon ground nutmeg (optional)
  • 1/2 teaspoon fine sea salt
  • 2 tablespoons melted coconut oil or butter
  • 1 cup chopped apples or pears (or 3/4 cup blueberries)
  • 1/4 cup chopped walnuts or pecans (optional)
  • 2 tablespoons chia seeds or ground flax (optional, for extra texture and fiber)
  • Extra maple syrup and milk or yogurt for serving

Instructions

Final plated/overhead: Overhead shot of a warm slice of Maple Cinnamon Quinoa Breakfast Bake in a sh
  1. Heat the oven to 350°F (175°C). Grease an 8×8-inch baking dish with coconut oil or butter.
  2. Rinse the quinoa in a fine-mesh sieve under cold water for 30–60 seconds. Don’t skip this step; it removes bitterness.
  3. In a large bowl, whisk together milk, maple syrup, eggs, vanilla, cinnamon, nutmeg, and salt until smooth.
  4. Stir in the rinsed quinoa, melted coconut oil or butter, fruit, nuts, and chia or flax if using.

    Mix well so the quinoa is evenly distributed.

  5. Pour the mixture into the prepared dish. Give it a gentle stir in the pan to prevent the quinoa from settling.
  6. Bake for 40–50 minutes, until the center is set and the edges are golden. A slight jiggle is fine, but it shouldn’t be liquid.
  7. Let it rest for 10 minutes before serving.

    This helps it firm up for clean slices.

  8. Serve warm with a splash of milk, a spoonful of yogurt, and a drizzle of maple syrup if you like a sweeter bowl.

Keeping It Fresh

Cool completely, then cover and refrigerate for up to 5 days. Reheat individual portions in the microwave with a splash of milk for 30–60 seconds. For longer storage, freeze slices in an airtight container for up to 2 months.

Thaw overnight in the fridge and warm gently before serving.

Why This is Good for You

  • Complete protein: Quinoa offers all nine essential amino acids, which helps keep you full.
  • Steady energy: Fiber from quinoa, fruit, and seeds supports stable blood sugar.
  • Healthy fats: Nuts and coconut oil provide satiety and flavor.
  • No refined sugar: Maple syrup adds sweetness with a touch of minerals and a cleaner taste.

Pitfalls to Watch Out For

  • Skipping the rinse: Unrinsed quinoa can taste bitter due to saponins.
  • Uneven distribution: Stir the mixture once in the pan so the quinoa doesn’t sink to the bottom.
  • Underbaking: If it’s still liquid in the center, bake 5–10 minutes longer and tent with foil if browning too fast.
  • Too little liquid: Don’t reduce the milk; quinoa needs it to cook properly and stay custardy.

Recipe Variations

  • Banana Bread Style: Mash 1 ripe banana into the wet ingredients and add 1/2 teaspoon extra cinnamon.
  • Berry Almond: Use blueberries or raspberries, swap in almond extract for vanilla, and top with sliced almonds.
  • Pumpkin Spice: Add 1/2 cup pumpkin puree and 1 teaspoon pumpkin spice; reduce milk by 1/4 cup.
  • Chocolate Chip: Stir in 1/3 cup dark chocolate chips and a pinch of flaky salt.
  • Dairy Free: Use almond or oat milk and coconut oil; the bake will still set beautifully.
  • No-Egg Option: Replace eggs with 3 tablespoons ground flax mixed with 6 tablespoons warm water (rest 5 minutes). Texture will be slightly softer.

FAQ

Do I need to cook the quinoa first?

No. The quinoa cooks in the oven as it absorbs the milk and maple mixture, which keeps the process simple and the texture tender.

Can I make this the night before?

Yes.

Mix everything, pour into the dish, cover, and refrigerate overnight. Stir gently before baking and add 5–10 minutes to the bake time if it’s going into the oven cold.

What size pan works best?

An 8×8-inch dish is ideal. A 9×9 will bake a bit faster, while a loaf pan will take longer.

Check doneness at 40 minutes and adjust as needed.

How do I keep it from being too sweet?

Use 1/4 cup maple syrup and add fresh fruit on top when serving. You can also increase cinnamon for more flavor without extra sugar.

Can I use steel-cut oats instead of quinoa?

Not in this exact recipe. Steel-cut oats absorb liquid differently and need a longer cook time.

If you want to combine them, use half quinoa and half rolled oats and add 1/4 cup more milk.

In Conclusion

This Maple Cinnamon Quinoa Breakfast Bake is simple, flexible, and reliably delicious. It’s an easy way to get a warm, protein-rich breakfast on the table without fuss. Keep it classic with apples and walnuts or make it your own with the variations.

Either way, you’ll have a cozy, gluten free breakfast that works for busy mornings and lazy weekends alike.

Maple Cinnamon Quinoa Breakfast Bake Gluten Free and Easy - Cozy, Simple, and Satisfying

Prep Time 10 minutes
Cook Time 35 minutes
Total Time 45 minutes
Servings 6 servings

Ingredients
  

  • 1 cup quinoa, rinsed well
  • 2 cups milk (dairy or unsweetened almond/oat milk)
  • 1/3 cup pure maple syrup
  • 2 large eggs
  • 1 teaspoon vanilla extract
  • 1 1/2 teaspoons ground cinnamon
  • 1/4 teaspoon ground nutmeg (optional)
  • 1/2 teaspoon fine sea salt
  • 2 tablespoons melted coconut oil or butter
  • 1 cup chopped apples or pears (or 3/4 cup blueberries)
  • 1/4 cup chopped walnuts or pecans (optional)
  • 2 tablespoons chia seeds or ground flax (optional, for extra texture and fiber)
  • Extra maple syrup and milk or yogurt for serving

Instructions
 

  • Heat the oven to 350°F (175°C). Grease an 8x8-inch baking dish with coconut oil or butter.
  • Rinse the quinoa in a fine-mesh sieve under cold water for 30–60 seconds. Don’t skip this step; it removes bitterness.
  • In a large bowl, whisk together milk, maple syrup, eggs, vanilla, cinnamon, nutmeg, and salt until smooth.
  • Stir in the rinsed quinoa, melted coconut oil or butter, fruit, nuts, and chia or flax if using.Mix well so the quinoa is evenly distributed.
  • Pour the mixture into the prepared dish. Give it a gentle stir in the pan to prevent the quinoa from settling.
  • Bake for 40–50 minutes, until the center is set and the edges are golden. A slight jiggle is fine, but it shouldn’t be liquid.
  • Let it rest for 10 minutes before serving.This helps it firm up for clean slices.
  • Serve warm with a splash of milk, a spoonful of yogurt, and a drizzle of maple syrup if you like a sweeter bowl.

Chocolate Chia Pudding with Berries Gluten Free and Protein-Packed – Easy, Creamy, and Satisfying

This chocolate chia pudding is the kind of make-ahead breakfast or snack that feels like dessert but fuels your day. It’s thick, creamy, and naturally sweet, with a rich cocoa flavor and a fresh pop from juicy berries. Everything is gluten free and simple to prep the night before.

You’ll get protein, fiber, and healthy fats in one spoonful. If you like quick, wholesome recipes that actually taste good, this one belongs in your rotation.

What Makes This Recipe So Good

Close-up detail shot: Thick, creamy chocolate chia pudding just after chilling, glistening surface w
  • No cooking required: Stir, chill, and eat. It’s that easy.
  • Great texture: The chia seeds plump up for a pudding-like consistency that’s smooth and satisfying.
  • Protein-packed: A boost from Greek yogurt or protein powder makes it a more complete meal.
  • Naturally gluten free: Made with simple, whole ingredients.
  • Make-ahead friendly: Mix it at night, and breakfast is ready in the morning.
  • Flexible sweetness: Adjust the sweetener to your taste, or swap for what you have.

What You’ll Need

  • 3 tablespoons chia seeds
  • 1 cup unsweetened milk (almond, oat, dairy, or coconut)
  • 2 tablespoons unsweetened cocoa powder
  • 1–2 tablespoons maple syrup or honey (or a zero-sugar sweetener to taste)
  • 1/2 teaspoon vanilla extract
  • Pinch of sea salt
  • 1/3 cup plain Greek yogurt or dairy-free yogurt (optional, for extra protein and creaminess)
  • 1 scoop chocolate or vanilla protein powder (optional; adjust sweetness if using)
  • 1/2–3/4 cup mixed berries (strawberries, blueberries, raspberries)
  • Optional toppings: shaved dark chocolate, chopped nuts, coconut flakes, or a drizzle of nut butter

Step-by-Step Instructions

Tasty top view and final presentation: Overhead shot of meal-prep jars layered with chocolate chia p
  1. Whisk the base: In a bowl or jar, whisk the milk, cocoa powder, sweetener, vanilla, and salt until the cocoa is fully dissolved and smooth.
  2. Add protein (optional): Stir in Greek yogurt and/or protein powder until well combined.

    If it’s too thick, add a splash more milk.

  3. Stir in chia seeds: Sprinkle in the chia seeds and whisk for 30 seconds so they don’t clump.
  4. Set, then stir again: Let the mixture rest for 10 minutes, then whisk again to break up any settling seeds.
  5. Chill: Cover and refrigerate for at least 2–3 hours, or overnight, until thick and pudding-like.
  6. Serve: Stir, then layer or top with fresh berries. Add optional toppings like nuts or dark chocolate.

Keeping It Fresh

  • Fridge: Store in an airtight container for 4–5 days. Keep berries separate and add right before eating.
  • Meal prep: Portion into individual jars for grab-and-go breakfasts.
  • Too thick? Stir in a little milk before serving to loosen the texture.

Why This is Good for You

  • Protein support: Greek yogurt or protein powder helps with satiety and muscle recovery.
  • Fiber-rich: Chia seeds deliver soluble fiber that supports digestion and steady energy.
  • Healthy fats: Chia’s omega-3s help keep you full and support heart health.
  • Antioxidants: Cocoa and berries bring flavonoids and vitamin C.
  • Lower added sugar: You control the sweetness and can keep it light.

Pitfalls to Watch Out For

  • Clumping chia: Always whisk twice—once when mixing and again after 10 minutes—to prevent lumps.
  • Too bitter: Unsweetened cocoa needs a touch of sweetener.

    Taste and adjust before chilling.

  • Runny pudding: If it doesn’t set, add 1 teaspoon more chia, stir, and chill 30–60 minutes.
  • Gritty protein: Some powders don’t blend well. Use a quality brand and whisk thoroughly.
  • Watery berries: If using frozen berries, thaw and drain before topping to avoid thinning the pudding.

Alternatives

  • Dairy-free: Use almond, coconut, or oat milk and a dairy-free yogurt.
  • No added sugar: Sweeten with mashed ripe banana or a few drops of stevia/monk fruit.
  • Flavor twist: Add a pinch of cinnamon, espresso powder, or orange zest for a new vibe.
  • Nutty boost: Stir in 1 tablespoon almond butter or peanut butter for richness and extra protein.
  • Berry swaps: Try sliced cherries, pomegranate arils, or chopped mango for a change.
  • Superfood add-ins: Flax meal, hemp hearts, or collagen peptides mix in easily.

FAQ

Can I make this without protein powder?

Yes. It’s still filling thanks to the chia seeds.

If you want more protein, use Greek yogurt or add nuts and seeds on top.

How long does chia pudding take to thicken?

It starts thickening in 10–15 minutes but needs at least 2–3 hours to fully set. Overnight is best for a creamy texture.

What’s the best milk for this?

Any unsweetened milk works. Almond milk is light, coconut milk is richer, and dairy milk gives a classic pudding feel.

Can I blend it smooth?

Absolutely.

Blend after chilling for a silky, mousse-like texture. Add a splash of milk if needed.

Is it suitable for kids?

Yes. Adjust sweetness to their preference and skip protein powders not intended for children.

Can I meal-prep a week’s worth?

You can prep 4–5 days at a time.

Keep berries separate until serving for the best texture.

Wrapping Up

Chocolate chia pudding with berries is simple, flexible, and genuinely satisfying. It’s an easy win for busy mornings or a smarter dessert at night. Keep the ingredients on hand, mix a batch in minutes, and enjoy a gluten-free, protein-packed treat any day of the week.

Chocolate Chia Pudding with Berries Gluten Free and Protein-Packed - Easy, Creamy, and Satisfying

Prep Time 10 minutes
Total Time 10 minutes
Servings 4 servings

Ingredients
  

  • 3 tablespoons chia seeds
  • 1 cup unsweetened milk (almond, oat, dairy, or coconut)
  • 2 tablespoons unsweetened cocoa powder
  • 1–2 tablespoons maple syrup or honey (or a zero-sugar sweetener to taste)
  • 1/2 teaspoon vanilla extract
  • Pinch of sea salt
  • 1/3 cup plain Greek yogurt or dairy-free yogurt (optional, for extra protein and creaminess)
  • 1 scoop chocolate or vanilla protein powder (optional; adjust sweetness if using)
  • 1/2–3/4 cup mixed berries (strawberries, blueberries, raspberries)
  • Optional toppings: shaved dark chocolate, chopped nuts, coconut flakes, or a drizzle of nut butter

Instructions
 

  • Whisk the base: In a bowl or jar, whisk the milk, cocoa powder, sweetener, vanilla, and salt until the cocoa is fully dissolved and smooth.
  • Add protein (optional): Stir in Greek yogurt and/or protein powder until well combined.If it’s too thick, add a splash more milk.
  • Stir in chia seeds: Sprinkle in the chia seeds and whisk for 30 seconds so they don’t clump.
  • Set, then stir again: Let the mixture rest for 10 minutes, then whisk again to break up any settling seeds.
  • Chill: Cover and refrigerate for at least 2–3 hours, or overnight, until thick and pudding-like.
  • Serve: Stir, then layer or top with fresh berries. Add optional toppings like nuts or dark chocolate.

Gluten Free Spiced Sweet Potato & Black Bean Buddha Bowl – A Cozy, Nourishing Meal

This Gluten Free Spiced Sweet Potato & Black Bean Buddha Bowl is the kind of meal you’ll want on repeat. It’s hearty, colorful, and full of satisfying textures—crispy roasted sweet potatoes, creamy avocado, and crunchy cabbage. Everything sits on a bed of fluffy rice or quinoa, with a zesty lime-tahini drizzle to tie it together.

It’s simple enough for weeknights and special enough for meal prep you’ll actually look forward to.

What Makes This Special

Overhead cooking process shot: Roasted spiced sweet potato cubes just out of the oven on a parchment
  • Big flavor, simple ingredients: Warm spices, fresh lime, and a creamy sauce make a humble lineup taste restaurant-worthy.
  • Naturally gluten free: Every component is safe for gluten-free diets when you choose certified GF grains and condiments.
  • Balanced and satisfying: Carb-smart sweet potatoes, fiber-rich black beans, healthy fats, and greens keep you full without feeling heavy.
  • Flexible: Swap your grain, change the greens, or use what’s in your pantry.

Ingredients

  • 2 medium sweet potatoes, peeled and cut into 1-inch cubes
  • 1 can (15 oz) black beans, drained and rinsed
  • 2 cups cooked brown rice or quinoa (use certified gluten free)
  • 1 cup red cabbage, thinly sliced
  • 1 ripe avocado, sliced
  • 1 cup cherry tomatoes, halved
  • 2 cups baby spinach or mixed greens
  • 2 tablespoons olive oil
  • 1 teaspoon ground cumin
  • 1 teaspoon smoked paprika
  • 1/2 teaspoon chili powder (adjust to taste)
  • 1/2 teaspoon garlic powder
  • 1/2 teaspoon onion powder
  • 1/2 teaspoon sea salt, plus more to taste
  • 1/4 teaspoon black pepper

Lime-Tahini Sauce

  • 1/3 cup tahini (stirred well)
  • 2 tablespoons fresh lime juice
  • 1 tablespoon maple syrup or honey
  • 1 small garlic clove, grated
  • 3–5 tablespoons warm water to thin
  • Pinch of salt

Optional Toppings

  • Fresh cilantro
  • Pepitas or toasted sunflower seeds
  • Lime wedges
  • Crushed red pepper

Step-by-Step Instructions

Final plated Buddha bowl, top-down: A vibrant gluten free bowl with a base of fluffy brown rice or q
  1. Preheat and prep: Heat oven to 425°F (220°C). Line a sheet pan with parchment.
  2. Season the sweet potatoes: Toss cubes with olive oil, cumin, smoked paprika, chili powder, garlic powder, onion powder, salt, and pepper. Spread in a single layer.
  3. Roast: Bake for 22–28 minutes, flipping halfway, until edges are crisp and centers are tender.
  4. Warm the beans: In a small skillet, heat the black beans with a splash of water and a pinch of salt for 3–4 minutes, just until warm.
  5. Make the sauce: Whisk tahini, lime juice, maple syrup, garlic, and salt.

    Add warm water, 1 tablespoon at a time, until it’s creamy and pourable.

  6. Assemble the base: Add cooked rice or quinoa to bowls. Top with spinach or greens so they gently wilt.
  7. Build the bowl: Add roasted sweet potatoes, warm black beans, cabbage, tomatoes, and avocado.
  8. Drizzle and finish: Spoon the lime-tahini sauce over the top. Add cilantro, pepitas, and a squeeze of lime.

    Taste and add a pinch of salt if needed.

Keeping It Fresh

  • Meal prep: Store components separately up to 4 days. Keep the sauce in a small jar and thin with water if it thickens.
  • Reheating: Warm the rice/quinoa, sweet potatoes, and beans. Add fresh veggies and avocado just before serving.
  • Prevent soggy greens: Place a paper towel in the salad container to absorb moisture.

Health Benefits

  • High fiber: Sweet potatoes, beans, and cabbage support digestion and steady energy.
  • Plant protein: Black beans and tahini offer protein plus minerals like iron and magnesium.
  • Healthy fats: Avocado and tahini provide heart-healthy monounsaturated fats.
  • Antioxidants: Colorful veggies bring carotenoids, vitamin C, and polyphenols.

What Not to Do

  • Don’t overcrowd the pan: Crowding makes sweet potatoes steam instead of crisp.

    Use two pans if needed.

  • Don’t skip salt: Proper seasoning brings out the natural sweetness and balances the sauce.
  • Don’t use bitter tahini: Taste your tahini first; if it’s overly bitter, switch brands.
  • Don’t drench the greens early: Add the sauce right before eating to keep textures fresh.

Recipe Variations

  • Change the grain: Try wild rice, cauliflower rice, or millet (all gluten free).
  • Swap the beans: Use chickpeas or lentils. For extra crunch, roast chickpeas with the same spices.
  • Spice it differently: Use curry powder and turmeric instead of the smoked paprika blend.
  • Add protein: Top with a jammy egg, grilled tofu, or shredded chicken if you eat meat.
  • Different sauce: Cilantro-lime yogurt sauce (use dairy-free yogurt if needed) or avocado crema.

FAQ

Is this bowl fully gluten free?

Yes, as long as you use certified gluten-free grains and check labels on tahini and spices. Cross-contact can happen, so choose trusted brands.

Can I make it without tahini?

You can.

Try a simple olive oil, lime, and honey vinaigrette, or blend avocado with lime juice and water for a creamy dressing.

How do I make it spicier?

Add extra chili powder, cayenne, or a drizzle of hot sauce. Crushed red pepper on top also works well.

Can I roast the sweet potatoes in an air fryer?

Yes. Cook at 400°F (205°C) for 12–16 minutes, shaking the basket halfway, until crisp and tender.

What’s the best way to keep avocado from browning?

Slice it right before serving.

If prepping ahead, toss slices with lime juice and store tightly covered.

Can I serve this cold?

Absolutely. It tastes great as a chilled salad bowl. Keep the dressing separate until you’re ready to eat.

Final Thoughts

This Gluten Free Spiced Sweet Potato & Black Bean Buddha Bowl is comforting, colorful, and easy to make your own.

With a short ingredient list and a bold, creamy sauce, it turns weeknight cooking into something satisfying and stress-free. Keep the components prepped, and you’ll have a wholesome meal ready whenever you are.

Gluten Free Spiced Sweet Potato & Black Bean Buddha Bowl – A Cozy, Nourishing Meal

Prep Time 15 minutes
Cook Time 30 minutes
Total Time 45 minutes
Servings 4 servings

Ingredients
  

  • 2 medium sweet potatoes, peeled and cut into 1-inch cubes
  • 1 can (15 oz) black beans, drained and rinsed
  • 2 cups cooked brown rice or quinoa (use certified gluten free)
  • 1 cup red cabbage, thinly sliced
  • 1 ripe avocado, sliced
  • 1 cup cherry tomatoes, halved
  • 2 cups baby spinach or mixed greens
  • 2 tablespoons olive oil
  • 1 teaspoon ground cumin
  • 1 teaspoon smoked paprika
  • 1/2 teaspoon chili powder (adjust to taste)
  • 1/2 teaspoon garlic powder
  • 1/2 teaspoon onion powder
  • 1/2 teaspoon sea salt, plus more to taste
  • 1/4 teaspoon black pepper
  • 1/3 cup tahini (stirred well)
  • 2 tablespoons fresh lime juice
  • 1 tablespoon maple syrup or honey
  • 1 small garlic clove, grated
  • 3–5 tablespoons warm water to thin
  • Pinch of salt
  • Fresh cilantro
  • Pepitas or toasted sunflower seeds
  • Lime wedges
  • Crushed red pepper

Instructions
 

  • Preheat and prep: Heat oven to 425°F (220°C). Line a sheet pan with parchment.
  • Season the sweet potatoes: Toss cubes with olive oil, cumin, smoked paprika, chili powder, garlic powder, onion powder, salt, and pepper. Spread in a single layer.
  • Roast: Bake for 22–28 minutes, flipping halfway, until edges are crisp and centers are tender.
  • Warm the beans: In a small skillet, heat the black beans with a splash of water and a pinch of salt for 3–4 minutes, just until warm.
  • Make the sauce: Whisk tahini, lime juice, maple syrup, garlic, and salt.Add warm water, 1 tablespoon at a time, until it’s creamy and pourable.
  • Assemble the base: Add cooked rice or quinoa to bowls. Top with spinach or greens so they gently wilt.
  • Build the bowl: Add roasted sweet potatoes, warm black beans, cabbage, tomatoes, and avocado.
  • Drizzle and finish: Spoon the lime-tahini sauce over the top. Add cilantro, pepitas, and a squeeze of lime.Taste and add a pinch of salt if needed.

Zesty Lemon Almond Energy Bars That Are Gluten Free – Bright, Nutty, and Ready to Go

These bars bring sunny lemon flavor together with toasty almonds and a touch of sweetness for an easy, energizing snack. They’re perfect for busy mornings, pre-workout fuel, or an afternoon pick-me-up. You don’t need fancy equipment, and the ingredients are simple and pantry-friendly.

Plus, they’re naturally gluten free and easily dairy free if you choose.

What Makes This Special

These energy bars strike the right balance: bright lemon, warm almond, and just enough sweetness to feel satisfying. They’re made with whole ingredients and no refined flour. The texture is soft with a pleasant chew, thanks to dates and oats.

Best of all, they come together quickly and hold up well in lunchboxes or gym bags.

Ingredients

  • 1 1/2 cups raw almonds
  • 1 cup gluten-free rolled oats
  • 1 cup pitted Medjool dates (about 10–12), packed
  • 1/2 cup unsweetened shredded coconut
  • 2–3 tablespoons maple syrup or honey (to taste)
  • 2 tablespoons almond butter
  • Zest of 2 lemons (finely grated)
  • 2–3 tablespoons fresh lemon juice
  • 1/2 teaspoon pure vanilla extract
  • 1/4 teaspoon fine sea salt
  • Optional: 1 tablespoon chia seeds or flaxseed meal for extra fiber
  • Optional drizzle: 1/3 cup white chocolate chips (gluten free) with 1 teaspoon coconut oil

Instructions

  1. Prep your pan: Line an 8×8-inch square pan with parchment, leaving overhang for easy lifting.
  2. Pulse the dry base: In a food processor, pulse almonds and oats until you have a fine, sandy meal with small flecks. Don’t over-process into paste.
  3. Add flavor boosters: Add shredded coconut, lemon zest, chia or flax (if using), and salt. Pulse to combine.
  4. Blend in sweetness: Add pitted dates and process until the mixture looks crumbly and slightly sticky.

    If dates are dry, soak them in warm water for 10 minutes, then drain well.

  5. Bring it together: Add almond butter, 2 tablespoons maple syrup, vanilla, and 2 tablespoons lemon juice. Process until the mixture clumps and holds when pinched. If it’s too dry, add another teaspoon of lemon juice at a time.

    For more sweetness, add the remaining syrup.

  6. Press and chill: Transfer the mixture to the lined pan. Press firmly and evenly with your hands or the back of a measuring cup. Aim for an even, compact layer.
  7. Optional drizzle: Melt white chocolate chips with coconut oil in short bursts in the microwave, stirring until smooth.

    Drizzle over the bars.

  8. Set and slice: Chill for 30–45 minutes, then lift out and cut into 12 bars or 16 squares. Wipe the knife between cuts for clean edges.

Keeping It Fresh

Store bars in an airtight container with parchment between layers. Keep in the fridge for up to 1 week or freeze for 2–3 months.

For on-the-go, wrap individually and refrigerate. They’ll hold at room temperature for a few hours without getting sticky.

Benefits of This Recipe

  • Naturally gluten free: Uses oats and nuts instead of flour.
  • Steady energy: Balanced carbs, healthy fats, and fiber keep you fueled.
  • Bright flavor: Lemon zest and juice cut through sweetness for a clean finish.
  • Easy to customize: Swap nuts, add seeds, or adjust sweetness.
  • No baking needed: Quick to make with minimal cleanup.

What Not to Do

  • Don’t skip the zest: It delivers the strongest lemon flavor.
  • Don’t over-process: If the mixture turns oily, the bars can feel greasy.
  • Don’t use instant oats: They can make the texture pasty. Stick with rolled oats.
  • Don’t add too much liquid: Extra lemon juice seems helpful, but it can prevent the bars from setting.
  • Don’t cut while warm: Chill first for clean slices and firm bars.

Recipe Variations

  • Lemon Blueberry: Fold in 1/3 cup dried blueberries and a pinch of cinnamon.
  • Lemon Poppy: Swap chia for 1 tablespoon poppy seeds for a bakery-style vibe.
  • Coconut Lemon: Toast the shredded coconut first for deeper flavor.
  • Cashew Citrus: Use cashews instead of almonds and add orange zest with the lemon.
  • Protein Boost: Mix in 1/4 cup vanilla or unflavored protein powder and adjust lemon juice as needed.

FAQ

Are these bars fully gluten free?

Yes, as long as you use certified gluten-free rolled oats and check that any add-ins (like white chocolate chips) are labeled gluten free.

Almonds, coconut, dates, and lemon are naturally gluten free.

Can I make them without a food processor?

You can, but it’s a workout. Chop the almonds finely, mash the dates with a fork after softening, and mix everything by hand. The texture will be a bit chunkier but still tasty.

How do I make them nut free?

Swap almonds for sunflower seeds and use sunflower seed butter.

The color may darken slightly because sunflower seeds react with lemon, but the flavor stays great.

Can I reduce the sugar?

Yes. Start with 1 tablespoon maple syrup and rely on dates for sweetness. Taste and add more lemon zest for brightness if you cut the sweetener.

What if my mixture won’t hold together?

Add a teaspoon of lemon juice or a touch more almond butter and pulse again.

If it’s still crumbly, a quick 10-second blitz usually helps the oils bind.

In Conclusion

These Zesty Lemon Almond Energy Bars deliver fresh citrus flavor, wholesome ingredients, and a satisfying chew—all without turning on the oven. They’re easy to prep, simple to store, and flexible enough to fit your routine. Make a batch on Sunday, and you’ll have bright, grab-and-go energy all week.

Crispy Cauliflower Tacos Made Gluten Free – Easy, Fresh, and Flavor-Packed

These crispy cauliflower tacos are the kind of weeknight meal you’ll want on repeat. They’re crunchy on the outside, tender inside, and loaded with bright, zesty toppings. Best of all, they’re gluten free without feeling like a compromise.

Whether you’re cooking for a mixed crowd or eating gluten free every day, these tacos deliver big flavor with simple ingredients. Grab some fresh limes and your favorite hot sauce—dinner is about to be fun.

Why This Recipe Works

Close-up detail shot: Crispy roasted cauliflower florets just out of the oven on a parchment-lined b
  • Texture you can’t resist: A light gluten-free coating and high-heat roast give the cauliflower a crisp shell and soft center.
  • Balanced flavor: Chili-lime seasoning, creamy sauce, and fresh slaw hit salty, tangy, and a little spicy all at once.
  • Simple pantry staples: Everything is easy to find, and substitutions are straightforward.
  • Built for gluten-free diets: Corn tortillas and a gluten-free batter keep it safe without sacrificing crunch.

Ingredients

  • For the crispy cauliflower:
    • 1 large head cauliflower, cut into bite-size florets
    • 1/2 cup gluten-free all-purpose flour (or fine rice flour)
    • 1/2 cup cornstarch
    • 1 teaspoon baking powder
    • 1 teaspoon kosher salt
    • 1 teaspoon chili powder
    • 1/2 teaspoon smoked paprika
    • 1/2 teaspoon garlic powder
    • 1/2 cup sparkling water (plus more as needed)
    • 2–3 tablespoons neutral oil (avocado, canola, or grapeseed)
  • For the slaw:
    • 2 cups shredded cabbage (green or purple)
    • 1/4 cup chopped cilantro
    • 2 tablespoons lime juice
    • 1 tablespoon olive oil
    • Pinch of salt
  • For the chipotle-lime sauce:
    • 1/3 cup mayonnaise (or Greek yogurt)
    • 1 tablespoon lime juice
    • 1 teaspoon adobo sauce from chipotles (or 1/4 teaspoon chipotle powder)
    • 1/2 teaspoon honey or maple syrup
    • Pinch of salt
  • To serve:
    • 8–10 small corn tortillas (certified gluten free)
    • Diced red onion
    • Fresh lime wedges
    • Sliced avocado or guacamole
    • Hot sauce (optional)

How to Make It

Overhead final presentation: Fully assembled gluten-free cauliflower tacos on warm corn tortillas, n
  1. Heat the oven: Preheat to 450°F (230°C). Line a large baking sheet with parchment and drizzle with 1 tablespoon oil.
  2. Mix the slaw: Toss cabbage, cilantro, lime juice, olive oil, and salt.

    Set aside to soften while you cook.

  3. Stir the sauce: Whisk mayo, lime juice, adobo, honey, and salt until smooth. Adjust heat and acidity to taste.
  4. Make the batter: In a bowl, whisk flour, cornstarch, baking powder, salt, chili powder, smoked paprika, and garlic powder. Add sparkling water and whisk until it’s the consistency of pancake batter.

    Add a splash more water if too thick.

  5. Coat the cauliflower: Toss florets in the batter until evenly coated. Shake off excess so it’s not gloopy.
  6. Roast until crisp: Spread florets on the sheet without crowding. Drizzle or mist with remaining oil.

    Roast 20–25 minutes, flipping once halfway, until browned and crisp on the edges.

  7. Warm the tortillas: Toast corn tortillas in a dry skillet 20–30 seconds per side, or wrap in foil and warm in the oven for 5 minutes. Keep them covered so they stay pliable.
  8. Assemble: Fill each tortilla with crispy cauliflower, a handful of slaw, avocado, red onion, and a drizzle of chipotle-lime sauce. Finish with lime and hot sauce.

How to Store

  • Cauliflower: Keep leftovers in an airtight container in the fridge up to 3 days.

    Re-crisp in a 425°F (220°C) oven or air fryer for 5–8 minutes.

  • Slaw: Store separately up to 2 days. It softens over time but still tastes great.
  • Sauce: Refrigerate in a jar up to 1 week.
  • Tortillas: Keep at room temp if sealed, or refrigerate after opening; warm before serving.

Benefits of This Recipe

  • Gluten free and crowd-pleasing: Corn tortillas and a GF batter make it safe and satisfying for everyone.
  • High on veggies: A full head of cauliflower plus crunchy slaw means fiber and micronutrients in every bite.
  • Lighter than fried: Oven-roasting uses less oil but still gives you crisp texture.
  • Customizable heat: Adjust the spice level easily with chipotle and hot sauce.

Pitfalls to Watch Out For

  • Soggy coating: Overcrowding the pan traps steam. Space the florets and flip once for even browning.
  • Batter too thick: Heavy batter won’t crisp.

    Aim for a thin, clinging coat; add a splash more sparkling water if needed.

  • Tortillas tearing: Cold corn tortillas crack. Warm them until pliable and keep covered with a towel.
  • Hidden gluten: Check labels on tortillas, spices, and mayo to ensure they’re certified gluten free.

Variations You Can Try

  • Air fryer version: Cook battered florets at 400°F (205°C) for 10–14 minutes, shaking halfway, until crisp and golden.
  • Buffalo style: Toss roasted cauliflower in a little melted butter and hot sauce; swap chipotle sauce for ranch.
  • Coconut-lime twist: Add shredded unsweetened coconut to the batter and finish with extra lime zest.
  • Spice swap: Use taco seasoning, curry powder, or berbere for a different flavor profile.
  • Bean boost: Add black beans or refried beans to make the tacos extra filling.

FAQ

Can I make these tacos vegan?

Yes. Use vegan mayo or a cashew crema for the sauce, and check that your tortillas and sweetener are vegan-friendly.

What’s the best gluten-free flour for the batter?

A gluten-free all-purpose blend works well.

Fine rice flour also makes an ultra-crisp coating paired with cornstarch.

Can I prep anything ahead?

You can make the sauce and slaw up to a day ahead. Cut the cauliflower and mix the dry batter ingredients in advance, then add sparkling water right before roasting.

How do I keep the cauliflower crispy for guests?

Hold the roasted florets on a wire rack in a 250°F (120°C) oven for up to 20 minutes. Sauce the tacos at the table so the coating stays crunchy.

What if I don’t have sparkling water?

Use regular water and an extra pinch of baking powder.

Sparkling water gives lighter bubbles, but you’ll still get good crunch without it.

Wrapping Up

Crispy Cauliflower Tacos Made Gluten Free are simple, bright, and satisfying. With a snappy coating, fresh slaw, and a punchy sauce, they taste restaurant-level without the fuss. Keep this recipe on hand for weeknights, meal prep, or casual dinners with friends.

It’s proof that gluten-free tacos can be every bit as crispy and craveable.

Crispy Cauliflower Tacos Made Gluten Free – Easy, Fresh, and Flavor-Packed

Prep Time 15 minutes
Cook Time 25 minutes
Total Time 40 minutes
Servings 4 servings

Ingredients
  

  • For the crispy cauliflower:
  • 1 large head cauliflower, cut into bite-size florets
  • 1/2 cup gluten-free all-purpose flour (or fine rice flour)
  • 1/2 cup cornstarch
  • 1 teaspoon baking powder
  • 1 teaspoon kosher salt
  • 1 teaspoon chili powder
  • 1/2 teaspoon smoked paprika
  • 1/2 teaspoon garlic powder
  • 1/2 cup sparkling water (plus more as needed)
  • 2–3 tablespoons neutral oil (avocado, canola, or grapeseed)
  • For the slaw:
  • 2 cups shredded cabbage (green or purple)
  • 1/4 cup chopped cilantro
  • 2 tablespoons lime juice
  • 1 tablespoon olive oil
  • Pinch of salt
  • For the chipotle-lime sauce:
  • 1/3 cup mayonnaise (or Greek yogurt)
  • 1 tablespoon lime juice
  • 1 teaspoon adobo sauce from chipotles (or 1/4 teaspoon chipotle powder)
  • 1/2 teaspoon honey or maple syrup
  • Pinch of salt
  • To serve:
  • 8–10 small corn tortillas (certified gluten free)
  • Diced red onion
  • Fresh lime wedges
  • Sliced avocado or guacamole
  • Hot sauce (optional)

Instructions
 

  • Heat the oven: Preheat to 450°F (230°C). Line a large baking sheet with parchment and drizzle with 1 tablespoon oil.
  • Mix the slaw: Toss cabbage, cilantro, lime juice, olive oil, and salt.Set aside to soften while you cook.
  • Stir the sauce: Whisk mayo, lime juice, adobo, honey, and salt until smooth. Adjust heat and acidity to taste.
  • Make the batter: In a bowl, whisk flour, cornstarch, baking powder, salt, chili powder, smoked paprika, and garlic powder. Add sparkling water and whisk until it’s the consistency of pancake batter.Add a splash more water if too thick.
  • Coat the cauliflower: Toss florets in the batter until evenly coated. Shake off excess so it’s not gloopy.
  • Roast until crisp: Spread florets on the sheet without crowding. Drizzle or mist with remaining oil.Roast 20–25 minutes, flipping once halfway, until browned and crisp on the edges.
  • Warm the tortillas: Toast corn tortillas in a dry skillet 20–30 seconds per side, or wrap in foil and warm in the oven for 5 minutes. Keep them covered so they stay pliable.
  • Assemble: Fill each tortilla with crispy cauliflower, a handful of slaw, avocado, red onion, and a drizzle of chipotle-lime sauce. Finish with lime and hot sauce.

High Protein Keto Fried Rice – A Fast, Satisfying Low-Carb Favorite

Skip the takeout and make a bowl that tastes just as good, fills you up, and keeps carbs in check. This high protein keto fried rice uses cauliflower rice, lean protein, and plenty of veggies for a fast weeknight win. It’s the kind of meal you can whip up with pantry staples and a hot skillet.

No complicated steps, no specialty equipment. Just big flavor, great texture, and macros that work.

Why This Recipe Works

Cooking process — Cauliflower keto fried rice sizzling in a large black wok over medium-high heat,
  • Cauliflower rice stands in for rice without the carbs, but still gives that classic fried rice bite.
  • High protein keeps you full and supports muscle maintenance, especially on a keto plan.
  • Quick-cooking technique locks in flavor while preventing soggy cauliflower.
  • Flexible add-ins mean you can use chicken, shrimp, tofu, or bacon and still hit your goals.
  • Simple sauce delivers takeout-style taste with clean ingredients.

Ingredients

  • 3 cups riced cauliflower (fresh or thawed from frozen, well drained)
  • 2 teaspoons avocado oil or light olive oil, divided
  • 1 tablespoon toasted sesame oil
  • 3 large eggs, lightly beaten
  • 10–12 oz cooked chicken breast or shrimp, diced (or extra-firm tofu for a vegetarian option)
  • 1 cup finely chopped low-carb veggies (mix of bell pepper, zucchini, or mushrooms)
  • 1/2 cup frozen peas (optional; can swap for chopped green beans to reduce carbs)
  • 3 cloves garlic, minced
  • 1 tablespoon fresh ginger, minced (or 1 teaspoon ground ginger)
  • 3 tablespoons tamari or coconut aminos (use tamari for lowest carbs)
  • 1 tablespoon rice vinegar (unseasoned)
  • 1–2 teaspoons sriracha or chili crisp (optional)
  • 1/4 teaspoon white pepper (or black pepper)
  • 2–3 green onions, thinly sliced
  • Salt to taste
  • Optional toppings: toasted sesame seeds, lime wedges, extra green onions

Instructions

Final dish — Overhead shot of a restaurant-quality bowl of high protein keto fried rice: golden ca
  1. Prep the cauliflower rice: If using frozen, squeeze out extra moisture with a clean towel. Drier rice browns better.
  2. Cook the eggs: Heat 1/2 teaspoon oil in a large skillet or wok over medium heat.

    Add beaten eggs, scramble just until set, then transfer to a plate.

  3. Brown the protein: Add 1 teaspoon oil. Sear chicken or shrimp until lightly browned and heated through. Remove to the same plate.
  4. Sauté aromatics and veggies: Add remaining oil.

    Cook garlic and ginger for 30 seconds. Add chopped veggies (and peas if using) and stir-fry 2–3 minutes until crisp-tender.

  5. Add cauliflower rice: Increase heat to medium-high. Add riced cauliflower and sesame oil.

    Spread it out and let it sit 1 minute to lightly brown, then stir. Repeat 2–3 times until steam reduces and texture is fluffy, about 5–6 minutes.

  6. Season: Pour in tamari, rice vinegar, and sriracha if using. Add white pepper.

    Stir to coat evenly.

  7. Finish: Return eggs and protein to the skillet. Toss with green onions. Taste and adjust salt, pepper, or tamari as needed.
  8. Serve hot: Top with sesame seeds and a squeeze of lime if you like.

Storage Instructions

  • Refrigerator: Store in an airtight container for 3–4 days.
  • Freezer: Freeze in meal-prep portions for up to 2 months.

    Thaw in the fridge overnight.

  • Reheat: Use a hot skillet with a splash of oil for best texture, 3–4 minutes. Microwave works in a pinch, but the skillet keeps it from getting soggy.

Benefits of This Recipe

  • High protein, low carb: Supports satiety and keto goals.
  • Fast and flexible: Ready in about 20 minutes and easy to adapt.
  • Budget-friendly: Uses common ingredients and leftover protein.
  • Veggie-forward: Packs in fiber and micronutrients without the carb load.

What Not to Do

  • Don’t add wet cauliflower rice straight to the pan. Excess moisture leads to mush. Pat it dry or squeeze thawed rice.
  • Don’t overcrowd the skillet. Cook in batches if needed to keep everything sizzling and browning.
  • Don’t skip the sesame oil. It adds that signature fried rice aroma.
  • Don’t drown it in sauce. Too much liquid kills the texture and can add hidden carbs.

Alternatives

  • Proteins: Ground turkey, pork, leftover rotisserie chicken, bacon bits, or smoked tofu.
  • Veggies: Swap peas for chopped green beans, diced asparagus, or shredded cabbage to lower carbs.
  • Sauce: Use coconut aminos for soy-free, or add a splash of fish sauce for deeper umami.
  • Spice level: Stir in red pepper flakes or chili oil for heat, or keep it mild for family-friendly bowls.
  • Egg-free: Replace eggs with crumbled tofu and a pinch of black salt for an eggy flavor.

FAQ

Is cauliflower rice really keto?

Yes.

Cauliflower is low in net carbs and fits comfortably into most keto plans. It’s an easy stand-in for regular rice without the blood sugar spike.

Can I use pre-riced cauliflower?

Absolutely. Fresh or frozen both work.

Just make sure it’s well drained and dry before cooking for the best texture.

How do I make it even higher in protein?

Add extra chicken or shrimp, toss in an additional egg, or mix in collagen peptides to the sauce. You can also use lean ground turkey for more grams per serving.

What’s the best pan to use?

A large nonstick skillet or a well-seasoned wok works best. You want high heat and space to move ingredients around quickly.

Is tamari keto-friendly?

Tamari is lower in carbs than many soy sauces and is generally keto-friendly in moderate amounts.

If you’re strict, coconut aminos is a good alternative with a touch of natural sweetness.

Can I meal prep this?

Yes. Portion it into containers and add a fresh squeeze of lime and extra green onions after reheating to brighten the flavors.

Wrapping Up

High Protein Keto Fried Rice gives you takeout vibes with smart macros and simple steps. It’s fast, flavorful, and easy to customize with whatever protein you have on hand.

Keep cauliflower rice in the freezer and you’re never more than 20 minutes from a satisfying bowl. Add heat, keep it mild, make it your own—either way, it’s a keeper.

High Protein Keto Fried Rice - A Fast, Satisfying Low-Carb Favorite

Prep Time 10 minutes
Cook Time 10 minutes
Total Time 20 minutes
Servings 4 servings

Ingredients
  

  • 3 cups riced cauliflower (fresh or thawed from frozen, well drained)
  • 2 teaspoons avocado oil or light olive oil, divided
  • 1 tablespoon toasted sesame oil
  • 3 large eggs, lightly beaten
  • 10–12 oz cooked chicken breast or shrimp, diced (or extra-firm tofu for a vegetarian option)
  • 1 cup finely chopped low-carb veggies (mix of bell pepper, zucchini, or mushrooms)
  • 1/2 cup frozen peas (optional; can swap for chopped green beans to reduce carbs)
  • 3 cloves garlic, minced
  • 1 tablespoon fresh ginger, minced (or 1 teaspoon ground ginger)
  • 3 tablespoons tamari or coconut aminos (use tamari for lowest carbs)
  • 1 tablespoon rice vinegar (unseasoned)
  • 1–2 teaspoons sriracha or chili crisp (optional)
  • 1/4 teaspoon white pepper (or black pepper)
  • 2–3 green onions, thinly sliced
  • Salt to taste
  • Optional toppings: toasted sesame seeds, lime wedges, extra green onions

Instructions
 

  • Prep the cauliflower rice: If using frozen, squeeze out extra moisture with a clean towel. Drier rice browns better.
  • Cook the eggs: Heat 1/2 teaspoon oil in a large skillet or wok over medium heat.Add beaten eggs, scramble just until set, then transfer to a plate.
  • Brown the protein: Add 1 teaspoon oil. Sear chicken or shrimp until lightly browned and heated through. Remove to the same plate.
  • Sauté aromatics and veggies: Add remaining oil.Cook garlic and ginger for 30 seconds. Add chopped veggies (and peas if using) and stir-fry 2–3 minutes until crisp-tender.
  • Add cauliflower rice: Increase heat to medium-high. Add riced cauliflower and sesame oil.Spread it out and let it sit 1 minute to lightly brown, then stir. Repeat 2–3 times until steam reduces and texture is fluffy, about 5–6 minutes.
  • Season: Pour in tamari, rice vinegar, and sriracha if using. Add white pepper.Stir to coat evenly.
  • Finish: Return eggs and protein to the skillet. Toss with green onions. Taste and adjust salt, pepper, or tamari as needed.
  • Serve hot: Top with sesame seeds and a squeeze of lime if you like.

High Protein Keto Broccoli Cheddar Soup – Cozy, Creamy, and Satisfying

This is the kind of bowl that makes weeknights feel easier. It’s thick, creamy, and loaded with cheesy broccoli goodness, but still fits a low-carb lifestyle. Thanks to a smart protein boost, it’s more filling than your average soup and perfect for meal prep.

Serve it on its own, pair it with a simple salad, or stash it in the fridge for quick lunches. Comfort and convenience, all in one pot.

What Makes This Special

Cooking process, close-up detail: In-pot shot of creamy keto broccoli cheddar soup mid-simmer right
  • High in protein, low in carbs: Uses whey isolate or collagen peptides and extra cheddar to bump up protein without adding carbs.
  • Ultra creamy, no flour needed: Heavy cream and cheese add body and richness without a roux.
  • Quick and weeknight-friendly: Ready in about 30 minutes with minimal prep.
  • Family-approved flavor: Classic broccoli cheddar taste with a savory twist from garlic, onion, and nutmeg.
  • Easy to customize: Swap proteins, dairy, or seasonings to fit your preferences.

Ingredients

  • 2 tablespoons butter or avocado oil
  • 1 small onion, finely chopped
  • 3 cloves garlic, minced
  • 4 cups broccoli florets, chopped small (fresh or frozen)
  • 4 cups low-sodium chicken broth (or vegetable broth)
  • 1 cup heavy cream
  • 2 cups sharp cheddar cheese, freshly grated (plus extra for topping)
  • 1/2 cup unflavored whey protein isolate or collagen peptides
  • 1 teaspoon Dijon mustard
  • 1/2 teaspoon ground nutmeg
  • 1/2 teaspoon smoked paprika (optional)
  • Salt and black pepper, to taste
  • Red pepper flakes, to taste (optional)

Step-by-Step Instructions

Final dish, top view: Overhead shot of a bowl of High Protein Keto Broccoli Cheddar Soup—thick and
  1. Sauté aromatics: In a large pot over medium heat, melt butter. Add onion and a pinch of salt.

    Cook 3–4 minutes until soft. Stir in garlic and cook 30 seconds until fragrant.

  2. Add broccoli and liquids: Stir in broccoli, broth, Dijon, nutmeg, and smoked paprika. Bring to a gentle boil, then reduce to a simmer.

    Cook 8–10 minutes until broccoli is tender.

  3. Blend for creaminess (optional): For a smoother soup, use an immersion blender to blend part or all of the pot. Leave some florets for texture if you like.
  4. Stir in cream: Reduce heat to low. Add heavy cream and stir until warmed through.

    Do not boil after adding dairy.

  5. Add protein and cheese: Whisk whey isolate or collagen into a small bowl with 1/2 cup warm broth until smooth. Stir this slurry into the pot. Gradually add cheddar by the handful, stirring constantly until melted and creamy.
  6. Season to taste: Add salt, pepper, and red pepper flakes as desired.

    If soup is too thick, thin with more broth. If too thin, simmer gently a few minutes.

  7. Serve: Ladle into bowls. Top with extra cheddar, a sprinkle of paprika, or a drizzle of olive oil.

Storage Instructions

  • Fridge: Store in an airtight container up to 4 days.

    Reheat gently over low heat, stirring often. Avoid boiling to prevent cheese from separating.

  • Freezer: Cheese-based soups can separate when frozen. If you must freeze, cool fully, portion into containers, and freeze up to 2 months.

    Reheat slowly and whisk to bring it back together.

  • Meal prep tip: Keep an extra splash of broth on hand to thin leftovers during reheating.

Health Benefits

  • High-quality protein: Whey isolate or collagen helps support satiety and muscle maintenance while keeping carbs low.
  • Broccoli power: Packed with fiber, vitamin C, vitamin K, and antioxidants that support immune and bone health.
  • Keto-friendly fats: Cream and cheese provide fats that keep you full and help with fat-soluble vitamin absorption.
  • Lower carb count: No flour or starch, so it fits most ketogenic macros when portioned appropriately.

Pitfalls to Watch Out For

  • Curdling cheese: High heat after adding cheese can cause separation. Keep the heat low and add cheese slowly.
  • Gritty protein: Dumping dry powder straight into hot soup can clump. Always whisk with warm broth first.
  • Over-salting: Cheddar and broth already contain salt.

    Season at the end.

  • Too thin or too thick: Adjust with broth to thin or simmer a bit longer to reduce. Avoid adding starch thickeners if staying keto.

Alternatives

  • Dairy-free: Use coconut cream and a dairy-free cheddar-style shreds. Choose a pea or egg white protein isolate if tolerated.
  • Extra protein: Stir in shredded rotisserie chicken or diced grilled chicken at the end.
  • Different cheeses: Try a mix of cheddar and gruyère, or add a little cream cheese for extra silkiness.
  • Vegetable swaps: Add cauliflower with broccoli for a thicker, bulkier soup without extra carbs.
  • Spice variation: Add curry powder and turmeric for a golden, warming version.

FAQ

Can I use pre-shredded cheese?

Pre-shredded cheese often has anti-caking starches that can make the soup grainy.

For the smoothest texture, use freshly grated cheddar.

What protein powder works best?

Unflavored whey protein isolate dissolves smoothly and keeps carbs very low. Collagen peptides also work and won’t thicken as much, but they won’t make it creamy like whey can.

How do I make it vegetarian?

Use vegetable broth instead of chicken broth and skip any meat additions. The rest of the recipe stays the same.

Can I use frozen broccoli?

Yes.

Toss it in straight from the freezer and simmer a few extra minutes until tender. It blends just as well as fresh.

How can I reduce calories without losing flavor?

Use half-and-half instead of heavy cream and reduce cheese by 25%. Keep the whey isolate for protein, and boost flavor with extra Dijon and spices.

In Conclusion

This High Protein Keto Broccoli Cheddar Soup checks all the boxes: creamy, comforting, and macro-friendly.

It’s simple enough for a busy night yet satisfying enough to keep you full for hours. Make a batch, stash a few portions for later, and enjoy a reliable go-to that never feels like a compromise.

High Protein Keto Broccoli Cheddar Soup – Cozy, Creamy, and Satisfying

Prep Time 10 minutes
Cook Time 25 minutes
Total Time 35 minutes
Servings 6 servings

Ingredients
  

  • 2 tablespoons butter or avocado oil
  • 1 small onion, finely chopped
  • 3 cloves garlic, minced
  • 4 cups broccoli florets, chopped small (fresh or frozen)
  • 4 cups low-sodium chicken broth (or vegetable broth)
  • 1 cup heavy cream
  • 2 cups sharp cheddar cheese, freshly grated (plus extra for topping)
  • 1/2 cup unflavored whey protein isolate or collagen peptides
  • 1 teaspoon Dijon mustard
  • 1/2 teaspoon ground nutmeg
  • 1/2 teaspoon smoked paprika (optional)
  • Salt and black pepper, to taste
  • Red pepper flakes, to taste (optional)

Instructions
 

  • Sauté aromatics: In a large pot over medium heat, melt butter. Add onion and a pinch of salt.Cook 3–4 minutes until soft. Stir in garlic and cook 30 seconds until fragrant.
  • Add broccoli and liquids: Stir in broccoli, broth, Dijon, nutmeg, and smoked paprika. Bring to a gentle boil, then reduce to a simmer.Cook 8–10 minutes until broccoli is tender.
  • Blend for creaminess (optional): For a smoother soup, use an immersion blender to blend part or all of the pot. Leave some florets for texture if you like.
  • Stir in cream: Reduce heat to low. Add heavy cream and stir until warmed through.Do not boil after adding dairy.
  • Add protein and cheese: Whisk whey isolate or collagen into a small bowl with 1/2 cup warm broth until smooth. Stir this slurry into the pot. Gradually add cheddar by the handful, stirring constantly until melted and creamy.
  • Season to taste: Add salt, pepper, and red pepper flakes as desired.If soup is too thick, thin with more broth. If too thin, simmer gently a few minutes.
  • Serve: Ladle into bowls. Top with extra cheddar, a sprinkle of paprika, or a drizzle of olive oil.

Keto White Chicken Chili – Cozy, Creamy, and Low Carb

This Keto White Chicken Chili is comfort in a bowl—rich, creamy, and full of flavor without weighing you down. It’s the kind of recipe that warms you up on a chilly night and still fits your low-carb goals. Tender chicken, green chiles, and spices simmer together in a silky, cheesy broth.

It’s satisfying, easy to make, and great for meal prep. Serve it with fresh toppings, and you’ve got a crowd-pleaser that happens to be keto-friendly.

What Makes This Recipe So Good

Cooking process, close-up detail: A steaming pot of keto white chicken chili mid-simmer, showing ten
  • Low carb without sacrificing flavor: Made with chicken, cream cheese, and green chiles instead of beans, it stays keto but tastes indulgent.
  • One-pot convenience: Minimal cleanup and simple steps make this perfect for weeknights.
  • Flexible and forgiving: Use rotisserie chicken, leftover turkey, or make it dairy-free with easy swaps.
  • Meal prep friendly: Reheats beautifully and thickens slightly, making tomorrow’s bowl even better.
  • Customizable heat: Keep it mild or turn it up with jalapeños or extra cayenne.

Ingredients

  • 2 tablespoons avocado oil or olive oil
  • 1 medium onion, finely chopped
  • 1 green bell pepper, diced
  • 2–3 garlic cloves, minced
  • 1 teaspoon ground cumin
  • 1 teaspoon dried oregano
  • 1/2 teaspoon chili powder
  • 1/4–1/2 teaspoon cayenne pepper (optional, to taste)
  • 1 (4-ounce) can diced green chiles
  • 4 cups low-sodium chicken broth
  • 1 1/2 pounds cooked chicken, shredded (rotisserie works great)
  • 4 ounces cream cheese, softened and cubed
  • 1/2 cup heavy cream
  • 1 cup shredded Monterey Jack or pepper jack cheese
  • 1/4 cup chopped fresh cilantro
  • Juice of 1/2 lime
  • Salt and black pepper, to taste
  • Optional toppings: Sliced jalapeño, avocado, extra cilantro, shredded cheese, sour cream

Step-by-Step Instructions

Final dish, : Overhead shot of a bowl of keto white chicken chili, luxuriously creamy and pale golde
  1. Sauté the vegetables: Heat the oil in a large pot over medium heat. Add onion and bell pepper, and cook 4–5 minutes until softened.

    Stir in the garlic and cook 30 seconds until fragrant.

  2. Bloom the spices: Add cumin, oregano, chili powder, and cayenne. Stir for 30–60 seconds to release their aroma.
  3. Add chiles and broth: Stir in the green chiles and chicken broth. Bring to a gentle simmer.
  4. Stir in the chicken: Add shredded chicken.

    Simmer 10 minutes to meld flavors.

  5. Make it creamy: Reduce heat to low. Stir in cream cheese until melted and smooth, then add heavy cream.
  6. Cheesy finish: Sprinkle in Monterey Jack, stirring until fully melted. Do not boil after adding cheese to avoid separation.
  7. Season and brighten: Add cilantro, lime juice, and season with salt and pepper.

    Adjust heat with more cayenne if desired.

  8. Serve: Ladle into bowls and top with jalapeño, avocado, extra cheese, and sour cream if you like.

Storage Instructions

  • Refrigerator: Store in an airtight container for up to 4 days. It will thicken slightly; thin with a splash of broth when reheating.
  • Freezer: Freeze up to 2 months. For best texture, freeze before adding the shredded cheese and heavy cream.

    Add them after reheating.

  • Reheating: Warm gently on the stove over low heat, stirring often. Avoid boiling once dairy is added.

Health Benefits

  • Low in carbs: Skips the beans and corn, keeping net carbs low while still delivering rich flavor.
  • High in protein: Chicken provides steady energy and supports muscle maintenance.
  • Satiating fats: Cream cheese and heavy cream help keep you full and satisfied on a keto diet.
  • Micronutrients: Onion, peppers, chiles, and cilantro add antioxidants and vitamin C.

Common Mistakes to Avoid

  • Boiling after adding dairy: This can cause curdling. Keep the heat low once the cream and cheese go in.
  • Skipping the spice bloom: Toasting the spices briefly boosts their flavor in the finished chili.
  • Not softening cream cheese: Cold cream cheese won’t melt smoothly.

    Cube and soften it first.

  • Under-seasoning: Taste and adjust salt, pepper, and lime at the end to balance richness.

Variations You Can Try

  • Slow cooker: Add everything except dairy and cheese to the slow cooker and cook on Low 4–6 hours. Stir in cream cheese, cream, and shredded cheese at the end.
  • Dairy-free: Use full-fat coconut milk and dairy-free cream cheese. Skip the shredded cheese or use a dairy-free option.
  • Extra veggies: Add diced zucchini or cauliflower rice for more texture with minimal carbs.
  • Turkey swap: Use leftover turkey instead of chicken for a post-holiday twist.
  • Spicy upgrade: Add minced jalapeño with the onion, or swirl in hot sauce before serving.

FAQ

Can I use raw chicken instead of cooked?

Yes.

Dice 1 1/2 pounds of raw chicken and sauté it after the onions and peppers until just cooked through. Proceed with the recipe as written.

How can I thicken the chili without flour?

Let it simmer uncovered to reduce, or add extra shredded cheese or a few tablespoons of softened cream cheese. Avoid high heat to keep it smooth.

Is this chili very spicy?

It’s mildly spicy as written.

For less heat, skip the cayenne and use mild green chiles. For more heat, add jalapeños or extra cayenne.

What can I serve with it on keto?

Try it with a side salad, roasted broccoli, or keto “cornbread” made with almond flour. Avocado and fresh lime make great toppings.

Can I make it ahead?

Absolutely.

The flavors deepen overnight. Reheat gently on the stove and thin with broth if needed.

Final Thoughts

Keto White Chicken Chili proves you don’t need beans to make a bowl that’s cozy, creamy, and full of character. It’s easy enough for busy nights and special enough for company.

Keep this recipe in your rotation, and switch up the toppings and heat level to match your mood. One pot, big flavor, and keto-friendly comfort—what’s not to love?

Keto White Chicken Chili - Cozy, Creamy, and Low Carb

Prep Time 10 minutes
Cook Time 30 minutes
Total Time 40 minutes
Servings 6 servings

Ingredients
  

  • 2 tablespoons avocado oil or olive oil
  • 1 medium onion, finely chopped
  • 1 green bell pepper, diced
  • 2–3 garlic cloves, minced
  • 1 teaspoon ground cumin
  • 1 teaspoon dried oregano
  • 1/2 teaspoon chili powder
  • 1/4–1/2 teaspoon cayenne pepper (optional, to taste)
  • 1 (4-ounce) can diced green chiles
  • 4 cups low-sodium chicken broth
  • 1 1/2 pounds cooked chicken, shredded (rotisserie works great)
  • 4 ounces cream cheese, softened and cubed
  • 1/2 cup heavy cream
  • 1 cup shredded Monterey Jack or pepper jack cheese
  • 1/4 cup chopped fresh cilantro
  • Juice of 1/2 lime
  • Salt and black pepper, to taste
  • Optional toppings: Sliced jalapeño, avocado, extra cilantro, shredded cheese, sour cream

Instructions
 

  • Sauté the vegetables: Heat the oil in a large pot over medium heat. Add onion and bell pepper, and cook 4–5 minutes until softened.Stir in the garlic and cook 30 seconds until fragrant.
  • Bloom the spices: Add cumin, oregano, chili powder, and cayenne. Stir for 30–60 seconds to release their aroma.
  • Add chiles and broth: Stir in the green chiles and chicken broth. Bring to a gentle simmer.
  • Stir in the chicken: Add shredded chicken.Simmer 10 minutes to meld flavors.
  • Make it creamy: Reduce heat to low. Stir in cream cheese until melted and smooth, then add heavy cream.
  • Cheesy finish: Sprinkle in Monterey Jack, stirring until fully melted. Do not boil after adding cheese to avoid separation.
  • Season and brighten: Add cilantro, lime juice, and season with salt and pepper.Adjust heat with more cayenne if desired.
  • Serve: Ladle into bowls and top with jalapeño, avocado, extra cheese, and sour cream if you like.

Gluten Free Gingerbread Cookies – Cozy, Spiced, and Perfectly Snappy

If you love the warm spice of classic gingerbread but need to skip the gluten, this recipe has your back. These cookies are crisp at the edges, slightly chewy in the middle, and full of ginger and molasses flavor. They hold their shape for cut-outs, so you can make stars, trees, or gingerbread people without the cookies spreading into blobs.

The dough is easy to work with, and the results taste just like the holiday favorite you remember. Make a batch for decorating, gifting, or just for yourself with a cup of tea.

Why This Recipe Works

Close-up detail shot: freshly baked gluten-free gingerbread cut-outs (stars, trees, and gingerbread
  • Balanced flours: A gluten-free all-purpose blend backed by almond flour gives structure, tenderness, and a clean snap.
  • Molasses + brown sugar: Adds deep flavor and moisture so the cookies don’t turn chalky.
  • Chill time matters: Resting the dough hydrates the flour and firms it up, making clean cut-outs and sharper edges.
  • Right spices, right amounts: Ground ginger, cinnamon, cloves, and a pinch of black pepper deliver that classic gingerbread heat.
  • Xanthan gum insurance: If your flour blend lacks it, a small amount helps the dough hold together and roll smoothly.

Shopping List

  • Gluten-free all-purpose flour blend (with xanthan gum if possible)
  • Almond flour (super-fine)
  • Xanthan gum (only if your blend doesn’t include it)
  • Baking soda
  • Fine sea salt
  • Ground ginger
  • Ground cinnamon
  • Ground cloves
  • Ground nutmeg (optional) and a pinch of black pepper (optional)
  • Unsalted butter, softened
  • Dark brown sugar
  • Unsulphured molasses
  • Large egg
  • Pure vanilla extract
  • Powdered sugar, lemon juice or milk (for icing, optional)

Step-by-Step Instructions

Overhead final presentation: a festive assortment of gluten-free gingerbread cookies arranged in a r
  1. Mix dry ingredients: In a bowl, whisk 2 cups gluten-free all-purpose flour, 1/2 cup almond flour, 1 teaspoon baking soda, 1/2 teaspoon salt, 2 teaspoons ground ginger, 1 teaspoon cinnamon, 1/4 teaspoon cloves, and a pinch of nutmeg and black pepper if using. If your blend lacks xanthan gum, whisk in 1/2 teaspoon.
  2. Cream butter and sugar: In a large bowl, beat 1/2 cup softened unsalted butter with 3/4 cup dark brown sugar until fluffy, about 2 minutes.
  3. Add wet ingredients: Beat in 1/2 cup molasses, 1 large egg, and 1 teaspoon vanilla until smooth.

    The mixture may look slightly separated; that’s fine.

  4. Combine: Add the dry ingredients to the wet and mix on low until a soft dough forms. It should be slightly tacky but not sticky.
  5. Chill: Divide dough in half, flatten into discs, wrap, and chill for at least 1 hour (up to 48 hours). This step is crucial for clean cut-outs and better texture.
  6. Prep to roll: Preheat oven to 350°F (175°C). Line two baking sheets with parchment.

    Lightly flour your surface and rolling pin with gluten-free flour.

  7. Roll and cut: Roll one disc to 1/4 inch thick. Cut shapes with cookie cutters, dusting cutters in flour as needed. Transfer to sheets, spacing 1 inch apart.
  8. Bake: Bake 8–10 minutes, depending on size.

    For softer centers, pull at 8 minutes; for snappier cookies, bake closer to 10. Edges should look set and slightly darker.

  9. Cool: Let cookies rest on the sheet 5 minutes, then move to a rack to cool completely.
  10. Optional icing: Stir 1 cup powdered sugar with 1–2 tablespoons milk or lemon juice until thick but pipeable. Pipe details once cookies are fully cool.

Keeping It Fresh

  • Room temperature: Store in an airtight tin up to 1 week.

    Add a small piece of bread to keep them from drying out.

  • Freeze baked cookies: Layer with parchment in a freezer bag, up to 2 months. Thaw at room temp before icing.
  • Freeze dough: Wrap well and freeze up to 2 months. Thaw overnight in the fridge, then roll and bake.

Benefits of This Recipe

  • Truly gluten free: Designed for cut-outs that hold shape without wheat flour.
  • Classic flavor: Spices and molasses deliver that nostalgic gingerbread taste.
  • Flexible texture: Adjust bake time for soft-chewy or crisp-snappy results.
  • Decorating-friendly: Smooth surface, sturdy edges, perfect for icing.

Pitfalls to Watch Out For

  • Skipping chill time: Warm dough spreads and loses detail.
  • Too much flour while rolling: Excess flour dries the cookies.

    Lightly dust and use parchment to roll if needed.

  • Overbaking: Gluten-free cookies can turn hard quickly. Pull when edges set.
  • Wrong flour choice: Use a quality gluten-free blend; avoid single flours like just rice flour.

Variations You Can Try

  • Dairy-free: Swap butter for vegan butter or refined coconut oil (use the firm kind). Add a tablespoon of milk alternative if dough seems dry.
  • Refined sugar light: Use coconut sugar in place of brown sugar; flavor will be slightly deeper and less sweet.
  • Extra snap: Roll thinner (1/8 inch) and bake 1–2 minutes longer.
  • Orange twist: Add 1 tablespoon orange zest to the dough and 1 tablespoon orange juice to the icing.
  • Chocolate-dipped: Dip cooled cookies in melted dark chocolate and sprinkle with crushed peppermint.

FAQ

Can I make these egg-free?

Yes.

Use a flax egg (1 tablespoon ground flax mixed with 3 tablespoons water, rested 5 minutes). The cookies will be slightly softer but still hold shape.

My dough is crumbly. What should I do?

Work in 1–2 teaspoons milk or water, just until the dough comes together.

Gluten-free dough should be soft and cohesive, not dry.

Do I need xanthan gum?

If your gluten-free flour blend already contains xanthan gum, you don’t need more. If it doesn’t, add 1/2 teaspoon to help with structure and rolling.

Can I make them softer?

Yes. Roll to 1/4 inch and bake on the shorter side (about 8 minutes).

Store with a slice of bread to keep them tender.

What kind of molasses should I use?

Use unsulphured molasses. Avoid blackstrap here—it’s more bitter and will overpower the cookies.

In Conclusion

These Gluten Free Gingerbread Cookies are everything you want from a holiday bake: bold spice, clean edges, and just the right texture. With a dependable dough and simple steps, they’re easy to make and fun to decorate.

Whether you bake them soft or snappy, they’ll taste like tradition—without the gluten.

Gluten Free Gingerbread Cookies - Cozy, Spiced, and Perfectly Snappy

Prep Time 15 minutes
Cook Time 10 minutes
Total Time 25 minutes
Servings 24 servings

Ingredients
  

  • Gluten-free all-purpose flour blend (with xanthan gum if possible)
  • Almond flour (super-fine)
  • Xanthan gum (only if your blend doesn’t include it)
  • Baking soda
  • Fine sea salt
  • Ground ginger
  • Ground cinnamon
  • Ground cloves
  • Ground nutmeg (optional) and a pinch of black pepper (optional)
  • Unsalted butter, softened
  • Dark brown sugar
  • Unsulphured molasses
  • Large egg
  • Pure vanilla extract
  • Powdered sugar, lemon juice or milk (for icing, optional)

Instructions
 

  • Mix dry ingredients: In a bowl, whisk 2 cups gluten-free all-purpose flour, 1/2 cup almond flour, 1 teaspoon baking soda, 1/2 teaspoon salt, 2 teaspoons ground ginger, 1 teaspoon cinnamon, 1/4 teaspoon cloves, and a pinch of nutmeg and black pepper if using. If your blend lacks xanthan gum, whisk in 1/2 teaspoon.
  • Cream butter and sugar: In a large bowl, beat 1/2 cup softened unsalted butter with 3/4 cup dark brown sugar until fluffy, about 2 minutes.
  • Add wet ingredients: Beat in 1/2 cup molasses, 1 large egg, and 1 teaspoon vanilla until smooth.The mixture may look slightly separated; that’s fine.
  • Combine: Add the dry ingredients to the wet and mix on low until a soft dough forms. It should be slightly tacky but not sticky.
  • Chill: Divide dough in half, flatten into discs, wrap, and chill for at least 1 hour (up to 48 hours). This step is crucial for clean cut-outs and better texture.
  • Prep to roll: Preheat oven to 350°F (175°C). Line two baking sheets with parchment.Lightly flour your surface and rolling pin with gluten-free flour.
  • Roll and cut: Roll one disc to 1/4 inch thick. Cut shapes with cookie cutters, dusting cutters in flour as needed. Transfer to sheets, spacing 1 inch apart.
  • Bake: Bake 8–10 minutes, depending on size.For softer centers, pull at 8 minutes; for snappier cookies, bake closer to 10. Edges should look set and slightly darker.
  • Cool: Let cookies rest on the sheet 5 minutes, then move to a rack to cool completely.
  • Optional icing: Stir 1 cup powdered sugar with 1–2 tablespoons milk or lemon juice until thick but pipeable. Pipe details once cookies are fully cool.