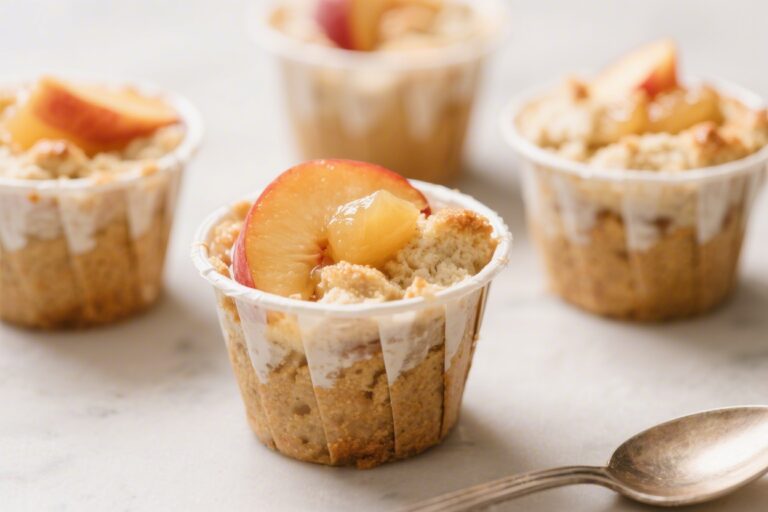
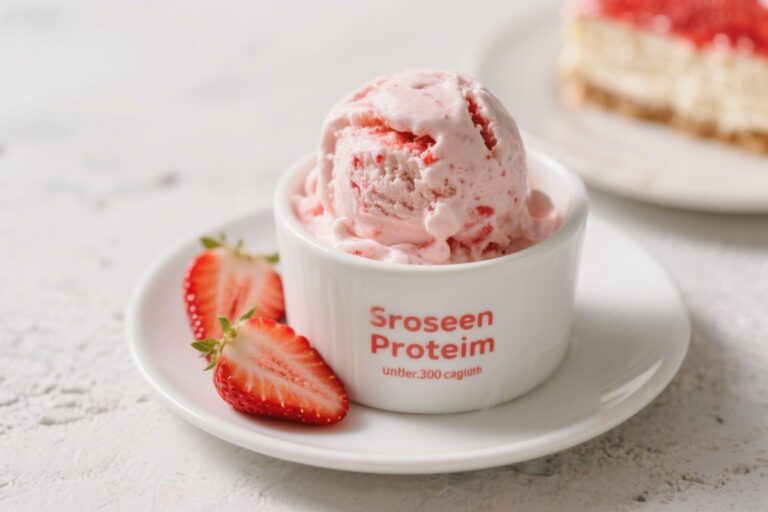
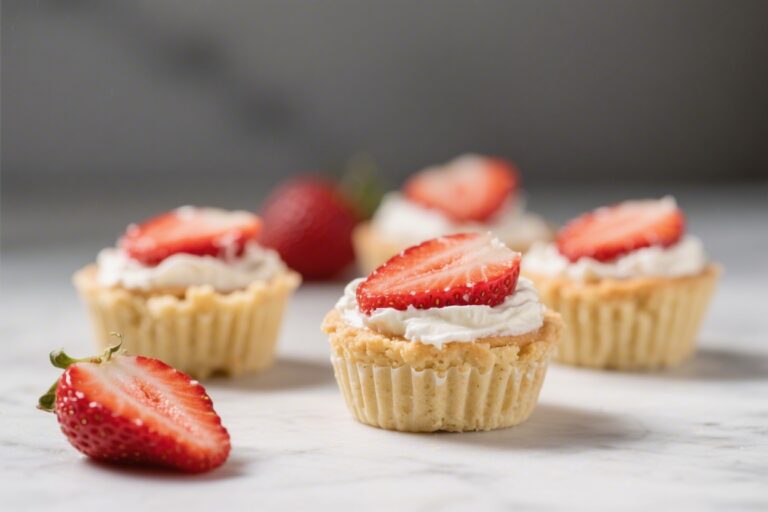
Chocolate Hazelnut Protein Holiday Shake – Cozy, Creamy, and Satisfying

This shake tastes like a festive dessert but packs the kind of nutrition that keeps you going through busy holiday days. It’s rich, chocolatey, lightly nutty, and naturally sweet—no weird aftertaste or overly complicated steps. Whether you’re craving an afternoon treat or need a quick breakfast, this blend hits the spot.

Think of it as a seasonal upgrade to your usual protein shake, with a little cozy magic in every sip.

What Makes This Recipe So Good

Close-up detail shot of the finished Chocolate Hazelnut Protein Holiday Shake being poured from a bl
  • Dessert vibes, balanced macros: You get a chocolate hazelnut flavor that feels indulgent, with solid protein to keep you full.
  • Holiday-friendly flavors: A hint of cinnamon and vanilla brings that warm, seasonal feel without being overpowering.
  • Quick and customizable: Toss everything in a blender and you’re done in minutes. Easy to tweak for dairy-free, low-carb, or higher-calorie needs.
  • Great texture: Frozen banana (or ice) creates a thick, milkshake-like feel—no chalkiness.
  • Better-for-you chocolate taste: Cocoa powder and a little hazelnut butter deliver that “nutty chocolate” experience without loads of sugar.

Ingredients

  • 1 cup unsweetened almond milk (or milk of choice)
  • 1 frozen banana (or 1/2 banana + 1 cup ice for a less sweet version)
  • 1 scoop chocolate protein powder (whey or plant-based)
  • 1 tablespoon hazelnut butter (or 1 tablespoon almond butter + 1/4 teaspoon hazelnut extract)
  • 1 tablespoon unsweetened cocoa powder
  • 1 teaspoon maple syrup or honey (optional, to taste)
  • 1/2 teaspoon vanilla extract
  • 1/4 teaspoon ground cinnamon
  • Pinch of sea salt
  • 2–3 ice cubes (optional, for extra thickness)
  • Optional garnish: shaved dark chocolate, crushed toasted hazelnuts, or a pinch of cocoa

Instructions

Overhead “tasty top view” of the final shake served in a low, wide glass on a matte ceramic plat
  1. Add the milk, banana, protein powder, hazelnut butter, cocoa powder, vanilla, cinnamon, and salt to a blender.
  2. Blend on high until smooth, 30–45 seconds. If it’s too thick, add a splash of milk.

    If it’s too thin, add a couple of ice cubes and blend again.

  3. Taste and adjust sweetness with maple syrup or honey if needed.
  4. Pour into a chilled glass. Top with shaved dark chocolate or crushed hazelnuts if you want a little holiday flair.

Storage Instructions

  • Short-term: Keep in the fridge for up to 24 hours in a sealed jar. Shake well before drinking.
  • Make-ahead tip: Portion the dry ingredients (protein powder, cocoa, cinnamon, salt) in a small jar and keep the wet ingredients ready.

    Blend when needed.

  • Freezer packs: Pre-freeze banana pieces and measured hazelnut butter in small bags. Add to the blender with milk and powders straight from the freezer.
Process shot showing the blended shake at perfect consistency inside a transparent blender jar, post

Why This is Good for You

  • Protein for satiety: Helps keep you full and supports muscle repair, especially useful during busy, snack-heavy holidays.
  • Healthy fats: Hazelnut butter adds monounsaturated fats that support heart health and a steady energy curve.
  • Antioxidants: Cocoa is rich in flavanols that can support circulation and mood.
  • Balanced sweetness: Banana and optional maple syrup offer natural sweetness without relying on heavy sugars.

Pitfalls to Watch Out For

  • Over-sweetening: Start with no added sweetener and taste. Protein powders vary in sweetness.
  • Wrong texture: If it’s icy or watery, add more banana or a few nuts to boost creaminess.

    If it’s too thick, add milk a little at a time.

  • Strong hazelnut extract: If using extract, go light—1/4 teaspoon is plenty. Too much can taste artificial.
  • Chalky protein: If your shake tastes chalky, try a different brand or add a few ice cubes to smooth it out.

Alternatives

  • Dairy-free: Use almond, oat, or coconut milk and a plant-based protein powder.
  • Low-sugar: Skip the banana and use 1–1.5 cups ice. Add 1–2 dates or a zero-calorie sweetener if needed.
  • Extra protein: Add 2 tablespoons Greek yogurt or a splash of pasteurized egg whites (if you’re comfortable and they’re safe to consume).
  • No hazelnuts: Use almond butter plus a tiny bit of hazelnut extract, or go full almond-chocolate for a “ferrero-adjacent” flavor.
  • Festive boost: Add a pinch of nutmeg, a splash of peppermint extract, or a shot of espresso for a holiday mocha vibe.

FAQ

Can I make this without a banana?

Yes.

Replace the banana with 1–1.5 cups ice and add 1–2 pitted dates or a touch of sweetener to balance the cocoa. You’ll get a colder, slightly lighter texture.

What protein powder works best?

Whey blends usually create the smoothest texture. For dairy-free, choose a plant blend with pea protein and rice or hemp for better mouthfeel.

Chocolate flavor works best here.

Can I use Nutella instead of hazelnut butter?

You can, but it will add more sugar and less protein. If you use Nutella, reduce or skip the added sweetener and keep the cocoa powder for a deeper chocolate taste.

How do I make it thicker?

Use a fully frozen banana, add more ice, or mix in 1–2 tablespoons of oats. Blend a little longer to aerate and thicken.

Is this good post-workout?

Yes.

It offers protein for recovery and carbs from banana for glycogen replenishment. If you need extra carbs post-workout, add half a banana or a few oats.

In Conclusion

This Chocolate Hazelnut Protein Holiday Shake feels like a treat, but it’s built to fuel your day. It’s quick, customizable, and cozy enough to match the season without weighing you down.

Keep the ingredients on hand, tweak the sweetness to your taste, and enjoy a festive shake that actually fits your goals.

Gingerbread Latte Protein Smoothie – Cozy Flavor, Energizing Protein

This Gingerbread Latte Protein Smoothie brings holiday coffee shop vibes to your kitchen in five minutes. It’s creamy, warmly spiced, and just sweet enough—like a gingerbread cookie met your morning latte. You get a gentle caffeine lift, a solid hit of protein, and that nostalgic gingerbread aroma.

It’s a great pre-workout breakfast, a mid-afternoon pick-me-up, or a smarter dessert swap. No complicated steps, no odd ingredients—just simple, craveable flavor.

Why This Recipe Works

Close-up detail shot: A freshly blended Gingerbread Latte Protein Smoothie being poured in a silky r
  • Balanced flavor: Real coffee plus classic gingerbread spices creates a cozy, latte-like taste without being overly sweet.
  • Protein-packed: A scoop of protein powder makes it satisfying and steadying, so you’re full longer.
  • Creamy texture: Frozen banana or ice cubes add body, while milk (dairy or non-dairy) keeps it smooth.
  • Quick and flexible: You can use cold brew, leftover coffee, or even instant espresso. Adjust sweetness and spices to your liking.

Ingredients

  • 3/4 cup strong cold brew or chilled leftover coffee
  • 1/2–3/4 cup milk of choice (almond, oat, dairy, or soy)
  • 1 scoop vanilla or unflavored protein powder
  • 1 small frozen banana (or 1 cup ice cubes for a lower-sugar option)
  • 1–2 teaspoons maple syrup or honey, to taste
  • 1/2 teaspoon ground ginger
  • 1/2 teaspoon ground cinnamon
  • 1/8 teaspoon ground nutmeg
  • 1/8 teaspoon ground cloves (a pinch goes a long way)
  • 1 teaspoon blackstrap molasses (optional, for classic gingerbread depth)
  • 1/2 teaspoon vanilla extract
  • Pinch of salt
  • Ice, as needed, for thickness

Step-by-Step Instructions

Overhead “tasty top view” shot: Final smoothie served in two chilled glasses on a matte charcoal
  1. Brew and chill: If you don’t have cold brew on hand, brew strong coffee and let it cool completely.

    Cold coffee prevents a watery smoothie.

  2. Load the blender: Add coffee, milk, protein powder, frozen banana (or ice), maple syrup, spices, molasses, vanilla, and a pinch of salt.
  3. Blend until smooth: Start low, then increase speed until creamy. If it’s too thick, add a splash of milk; too thin, add ice.
  4. Taste and tweak: Adjust sweetness or spice. Add more ginger for zing, more cinnamon for warmth, or a touch more molasses for deeper flavor.
  5. Serve right away: Pour into a chilled glass.

    Top with a sprinkle of cinnamon or crushed ginger snaps if you like.

How to Store

For best texture, drink immediately. If needed, refrigerate up to 24 hours in a sealed jar. Shake well before drinking, as separation is normal.

To prep ahead, freeze smoothie in ice cube trays and blend with a splash of fresh milk and coffee when ready.

Process-action shot: “Blend and tweak” moment—blender jar on a countertop mid-whirl with the s

Why This is Good for You

  • Steady energy: Protein plus a bit of caffeine gives focus without the crash of sugary drinks.
  • Spice benefits: Ginger and cinnamon may support digestion and healthy blood sugar response.
  • Minerals in molasses: Blackstrap molasses offers trace minerals like iron and potassium.
  • Customizable nutrition: Choose a protein powder and milk that fit your goals—higher protein, lower sugar, or dairy-free.

Pitfalls to Watch Out For

  • Too much clove: Cloves are potent. Start with a pinch and increase only if needed.
  • Warm coffee issue: Using warm coffee melts the ice and thins the smoothie. Chill it first.
  • Gritty texture: Some protein powders get chalky.

    Blend longer or add a little more banana for creaminess.

  • Over-sweetening: Taste before adding more sweetener. The banana and vanilla protein may already be sweet enough.

Variations You Can Try

  • Dairy-free café vibe: Use oat milk for extra creaminess and a barista-style texture.
  • Extra protein: Add 2 tablespoons Greek yogurt or silken tofu. Adjust ice for thickness.
  • Low-sugar swap: Skip banana, use ice and a few cauliflower florets (frozen) for body, and sweeten lightly.
  • Mocha gingerbread: Add 1 teaspoon cocoa powder for a chocolatey edge.
  • Decaf evening treat: Use decaf cold brew and keep the spices generous.
  • Cookie crumble topping: Finish with crushed ginger snaps or a dusting of cinnamon sugar for dessert vibes.

FAQ

Can I make this without coffee?

Yes.

Replace coffee with strong black tea, chai concentrate, or extra milk. The spices still deliver that gingerbread feel, and you can add a touch more molasses for depth.

Which protein powder works best?

Vanilla whey blends smoothly and tastes like a latte. For dairy-free, pea or soy protein works well—just blend a bit longer and consider adding a splash more milk for smoothness.

Do I need the molasses?

No, but it adds that unmistakable gingerbread flavor and a hint of bitterness that balances sweetness.

If you skip it, increase cinnamon slightly and keep the sweetener modest.

How can I make it thicker?

Use more frozen banana, add extra ice, or toss in a few frozen milk cubes. A tablespoon of rolled oats can also add body and creaminess.

Is it good before a workout?

Yes. It offers quick carbs, protein for muscle support, and a mild caffeine boost.

If you’re sensitive to caffeine, go decaf or halve the coffee.

In Conclusion

This Gingerbread Latte Protein Smoothie gives you cozy coffee shop flavor with real nourishment and zero fuss. It’s flexible, fast, and easy to tailor to your diet and taste. Keep the spices balanced, chill your coffee, and you’ll have a creamy, energizing smoothie that feels special any day of the week.

Gingerbread Protein Banana Bread – Cozy Flavor Meets Everyday Fuel

This gingerbread protein banana bread brings warm, cozy spices together with everyday, feel-good ingredients. It tastes like a holiday treat, but it’s built for busy mornings and post-workout snacks. The texture is moist and tender, with a sweet banana base and deep gingerbread notes.

You get plenty of protein without the chalky taste. Bake it once, slice it for the week, and enjoy a flavorful, better-for-you loaf that actually satisfies.

What Makes This Special

Close-up detail shot: A freshly baked slice of gingerbread protein banana bread on a small stoneware

This recipe blends the comfort of classic banana bread with the festive spice of gingerbread. It uses protein powder to boost nutrition while keeping the crumb soft and cake-like.

We swap some of the oil for Greek yogurt to add moisture and extra protein without heaviness. The loaf is sweetened naturally with ripe bananas and a touch of maple syrup or molasses. It’s a simple, wholesome bake that smells incredible and fits your routine.

What You’ll Need

  • 3 very ripe bananas (about 1 1/4 cups mashed)
  • 2 large eggs, room temperature
  • 1/3 cup plain Greek yogurt (2% or whole milk works best)
  • 2 tablespoons melted coconut oil or butter
  • 1/4 cup maple syrup or 3 tablespoons molasses (for deeper gingerbread flavor)
  • 1 teaspoon vanilla extract
  • 1 cup white whole wheat flour or all-purpose flour
  • 1/2 cup oat flour (store-bought or blended oats)
  • 1/2 cup vanilla or unflavored whey protein powder (plant protein works; see notes)
  • 1 teaspoon baking powder
  • 1/2 teaspoon baking soda
  • 1/2 teaspoon fine sea salt
  • 2 teaspoons ground ginger
  • 1 teaspoon ground cinnamon
  • 1/4 teaspoon ground cloves or allspice
  • Optional add-ins: 1/3 cup dark chocolate chips, chopped pecans, or crystallized ginger

Instructions

Overhead “tasty top view” shot: The full loaf cooled and sliced on a parchment-lined cooling rac
  1. Prep your pan and oven. Heat oven to 350°F (175°C).

    Line a 9×5-inch loaf pan with parchment and lightly grease the sides.

  2. Mash the bananas. In a large bowl, mash bananas until mostly smooth with a few small lumps.
  3. Whisk wet ingredients. Add eggs, Greek yogurt, melted oil or butter, maple syrup or molasses, and vanilla. Whisk until combined and creamy.
  4. Combine dry ingredients. In a separate bowl, whisk flour(s), protein powder, baking powder, baking soda, salt, ginger, cinnamon, and cloves.
  5. Bring it together. Add dry ingredients to wet. Stir gently with a spatula until just combined.

    If using add-ins, fold them in now. Do not overmix.

  6. Fill the pan. Spread batter into the prepared pan, smoothing the top.
  7. Bake. Bake for 45–55 minutes, or until a toothpick comes out with a few moist crumbs. If the top browns too quickly, tent with foil for the last 10 minutes.
  8. Cool. Let the loaf cool in the pan for 10 minutes, then lift out and cool completely on a rack before slicing. This sets the crumb.

Storage Instructions

  • Room temperature: Store sliced in an airtight container for up to 2 days.
  • Refrigerator: Keeps well for 5–6 days.

    Warm slices in the toaster oven or microwave for best texture.

  • Freezer: Wrap individual slices and freeze up to 3 months. Thaw overnight in the fridge or reheat from frozen.

Benefits of This Recipe

  • Higher protein: Protein powder and Greek yogurt help keep you fuller longer.
  • Nourishing ingredients: Bananas add natural sweetness, moisture, and potassium.
  • Balanced flavor: Gingerbread spices bring warmth without overwhelming the banana.
  • Meal prep friendly: One bake sets you up for several breakfasts or snacks.
  • Flexible: Works with different flours and protein types with minor tweaks.

Pitfalls to Watch Out For

  • Overmixing the batter: This can make the loaf dense or rubbery, especially with protein powder.
  • Using too much protein powder: Stick to the listed amount; more can dry out the bread.
  • Underbaking: A gooey center can collapse. Check with a toothpick in the middle.
  • Too little spice: If your spices are old, the flavor will be flat.

    Use fresh, aromatic spices.

Recipe Variations

  • Plant-based protein: Use pea or brown rice protein, but reduce to 1/3 cup and add 2–3 tablespoons extra milk for moisture.
  • Dairy-free: Swap Greek yogurt for a thick coconut yogurt and use coconut oil.
  • Gluten-free: Use a 1:1 gluten-free baking blend and certified gluten-free oat flour.
  • No refined sugar: Choose maple syrup and skip chocolate chips, or use 85% dark chocolate.
  • Extra ginger snap: Add 1 tablespoon finely chopped crystallized ginger to the batter.
  • Nutty crunch: Fold in chopped pecans or walnuts and sprinkle a few on top before baking.

FAQ

Can I make this into muffins?

Yes. Divide the batter into a lined 12-cup muffin tin and bake at 350°F (175°C) for 16–20 minutes, or until a toothpick comes out clean.

What type of protein powder works best?

Whey or whey-casein blends bake up tender and moist. Plant proteins are fine but more absorbent; reduce the amount slightly and add a splash of milk if the batter is very thick.

Do I have to use molasses?

No, but molasses gives classic gingerbread depth.

If you skip it, use maple syrup and consider adding an extra 1/4 teaspoon each of ginger and cinnamon.

Why is my banana bread dry?

Overbaking, too much protein powder, or not enough banana can dry it out. Check your oven temperature, measure ingredients accurately, and pull the loaf when a toothpick shows moist crumbs.

Can I reduce the sweetener?

You can. Use very ripe bananas and drop the maple syrup or molasses by 1–2 tablespoons.

The loaf will be less sweet but still flavorful.

Final Thoughts

This gingerbread protein banana bread is a cozy, practical bake that fits real life. It’s simple to make, easy to customize, and tastes great warm or cold. Keep a few slices on hand for busy mornings, a mid-afternoon pick-me-up, or a pre-gym snack.

One loaf brings comfort, spice, and steady energy to your week.

Gingerbread Protein Pancake Prep Stack – Cozy, High-Protein Breakfast You Can Make Ahead

These pancakes bring warm gingerbread flavor to your weekday mornings without the sugar crash. They’re soft, gently spiced, and pack a solid protein punch so you actually stay full. The batter blends up fast, cooks cleanly, and reheats well for meal prep.

Pair them with Greek yogurt or a drizzle of maple for a balanced breakfast. If you love holiday flavors but want something practical, this stack hits the sweet spot.

Why This Recipe Works

Close-up detail: A stack of gingerbread protein pancakes fresh off the griddle, close-up on the cut
  • Protein-forward and satisfying: Whey or plant protein helps keep you full and supports muscle recovery.
  • Warm, cozy flavor: Gingerbread spices and molasses add classic holiday depth without overdoing the sugar.
  • Meal-prep friendly: The pancakes hold up in the fridge or freezer and reheat beautifully.
  • Balanced texture: Oats and egg whites create tender pancakes that aren’t dry or rubbery.
  • One-bowl simplicity: Minimal cleanup and straightforward steps.

Ingredients

  • 1 cup rolled oats (or oat flour)
  • 1 scoop vanilla or unflavored whey protein (about 25–30 g) or plant protein
  • 2 large eggs (or 1 egg + 1/3 cup liquid egg whites)
  • 3/4 cup milk of choice (dairy or unsweetened almond)
  • 2 tablespoons molasses
  • 1–2 tablespoons maple syrup or honey (to taste)
  • 1 teaspoon baking powder
  • 1/2 teaspoon baking soda
  • 1 teaspoon ground cinnamon
  • 3/4 teaspoon ground ginger
  • 1/4 teaspoon ground nutmeg
  • 1/8 teaspoon ground cloves (optional, strong)
  • Pinch of salt
  • 1 teaspoon vanilla extract
  • Cooking oil or butter for the pan
  • Optional add-ins: 2 tablespoons mini chocolate chips, 2 tablespoons chopped pecans, or a handful of raisins

How to Make It

Cooking process: Overhead shot of evenly sized 1/4-cup pancakes cooking on a nonstick griddle; batte
  1. Make oat flour: If using rolled oats, blitz them in a blender until fine. You want a flour-like texture with no big flakes.
  2. Build the batter: Add protein powder, baking powder, baking soda, spices, and salt to the blender.

    Pulse to mix. Add eggs, milk, molasses, maple syrup, and vanilla. Blend until smooth, about 20–30 seconds.

  3. Rest the batter: Let it sit for 5 minutes so the oats hydrate and the batter thickens slightly.

    If it gets too thick, splash in 1–2 tablespoons milk.

  4. Heat the pan: Warm a nonstick skillet or griddle over medium heat. Lightly grease with oil or butter.
  5. Cook: Pour 1/4-cup scoops for evenly sized pancakes. Cook 2–3 minutes until bubbles form and edges look set.

    Flip and cook 1–2 minutes more. Lower the heat if they brown too fast.

  6. Finish and stack: Repeat with remaining batter. Keep cooked pancakes on a low oven (200°F/95°C) tray while you finish.
  7. Serve or prep: Top with Greek yogurt, a drizzle of maple, or berries.

    For meal prep, cool completely before storing.

Storage Instructions

  • Fridge: Store in an airtight container for up to 4 days. Layer with parchment to prevent sticking.
  • Freezer: Freeze on a tray, then bag once solid. Keeps well for 2–3 months.
  • Reheat: Microwave 30–60 seconds, or toast on low.

    For crisp edges, warm in a skillet with a touch of butter.

Final dish plated: Restaurant-quality presentation of the Gingerbread Protein Pancake Prep Stack arr

Why This is Good for You

  • Protein supports satiety and recovery: A scoop of protein plus eggs helps stabilize hunger and maintain muscle.
  • Spice benefits: Ginger and cinnamon bring antioxidants and a comforting aroma.
  • Balanced carbs: Oats provide fiber for steady energy without the mid-morning slump.
  • Smarter sweetness: Molasses adds iron and deep flavor, so you can use less syrup overall.

Pitfalls to Watch Out For

  • Dry or rubbery pancakes: Too much protein powder or overcooking can toughen them. Stick to one scoop and medium heat.
  • Gritty texture: Blend oats until fine and let the batter rest to hydrate.
  • Bitter aftertaste: Don’t overdo cloves or baking soda. Measure carefully.
  • Burning: Molasses browns fast.

    Keep heat moderate and flip when bubbles appear.

Alternatives

  • Gluten-free: Use certified gluten-free oats and a gluten-free baking powder.
  • Dairy-free: Choose almond or oat milk and a dairy-free protein powder.
  • No molasses: Swap 1 tablespoon maple syrup plus 1 teaspoon dark brown sugar. Flavor will be lighter.
  • Extra fiber: Stir in 1 tablespoon ground flax or chia; add a splash more milk if needed.
  • Lower sugar: Skip the maple in the batter and rely on light toppings like berries and Greek yogurt.

FAQ

Can I make the batter the night before?

Yes, but it will thicken. Stir in a little milk in the morning to loosen it.

Cook as usual.

Which protein powder works best?

Whey isolate blends smoothly and keeps the texture light. If using plant protein, add a splash more milk and avoid gritty brands.

How do I keep pancakes fluffy?

Use fresh baking powder and don’t overmix. Let the batter rest 5 minutes and cook on medium heat, not high.

Can I bake these as sheet pan pancakes?

Yes.

Spread the batter on a greased, parchment-lined quarter sheet pan and bake at 400°F (205°C) for 10–12 minutes, until set and lightly golden.

What toppings pair well with gingerbread flavor?

Greek yogurt, bananas, pears, toasted pecans, a light drizzle of maple, or a smear of almond butter all work great.

In Conclusion

Gingerbread Protein Pancake Prep Stack gives you a cozy, spiced breakfast that’s practical for busy mornings. It’s easy to make, stores well, and delivers balanced nutrition without sacrificing flavor. Keep a batch in the fridge or freezer, and you’ll have a warm, satisfying start whenever you need it.

Salted Caramel Thumbprint Cookies – Buttery, Chewy, and Perfectly Sweet

These Salted Caramel Thumbprint Cookies are the kind of treat that makes people hover around the cookie plate. They’re buttery, soft, and filled with silky caramel, finished with a sprinkle of flaky sea salt. Each bite balances sweet and salty in the best way.

They look special enough for holidays but are easy enough for a weeknight bake. If you love caramel and a little crunch of salt, this is your cookie.

What Makes This Special

Close-up detail: Freshly baked salted caramel thumbprint cookies just out of the oven with shallow w

These cookies blend a classic shortbread-style base with a rich, glossy caramel center. The dough is simple, so the flavors shine.

A light hand with the salt elevates the caramel without overpowering it. They hold their shape well, bake evenly, and stay tender for days. It’s a bakery-worthy result with minimal fuss.

Ingredients

  • 1 cup (226 g) unsalted butter, softened
  • 2/3 cup (135 g) granulated sugar
  • 1 large egg, room temperature
  • 1 tsp vanilla extract
  • 2 cups (250 g) all-purpose flour
  • 1/4 tsp fine sea salt
  • 1 cup soft caramels (about 20–24 pieces), unwrapped
  • 2–3 tbsp heavy cream
  • Flaky sea salt, for topping
  • Optional: 1/2 cup finely chopped pecans or almonds for rolling

Step-by-Step Instructions

Cooking process: Warm caramel being spooned into the thumbprint wells on a tray of cooled cookies, g
  1. Preheat and prep: Heat the oven to 350°F (175°C).

    Line two baking sheets with parchment paper.

  2. Cream the butter and sugar: In a large bowl, beat the butter and sugar until light and fluffy, about 2–3 minutes. This creates a soft, tender cookie.
  3. Add egg and vanilla: Mix in the egg and vanilla until just combined. Scrape the bowl so everything blends evenly.
  4. Add dry ingredients: Whisk flour and fine sea salt in a separate bowl.

    Add to the butter mixture and mix on low until a soft dough forms. Don’t overmix.

  5. Shape the cookies: Scoop 1-tablespoon portions and roll into smooth balls. If using nuts, roll the dough balls in chopped nuts to coat.
  6. Make the “thumbprint”: Place balls on the sheet, spacing 2 inches apart.

    Use your thumb or the back of a 1/2-teaspoon measuring spoon to press a shallow well in the center. If cracks form, gently pinch them closed for a neater look.

  7. Bake: Bake 10–12 minutes until the edges are set but not browned. The cookies should stay pale and soft. If the centers puff, press the wells again gently right out of the oven.
  8. Make the caramel: While cookies cool slightly, melt caramels with heavy cream in a small saucepan over low heat, stirring until smooth. If too thick, add a splash more cream; if too thin, let it cool a minute to thicken.
  9. Fill: Spoon warm caramel into each well, about 1 teaspoon per cookie.

    Tap the sheet gently to level the caramel.

  10. Finish with salt: Sprinkle a pinch of flaky sea salt on top while the caramel is still warm so it adheres.
  11. Set and serve: Let cookies cool until the caramel firms slightly. They’re perfect when the centers are set but still soft and chewy.

Keeping It Fresh

Store cookies in an airtight container at room temperature for up to 4 days. Place parchment between layers to prevent sticking.

For longer storage, freeze in a single layer until solid, then transfer to a bag or container for up to 2 months. Thaw at room temperature—no reheating needed.

Final dish top view: Overhead shot of a platter of finished Salted Caramel Thumbprint Cookies arrang

Why This is Good for You

While these are a treat, there are still a few wins. Portion control is built in—one cookie satisfies a sweet craving. A touch of sea salt helps balance sweetness, making each bite feel more satisfying.

Serve them with fruit or tea for a mindful treat moment.

What Not to Do

  • Don’t overbake. Browning means the cookies will turn dry and crumbly.
  • Don’t skip the salt. A tiny sprinkle brings the caramel to life.
  • Don’t overfill the wells. Too much caramel will spill and harden on the sides.
  • Don’t rush the caramel. High heat scorches. Keep it low and stir.
  • Don’t use cold butter. Softened butter creates the right texture and lift.

Alternatives

  • Chocolate center: Fill with warm ganache (chocolate + cream) and top with sea salt.
  • Dulce de leche swap: Use canned dulce de leche instead of melted caramels for a deeper flavor.
  • Gluten-free: Use a 1:1 gluten-free baking flour blend. Chill dough 20 minutes for easier shaping.
  • Nutty coating: Roll dough balls in finely chopped pecans, almonds, or hazelnuts for crunch.
  • Spiced dough: Add 1/2 tsp cinnamon or cardamom to the flour for warmth.

FAQ

Can I make the dough ahead?

Yes.

Wrap and chill the dough for up to 48 hours. Let it sit at room temperature for 15–20 minutes before shaping so it softens slightly.

My caramel hardened too much—what can I do?

Warm it gently with another teaspoon of cream, stirring until smooth. Refill as needed.

Avoid overheating, which makes it grainy.

How do I keep the cookies from cracking?

Roll dough into very smooth balls and press the wells slowly. If cracks appear, pinch them closed before baking. Slight cracks are normal and still look charming.

Can I use homemade caramel sauce?

Absolutely.

Use a thicker sauce so it sets in the center. If it’s runny, cook it a bit longer to reduce, or chill the sauce briefly before filling.

Do these travel well?

Yes. Let them set completely, then layer with parchment in a snug container.

Avoid heat so the caramel doesn’t soften and smear.

In Conclusion

Salted Caramel Thumbprint Cookies bring together buttery dough, smooth caramel, and a kiss of flaky salt for a treat that feels special and tastes irresistible. They’re simple to make, pretty on a platter, and always a crowd favorite. Keep this recipe on hand for holidays, bake sales, or any time you want something sweet and satisfying.

Toffee Pecan Shortbread Cookies – Buttery, Crunchy, and Perfectly Sweet

Buttery shortbread meets crunchy pecans and pockets of toffee in a cookie that feels both cozy and a little indulgent. These cookies are simple to make, with a melt-in-your-mouth texture and just the right sweetness. They’re great for holiday tins, coffee breaks, or anytime you want something special without a lot of fuss.

The dough is forgiving, the ingredients are pantry-friendly, and the results are always impressive. If you love caramel notes and nutty crunch, this one’s for you.

What Makes This Special

Close-up detail: Sliced rounds of toffee pecan shortbread just out of the oven on a parchment-lined
  • Classic shortbread base that bakes up tender and buttery, without being overly sweet.
  • Rich toffee bits bring caramel flavor and a little chew, balancing the crisp cookie.
  • Toasted pecans add warmth and crunch, making every bite textured and satisfying.
  • No eggs needed, so the dough stays simple and easy to handle.
  • Freezer-friendly slice-and-bake style—make-ahead dough you can bake on demand.

Ingredients

  • 1 cup (2 sticks) unsalted butter, softened
  • 2/3 cup powdered sugar
  • 1/4 cup granulated sugar
  • 1 teaspoon pure vanilla extract
  • 1/2 teaspoon almond extract (optional but lovely)
  • 2 1/4 cups all-purpose flour
  • 1/2 teaspoon fine sea salt
  • 3/4 cup toffee bits (such as Heath toffee bits; plain, not chocolate-coated)
  • 3/4 cup pecans, toasted and finely chopped

Instructions

Cooking process: Overhead shot of chilled shortbread dough log being cleanly sliced into 1/4-inch ro
  1. Toast the pecans. Heat the oven to 350°F (175°C). Spread pecans on a sheet pan and toast for 6–8 minutes until fragrant.

    Let cool, then finely chop.

  2. Cream the butter and sugars. In a large bowl, beat softened butter with powdered sugar and granulated sugar until smooth and creamy, about 2 minutes. Mix in vanilla and almond extract.
  3. Add dry ingredients. Whisk flour and salt together. Add to the butter mixture and mix on low just until the dough starts to come together.

    It will look a bit crumbly at first—keep mixing gently.

  4. Fold in the mix-ins. Stir in the toffee bits and chopped pecans until evenly distributed. Do not overmix.
  5. Shape the dough. Divide dough in half. Place each half on a piece of parchment and shape into a log about 2 inches in diameter.

    Wrap tightly and roll to smooth the sides.

  6. Chill. Refrigerate the logs for at least 2 hours, or freeze for 30–45 minutes, until very firm. Cold dough slices cleanly and holds its shape.
  7. Prep for baking. Reduce oven to 325°F (165°C). Line two baking sheets with parchment.
  8. Slice and bake. Using a sharp knife, slice logs into 1/4-inch rounds. Arrange 2 inches apart.

    Bake 13–16 minutes, until edges are just turning golden. Rotate pans halfway through for even baking.

  9. Cool. Let cookies rest on the sheet for 5 minutes, then transfer to a rack to cool completely. They crisp as they cool.

How to Store

  • Room temperature: Store in an airtight container for up to 1 week.

    Add a small piece of parchment between layers to protect the edges.

  • Freezer (baked): Freeze cooled cookies in a zip-top bag for up to 2 months. Thaw at room temp.
  • Freezer (dough): Keep wrapped dough logs frozen for up to 3 months. Slice straight from frozen and add 1–2 minutes to the bake time.
Final dish presentation: Beautifully plated toffee pecan shortbread cookies stacked and fanned on a

Why This is Good for You

  • Built-in portion control: Shortbread is rich, so a couple of cookies satisfy a sweet tooth without overdoing it.
  • Nuts for balance: Pecans bring healthy fats and a bit of fiber, helping these feel more satiating than a sugary cookie alone.
  • Simple ingredients: No artificial flavors needed—real butter, nuts, and toffee deliver big flavor naturally.

Pitfalls to Watch Out For

  • Warm dough spreads: If the dough softens, the cookies can bake flat.

    Keep it cold before slicing and baking.

  • Overbaking: Shortbread should be pale with lightly golden edges. Too dark means dry and crumbly.
  • Rough slicing: Press down gently with a sharp knife. If pieces crumble, re-chill or use a sawing motion.
  • Too much flour: Measure with the scoop-and-level method.

    Packed flour leads to dry, tough cookies.

Variations You Can Try

  • Chocolate-dipped: Dip half of each cooled cookie in melted dark chocolate and sprinkle with flaky sea salt.
  • Maple pecan: Swap vanilla for 1 teaspoon maple extract and add a pinch of cinnamon.
  • Espresso toffee: Add 1 teaspoon instant espresso powder to the dough for a subtle coffee note.
  • Gluten-free option: Use a 1:1 gluten-free all-purpose blend and chill thoroughly before slicing.
  • Brown butter twist: Brown the butter, chill until solid, then proceed. Expect deeper, nutty flavor.

FAQ

Can I use salted butter?

Yes. Reduce the added salt to a pinch or omit it.

Taste the dough if you’re unsure—shortbread can handle a light salt note.

Do I have to toast the pecans?

It’s worth it. Toasting boosts flavor and keeps the nuts from tasting flat in the finished cookie.

My cookies are crumbly. What happened?

Likely too much flour or overbaking.

Next time, measure carefully and pull them when the edges just turn golden. They firm up as they cool.

Can I roll and cut these instead of slicing?

Yes. Chill the dough, roll to about 1/4 inch, cut with a cookie cutter, and bake.

Dust the surface lightly with flour to prevent sticking.

What toffee bits should I use?

Plain toffee bits work best. If you only have chocolate-coated ones, reduce other mix-ins and expect a slightly sweeter cookie.

Final Thoughts

Toffee Pecan Shortbread Cookies deliver a perfect mix of buttery crumb, caramel sweetness, and nutty crunch. The dough is easy, the flavor is big, and they store beautifully.

Keep a log in the freezer and you’re always 15 minutes away from a warm, homemade treat. Simple, reliable, and a little luxurious—just the way a great cookie should be.

Chewy Eggnog Snickerdoodle Cookies – Soft, Spiced, and Holiday-Ready

These cookies taste like a holiday party in a bite: warm cinnamon, creamy eggnog, and a hint of nutmeg. They’re soft and chewy in the center with a lightly crisp edge, just like a classic snickerdoodle should be. If you love eggnog, these will be your new favorite.

If you’re on the fence, the flavor here is cozy and subtle, not overpowering. They’re easy to make, perfect for gifting, and disappear fast.

What Makes This Special

Close-up detail: A just-baked eggnog snickerdoodle cookie resting on parchment, edges lightly crisp
  • Eggnog in the dough: It adds richness and a gentle holiday flavor without making the cookies cakey.
  • Chewy center, crisp edge: Cream of tartar keeps the classic snickerdoodle tang and texture.
  • Warm spices: Cinnamon and nutmeg boost the eggnog vibe, while vanilla ties it all together.
  • Foolproof for sharing: The dough is sturdy, rolls easily, and bakes evenly.

What You’ll Need

  • 2 3/4 cups all-purpose flour
  • 2 teaspoons cream of tartar
  • 1 teaspoon baking soda
  • 1/2 teaspoon fine sea salt
  • 1 teaspoon ground cinnamon
  • 1/4 teaspoon ground nutmeg (plus more for rolling sugar)
  • 1 cup unsalted butter, softened
  • 1 cup granulated sugar
  • 1/2 cup light brown sugar, packed
  • 1 large egg
  • 1/3 cup eggnog (full-fat is best)
  • 2 teaspoons pure vanilla extract

For Rolling:

  • 1/3 cup granulated sugar
  • 1 teaspoon ground cinnamon
  • 1/8 teaspoon ground nutmeg

How to Make It

Cooking process: Overhead shot of coated dough balls spaced 2 inches apart on a parchment-lined baki
  1. Preheat and prep: Heat the oven to 350°F (175°C). Line two baking sheets with parchment paper.
  2. Mix dry ingredients: In a bowl, whisk flour, cream of tartar, baking soda, salt, cinnamon, and nutmeg.

    Set aside.

  3. Cream butter and sugars: In a large bowl, beat butter, granulated sugar, and brown sugar until light and fluffy, 2–3 minutes.
  4. Add wet ingredients: Beat in the egg, vanilla, and eggnog until smooth. The mixture may look slightly curdled—this is fine.
  5. Combine: Add dry ingredients to the wet in two additions. Mix just until no dry spots remain.

    Do not overmix.

  6. Make the rolling sugar: Stir together the sugar, cinnamon, and nutmeg in a small bowl.
  7. Shape: Scoop dough into 1.5-tablespoon portions (about a heaping tablespoon). Roll into balls, then coat in the spiced sugar.
  8. Bake: Arrange 2 inches apart on baking sheets. Bake 9–11 minutes until edges are set and centers look slightly underbaked.
  9. Set the texture: Let cookies rest on the sheet for 5 minutes to finish setting, then move to a rack to cool.
  10. Optional finish: While warm, lightly dust with a pinch of nutmeg for extra aroma.

Storage Instructions

  • Room temperature: Store in an airtight container for 3–4 days.

    Add a slice of bread to keep them soft.

  • Freezer (baked): Freeze in a zip-top bag up to 2 months. Thaw at room temp.
  • Freezer (dough): Roll into balls, freeze on a tray, then bag. Bake from frozen at 350°F, adding 1–2 minutes.
Final dish presentation: A styled plate of eggnog snickerdoodle cookies stacked and fanned on a matt

Health Benefits

  • Portion control: Smaller cookies satisfy sweet cravings without overdoing it.
  • Homemade advantage: You control the ingredients—no artificial flavors or preservatives.
  • Spice perks: Cinnamon and nutmeg offer natural warmth and may support balanced blood sugar as part of an overall healthy diet.

What Not to Do

  • Don’t skip cream of tartar: It’s key to the signature snickerdoodle tang and chew.
  • Don’t overbake: Pull them when the centers look slightly soft.

    They firm up as they cool.

  • Don’t use cold butter: It won’t cream properly, and the cookies won’t spread evenly.
  • Don’t overmix the dough: Too much mixing develops gluten and makes cookies tough.
  • Don’t drown them in eggnog: More liquid makes them cakey. Stick to the measured amount.

Variations You Can Try

  • Glazed: Drizzle with a simple eggnog glaze (powdered sugar + a splash of eggnog + vanilla).
  • Brown butter: Swap softened butter for browned butter cooled to solid. Adds nutty depth.
  • Cardamom twist: Add 1/4 teaspoon ground cardamom to the dough for a fragrant lift.
  • Cranberry white chocolate: Fold in 1/2 cup dried cranberries and 1/2 cup white chocolate chips.
  • Gluten-free: Use a 1:1 gluten-free flour blend with xanthan gum.

    Chill dough 30 minutes before baking.

FAQ

Can I make these without eggnog?

Yes. Replace eggnog with a mix of milk and a pinch of nutmeg. The flavor will be lighter, but still delicious.

Why did my cookies turn out cakey?

Too much flour or too much liquid can cause cakiness.

Spoon and level the flour, measure eggnog accurately, and avoid overmixing.

Can I chill the dough?

Yes. Chill 30–60 minutes if your kitchen is warm or if you want a thicker cookie. Let sit a few minutes at room temp if it gets too firm to scoop.

How do I keep them soft for days?

Store airtight with a slice of bread or a tortilla in the container.

Replace the slice when it dries out.

Are these safe for kids if they contain eggnog?

Yes, as long as you use pasteurized, non-alcoholic eggnog. The cookies are fully baked and kid-friendly.

Can I double the recipe?

Absolutely. Use a stand mixer if you can, and rotate baking sheets halfway through to ensure even baking.

In Conclusion

These Chewy Eggnog Snickerdoodle Cookies bring classic holiday comfort with a twist.

They’re soft, warmly spiced, and easy to bake for parties, gifts, or a cozy night in. Make a batch, stash some dough in the freezer, and you’re holiday-ready anytime the craving hits.

Soft Gingerbread Cookies With Maple Icing – Cozy, Spiced, and Perfectly Tender

These soft gingerbread cookies taste like the holidays and feel like a warm hug. They’re plush in the center, gently crisp at the edges, and full of molasses, ginger, and warm spices. The maple icing adds a simple, sweet finish that sets just enough to stack.

Whether you’re baking for a cookie swap or a quiet night in, this recipe is easy, forgiving, and always a hit.

What Makes This Recipe So Good

Close-up detail: Freshly baked soft gingerbread cookies cooling on a wire rack, edges gently crisp w
  • Soft and chewy texture: The mix of brown sugar, molasses, and butter keeps the cookies tender and moist.
  • Balanced spice: Ginger, cinnamon, and cloves bring warmth without burning your taste buds.
  • Easy dough: No fancy equipment, and it chills quickly for neat, puffy cookies.
  • Maple icing: Real maple syrup gives the glaze a cozy, caramel-like sweetness.
  • Make-ahead friendly: The dough freezes well, and the baked cookies stay soft for days.

Shopping List

  • All-purpose flour
  • Baking soda
  • Fine sea salt
  • Ground ginger
  • Ground cinnamon
  • Ground cloves (or allspice)
  • Unsalted butter, softened
  • Dark brown sugar
  • Egg
  • Unsulphured molasses (not blackstrap)
  • Pure vanilla extract
  • Granulated sugar (for rolling, optional)
  • Powdered sugar (for icing)
  • Pure maple syrup
  • Milk or cream
  • Pinch of salt (for icing)

Instructions

Tasty top view: Overhead shot of a parchment-lined baking sheet filled with just-baked, puffy ginger
  1. In a medium bowl, whisk 3 cups flour, 1 teaspoon baking soda, 1/2 teaspoon salt, 2 teaspoons ground ginger, 1 1/2 teaspoons cinnamon, and 1/4 teaspoon cloves. Set aside.
  2. In a large bowl, beat 3/4 cup unsalted butter and 1 cup dark brown sugar until creamy and slightly fluffy, about 2–3 minutes.
  3. Add 1 large egg, 1/2 cup molasses, and 1 teaspoon vanilla. Beat until smooth.

    The mixture may look separated at first; it will come together.

  4. Mix in the dry ingredients on low speed just until a soft dough forms. If the dough feels sticky, add up to 2 extra tablespoons flour.
  5. Cover and chill the dough for 45–60 minutes. This helps the cookies hold shape and bake up thick and soft.
  6. Preheat the oven to 350°F (175°C).

    Line two baking sheets with parchment.

  7. Scoop 1 1/2-tablespoon portions, roll into balls, and optionally roll in granulated sugar for a sparkly crust. Place 2 inches apart.
  8. Bake 9–11 minutes until the tops are puffed and just set. The centers should look slightly underbaked—this keeps them soft.
  9. Cool on the sheet for 5 minutes, then move to a rack to cool completely.
  10. Make the maple icing: Whisk 1 cup powdered sugar, 2–3 tablespoons pure maple syrup, 1–2 teaspoons milk or cream, 1/2 teaspoon vanilla, and a tiny pinch of salt until smooth and pourable but not runny.

    Adjust with more powdered sugar or milk as needed.

  11. Drizzle or spread icing over cooled cookies. Let it set 20–30 minutes before stacking.

How to Store

  • Room temperature: Keep iced cookies in an airtight container for 3–4 days. Add a slice of bread to keep them extra soft.
  • Freezer (baked): Freeze in layers between parchment for up to 2 months.

    Thaw at room temperature.

  • Freezer (dough): Scoop, freeze dough balls on a sheet, then bag for up to 2 months. Bake from frozen, adding 1–2 minutes.
Final dish presentation: Beautifully plated gingerbread cookies with set maple icing in a soft matte

Health Benefits

  • Ginger: Known for soothing digestion and offering anti-inflammatory compounds.
  • Molasses: Provides small amounts of iron, potassium, and calcium.
  • Portion-friendly: The cookies are rich, so one or two satisfy a sweet craving without going overboard.

Pitfalls to Watch Out For

  • Overbaking: Pull them when the centers are slightly soft. They firm up as they cool.
  • Using blackstrap molasses: It’s too bitter and can dry out the dough.

    Choose regular unsulphured molasses.

  • Skipping the chill: Warm dough spreads too much and loses that thick, soft texture.
  • Icing too thin: If it runs off the cookie, whisk in more powdered sugar 1 tablespoon at a time.

Variations You Can Try

  • Lemon glaze: Swap maple syrup for lemon juice and zest for a bright, tangy finish.
  • Extra spice: Add a pinch of black pepper or cardamom for a subtle kick.
  • Chocolate-dipped: Dip half the cookie in melted dark chocolate and sprinkle with flaky salt.
  • Gluten-free: Use a 1:1 gluten-free flour blend with xanthan gum and chill a bit longer.
  • Dairy-free: Replace butter with a plant-based stick and use non-dairy milk for the icing.

FAQ

Can I make the dough ahead?

Yes. Chill the dough up to 48 hours, tightly covered. If it’s very firm, let it sit 15 minutes at room temperature before scooping.

How do I keep the cookies soft for days?

Store them airtight with a slice of sandwich bread or a piece of apple peel.

Replace the slice every day or two to maintain moisture.

What if I don’t have dark brown sugar?

Use light brown sugar and add 1 teaspoon molasses to the wet ingredients to deepen the flavor.

Can I cut these into shapes?

Yes, but add 2–3 tablespoons extra flour and chill the dough longer (at least 2 hours). Roll between parchment to 1/4 inch and watch the bake time.

Is the icing supposed to harden completely?

It sets to a soft matte finish that’s stackable but not rock hard. For a firmer set, add more powdered sugar and a touch less milk.

Wrapping Up

These soft gingerbread cookies bring classic spice, cozy molasses flavor, and a maple-kissed finish that feels special without extra fuss.

They’re simple enough for a weeknight and festive enough for a party. Bake a batch, share a few, and keep some tucked away—you’ll want another with tomorrow’s coffee.

Classic Brown Butter Sugar Cookies with Cinnamon Glaze – Cozy, Crisp, and Perfectly Spiced

These cookies taste like a warm afternoon in a bakery. They’re buttery and crisp at the edges, tender in the center, and finished with a light cinnamon glaze that sets into a shiny, sweet crust. Browning the butter brings out deep, nutty flavors that make a simple sugar cookie feel special.

The dough is easy to handle, the bake is quick, and the glaze comes together in minutes. If you’re craving a cookie that feels classic yet a little elevated, this is it.

What Makes This Recipe So Good

Close-up detail: A just-baked brown butter sugar cookie cooling on a wire rack, crisp, lightly golde
  • Brown butter adds a toasted, nutty flavor you can’t get from regular creamed butter.
  • Balanced texture: crisp edges, soft centers, and a delicate glazed top.
  • Simple pantry ingredients with a bakery-style result.
  • Just-sweet-enough glaze with cinnamon that boosts the cookie without overpowering it.
  • Make-ahead friendly: the dough chills well and the cookies freeze beautifully.

What You’ll Need

  • For the cookies:
    • 1 cup (227 g) unsalted butter
    • 1 cup (200 g) granulated sugar
    • 1/2 cup (110 g) light brown sugar, packed
    • 1 large egg + 1 large egg yolk
    • 2 teaspoons vanilla extract
    • 2 1/4 cups (270 g) all-purpose flour
    • 1/2 teaspoon baking powder
    • 1/2 teaspoon baking soda
    • 3/4 teaspoon fine sea salt
    • Optional: 2 tablespoons granulated sugar for rolling
  • For the cinnamon glaze:
    • 1 cup (120 g) powdered sugar
    • 1/2 teaspoon ground cinnamon
    • Pinch of fine salt
    • 2–3 tablespoons milk or cream
    • 1/2 teaspoon vanilla extract

Step-by-Step Instructions

Cooking process: Overhead shot of freshly baked sugar-coated cookie balls just out of the oven on pa
  1. Brown the butter. Add butter to a light-colored saucepan over medium heat. Cook, stirring, until it foams, then turns golden with brown bits on the bottom and smells nutty, 5–7 minutes.

    Transfer to a bowl, scraping in the browned bits. Cool 15–20 minutes until just warm.

  2. Whisk dry ingredients. In a bowl, whisk flour, baking powder, baking soda, and salt. Set aside.
  3. Mix sugars and butter. In a large bowl, whisk the granulated and brown sugars into the cooled brown butter until combined and glossy.
  4. Add eggs and vanilla. Whisk in the egg, egg yolk, and vanilla until smooth and slightly thickened.
  5. Combine with dry ingredients. Use a spatula to fold in the flour mixture until no dry streaks remain.

    The dough will be soft.

  6. Chill. Cover and refrigerate 30–45 minutes until scoopable. This helps the cookies bake thick with chewy centers.
  7. Preheat and prep. Heat oven to 350°F (175°C). Line two baking sheets with parchment.

    If rolling in sugar, pour the sugar into a shallow bowl.

  8. Portion. Scoop 1 1/2 tablespoons of dough per cookie. Roll into balls. If using, roll in sugar to coat lightly.
  9. Bake. Arrange on sheets, spacing 2 inches apart.

    Bake 9–11 minutes, until edges are set and lightly golden and centers look slightly underbaked. They’ll firm up as they cool.

  10. Cool. Let cookies rest on the sheet 5 minutes, then transfer to a rack to cool completely before glazing.
  11. Make the glaze. Whisk powdered sugar, cinnamon, salt, vanilla, and 2 tablespoons milk. Add more milk a few drops at a time until it’s thick but pourable.
  12. Glaze. Spoon or drizzle glaze over cooled cookies.

    Let sit 20–30 minutes to set.

Keeping It Fresh

  • Room temperature: Store glazed cookies in an airtight container for 3–4 days. Place parchment between layers.
  • Freeze baked: Freeze unglazed cookies up to 2 months. Thaw, then glaze.
  • Freeze dough: Scoop, freeze until solid, then bag.

    Bake from frozen, adding 1–2 minutes.

Final presentation: Beautifully plated stack of Classic Brown Butter Sugar Cookies with Cinnamon Gla

Benefits of This Recipe

  • Elevated flavor from brown butter without extra steps during baking.
  • Foolproof texture: chilling and the extra yolk keep them tender and chewy.
  • Flexible finish: glaze, sugar-roll, or both.
  • Great for gifting thanks to the pretty glazed tops and sturdy crumb.

What Not to Do

  • Don’t skip cooling the brown butter. Hot butter can scramble the egg and make greasy dough.
  • Don’t overbake. Pull them when the centers still look soft; they set as they cool.
  • Don’t over-flour. Weigh flour if possible. Too much flour = dry, cakey cookies.
  • Don’t glaze warm cookies. The glaze will melt and turn runny.

Variations You Can Try

  • Maple twist: Swap half the milk in the glaze for pure maple syrup.
  • Spice blend: Add 1/2 teaspoon cardamom or chai spice to the dough.
  • Brown sugar forward: Use 3/4 cup brown sugar and 3/4 cup granulated for deeper flavor.
  • Sparkle sugar: Roll dough balls in coarse turbinado sugar for crunch.
  • Citrus note: Add 1 teaspoon orange or lemon zest to the dough or glaze.

FAQ

Can I use salted butter?

Yes. Reduce the added salt to 1/4 teaspoon to balance the dough.

Do I have to chill the dough?

Chilling isn’t strictly required, but it helps prevent spreading and improves texture and flavor.

Even 20–30 minutes makes a difference.

How do I know the butter is properly browned?

Look for golden-brown milk solids on the bottom, a toasty aroma, and a deepened color. Remove from heat as soon as the bits turn chestnut brown—black means burned.

Can I make these gluten-free?

Use a 1:1 gluten-free all-purpose flour with xanthan gum. The texture will be a bit more delicate but still tasty.

What if my glaze is too thick or thin?

If it’s too thick, add milk a few drops at a time.

If too thin, whisk in a tablespoon of powdered sugar until it coats the spoon and slowly drips.

Why did my cookies turn cakey?

Too much flour or overbaking. Weigh your flour and pull the cookies while the centers look slightly underdone.

Final Thoughts

These Classic Brown Butter Sugar Cookies with Cinnamon Glaze take a timeless favorite and give it a cozy, bakery-worthy finish. They’re easy enough for a weeknight and pretty enough for a party.

Keep a batch of dough in the freezer, and you’re never far from warm, fragrant cookies that make any day feel special.

Red Velvet Cream Cheese Stuffed Cookies – Soft, Sweet, and Simply Irresistible

Red velvet and cream cheese were made for each other, and these cookies prove it with every bite. Imagine a soft, cocoa-kissed red velvet cookie wrapped around a creamy cheesecake center. They’re rich without being heavy, festive without extra fuss, and perfect for sharing.

Whether you’re baking for a holiday, a birthday, or just because, these cookies bring a little wow-factor to the table.

What Makes This Recipe So Good

Close-up detail: A just-baked red velvet cream cheese stuffed cookie cracked open to reveal the tang
  • Soft and chewy texture: The cookie base stays tender, with just enough chew to feel satisfying.
  • Velvety cream cheese center: A tangy, smooth filling balances the sweetness and adds a surprise in every bite.
  • Eye-catching color: That classic red hue makes these cookies a standout on any dessert plate.
  • Make-ahead friendly: Both the filling and the dough can be prepped ahead for easy baking later.
  • Freezer-friendly: Bake now, enjoy later—these freeze beautifully.

What You’ll Need

  • For the cream cheese filling:
    • 8 oz cream cheese, softened
    • 1/3 cup powdered sugar
    • 1/2 teaspoon vanilla extract
    • Pinch of salt
  • For the red velvet cookie dough:
    • 1/2 cup unsalted butter, softened
    • 3/4 cup granulated sugar
    • 1/4 cup light brown sugar, packed
    • 1 large egg
    • 1 teaspoon vanilla extract
    • 1 1/2 cups all-purpose flour
    • 1/4 cup unsweetened cocoa powder (natural or Dutch-process)
    • 1 teaspoon cornstarch
    • 1/2 teaspoon baking soda
    • 1/4 teaspoon baking powder
    • 1/4 teaspoon salt
    • 1–1 1/2 tablespoons red food coloring (liquid or gel)
    • 2–3 teaspoons milk, as needed for consistency
  • Optional for rolling: 1/4 cup granulated sugar

How to Make It

Cooking process: Assembling the cookies—deep-red, chilled dough disc being wrapped around a frozen
  1. Make the filling: Beat cream cheese, powdered sugar, vanilla, and a pinch of salt until smooth. Scoop into teaspoon-size mounds (about 16) onto a parchment-lined plate. Freeze 30–45 minutes until firm.
  2. Cream the butter and sugars: In a large bowl, beat butter, granulated sugar, and brown sugar until light and fluffy, 2–3 minutes.
  3. Add egg and vanilla: Mix in the egg and vanilla until combined.

    Stir in red food coloring to reach a deep red shade.

  4. Whisk dry ingredients: In a separate bowl, whisk flour, cocoa, cornstarch, baking soda, baking powder, and salt.
  5. Combine: Add dry ingredients to the wet mixture. Mix on low just until a soft dough forms. If dough feels stiff or crumbly, add milk 1 teaspoon at a time until pliable.
  6. Chill: Cover and chill the dough for 30–45 minutes.

    This makes shaping easier and prevents spreading.

  7. Preheat oven: Set oven to 350°F (175°C). Line baking sheets with parchment.
  8. Assemble cookies: Scoop about 2 tablespoons of dough. Flatten into a thick disc.

    Place a frozen cream cheese mound in the center, then wrap dough around it, sealing the edges. Roll into a smooth ball. If desired, roll in sugar.

  9. Bake: Place on the sheet 2 inches apart.

    Bake 10–12 minutes, until the edges look set and tops are slightly cracked but centers still look soft.

  10. Cool: Let cookies rest on the sheet for 10 minutes, then transfer to a rack to cool completely. The filling sets as they cool.

Storage Instructions

  • Room temperature: Keep in an airtight container up to 1 day.
  • Refrigerator: Store up to 5 days for best freshness.
  • Freezer (baked): Freeze in a sealed container up to 2 months. Thaw in the fridge, then bring to room temp.
  • Freezer (unbaked): Freeze assembled dough balls on a tray, then transfer to a bag.

    Bake from frozen at 350°F, adding 1–2 minutes.

Tasty top view: Overhead shot of a platter of finished red velvet cream cheese stuffed cookies with

Benefits of This Recipe

  • Balanced flavor: Tangy cream cheese cuts through the sweet, cocoa-rich dough.
  • Special-occasion ready: Festive color without complicated decorating.
  • Flexible timing: Make components ahead for stress-free baking.
  • Reliable results: Chilled dough and frozen filling help keep shape and texture.

Common Mistakes to Avoid

  • Skipping the chill: Warm dough spreads too much and can leak filling.
  • Overbaking: Pull them when edges set. The centers finish on the sheet.
  • Too much flour: Spoon and level flour to avoid dry, crumbly dough.
  • Under-sealing: Pinch seams well so the filling stays inside.
  • Cold butter: Softened butter creams properly and creates tender cookies.

Alternatives

  • Chocolate chips: Fold 1/2 cup mini chips into the dough for extra richness.
  • Stuffing swap: Add lemon zest to the cream cheese for a bright twist, or a teaspoon of raspberry jam on top of the cream cheese before sealing.
  • Color-free: Skip red coloring and enjoy them as cocoa cream cheese cookies.
  • Gluten-free: Use a 1:1 gluten-free flour blend with xanthan gum.
  • Cream cheese glaze: Drizzle with a quick glaze (cream cheese, powdered sugar, milk) after cooling.

FAQ

Can I use beet powder instead of food coloring?

Yes. Use 1–2 tablespoons beet powder.

The color will be more muted, but it adds a natural tint without changing flavor much.

Why did my filling leak out?

It’s usually from warm dough, a soft filling, or gaps in the seam. Make sure the filling is frozen, the dough is chilled, and seal any cracks before baking.

Can I make the dough ahead?

Absolutely. Chill for up to 48 hours.

Let it sit at room temperature 10–20 minutes if it’s too firm to scoop.

Do I need both baking soda and baking powder?

Yes. The combo supports lift and a soft texture, especially with the cocoa and added moisture.

How do I know when they’re done?

Edges will look set, and the tops will be slightly cracked but still soft. If they’re puffed and no longer glossy, pull them—overbaking dries them out.

Wrapping Up

Red Velvet Cream Cheese Stuffed Cookies bring bakery-style flair with simple pantry ingredients.

They’re soft, striking, and full of creamy goodness. Keep a batch in the freezer, and you’ll always have a show-stopping dessert ready to bake.