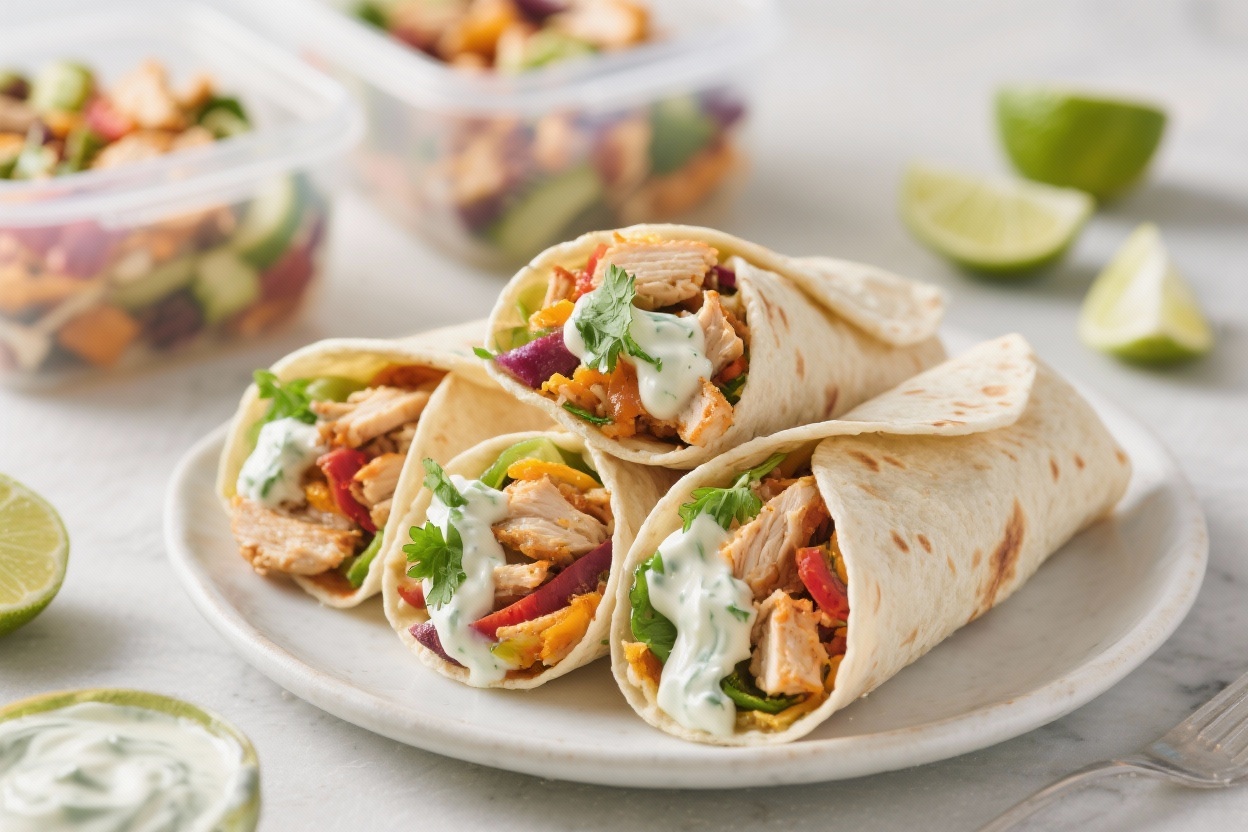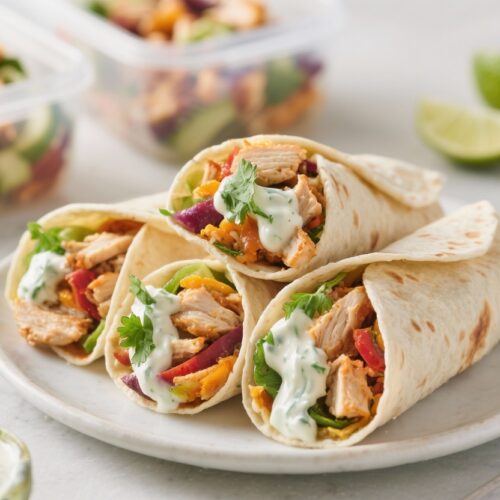
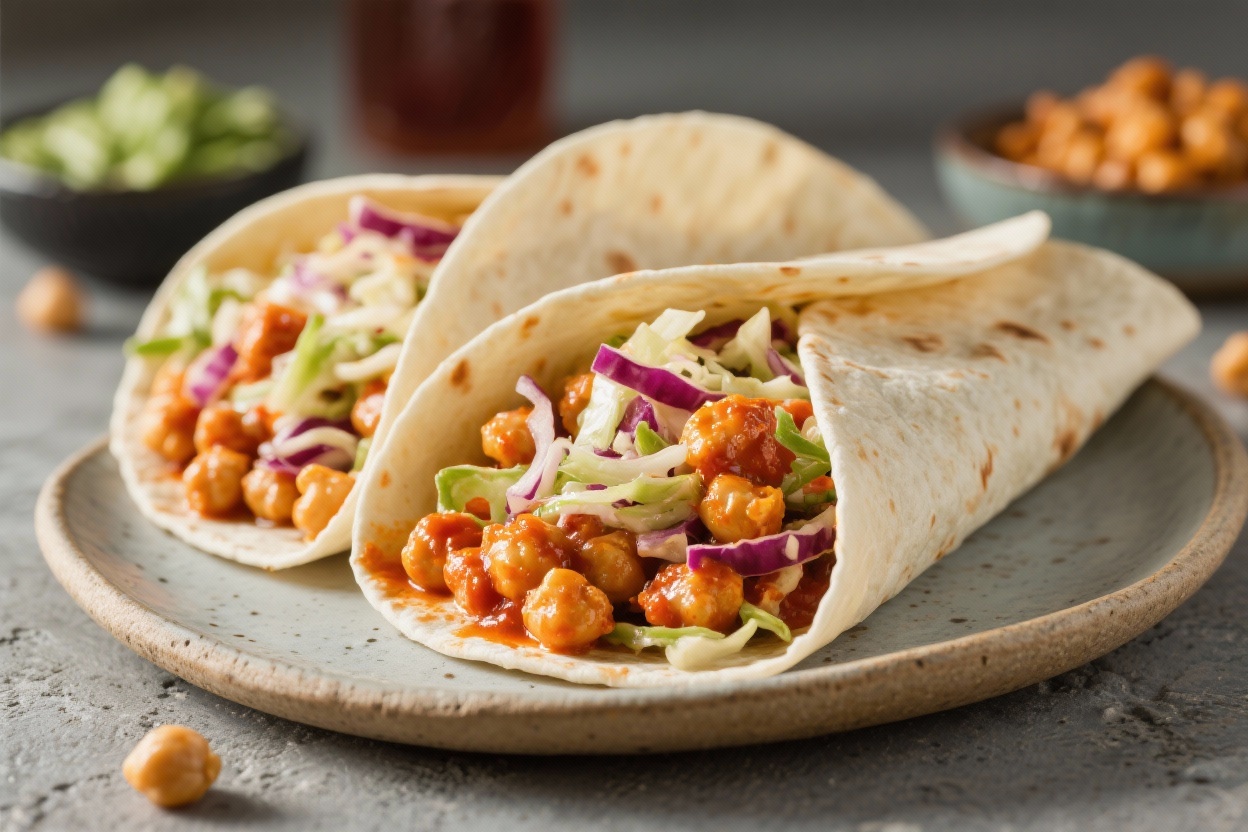
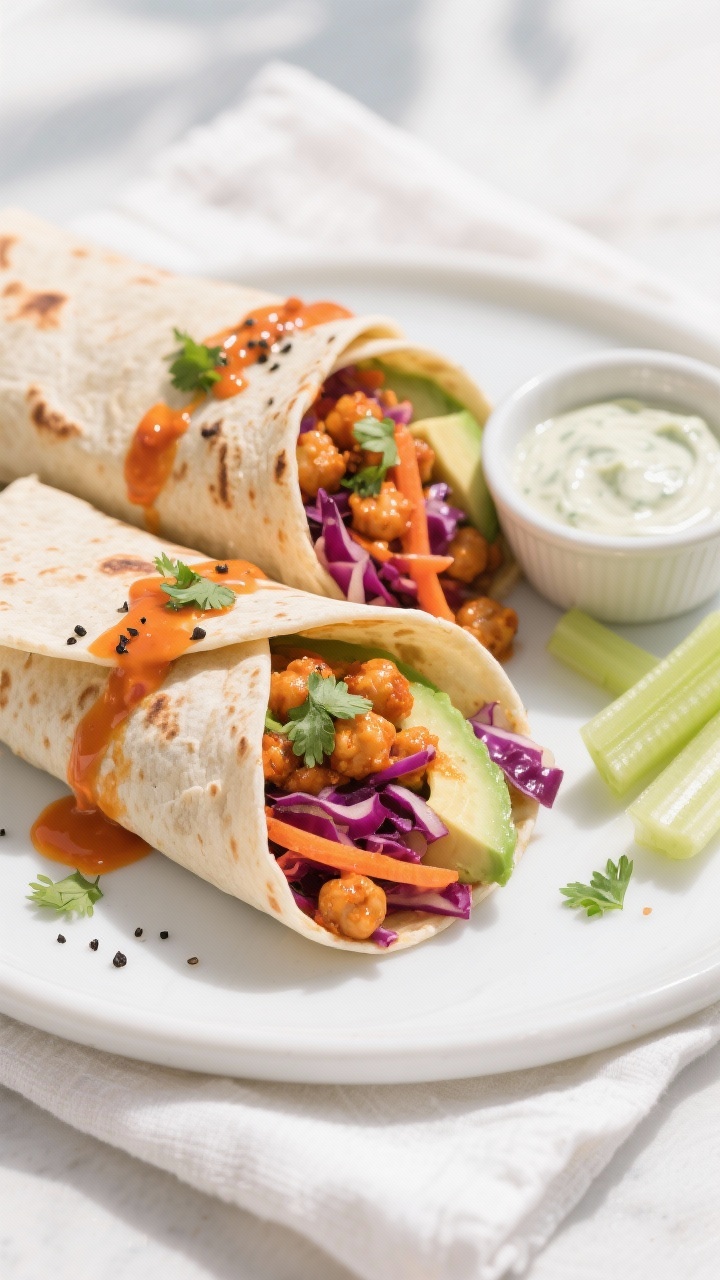
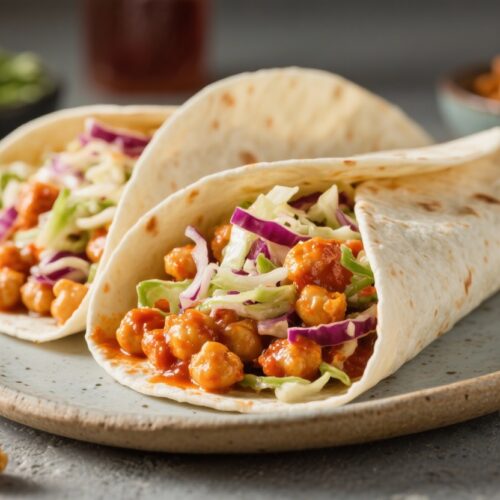
These wraps taste like your favorite game-day snack, but they’re plant-based, quick to make, and surprisingly satisfying. Tender chickpeas get tossed in a fiery, tangy Buffalo sauce, then tucked into warm tortillas with a crisp, creamy slaw. It’s the kind of weekday lunch that feels special without being fussy.
Make them for meal prep or a fast dinner when you want bold flavor with minimal effort.
What Makes This Recipe So Good
- Big flavor, minimal effort: Canned chickpeas and pantry staples turn into a craveable, saucy filling in minutes.
- Crunch meets creamy: A cool slaw balances the heat and adds texture so every bite is satisfying.
- Fully vegan and protein-packed: Chickpeas bring plant protein and fiber, keeping you full longer.
- Customizable heat level: Adjust the Buffalo sauce and spice to match your taste.
- Meal-prep friendly: Make components ahead and assemble fresh for quick lunches.
Shopping List
- 2 cans chickpeas (15 oz each), drained and rinsed
- Large flour tortillas or whole-wheat wraps (8–10 inches)
- Buffalo hot sauce (Frank’s-style)
- Vegan butter or olive oil
- Smoked paprika
- Garlic powder
- Onion powder
- Salt and black pepper
- Red cabbage (or green), thinly sliced
- Carrots, shredded
- Green onions, thinly sliced (optional)
- Fresh cilantro or parsley, chopped (optional)
- Vegan mayo
- Apple cider vinegar or lemon juice
- Maple syrup (or agave)
- Celery, finely sliced (optional, for that Buffalo “feel”)
- Avocado (optional, for extra creaminess)
Step-by-Step Instructions
- Make the slaw: In a large bowl, combine 3 cups thinly sliced cabbage, 1 cup shredded carrots, and optional celery and green onions. In a small bowl, whisk 1/3 cup vegan mayo, 1 tablespoon apple cider vinegar or lemon juice, 1 teaspoon maple syrup, a pinch of salt, and pepper. Toss with the veggies.
Chill while you cook the chickpeas.
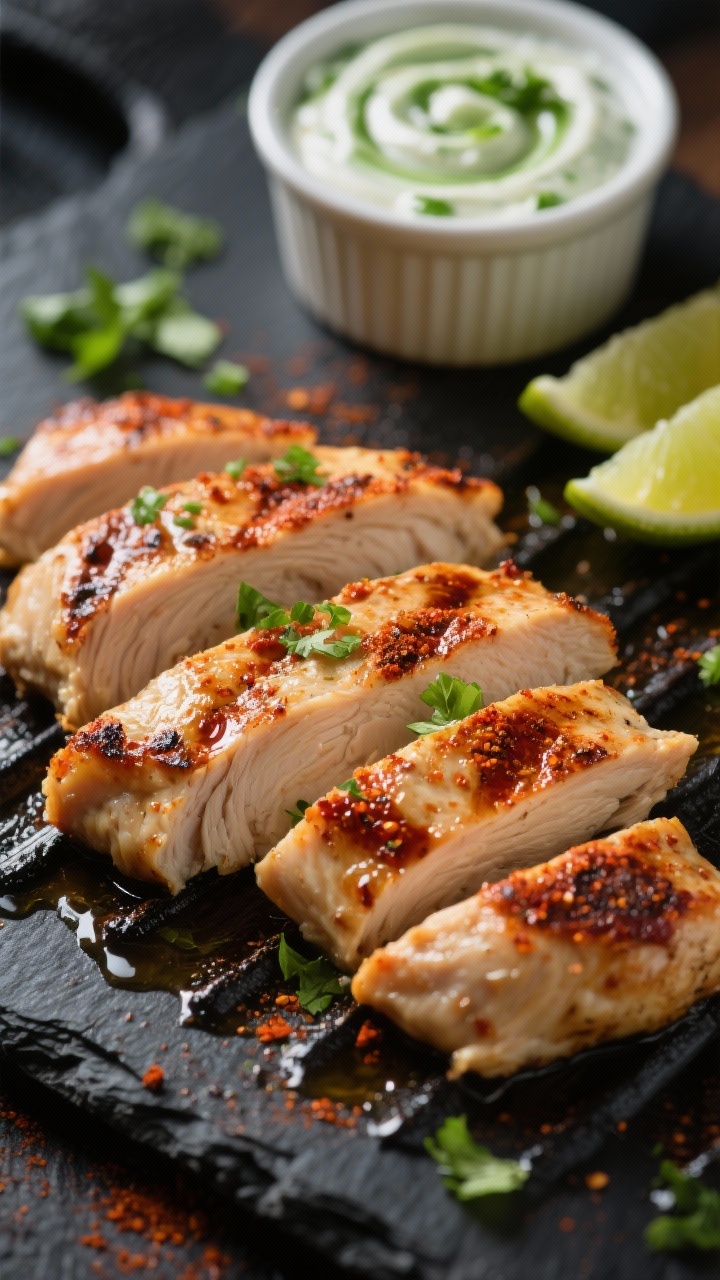
- Season the chickpeas: Pat chickpeas dry. In a bowl, mix them with 1 teaspoon smoked paprika, 1/2 teaspoon garlic powder, 1/2 teaspoon onion powder, 1/2 teaspoon salt, and a few grinds of black pepper.
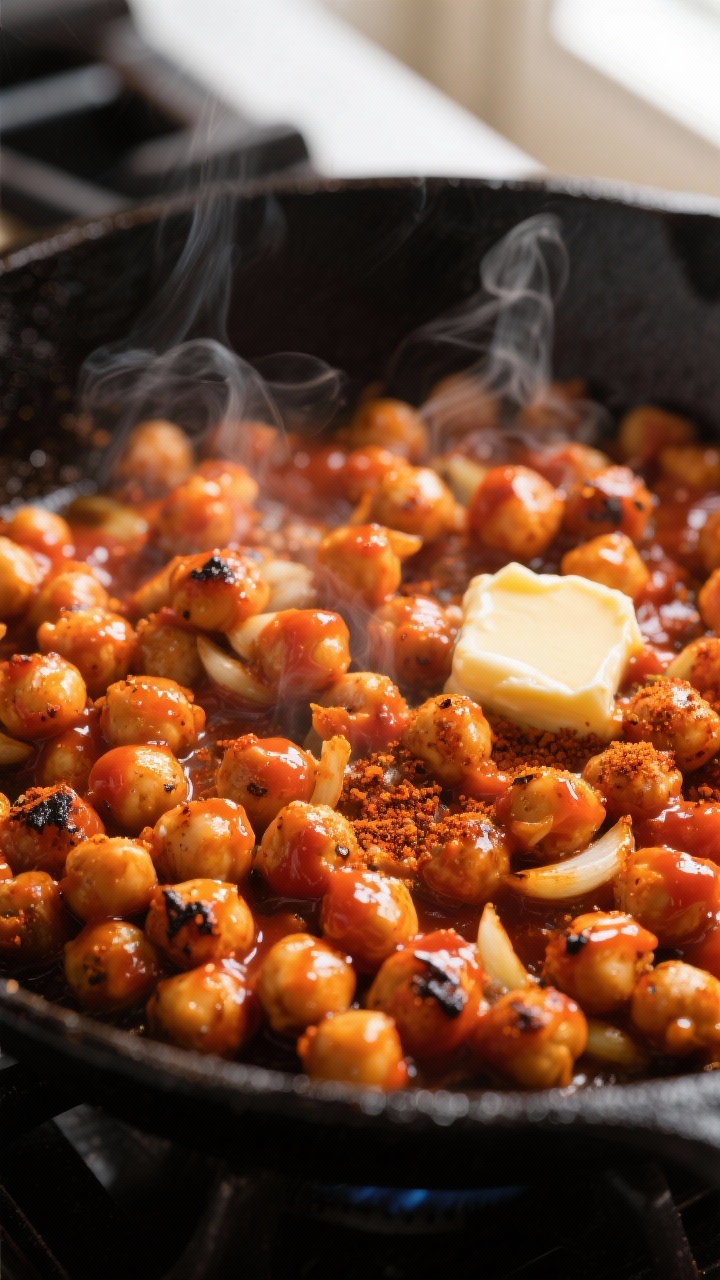
- Crisp them up: Warm a large skillet over medium-high heat. Add 1 tablespoon olive oil.
Cook chickpeas 6–8 minutes, shaking the pan occasionally, until lightly browned and a bit crisp.
- Buffalo it up: Reduce heat to medium-low. Stir in 2–4 tablespoons Buffalo hot sauce (to taste) and 1 tablespoon vegan butter (or a drizzle of oil). Cook 1–2 minutes, stirring, until the chickpeas are glossy and coated.
- Warm the wraps: Heat tortillas in a dry skillet for 20–30 seconds per side or wrap in a damp towel and microwave 20–30 seconds until pliable.
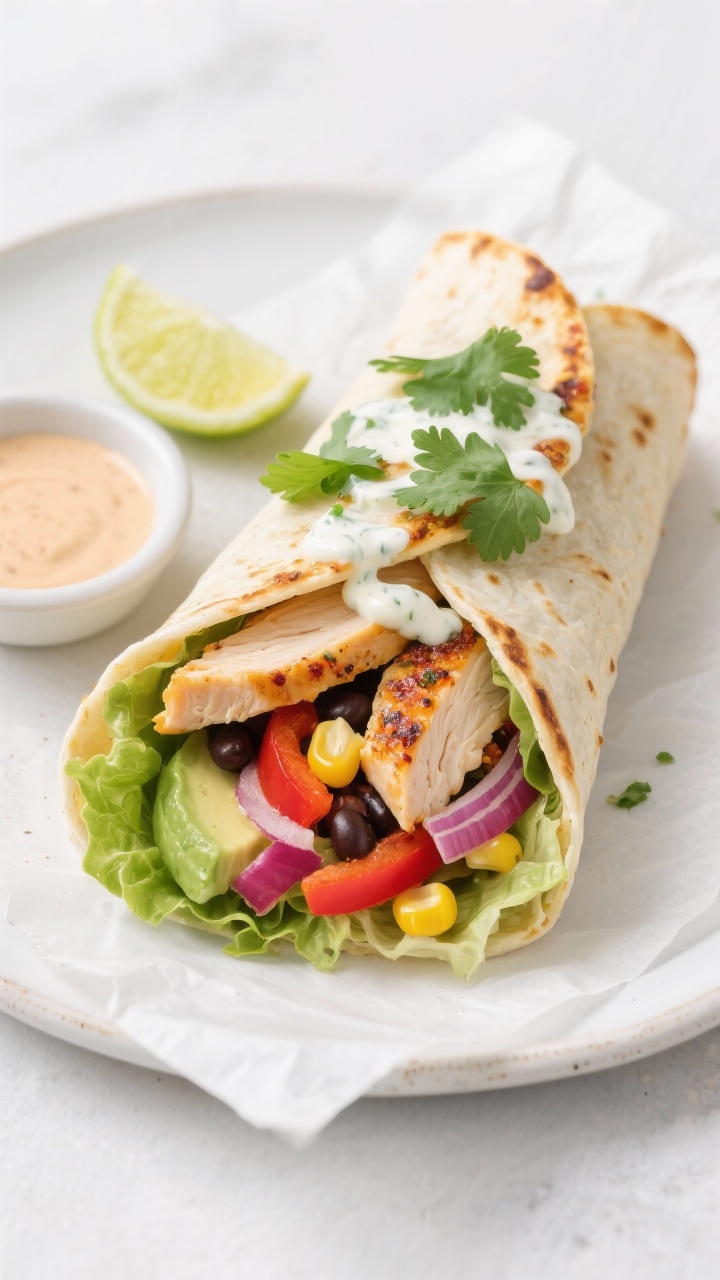
- Assemble: Add a generous scoop of slaw to the center of each tortilla.
Spoon Buffalo chickpeas on top. Add avocado slices and chopped herbs if you like.
- Wrap and serve: Fold the sides in, roll tightly from the bottom, and slice in half. Drizzle extra hot sauce if you’re feeling bold.
Keeping It Fresh
- Store components separately: Keep Buffalo chickpeas, slaw, and tortillas apart in the fridge.
Assemble right before eating to avoid soggy wraps.
- Fridge life: Chickpeas keep 4 days. Slaw stays crisp 2–3 days. Tortillas last a week sealed.
- Reheat smart: Rewarm chickpeas in a skillet over medium heat for the best texture.
Add a splash of water if they seem dry.
- Pack for lunch: Layer slaw, then chickpeas, then a barrier like avocado or extra lettuce to keep moisture from the tortilla.
Why This is Good for You
- Plant protein and fiber: Chickpeas help keep you full and support steady energy.
- Colorful veg: Cabbage and carrots offer antioxidants, vitamin C, and crunch with few calories.
- Healthy fats (if using avocado): Adds creaminess and supports absorption of fat-soluble nutrients.
- Balanced meal: Carbs from the wrap, protein and fiber from chickpeas, and fats from mayo/avocado make a well-rounded plate.
What Not to Do
- Don’t skip drying the chickpeas: Excess moisture prevents browning and crisping.
- Don’t over-sauce too early: Add Buffalo sauce after crisping or you’ll end up with mushy chickpeas.
- Don’t overload the wrap: Too much filling makes rolling messy and the tortilla more likely to tear.
- Don’t store assembled wraps overnight: They’ll get soggy. Assemble just before eating.
Recipe Variations
- Air fryer chickpeas: Toss seasoned chickpeas with a little oil, air-fry at 390°F (200°C) for 10–12 minutes, then toss with Buffalo sauce.
- Gluten-free: Use gluten-free tortillas and ensure your hot sauce is GF.
- Extra protein: Add baked tofu strips or tempeh alongside the chickpeas.
- Ranch vibe: Stir dried dill and parsley into the slaw, or use vegan ranch instead of plain mayo dressing.
- Add-ins: Diced pickles, thin-sliced red onion, or shredded lettuce for extra crunch.
- Low-heat version: Swap half the Buffalo sauce for tomato sauce or mild salsa for a gentler kick.
FAQ
Can I use dried chickpeas instead of canned?
Yes. Cook them until tender but not falling apart, then dry well before crisping.
You’ll need about 3 cups cooked chickpeas to replace two cans.
What’s the best Buffalo sauce to use?
Use a classic cayenne pepper hot sauce (like Frank’s) mixed with a little vegan butter or oil. This combo gives that signature tangy, buttery Buffalo flavor.
Can I make the slaw without mayo?
Absolutely. Use tahini or a thick vegan yogurt with lemon juice, a touch of maple, salt, and pepper.
It will still be creamy and fresh.
How do I keep my wraps from tearing?
Warm tortillas until flexible, don’t overfill, and tuck the sides in tightly as you roll. If tortillas are dry, a quick steam in a damp towel helps.
Are these good cold?
Yes. They’re tasty at room temperature, but for the best texture, warm the chickpeas and keep the slaw cold before assembling.
Wrapping Up
These Spicy Buffalo Chickpea Wraps bring heat, crunch, and comfort without a ton of prep.
They’re easy to customize, quick to assemble, and perfect for lunch or a light dinner. Keep the components on hand, and you’ve got a reliable, flavor-packed meal any day of the week.
Spicy Buffalo Chickpea Wraps With Crunchy Slaw (Vegan & Filling) - Easy, Flavor-Packed Lunch
Ingredients
- 2 cans chickpeas (15 oz each), drained and rinsed
- Large flour tortillas or whole-wheat wraps (8–10 inches)
- Buffalo hot sauce (Frank’s-style)
- Vegan butter or olive oil
- Smoked paprika
- Garlic powder
- Onion powder
- Salt and black pepper
- Red cabbage (or green), thinly sliced
- Carrots, shredded
- Green onions, thinly sliced (optional)
- Fresh cilantro or parsley, chopped (optional)
- Vegan mayo
- Apple cider vinegar or lemon juice
- Maple syrup (or agave)
- Celery, finely sliced (optional, for that Buffalo “feel”)
- Avocado (optional, for extra creaminess)
Instructions
- Make the slaw: In a large bowl, combine 3 cups thinly sliced cabbage, 1 cup shredded carrots, and optional celery and green onions. In a small bowl, whisk 1/3 cup vegan mayo, 1 tablespoon apple cider vinegar or lemon juice, 1 teaspoon maple syrup, a pinch of salt, and pepper. Toss with the veggies.Chill while you cook the chickpeas.
- Season the chickpeas: Pat chickpeas dry. In a bowl, mix them with 1 teaspoon smoked paprika, 1/2 teaspoon garlic powder, 1/2 teaspoon onion powder, 1/2 teaspoon salt, and a few grinds of black pepper.
- Crisp them up: Warm a large skillet over medium-high heat. Add 1 tablespoon olive oil.Cook chickpeas 6–8 minutes, shaking the pan occasionally, until lightly browned and a bit crisp.
- Buffalo it up: Reduce heat to medium-low. Stir in 2–4 tablespoons Buffalo hot sauce (to taste) and 1 tablespoon vegan butter (or a drizzle of oil). Cook 1–2 minutes, stirring, until the chickpeas are glossy and coated.
- Warm the wraps: Heat tortillas in a dry skillet for 20–30 seconds per side or wrap in a damp towel and microwave 20–30 seconds until pliable.
- Assemble: Add a generous scoop of slaw to the center of each tortilla.Spoon Buffalo chickpeas on top. Add avocado slices and chopped herbs if you like.
- Wrap and serve: Fold the sides in, roll tightly from the bottom, and slice in half. Drizzle extra hot sauce if you’re feeling bold.