Roasted Root Vegetable Buddha Bowl – Colorful, Cozy, and Satisfying

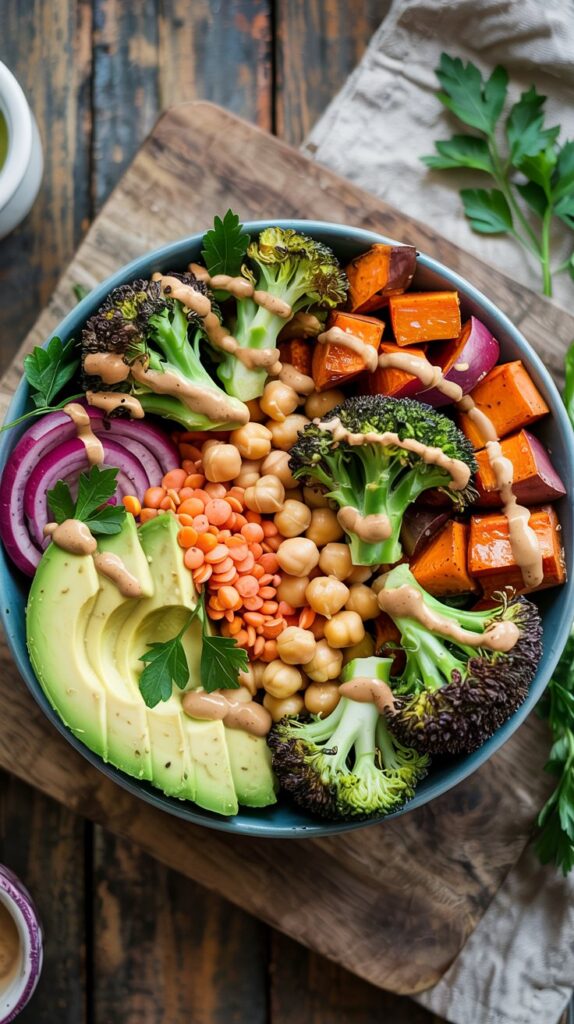
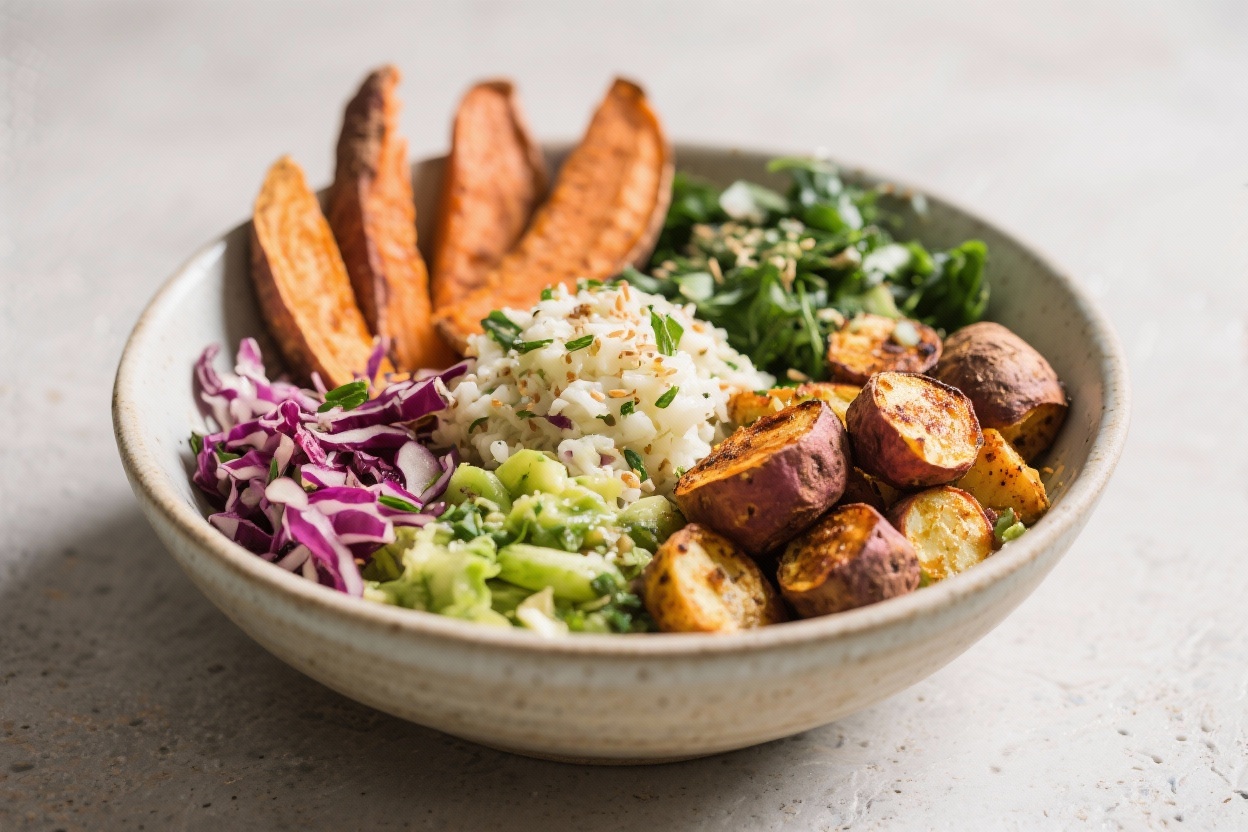
This Roasted Root Vegetable Buddha Bowl is simple, hearty, and full of everyday flavor. It’s the kind of meal that feels cozy but still bright, with caramelized veggies, creamy tahini dressing, and plenty of texture. You’ll roast a rainbow of roots, add a grain for staying power, and finish with fresh greens and crunchy toppings.

It’s easy to prep, easy to customize, and great for lunches or weeknight dinners.

Why This Recipe Works

Close-up detail: Roasted root vegetables just out of the oven—caramelized sweet potato cubes, gold
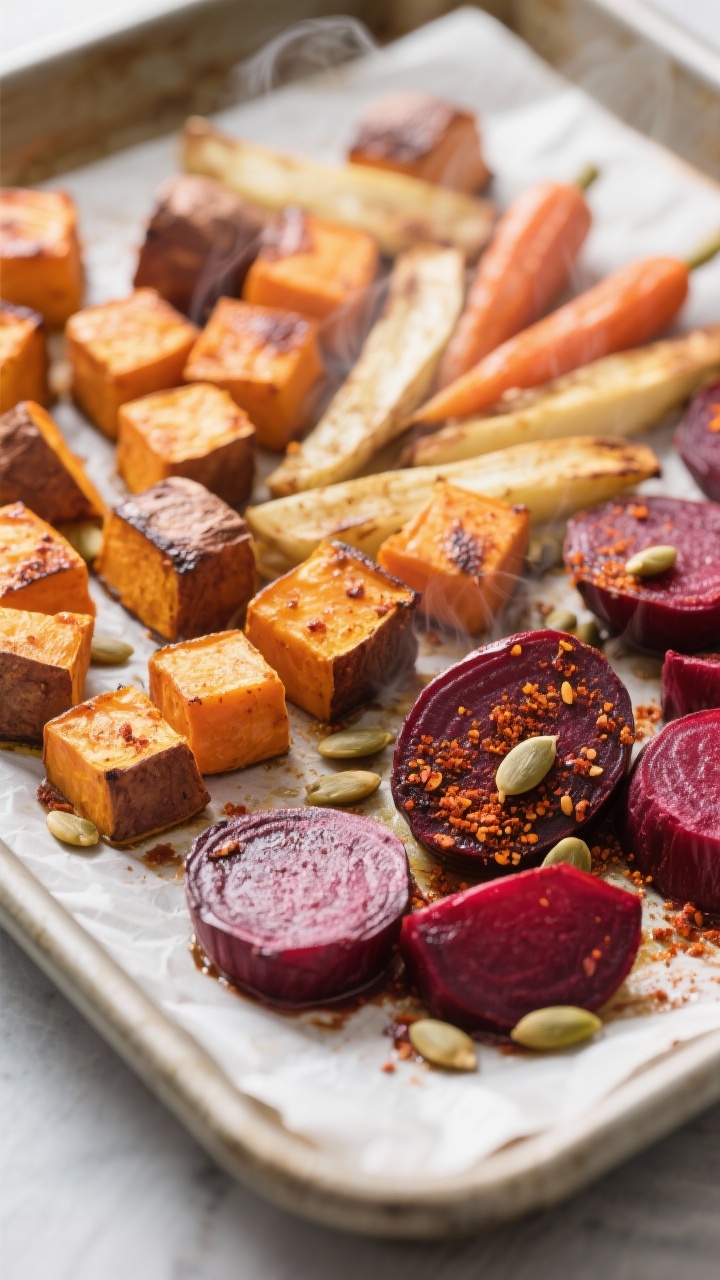
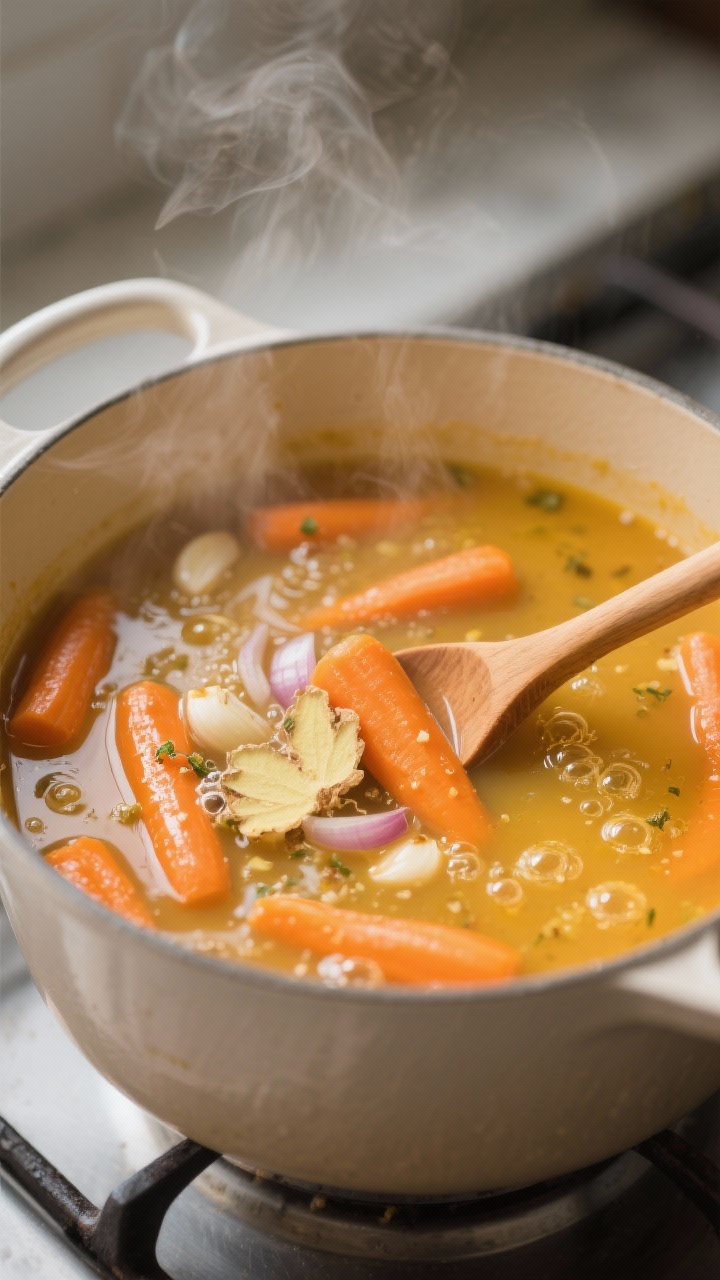
  • Roasting builds flavor: High heat turns root vegetables sweet and crisp around the edges.
  • Balanced bowl: You get complex carbs, healthy fats, plant protein, and fiber in every bite.
  • Make-ahead friendly: Everything holds up well in the fridge, so it’s perfect for meal prep.
  • Flexible format: Swap veggies, grains, or toppings based on what you have.

What You’ll Need

  • 2 cups cubed sweet potatoes
  • 2 cups cubed carrots or parsnips
  • 2 cups cubed beets (golden or red)
  • 1 red onion, cut into wedges
  • 2 tablespoons olive oil
  • 1 teaspoon smoked paprika
  • 1 teaspoon ground cumin
  • 1/2 teaspoon garlic powder
  • Salt and black pepper, to taste
  • 2 cups cooked grain (quinoa, farro, or brown rice)
  • 2 cups greens (baby spinach, arugula, or kale)
  • 1 can (15 oz) chickpeas, drained and rinsed
  • 1 avocado, sliced
  • 1/4 cup toasted pepitas or chopped nuts
  • Lemon wedges, for serving

Tahini Dressing:

  • 1/4 cup tahini
  • 2 tablespoons lemon juice
  • 1 tablespoon maple syrup or honey
  • 1 small garlic clove, grated
  • 2–4 tablespoons warm water (to thin)
  • Salt and pepper, to taste

Step-by-Step Instructions

Cooking process: Crispy roasted chickpeas being shaken across a separate pan beside a pot of fluffy
  1. Heat the oven: Preheat to 425°F (220°C). Line two sheet pans with parchment for easy cleanup.
  2. Prep the vegetables: Cut everything into similar 3/4-inch cubes so they cook evenly. Keep beets on a separate pan to avoid staining.
  3. Season well: Toss veggies with olive oil, smoked paprika, cumin, garlic powder, salt, and pepper.

    Spread in a single layer with space between pieces.

  4. Roast: Bake for 25–35 minutes, flipping once. They’re done when tender with browned edges. Beets may need a few extra minutes.
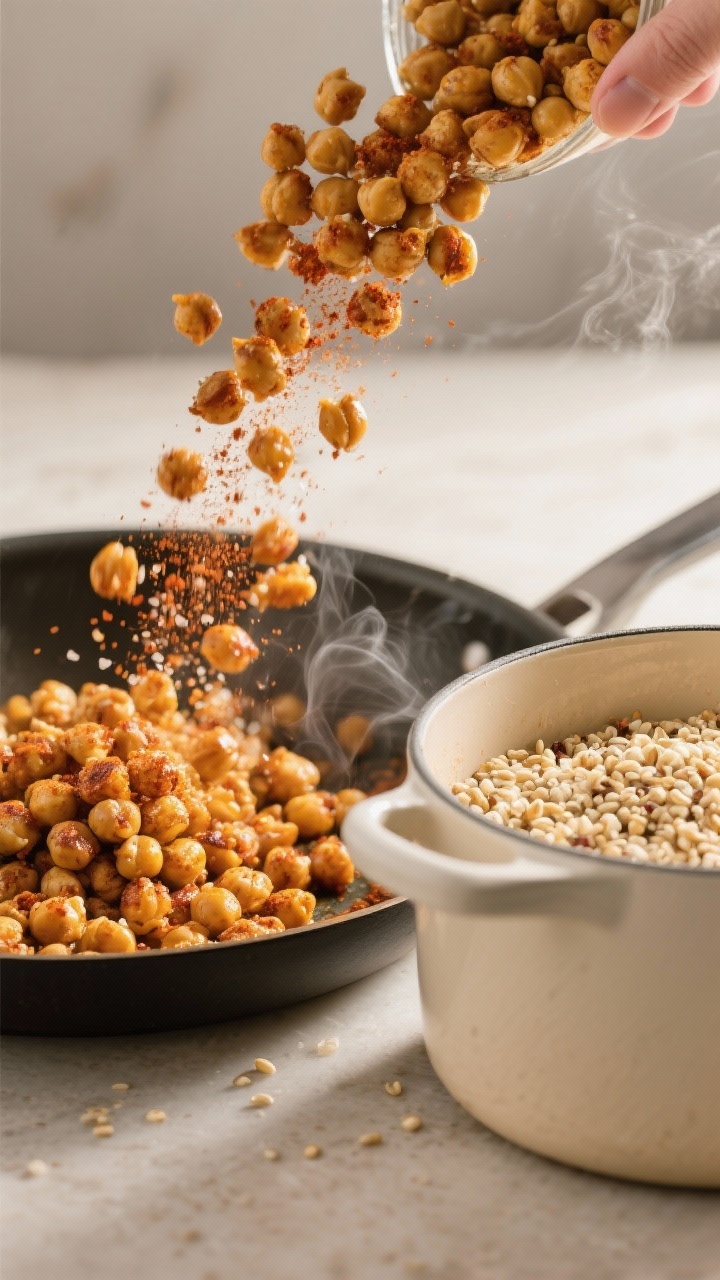
  5. Crisp the chickpeas (optional but great): Pat chickpeas dry, toss with a splash of oil, salt, and extra paprika, then roast on a separate pan for 15–20 minutes until golden.
  6. Cook the grain: While veggies roast, prepare quinoa, farro, or rice according to package directions.

    Fluff with a fork and season with a pinch of salt.

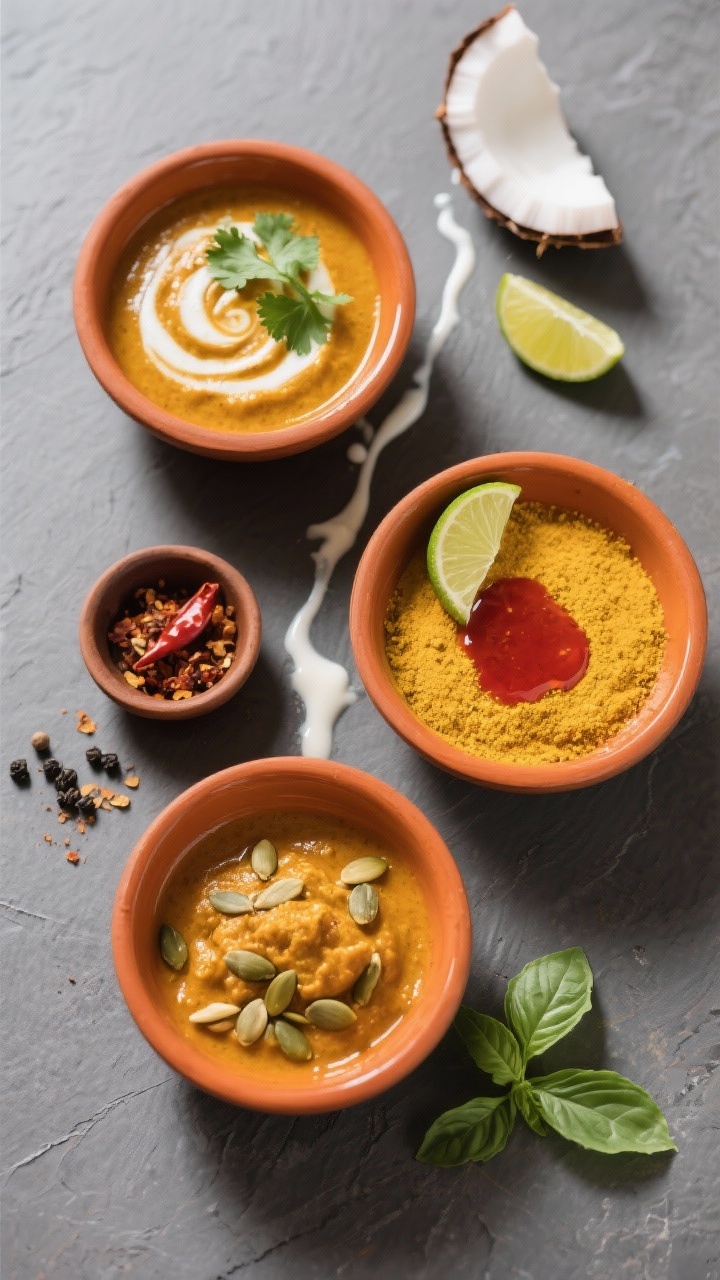
  7. Make the dressing: Whisk tahini, lemon juice, maple syrup, and garlic. Add warm water a little at a time until creamy and pourable. Season to taste.
  8. Build the bowls: Layer greens, warm grains, and roasted vegetables.

    Add chickpeas, avocado, and pepitas. Drizzle with tahini dressing and finish with a squeeze of lemon.

Keeping It Fresh

  • Store components separately: Keep roasted veggies, grains, and dressing in separate containers for 4–5 days.
  • Add fresh items last: Slice avocado right before serving. Dress the bowl when ready to eat.
  • Reheat gently: Warm veggies and grains in a skillet or microwave, then add greens and toppings.

Benefits of This Recipe

  • Nutrient-dense: Root veggies bring fiber, beta-carotene, and minerals.
  • Steady energy: Complex carbs and healthy fats keep you full longer.
  • Plant-forward: Naturally vegetarian and easy to make vegan.
  • Budget-friendly: Root vegetables are affordable and widely available.

What Not to Do

  • Don’t overcrowd the pan: Crowded veggies steam instead of roast and won’t caramelize.
  • Don’t skip seasoning: Roots need salt and spice for depth.
  • Don’t forget texture: Add something crunchy (pepitas, nuts) and something creamy (avocado, dressing).
  • Don’t cut unevenly: Different sizes cook at different speeds and lead to mushy or underdone pieces.

Recipe Variations

  • Spice swap: Try curry powder and coriander, or harissa and cinnamon for warmth.
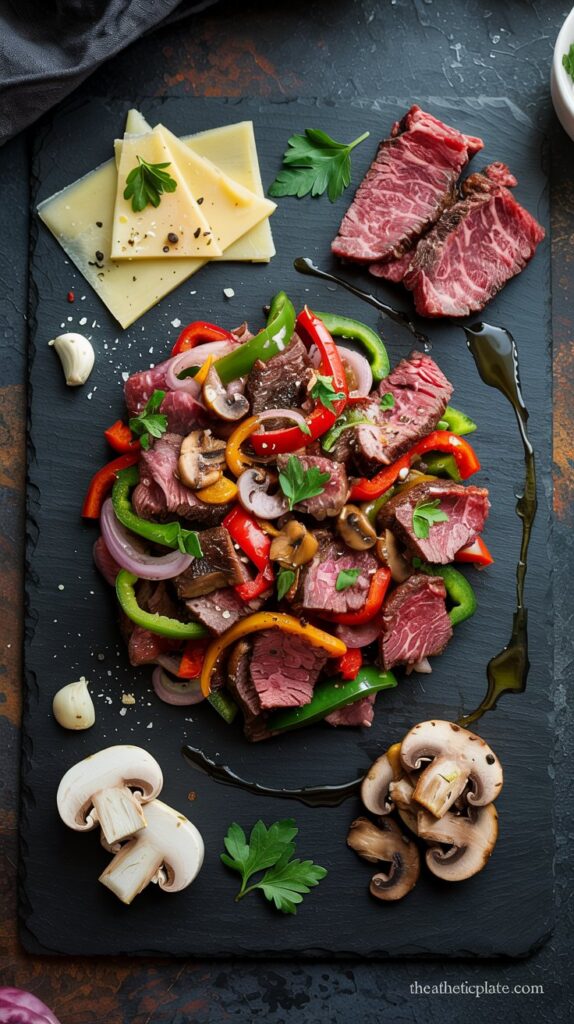
  • Protein boost: Add roasted tofu, tempeh, grilled chicken, or a jammy egg.
  • Different grain: Use couscous, barley, wild rice, or cauliflower rice for low-carb.
  • Add-ons: Sprinkle with feta or goat cheese, toss in pickled onions, or finish with fresh herbs like parsley or dill.
  • Different dressing: Lemon-herb yogurt, miso-ginger, or a simple olive oil and lemon vinaigrette all work.

FAQ

Can I use frozen vegetables?

Yes, but they won’t caramelize as well.

Roast from frozen at a higher rack position and give them extra time, keeping space between pieces.

How do I keep the beets from staining everything?

Roast them on a separate pan and add them to the bowl last. Golden beets stain less and are a good alternative.

Is the tahini dressing nut-free?

Yes. Tahini is made from sesame seeds.

If you need to avoid sesame, try a sunflower seed butter dressing instead.

Can I make this oil-free?

You can. Toss veggies with a splash of vegetable broth and roast on parchment, though they’ll brown less. Use water to thin the dressing.

What’s the best way to reheat without drying out?

Warm veggies and grains in a covered skillet over medium heat with a tablespoon of water.

Add dressing after heating.

Wrapping Up

This Roasted Root Vegetable Buddha Bowl is cozy, colorful, and practical for busy days. It’s easy to customize, great for meal prep, and satisfying without feeling heavy. Keep the components on hand, and you’ve got a reliable, nourishing meal whenever you need it.

Ginger Carrot Soup with Coconut Cream – Cozy, Bright, and Simple

This Ginger Carrot Soup with Coconut Cream brings warmth, brightness, and a silky finish to your table with minimal effort. The sweet earthiness of carrots pairs beautifully with fresh ginger and a touch of garlic, while coconut cream adds lush body without the heaviness of dairy. It’s the kind of soup that feels soothing yet fresh, perfect for busy weeknights or a relaxed weekend lunch.

Serve it with crusty bread or a simple salad, and you’ve got a complete, satisfying meal.

Why This Recipe Works

Cooking process close-up: A steaming pot of ginger carrot soup mid-simmer, carrots tender and just s
  • Balanced flavors: Carrots bring natural sweetness, ginger adds gentle heat, and coconut cream smooths it all out.
  • Simple technique: Sauté, simmer, blend—no special equipment beyond a blender or immersion blender.
  • Dairy-free and flexible: Coconut cream gives a velvety texture without dairy, and the recipe adapts easily to different diets.
  • Make-ahead friendly: The flavors deepen after a day in the fridge, making this ideal for meal prep.

What You’ll Need

  • 2 tablespoons olive oil (or coconut oil)
  • 1 medium onion, chopped
  • 3 garlic cloves, minced
  • 2 tablespoons fresh ginger, grated (adjust to taste)
  • 2 pounds carrots, peeled and sliced
  • 4 cups vegetable broth (or chicken broth)
  • 1 cup full-fat coconut milk or coconut cream (plus extra for drizzling)
  • 1 tablespoon fresh lemon or lime juice
  • Salt and freshly ground black pepper, to taste
  • Optional garnish: chopped cilantro, toasted pumpkin seeds, chili flakes, or a swirl of coconut cream

Instructions

Final dish beauty shot: A silky bowl of Ginger Carrot Soup with Coconut Cream served in a wide, matt
  1. Sauté the aromatics: Warm the oil in a large pot over medium heat. Add the onion and a pinch of salt. Cook 4–5 minutes until softened, then add garlic and ginger.

    Cook 1 minute until fragrant.

  2. Add carrots and broth: Stir in the carrots, then pour in the broth. Bring to a boil, then reduce heat to a gentle simmer. Cover and cook 18–22 minutes, until the carrots are very tender.
  3. Blend until smooth: Remove from heat.

    Use an immersion blender to puree in the pot, or carefully transfer to a blender in batches. Blend until silky.

  4. Stir in coconut and citrus: Return the soup to low heat. Stir in the coconut milk or cream and the lemon or lime juice.

    Season with salt and pepper. If you like more zing, add a bit more ginger or citrus.

  5. Serve and garnish: Ladle into bowls. Drizzle with extra coconut cream and finish with cilantro, pumpkin seeds, or chili flakes for crunch and color.

Keeping It Fresh

  • Refrigerate: Store in an airtight container for up to 4 days.

    The flavors improve by day two.

  • Freeze: Cool completely, then freeze for up to 3 months. Thaw overnight in the fridge and reheat gently, adding a splash of broth if it thickens.
  • Reheat: Warm on the stove over low heat, stirring often. Avoid boiling once the coconut is added to keep it smooth.
Tasty top-down variation: Overhead shot of three small bowls showcasing variations—classic, currie

Health Benefits

  • Beta-carotene boost: Carrots are rich in beta-carotene, which supports eye and skin health.
  • Anti-inflammatory ginger: Ginger may help ease digestion and inflammation while adding bright flavor.
  • Dairy-free fats: Coconut provides satisfying fats that help you feel full and help absorb fat-soluble nutrients.
  • Lower-sodium friendly: Using homemade or low-sodium broth keeps the salt content in check.

Pitfalls to Watch Out For

  • Under-seasoning: Carrot soups need adequate salt and acid.

    Taste at the end and adjust with salt and lemon/lime.

  • Too thick or too thin: Add broth to thin or simmer to reduce. Aim for a pourable, creamy consistency.
  • Overcooking aromatics: Burned garlic or ginger turns bitter. Keep heat moderate and stir frequently.
  • Blender safety: Let the soup cool slightly and vent the blender lid to avoid steam build-up.

Recipe Variations

  • Spiced carrot: Add 1 teaspoon ground cumin and 1/2 teaspoon ground coriander with the aromatics.
  • Thai-inspired: Stir in 1 tablespoon red curry paste and finish with lime zest and fresh basil.
  • Curried coconut: Add 1–2 teaspoons curry powder and a pinch of turmeric for golden color.
  • Protein boost: Top with crispy chickpeas or add a scoop of cooked red lentils before blending.
  • Extra veggies: Swap 1 cup of carrots for roasted sweet potato or butternut squash for deeper sweetness.

FAQ

Can I use light coconut milk?

Yes, but the texture will be less silky.

If using light coconut milk, simmer a bit longer to thicken or blend in a small cooked potato for body.

Do I need to peel the carrots?

Peeling gives a cleaner flavor and color. If the carrots are fresh and thin-skinned, a good scrub is often enough.

Can I make it in a slow cooker?

Yes. Add everything except the coconut milk and citrus, cook on low for 6–8 hours, then blend and stir in the coconut and lemon/lime at the end.

What can I use instead of ginger?

Try a smaller amount of fresh turmeric or 1/2 teaspoon ground ginger.

You can also lean on warm spices like cumin or curry powder.

How do I fix a soup that’s too sweet?

Add acidity and heat. A squeeze of lemon or lime, extra ginger, a pinch of chili flakes, or a splash of apple cider vinegar will balance it out.

In Conclusion

Ginger Carrot Soup with Coconut Cream is bright, cozy, and weeknight-easy. With a handful of pantry staples and fresh ginger, you get a smooth, nourishing bowl that feels special.

Make it as written or riff with spices and toppings. Either way, it’s a reliable, feel-good soup you’ll want on repeat.

Almond Flour Snowball Cookies – Buttery, Tender, and Naturally Gluten-Free

Almond Flour Snowball Cookies are the kind of treat that makes a simple afternoon feel special. They’re buttery, tender, and melt-in-your-mouth with a delicate dusting of powdered sugar. These cookies look festive but come together with just a handful of ingredients.

If you’re baking for a holiday platter or a cozy coffee break, this recipe is easy, reliable, and gluten-free by nature. You’ll love how satisfying they are without being overly sweet.

This post may contain Amazon affiliate links. As an Amazon Associate, I earn from qualifying purchases.

What Makes This Recipe So Good

Close-up detail: Warm almond flour snowball cookies just out of the oven being gently rolled in powd
  • Simple ingredients: Almond flour, butter, vanilla, and a few pantry staples are all you need.
  • Gluten-free and grain-free: Naturally made with almond flour, so no wheat flour required.
  • Tender, melt-away texture: Almond flour gives a soft crumb and rich flavor.
  • Quick to make: No chilling required, and they bake in about 12 minutes.
  • Perfect for gifting: Pretty, bite-sized cookies that hold their shape and travel well.

Ingredients

  • 1 3/4 cups fine almond flour (blanched, super-fine works best)
  • 1/3 cup powdered sugar, plus more for rolling
  • 1/4 teaspoon fine sea salt
  • 1/2 cup unsalted butter, softened to room temperature
  • 1 1/2 teaspoons pure vanilla extract
  • 1/2 teaspoon almond extract (optional, for extra almond flavor)
  • 1/3 cup finely chopped pecans or walnuts (optional)

How to Make It

Tasty top view: Overhead shot of a cooling rack filled with almond flour snowball cookies after the
  1. Prep the oven: Preheat to 350°F (175°C). Line a baking sheet with parchment paper.
  2. Mix the dry ingredients: In a bowl, whisk almond flour, powdered sugar, and salt to break up clumps.
  3. Cream the butter: In a separate bowl, beat softened butter with vanilla (and almond extract, if using) until smooth and creamy, about 1 minute.
  4. Combine: Add the dry mixture to the butter.

    Beat on low until a soft dough forms. If using nuts, fold them in.


  5. Shape: Scoop 1 tablespoon of dough and roll into balls. Place on the prepared sheet about 1 inch apart.
  6. Bake: Bake 10–12 minutes, until set and just lightly golden on the bottoms.

    The tops should remain pale.


  7. First sugar coat: Let cookies cool for 5–7 minutes, then gently roll warm cookies in powdered sugar. Place on a rack to cool completely.
  8. Second sugar coat: Once cool, roll again in powdered sugar for a snowy finish.

Keeping It Fresh

  • Room temperature: Store in an airtight container for 4–5 days. Add a small piece of parchment between layers to protect the coating.
  • Freezing baked cookies: Freeze in a single layer, then transfer to a bag or container for up to 2 months.

    Refresh with a light dusting of powdered sugar after thawing.


  • Freezing the dough: Roll into balls and freeze raw on a tray. Bake from frozen, adding 1–2 minutes to the time.
Final dish presentation: Beautifully plated almond flour snowball cookies arranged in a low ceramic

Health Benefits

  • Almond flour is nutrient-dense: It provides healthy fats, vitamin E, and magnesium.
  • Lower in carbs than wheat flour: A good option for those watching carbs or avoiding gluten.
  • Better satiety: The fat and protein in almonds can help you feel satisfied with fewer cookies.

Common Mistakes to Avoid

  • Using coarse almond meal: It makes the cookies gritty and crumbly. Choose fine, blanched almond flour.
  • Overbaking: These should stay pale on top.

    Too much time in the oven dries them out.


  • Skipping the double coat: The first coat melts slightly into the warm cookie; the second gives that classic snowy finish.
  • Hot butter: Butter should be soft, not melted. Melted butter can make the dough greasy and flat.

Recipe Variations

  • Lemon snowballs: Add 1 teaspoon lemon zest to the dough and a little zest to the powdered sugar.
  • Chocolate-dipped: Dip half of each cooled cookie in melted dark chocolate and let set.
  • Spiced version: Add 1/2 teaspoon cinnamon and a pinch of nutmeg to the dry mix.
  • Pistachio swap: Use finely chopped pistachios instead of walnuts for color and flavor.
  • Vanilla bean: Replace vanilla extract with the seeds of 1/2 vanilla bean for a fragrant twist.

FAQ

Can I make them dairy-free?

Yes. Use a high-quality dairy-free butter stick that behaves like butter, not a spread from a tub.

The texture will be slightly less rich but still delicious.

Why did my cookies crack?

Small surface cracks are normal. Large cracks usually mean the dough was too dry or the oven ran hot. Make sure the almond flour is fresh and measure by scooping and leveling.

Do I have to add nuts?

No.

These are great without nuts. If skipping, you can add 1–2 tablespoons of finely shredded coconut or just leave them plain.

How do I keep the sugar coating from melting?

Roll once while warm, let cool fully, then roll again. Store in a cool, dry container away from steam or humidity.

Can I reduce the sugar?

You can cut the sugar in the dough to 1/4 cup.

The cookies will be less sweet, so the powdered sugar coating becomes more important for balance.

Final Thoughts

Almond Flour Snowball Cookies bring together simple ingredients for a classic, cozy treat. They’re easy to bake, pretty to serve, and naturally gluten-free. Keep a batch on hand for coffee breaks, holidays, or gifting.

Once you try them, they’ll become a go-to cookie in your rotation.

Spiced Pumpkin Protein Smoothie – Cozy Flavor With a Nutrient Boost

This Spiced Pumpkin Protein Smoothie tastes like a fall dessert but fuels you like a solid breakfast. It’s creamy, lightly sweet, and full of warming spices that make it feel special any time of year. You can blend it in minutes with pantry staples and a few fridge items.

It’s an easy way to use leftover pumpkin puree, and it keeps you satisfied for hours. Great for post-workout recovery, busy mornings, or an afternoon pick-me-up.

What Makes This Special

Close-up detail: Thick, creamy Spiced Pumpkin Protein Smoothie streaming from a blender into a chill
  • Balanced and satisfying: Protein, fiber, and healthy fats help keep hunger away.
  • Real pumpkin: Pumpkin puree adds natural creaminess and vitamins, without heavy dairy.
  • Warming spice blend: Cinnamon, ginger, and nutmeg deliver cozy flavor without extra sugar.
  • Quick and flexible: Easy to customize for vegan, dairy-free, or low-sugar needs.

Ingredients

  • 1/2 cup pumpkin puree (100% pure, not pumpkin pie filling)
  • 1 frozen banana (in chunks)
  • 3/4 to 1 cup unsweetened milk of choice (almond, oat, dairy, or soy)
  • 1 scoop vanilla protein powder (whey or plant-based)
  • 1 tablespoon nut butter (almond, peanut, or cashew) or 1 tablespoon tahini
  • 1 to 2 teaspoons maple syrup or honey (optional, to taste)
  • 1/2 teaspoon ground cinnamon
  • 1/4 teaspoon ground ginger
  • Pinch of nutmeg
  • Pinch of allspice or cloves (optional, strong but lovely)
  • 1/2 teaspoon vanilla extract
  • 3 to 5 ice cubes (optional, for extra thickness and chill)
  • Small pinch of salt (enhances flavor)

How to Make It

Tasty top view: Overhead shot of the finished Spiced Pumpkin Protein Smoothie in a wide-mouth glass,
  1. Add liquids first. Pour the milk into your blender to help everything blend smoothly.
  2. Layer in the rest. Add pumpkin, frozen banana, protein powder, nut butter, spices, vanilla, salt, and sweetener if using.
  3. Blend until creamy. Start low, then go high for 30–45 seconds. Add ice for a thicker texture and blend again.
  4. Taste and adjust. Add more milk to thin, more ice for thickness, or a touch of maple syrup for sweetness.
  5. Serve right away. Pour into a chilled glass and sprinkle a little cinnamon on top if you like.

How to Store

If you have leftovers, store the smoothie in an airtight jar in the fridge for up to 24 hours.

It may thicken as it sits; add a splash of milk and shake before drinking. For meal prep, you can freeze portions in freezer-safe jars, leaving headspace, for up to 1 month. Thaw in the fridge overnight and reblend for the best texture.

Final dish presentation: Restaurant-quality setup of two Spiced Pumpkin Protein Smoothies—one clas

Why This is Good for You

  • Protein for muscles: Helps with recovery and keeps you fuller longer.
  • Fiber from pumpkin and banana: Supports digestion and steady energy.
  • Micronutrients: Pumpkin is rich in vitamin A, potassium, and antioxidants.
  • Healthy fats: Nut butter adds creaminess and supports hormone and brain health.
  • Lower sugar option: Natural sweetness from banana means you can keep added sugar minimal.

What Not to Do

  • Don’t use pumpkin pie filling. It’s pre-sweetened and spiced, which can make the smoothie too sweet.
  • Don’t skip the salt. A tiny pinch lifts the flavors and balances sweetness.
  • Don’t overdo the cloves/allspice. A little goes a long way and can overwhelm the smoothie.
  • Don’t add too much liquid at once. Start with less; you can always add more to reach your ideal consistency.

Recipe Variations

  • Greek yogurt boost: Swap half the milk for 1/2 cup Greek yogurt for extra protein and tang.
  • Oats for staying power: Add 2 tablespoons rolled oats before blending for a thicker, heartier smoothie.
  • Espresso twist: Add a shot of cooled espresso for a pumpkin spice latte vibe with protein.
  • Chocolate pumpkin: Use chocolate protein powder and add 1 teaspoon cocoa powder.
  • Green upgrade: Blend in a handful of baby spinach; the color changes, but the flavor stays mellow.
  • Nut-free: Use tahini or sunflower seed butter instead of nut butter and choose a nut-free milk.
  • Low-carb: Replace banana with 1/2 avocado and a few ice cubes; sweeten lightly with stevia or allulose.

FAQ

Can I make it without banana?

Yes.

Use 1/2 avocado for creaminess and a few ice cubes for thickness. Add a little extra sweetener to taste since you’re losing the banana’s natural sweetness.

What protein powder works best?

Vanilla whey blends the creamiest, but a quality plant-based powder works well too. If using a grainy powder, add an extra splash of milk and blend a bit longer.

Do I need all the spices?

No.

You can use 3/4 teaspoon pumpkin pie spice in place of the cinnamon, ginger, nutmeg, and allspice. Adjust to taste.

Can I use fresh pumpkin?

Absolutely. Roast and puree it until smooth, then cool before using.

Fresh pumpkin can be slightly more watery, so start with less milk.

How do I make it thicker?

Use less milk, add more ice, include oats, or toss in a bit of Greek yogurt. Freezing the pumpkin puree in cubes also helps.

Is it good for post-workout?

Yes. It offers protein for recovery and carbs from banana and pumpkin to refill glycogen.

Add a pinch of salt for electrolytes if you’ve had a sweaty session.

In Conclusion

This Spiced Pumpkin Protein Smoothie brings cozy flavor and real nourishment together in one quick blend. It’s easy to customize, tastes like a treat, and keeps you fueled for whatever’s ahead. Keep a can of pumpkin on hand and this will become a go-to recipe you’ll make on repeat.

Philly Cheese Steak Protein Bowl: All the Flavor, None of the Guilt

So you’re craving something tasty but too lazy to spend forever in the kitchen, huh? Same. Enter the Philly Cheese Steak Protein Bowl—all the gooey, savory goodness of a Philly cheesesteak, minus the bread coma and mid-afternoon slump.

Bonus: it’s high-protein, packed with veggies, and actually meal-prep friendly. Your post-gym self is about to thank you.

Why This Recipe is Awesome

Let’s be honest: some meal-prep recipes are basically cardboard with seasoning. Not this one.

  • It’s idiot-proof. Even I didn’t mess it up (and I once burned water—true story).
  • High-protein magic. Chicken or beef? Either way, you’re hitting those macros hard.
  • Flavor without guilt. All the melty, savory cheesesteak vibes, none of the greasy regret.
  • Flexible AF. Swap veggies, swap protein, swap cheese—heck, even swap your attitude.

Seriously, this recipe is basically a hug in a bowl.

Ingredients You’ll Need

Here’s what makes this Philly bowl sing. All simple, mostly stuff you can find without interrogating your grocery store:

  • 1 lb lean beef strips or chicken breast, sliced thin
  • 1 large onion, sliced into strips
  • 1 green bell pepper, sliced thin
  • 1 red bell pepper, sliced thin
  • 1 cup mushrooms, sliced
  • 2 cloves garlic, minced
  • 2 tsp olive oil or avocado oil
  • 1/2 tsp smoked paprika
  • 1/2 tsp black pepper
  • Salt, to taste (obv)
  • 4 slices provolone cheese or mozzarella, for that melty goodness
  • Optional: hot sauce, for drama

FYI, this recipe doubles easily if you want to meal prep for the week.

Step-by-Step Instructions

  1. Heat the oil. In a large skillet over medium-high heat, toss in the onions, bell peppers, and mushrooms. Sauté until tender and slightly caramelized, about 5-6 minutes. Smell that? That’s victory.
  2. Cook your protein. Push the veggies to the side, add the beef or chicken strips. Sprinkle in smoked paprika, salt, and pepper. Stir-fry until cooked through, 5-7 minutes for chicken, 4-6 for beef. Don’t overcook—it gets sad and rubbery.
  3. Garlic magic. Toss in minced garlic, stir for another 30 seconds. The aroma = your reward for adulting.
  4. Cheese time. Lay the provolone slices over the protein-veggie mix. Cover for a minute or two to melt. Cheese stretch pics optional but encouraged.
  5. Serve it up. Spoon into bowls, drizzle with hot sauce if you’re feeling spicy, and dive in.

Common Mistakes to Avoid

  • Skipping the pre-sauté. Raw veggies + protein = soggy, sad bowl. Don’t do it.
  • Overcrowding the pan. Your protein deserves space. Respect it.
  • Cheese too early. Melty magic happens best at the end. Patience, grasshopper.
  • Microwaving leftovers forever. Seriously, 1-2 minutes max. Otherwise, chewy regret.

Alternatives & Substitutions

  • Protein swap: Chicken, turkey, beef, or even seitan for the plant-based squad. IMO, beef wins for nostalgia, chicken wins for macros.
  • Cheese swap: Provolone, mozzarella, or even a sprinkle of feta if you’re feeling fancy.
  • Veggie remix: Red onion instead of white, zucchini instead of bell pepper—make it yours.
  • Spice it up: A dash of sriracha or chili flakes for heat.

Personal tip: I once tried Swiss cheese here… never again. Flavor shame.

FAQ (Frequently Asked Questions)

Can I meal prep this?
Totally. Store in airtight containers for up to 3 days. Reheat gently so your cheese doesn’t turn sad.

Is this keto-friendly?
Yep. Skip the bread, load the protein, enjoy guilt-free melty goodness.

Can I use frozen veggies?
Sure, but drain them well. Nobody wants water-logged cheesesteak vibes.

Can I swap beef for tofu?
Absolutely. Marinate for a few minutes and pan-fry. You’ll get protein-packed plant-based goodness.

How do I keep the cheese melty if I meal prep?
Leave it off until reheating. Add at the last 30 seconds in the microwave or oven. Instant gooey win.

Can I make it spicy?
Yes. Hot sauce, red pepper flakes, or even a chopped jalapeño will do the trick.

Is this freezer-friendly?
Sort of. Protein + veggies freeze fine, but the cheese texture might change. Consider adding cheese fresh after thawing.

Final Thoughts

This Philly Cheese Steak Protein Bowl is basically a cheat day that behaves itself. It’s high protein, packed with veggies, and hits that melty, savory craving without making you feel like you just ate regret.

So go on—channel your inner chef, make a batch, and maybe even impress someone (or just yourself, no judgment). You’ve officially leveled up your healthy gym meals game.

And hey, if you love this, check out high-protein meal prep lunches and easy gym meal prep ideas for more flavor-packed inspiration. You’re welcome 😉.

10 Easy Gym Meal Prep Ideas That Actually Taste Amazing

If you’ve ever hit the gym hard and then realized you had nothing ready to eat at home, you know the struggle.

Fast food starts whispering your name, protein shakes become your sad dinner, and suddenly your so-called fitness meal prep plan looks more like “wing it and hope for the best.”

Been there, done that. But here’s the good news: easy gym meal prep doesn’t have to be boring or complicated.

In fact, with the right recipes, it can be delicious, high-protein, and actually something you look forward to eating.

This article is all about giving you high protein meal prep ideas that balance flavor and nutrition—whether you’re looking for a gym meal plan for women, bulking meal prep for gains, or just some healthy gym meals that don’t taste like cardboard.

And yes, we’ll even talk about pre workout food because no one deserves to train on an empty stomach.

Oh, and if you’re obsessed with high-protein lunches (like I am), you’ll want to check out this list of high-protein meal prep lunches after you finish here. Thank me later 😉.

1. Chicken Burrito Bowls with a Kick

Why It’s Awesome: Imagine Chipotle…but cheaper, healthier, and you can control the spice level. These bowls pack protein, carbs, and healthy fats into one magical container.

Ingredients

  • 2 cups cooked brown rice (or cauliflower rice if you’re low-carb)
  • 1 lb grilled chicken breast, diced
  • 1 can black beans, rinsed
  • 1 cup corn kernels
  • 1 diced bell pepper
  • ½ cup salsa
  • Optional: shredded cheese, avocado, jalapeños

Step-by-Step Instructions

  1. Cook rice and let it cool slightly.
  2. Layer rice, chicken, beans, corn, and veggies in containers.
  3. Top with salsa, cheese, or avocado right before eating.

Why You’ll Love It

This is the king of protein lunch prep ideas. It’s filling, customizable, and tastes even better after sitting in the fridge overnight.

2. Turkey and Quinoa Stuffed Peppers

Why It’s Awesome: These are the ultimate lean meal prep ideas. Colorful, satisfying, and packed with protein without being heavy.

Ingredients

  • 4 large bell peppers, halved
  • 1 lb ground turkey
  • 1 cup cooked quinoa
  • 1 small onion, diced
  • 1 can diced tomatoes
  • 1 tsp garlic powder
  • Optional: shredded mozzarella

Step-by-Step Instructions

  1. Preheat oven to 375°F (190°C).
  2. Cook ground turkey with onions and garlic.
  3. Mix in quinoa and tomatoes.
  4. Stuff peppers with the mixture and bake for 25–30 minutes.

Why You’ll Love It

These peppers make healthy gym meals that are easy to portion. They freeze well too—hello, future you will thank you.

3. Protein-Packed Breakfast Muffins

Why It’s Awesome: Meal prep isn’t just for lunch and dinner. These muffins are grab-and-go pre workout food that won’t weigh you down.

Ingredients

  • 6 large eggs
  • ½ cup cottage cheese
  • 1 cup diced veggies (spinach, mushrooms, bell peppers)
  • ½ cup cooked turkey bacon or chicken sausage
  • Salt and pepper to taste

Step-by-Step Instructions

  1. Preheat oven to 350°F (175°C).
  2. Whisk eggs, cottage cheese, and seasoning.
  3. Stir in veggies and protein.
  4. Pour into a greased muffin tin and bake 20 minutes.

Why You’ll Love It

These are the definition of simple protein meal prep. You can eat them hot, cold, or in the car when you’re running late. (Guilty.)

4. Salmon with Roasted Veggies

Why It’s Awesome: Omega-3s + protein + zero effort = a win. This one’s ideal if you want a balanced meal that feels gourmet without the work.

Ingredients

  • 4 salmon fillets
  • 2 cups broccoli florets
  • 1 cup diced sweet potatoes
  • 1 tbsp olive oil
  • Lemon wedges

Step-by-Step Instructions

  1. Preheat oven to 400°F (200°C).
  2. Toss veggies with olive oil, salt, and pepper.
  3. Place salmon and veggies on a sheet pan.
  4. Bake 20 minutes, squeeze with lemon.

Why You’ll Love It

It’s basically a spa day for your stomach. Light, nutritious, and perfect for fitness meal prep that doesn’t feel like diet food.

5. Greek Yogurt Chicken Salad

Why It’s Awesome: Swap mayo for Greek yogurt, and suddenly your old-school chicken salad becomes a high protein meal prep idea.

Ingredients

  • 2 cups shredded cooked chicken
  • ½ cup plain Greek yogurt
  • ¼ cup chopped celery
  • ¼ cup diced apples
  • 2 tbsp walnuts

Step-by-Step Instructions

  1. Mix chicken with Greek yogurt.
  2. Add celery, apples, and walnuts.
  3. Chill before serving.

Why You’ll Love It

This is one of those good protein meals for lunch that’s both creamy and crunchy. Pro tip: throw it in a wrap for the ultimate work lunch.

6. Beef and Broccoli Stir Fry

Why It’s Awesome: Your favorite takeout, but healthier and packed with protein.

Ingredients

  • 1 lb lean beef strips
  • 3 cups broccoli florets
  • 2 tbsp low-sodium soy sauce
  • 1 tbsp garlic
  • 1 tbsp sesame oil

Step-by-Step Instructions

  1. Heat sesame oil in a skillet.
  2. Stir fry beef until browned.
  3. Add broccoli, garlic, and soy sauce.
  4. Cook until broccoli is tender-crisp.

Why You’ll Love It

This is bulking meal prep made simple. It reheats beautifully and tastes like a treat, not “diet food.”

7. Lentil and Chickpea Power Bowls

Why It’s Awesome: For the plant-based crew, this one’s a protein-loaded meal that proves you don’t need meat to hit your macros.

Ingredients

  • 1 cup cooked lentils
  • 1 cup cooked chickpeas
  • 1 cup roasted veggies
  • ½ avocado
  • Drizzle of tahini

Step-by-Step Instructions

  1. Cook lentils and chickpeas (or grab canned).
  2. Roast veggies of choice.
  3. Assemble bowls with lentils, chickpeas, veggies, avocado, and tahini.

Why You’ll Love It

This is hearty, filling, and perfect for gym meal plans for women or anyone wanting plant-based gains.

8. Egg Fried Rice (Protein Edition)

Why It’s Awesome: Comfort food, but upgraded for the gym. Extra eggs = extra protein.

Ingredients

  • 3 cups cooked brown rice
  • 3 eggs, scrambled
  • 1 cup peas and carrots
  • 2 tbsp soy sauce
  • 1 tsp sesame oil

Step-by-Step Instructions

  1. Heat sesame oil in a wok.
  2. Add rice, veggies, and soy sauce.
  3. Stir in scrambled eggs.

Why You’ll Love It

This is simple protein meal prep at its finest. Plus, it tastes way better than leftover plain rice.

9. Cottage Cheese Protein Bowls

Why It’s Awesome: Sweet or savory, these bowls are versatile, high-protein, and ready in 2 minutes flat.

Ingredients

  • 1 cup cottage cheese
  • Toppings: berries + granola (sweet) or cucumber + smoked salmon (savory)

Step-by-Step Instructions

  1. Scoop cottage cheese into a bowl.
  2. Add your toppings of choice.

Why You’ll Love It

This is the ultimate work lunches high protein hack. No cooking required, endless flavor combos.

10. Sweet Potato and Black Bean Wraps

Why It’s Awesome: High-protein, high-fiber, and meal prep friendly. Wraps are the unsung hero of fitness meal prep.

Ingredients

  • 2 cups roasted sweet potatoes
  • 1 can black beans, rinsed
  • Whole wheat wraps
  • Optional: avocado, salsa

Step-by-Step Instructions

  1. Roast sweet potatoes until tender.
  2. Mash slightly with black beans.
  3. Wrap in tortillas and add toppings.

Why You’ll Love It

Portable, filling, and perfect for post-workout fuel. These wraps are proof that healthy gym meals don’t have to be bland.

Final Thoughts

Meal prepping for the gym doesn’t have to mean eating chicken and broccoli until you cry. With these recipes, you’ll have balanced meals, protein-loaded options, and enough variety to keep things fun.

Whether you’re chasing strength, fat loss, or just want better gym food recipes that make weekdays easier, this list has your back.

And hey, if you loved these, don’t forget to peek at my roundup of high-protein meal prep lunches—because let’s be honest, who couldn’t use more lunch inspo?

12 Delicious Overnight Weetabix Recipes to Try Tonight

If you’re looking for a quick and easy breakfast option that packs a nutritious punch, overnight Weetabix recipes are your answer! These simple, no-fuss recipes combine the goodness of Weetabix with your favorite fruits, nuts, and dairy or dairy alternatives, allowing you to prep your breakfast the night before. Just mix, refrigerate, and enjoy a delicious and satisfying meal to kickstart your day!

Matcha Green Tea Overnight Weetabix

A glass of matcha green tea overnight weetabix topped with nuts and seeds.

This Matcha Green Tea Overnight Weetabix is a delightful way to start your day. With its creamy texture and subtle earthy flavors from the matcha, it offers a refreshing twist to your typical breakfast routine. It’s incredibly simple to prepare, requiring just a few minutes of prep time the night before.

The combination of the wholesome Weetabix, rich matcha, and your choice of toppings creates a well-balanced meal that’s both nutritious and satisfying. Plus, it’s a great canvas for creativity—feel free to mix in fruits, nuts, or your favorite sweeteners!

Ingredients

  • 2 Weetabix biscuits
  • 1 cup milk (or a dairy-free alternative)
  • 1 tablespoon matcha powder
  • 1 tablespoon honey or maple syrup (to taste)
  • 1/2 teaspoon vanilla extract
  • Your choice of toppings (e.g., nuts, seeds, or fresh fruit)

Instructions

  1. In a bowl, crumble the Weetabix biscuits into smaller pieces.
  2. In a separate container, whisk together the milk, matcha powder, honey, and vanilla extract until smooth.
  3. Pour the matcha mixture over the crumbled Weetabix and stir until combined.
  4. Cover and refrigerate overnight.
  5. In the morning, give it a good stir and top with your favorite toppings before serving.

Cinnamon Apple Overnight Weetabix

A close-up view of a bowl filled with cinnamon apple overnight weetabix topped with diced apples and crunchy granola.

Cinnamon Apple Overnight Weetabix is a delightful breakfast option that combines the warm flavors of cinnamon and fresh apples. This dish is creamy, crunchy, and oh-so-fulfilling, making it a lovely choice to start your day. Plus, it’s incredibly simple to prepare, requiring just a few minutes of assembly the night before.

As you wake up, all you need to do is grab your bowl and enjoy a nutritious meal that’s packed with fiber and nutrients. The soothing taste of cinnamon pairs wonderfully with the crispness of apples, creating a breakfast that feels both comforting and refreshing.

Ingredients

  • 2 Weetabix biscuits
  • 1 cup milk (dairy or plant-based)
  • 1 medium apple, diced
  • 1 teaspoon ground cinnamon
  • 1 tablespoon honey or maple syrup (optional)
  • Granola for topping (optional)

Instructions

  1. In a bowl, crumble the Weetabix biscuits into small pieces.
  2. Add the milk and stir gently to combine.
  3. Fold in the diced apple and ground cinnamon. If you like it sweet, drizzle in honey or maple syrup.
  4. Cover the bowl with a lid or plastic wrap and refrigerate overnight.
  5. In the morning, give it a good stir, and top with granola for added crunch if desired. Enjoy your Cinnamon Apple Overnight Weetabix!

Berry Bliss Overnight Weetabix

A layered glass of Berry Bliss Overnight Weetabix with fresh berries and mint leaves.

Berry Bliss Overnight Weetabix is a delightful and refreshing breakfast option that combines the wholesome taste of Weetabix with the vibrant flavors of fresh berries. This recipe is not only simple to make but also offers a burst of fruity goodness that will kick-start your day. The creamy yogurt blends beautifully with the crunchy cereal and sweet berries, creating a texture that’s both satisfying and enjoyable.

Prepare this overnight treat in just a few minutes, and let the fridge do the work while you sleep. By morning, you’ll have a delicious and nutritious breakfast waiting for you, perfect for busy days or leisurely weekends. It’s a lovely way to enjoy your morning routine while indulging in a mix of flavors and textures.

Ingredients

  • 2 Weetabix biscuits
  • 1 cup Greek yogurt
  • 1/2 cup mixed berries (strawberries, blueberries, raspberries)
  • 1 tablespoon honey or maple syrup
  • 1/4 cup almond milk (or any milk of your choice)
  • Fresh mint leaves for garnish

Instructions

  1. In a bowl, break the Weetabix into smaller pieces and layer them at the bottom of a glass or jar.
  2. In a separate bowl, mix the Greek yogurt with honey or maple syrup, then pour half of this mixture over the Weetabix.
  3. Add a layer of mixed berries over the yogurt.
  4. Repeat the layers with the remaining Weetabix, yogurt, and berries.
  5. Pour almond milk over the top to soak the layers slightly.
  6. Cover and refrigerate overnight. In the morning, give it a gentle stir, garnish with fresh mint, and enjoy your Berry Bliss Overnight Weetabix!

Tropical Coconut Overnight Weetabix

Tropical Coconut Overnight Weetabix topped with Banana

Start your day on a sunny note with this Tropical Coconut Overnight Weetabix recipe! Combining the creamy richness of coconut with the light crunch of Weetabix creates a delightful breakfast that feels like a mini-vacation.

It’s super simple to prepare the night before, making your mornings less hectic. Just layer your ingredients in a jar, let it soak overnight, and wake up to a refreshing and tasty meal.

Ingredients

  • 2 Weetabix biscuits
  • 1 cup coconut milk (or any milk of choice)
  • 1/2 cup diced pineapple
  • 1/4 cup shredded coconut
  • 1 tablespoon honey or maple syrup (optional)
  • 2 tablespoons chopped nuts (like almonds or cashews)

Instructions

  1. Layer the Weetabix: In a jar or bowl, break the Weetabix into chunks and layer them at the bottom.
  2. Add Coconut Milk: Pour the coconut milk over the Weetabix, ensuring it’s well soaked.
  3. Layer the Fruit: Add the diced pineapple and shredded coconut on top.
  4. Sweeten: Drizzle with honey or maple syrup if you like it sweeter, then top with chopped nuts.
  5. Chill Overnight: Cover the jar and place it in the fridge overnight.
  6. Serve: In the morning, give it a gentle stir and enjoy your tropical treat!

Nutty Maple Overnight Weetabix

A bowl filled with mixed nuts and Weetabix, drizzled with maple syrup

Nuts and maple syrup come together in a delightful way to create a nutty maple overnight Weetabix that’s not only tasty but also super easy to whip up. This recipe is perfect for those busy mornings when you want something nutritious without a lot of fuss.

With a blend of crunchy nuts and the sweetness of maple syrup, each bite is a comforting experience. Plus, preparing it the night before means you can grab and go in the morning. Enjoy the satisfying crunch and the rich flavors with every spoonful!

Ingredients

  • 2 Weetabix biscuits
  • 1 cup milk (dairy or non-dairy)
  • 1/4 cup Greek yogurt
  • 2 tablespoons maple syrup
  • 1/4 cup mixed nuts (e.g., almonds, pecans, walnuts)
  • 1 tablespoon chia seeds (optional)
  • Fresh fruit (like banana or berries) for topping

Instructions

  1. Layer the Base: In a jar or container, crumble the Weetabix biscuits and place them at the bottom.
  2. Add the Liquids: Pour the milk and Greek yogurt over the crumbled Weetabix. Stir gently to combine.
  3. Sweeten it Up: Drizzle in the maple syrup and sprinkle the chia seeds if using. Mix well.
  4. Top with Nuts: Add the mixed nuts on top, pressing them slightly into the mixture.
  5. Chill Overnight: Cover the container and refrigerate overnight or for at least 4 hours to let the flavors meld.
  6. Serve and Enjoy: In the morning, give it a good stir, add fresh fruit on top, and enjoy your nutty maple overnight Weetabix!

Peanut Butter and Jelly Overnight Weetabix

A close-up view of a jar layered with peanut butter, jelly, and Weetabix.

This Peanut Butter and Jelly Overnight Weetabix recipe is a delightful twist on a classic flavor combination. It’s creamy, sweet, and oh-so-comforting, perfect for a quick breakfast or snack. Plus, it’s super easy to prepare, requiring just a few ingredients and minimal effort!

The crunchy texture of Weetabix pairs perfectly with the smoothness of peanut butter and the fruity sweetness of jelly. You can customize it with your favorite flavors, making it a fun and personal treat. Ideal for busy mornings, this recipe combines taste and convenience in one jar!

Ingredients

  • 2 Weetabix biscuits
  • 1 cup milk (dairy or plant-based)
  • 2 tablespoons peanut butter
  • 2 tablespoons fruit jelly or jam
  • 1 teaspoon honey or maple syrup (optional)
  • Fresh fruit for topping (optional)

Instructions

  1. Layer the Weetabix in a jar or bowl, breaking them into smaller pieces if desired.
  2. Pour the milk over the Weetabix, ensuring they are well-soaked.
  3. Spread the peanut butter on top, then add a layer of jelly or jam.
  4. If you like it sweeter, drizzle honey or maple syrup on top.
  5. Cover and refrigerate overnight. In the morning, top with fresh fruit if desired, and enjoy!

Chocolate Banana Overnight Weetabix

A bowl of chocolate banana overnight weetabix topped with banana slices and chocolate chips.

This Chocolate Banana Overnight Weetabix is a delightful way to start your day. It’s creamy, chocolatey, and has a hint of sweetness from the bananas. Plus, it’s incredibly easy to prepare—just mix everything the night before and let the fridge do the work!

With layers of flavorful ingredients, you get a delicious breakfast that’s both satisfying and nutritious. The combination of chocolate and banana is not only tasty but also gives you a nice energy boost to kick off your morning. This recipe is perfect for busy mornings or a relaxed weekend brunch!

Ingredients

  • 2 Weetabix biscuits
  • 1 cup milk (dairy or plant-based)
  • 1 tablespoon cocoa powder
  • 1 tablespoon honey or maple syrup
  • 1 banana, sliced
  • 1 tablespoon chia seeds (optional)
  • Chocolate chips or shavings for topping

Instructions

  1. In a bowl, break the Weetabix into smaller pieces and place them at the bottom of a jar or container.
  2. In a separate bowl, mix the milk, cocoa powder, and honey until well combined.
  3. Pour the chocolate milk mixture over the Weetabix and stir gently to combine.
  4. Add the chia seeds if using, and mix again.
  5. Layer the sliced bananas on top, cover the container, and refrigerate overnight.
  6. In the morning, give it a good stir, top with chocolate chips or shavings, and enjoy your delicious breakfast!

Chia Seed and Weetabix Pudding

Close up of chia seed and weetabix pudding with fresh fruits and granola

Chia Seed and Weetabix Pudding is a delightful way to start your day! This simple recipe combines the wholesome crunch of Weetabix with the creamy texture of chia seeds soaked overnight. It’s not only tasty but also packed with nutrients, making it a great breakfast option that leaves you feeling satisfied.

The creamy pudding has a mild sweetness and pairs beautifully with fresh fruits, offering a refreshing balance of flavors. Plus, it’s super easy to prepare—just mix, soak, and enjoy! Let’s dive into the ingredients and simple steps to whip up this delicious treat.

Ingredients

  • 2 Weetabix biscuits
  • 1/4 cup chia seeds
  • 1 cup almond milk (or any milk of choice)
  • 1 tablespoon honey or maple syrup (optional)
  • 1/2 teaspoon vanilla extract
  • Your choice of fresh fruits (e.g., berries, banana, or mango)
  • Granola or nuts for topping (optional)

Instructions

  1. In a mixing bowl, crumble the Weetabix biscuits and add chia seeds, almond milk, honey, and vanilla extract. Stir until well combined.
  2. Cover the bowl and refrigerate overnight, allowing the chia seeds to absorb the liquid and thicken.
  3. In the morning, give the pudding a good stir. If it’s too thick, add a splash more milk to reach your desired consistency.
  4. Top with fresh fruits and granola or nuts for some added crunch, and enjoy your ready-to-eat breakfast!

Pumpkin Spice Overnight Weetabix

A close-up view of a jar containing Pumpkin Spice Overnight Weetabix surrounded by small pumpkins and spices.

Kickstart your mornings with a warm embrace of autumn flavors in this Pumpkin Spice Overnight Weetabix. This simple recipe combines the wholesome goodness of Weetabix with the rich, cozy taste of pumpkin spice, creating a delightful breakfast that’s both nutritious and satisfying.

It’s easy to prepare and can be made ahead of time, making it a perfect choice for busy mornings. Just mix and chill overnight for a convenient, delicious meal that’s packed with flavor!

Ingredients

  • 2 Weetabix biscuits
  • 1 cup unsweetened almond milk (or any milk of choice)
  • 1/2 cup pumpkin puree
  • 1 tablespoon maple syrup
  • 1 teaspoon pumpkin spice
  • 1/4 teaspoon vanilla extract
  • Chopped nuts or granola for topping
  • Additional pumpkin spice for garnish

Instructions

  1. In a bowl, crumble the Weetabix biscuits into small pieces.
  2. Add the almond milk, pumpkin puree, maple syrup, pumpkin spice, and vanilla extract. Stir until well combined.
  3. Transfer the mixture to a jar or container and cover it. Refrigerate overnight to let the flavors meld.
  4. In the morning, give it a good stir and top with chopped nuts or granola. Sprinkle additional pumpkin spice on top before serving.

Caramelized Pear Overnight Weetabix

A close-up of Caramelized Pear Overnight Weetabix topped with pear slices and caramel sauce.

Caramelized Pear Overnight Weetabix is a delightful treat that combines the wholesome goodness of Weetabix with the sweet, warm notes of caramelized pears. This recipe is not only simple but also provides a comforting breakfast option that’s perfect for busy mornings. The combination of crunchy Weetabix and soft, sweet pears creates a lovely texture contrast that is sure to brighten your day.

The caramelized pears add a rich flavor that pairs beautifully with creamy yogurt or milk, making each bite a delicious experience. Plus, you can prepare this dish the night before, making it a convenient choice for anyone looking to enjoy a nutritious breakfast without much hassle.

Ingredients

  • 2 Weetabix biscuits
  • 1 ripe pear, sliced
  • 1 tablespoon brown sugar
  • 1 tablespoon butter
  • 1/2 teaspoon cinnamon
  • 1 cup milk or yogurt
  • Honey or maple syrup (optional)
  • Chopped nuts (optional)

Instructions

  1. Caramelize the Pears: In a skillet over medium heat, melt the butter. Add the sliced pear, brown sugar, and cinnamon. Cook for about 5 minutes, stirring occasionally, until the pears are tender and golden.
  2. Assemble: In a jar or bowl, layer the Weetabix, caramelized pears, and milk or yogurt. Make sure to distribute the caramelized pears evenly.
  3. Refrigerate: Cover and refrigerate overnight to let the flavors meld together.
  4. Serve: In the morning, drizzle with honey or maple syrup, and sprinkle with chopped nuts if desired. Enjoy your delicious Caramelized Pear Overnight Weetabix!

Almond Joy Overnight Weetabix

A bowl of almond joy overnight weetabix topped with chocolate, shredded coconut, and almonds

If you’re looking for a deliciously simple breakfast that feels indulgent, Almond Joy Overnight Weetabix is the way to go. This recipe combines the crunchy texture of Weetabix with the rich flavors of chocolate, coconut, and almonds, creating a treat that tastes like dessert but is packed with nutrition. Plus, it’s incredibly easy to prepare the night before, so you can wake up to a hassle-free and satisfying meal.

The blend of creamy yogurt and milk with the Weetabix makes for a delightful consistency, while the toppings add a crunchy finish. It’s a fun twist on classic overnight oats that will keep you energized throughout the morning.

Ingredients

  • 2 Weetabix biscuits
  • 1 cup milk (dairy or non-dairy)
  • 1 cup Greek yogurt
  • 2 tablespoons cocoa powder
  • 1 tablespoon honey or maple syrup
  • 1/4 cup shredded coconut
  • 1/4 cup sliced almonds
  • 2 tablespoons chocolate chips

Instructions

  1. Layer the Base: In a jar or bowl, crumble the Weetabix biscuits. Pour in the milk and mix well until the biscuits are coated.
  2. Add Yogurt: Next, layer the Greek yogurt over the Weetabix mixture. This creates a creamy texture that pairs perfectly with the crunch.
  3. Flavor It Up: Sprinkle the cocoa powder and drizzle honey or maple syrup over the yogurt layer. Stir gently to combine the flavors.
  4. Incorporate Toppings: Add the shredded coconut and half of the sliced almonds on top. Finish with a handful of chocolate chips for a little extra sweetness.
  5. Chill: Cover the jar or bowl and place it in the refrigerator overnight. Allowing it to sit will let the flavors meld beautifully.
  6. Serve: In the morning, give it a gentle stir, top with the remaining almonds, and enjoy!

Savory Avocado Overnight Weetabix

Savory avocado overnight Weetabix with cherry tomatoes on a plate

If you’re looking for a breakfast that’s both satisfying and delicious, savory avocado overnight Weetabix is the way to go. This dish combines the crunchy texture of Weetabix with creamy avocado and fresh toppings, creating a fun, savory twist on traditional overnight oats. It’s simple to make, perfect for busy mornings, and packs a punch of flavor!

This recipe is not only easy but also customizable. You can add your favorite seasonings or toppings to suit your taste. Imagine waking up to a nutritious meal that you can prepare the night before. It’s truly a breakfast that will keep you energized throughout the day!

Ingredients

  • 2 Weetabix biscuits
  • 1 ripe avocado
  • 1/2 cup unsweetened almond milk (or your choice of milk)
  • 1 tablespoon lemon juice
  • Salt and pepper to taste
  • Cherry tomatoes, halved (for topping)
  • Sesame seeds (for garnish)

Instructions

  1. In a bowl, crumble the Weetabix biscuits into small pieces.
  2. In a separate bowl, mash the avocado with lemon juice, salt, and pepper.
  3. Layer the crumbled Weetabix in a jar or bowl, followed by the avocado mix, and pour in the almond milk to soak it all.
  4. Cover and refrigerate overnight.
  5. In the morning, give it a good stir, top with halved cherry tomatoes and sprinkle sesame seeds before serving.

12 Incredible Unexpected Recipes to Try Today

Ready to shake up your kitchen routine? Dive into these 12 epic unexpected recipes that bring a twist to familiar flavors. From savory to sweet, each dish is designed to surprise your taste buds and inspire creativity in your cooking. Get ready to impress yourself and anyone lucky enough to share your culinary adventures!

1. Chocolate Avocado Mousse

Two servings of chocolate avocado mousse topped with berries and mint on a wooden table.

Who knew that avocados could create such a creamy dessert? This chocolate avocado mousse is rich and satisfying, making it the perfect sweet treat without the guilt. Top it off with fresh berries and mint for a pop of color and flavor!

2. Cauliflower Buffalo Wings

A platter of Cauliflower Buffalo Wings drizzled with hot sauce, accompanied by celery sticks and a small bowl of ranch dressing.

Cauliflower Buffalo Wings are a fun twist on a classic snack. These crispy bites are coated in spicy sauce and served with a cool dip, making them perfect for sharing. Whether you’re a veggie lover or just looking for a tasty alternative, these wings are sure to please!

3. Zucchini Noodles

A plate of zucchini noodles topped with cherry tomatoes, olives, and fresh herbs.

Zucchini noodles are a fun twist on traditional pasta. They’re light, fresh, and soak up flavors beautifully. Toss them with some cherry tomatoes, olives, and a drizzle of olive oil for a quick and tasty meal!

4. Chickpea Pancakes

A stack of chickpea pancakes topped with yogurt and cherry tomatoes, served on a plate.

Chickpea pancakes are a fun twist on the traditional breakfast favorite. Made from simple ingredients, they pack a protein punch and are super easy to whip up. Top them with yogurt and cherry tomatoes for a fresh and tasty meal any time of day.

5. Sweet Potato Brownies

A plate of sweet potato brownies dusted with powdered sugar, surrounded by sweet potatoes and chocolate chips.

Sweet potato brownies are a tasty twist on a classic dessert. They’re rich, fudgy, and pack a hidden veggie punch that makes them a fun treat. Whether you’re a sweet potato lover or just curious, these brownies are worth a try!

6. Savory Oatmeal

A bowl of savory oatmeal topped with a poached egg, avocado, and spinach.

If you think oatmeal can only be sweet, think again! Savory oatmeal is a delightful twist that combines creamy grains with toppings like poached eggs, fresh greens, and avocado. It’s a simple way to start your day with something different while still being super satisfying.

7. Avocado Chocolate Pudding

A bowl of creamy avocado chocolate pudding garnished with raspberries and green apple slices.

Avocado chocolate pudding is a sweet surprise that’s both creamy and rich. Made with ripe avocados, cocoa powder, and a touch of sweetener, it’s a treat you won’t forget. Top it off with some fresh raspberries for a fun twist!

8. Quinoa Stuffed Peppers

Colorful quinoa stuffed peppers filled with vegetables

Quinoa stuffed peppers are a tasty and healthy option for your next meal. These vibrant peppers are filled with fluffy quinoa, fresh veggies, and spices to create a satisfying dish. They’re easy to make and perfect for meal prep or a cozy dinner.

9. Eggplant Pizza

A delicious eggplant pizza topped with colorful vegetables on a wooden table.

Eggplant pizza is a fun twist on your usual pizza night. Instead of traditional dough, you use thick slices of eggplant as the base, topped with your favorite sauces and veggies. It’s a tasty way to sneak in some extra vegetables while still enjoying a classic dish.

10. Peanut Butter Banana Sushi

A plate of peanut butter banana sushi rolls with fresh berries and sauce

Peanut Butter Banana Sushi is a fun twist on a classic snack! Just spread some peanut butter on a tortilla, add banana slices, and roll it all up. Slice it like sushi, and you’ve got a tasty treat that’s perfect for kids and adults alike.

11. Chia Seed Pudding

A jar of chia seed pudding topped with strawberries, blueberries, and raspberries, with honey being drizzled on top.

Chia seed pudding is a fun and simple treat that anyone can make. Just mix chia seeds with your favorite milk, let it sit overnight, and you’re ready to enjoy! Top it off with fresh fruits and a drizzle of honey for a sweet touch.

12. Ramen Noodle Salad

A bowl of ramen noodle salad topped with colorful vegetables and nuts.

This ramen noodle salad brings a fun twist to your usual pasta dishes. Tossed with colorful veggies and crunchy nuts, it’s a tasty mix of textures and flavors. Perfect as a side or a light meal, you’ll love how easy it is to whip up!

10 Delicious Easter Overnight Oats Recipes to Try This Spring

Easter Overnight Oats are a delightful way to celebrate the spring season while enjoying a nutritious breakfast. Combining creamy oats with festive flavors and colorful toppings, these jars are not only easy to prepare but also offer a fun and tasty twist for your morning routine. Perfect for those busy holiday mornings, just make them the night before and wake up to a convenient and flavorful treat!

1. Easter Carrot Cake Overnight Oats

These Easter Carrot Cake Overnight Oats are a delicious way to start your day! They blend the comforting flavors of carrot cake with the convenience of overnight oats, creating a treat that is both satisfying and nutritious. With hints of cinnamon, nutmeg, and sweet carrots, you’ll feel like you’re enjoying dessert for breakfast.

The best part? They’re super easy to make! Simply mix the ingredients the night before, let them chill in the refrigerator, and wake up to a creamy and flavorful breakfast. Finding ways to enjoy oats can be a challenge, but this recipe makes it fun and festive.

Ingredients

  • 1 cup rolled oats
  • 1 cup milk (dairy or non-dairy)
  • 1/2 cup grated carrot
  • 1/4 cup Greek yogurt or a dairy-free alternative
  • 2 tablespoons maple syrup or honey
  • 1 teaspoon vanilla extract
  • 1/2 teaspoon ground cinnamon
  • 1/4 teaspoon ground nutmeg
  • 1/4 cup chopped walnuts or pecans
  • Optional: raisins or coconut flakes for added flavor

Instructions

  1. In a medium bowl, combine rolled oats, milk, grated carrot, Greek yogurt, maple syrup, vanilla extract, cinnamon, and nutmeg.
  2. Mix well until all ingredients are combined.
  3. Divide the mixture into jars or airtight containers and top with chopped walnuts or pecans.
  4. Cover and refrigerate overnight (or at least 4 hours) to let the oats soak and flavors meld.
  5. In the morning, give the oats a good stir. Add more milk if needed for desired consistency and enjoy!

2. Chocolate Peanut Butter Easter Overnight Oats

A jar of chocolate peanut butter overnight oats topped with chocolate chips and a cookie.

Chocolate Peanut Butter Easter Overnight Oats are a delightful breakfast that’s both tasty and easy to prepare. With a rich chocolate flavor and creamy peanut butter goodness, this recipe will make your mornings feel special, especially around the Easter holiday. The combination of ingredients creates a satisfying meal that keeps you fueled throughout the day.

Not only are these overnight oats simple to make, but they can also be customized to suit your taste. Just combine the ingredients the night before, and you’ll wake up to a delicious breakfast ready to go. For a sweet twist, you can even add some festive toppings like mini chocolate eggs or bunny-shaped cookies. Check out this Chocolate Peanut Butter Overnight Oats recipe for inspiration!

Ingredients

  • 1/2 cup rolled oats
  • 1 cup almond milk (or any milk of your choice)
  • 2 tablespoons cocoa powder
  • 2 tablespoons peanut butter
  • 1 tablespoon maple syrup (or honey)
  • 1/2 teaspoon vanilla extract
  • 1/4 cup chocolate chips (for topping)
  • 1 tablespoon chopped peanuts (for topping)

Instructions

  1. In a jar or container, combine rolled oats, almond milk, cocoa powder, peanut butter, maple syrup, and vanilla extract. Stir well until all ingredients are fully mixed.
  2. Cover the jar and refrigerate overnight, allowing the oats to soak and soften.
  3. The next morning, give the oats a good stir and add a splash of milk if it’s too thick for your liking.
  4. Top with chocolate chips and chopped peanuts before serving. Enjoy your delicious Chocolate Peanut Butter Easter Overnight Oats!

3. Coconut Cream Easter Overnight Oats

A bowl of coconut cream overnight oats topped with mango slices, shredded coconut, and edible flowers, surrounded by colorful Easter eggs.

Coconut Cream Easter Overnight Oats is a delightful way to celebrate the season with a tropical twist. Combining creamy coconut with oats creates a smooth and rich texture that makes for a satisfying breakfast. This recipe is easy to whip up the night before, allowing you to enjoy a delicious and nutritious meal without the morning rush.

The combination of coconut, fresh fruits, and a hint of sweetness offers a refreshing taste that’s perfect for Easter brunch or any spring morning. Your family and friends will love the flavors, and you’ll appreciate how simple it is to prepare.

Ingredients

  • 1 cup rolled oats
  • 1 cup coconut milk
  • 1/4 cup Greek yogurt
  • 2 tablespoons chia seeds
  • 2 tablespoons honey or maple syrup (to taste)
  • 1/2 teaspoon vanilla extract
  • 1/4 cup shredded coconut
  • Fresh fruit (like mango or berries) for topping
  • Edible flowers for garnish (optional)

Instructions

  1. In a medium bowl, combine the rolled oats, coconut milk, Greek yogurt, chia seeds, honey or maple syrup, and vanilla extract. Mix well until all ingredients are combined.
  2. Transfer the mixture to a jar or airtight container. Cover and refrigerate overnight, or for at least 4 hours, to allow the oats to soften and absorb the liquid.
  3. Before serving, stir the oats and add more coconut milk if needed to reach your desired consistency.
  4. Top with shredded coconut, fresh fruit, and edible flowers for a festive touch. Enjoy your delicious Coconut Cream Easter Overnight Oats!

4. Berry Bliss Easter Overnight Oats

Berry Bliss Overnight Oats with strawberries, blueberries, and raspberries

Berry Bliss Easter Overnight Oats are a delightful way to celebrate the season with a burst of fresh flavor. This recipe is as simple as it is delicious—just mix, refrigerate overnight, and enjoy the next morning. Each spoonful is packed with juicy strawberries, blueberries, and raspberries, creating a fruity treat that’s perfect for breakfast or a snack.

The oats soak in creamy yogurt and a splash of milk, making them soft and satisfying. Plus, it’s a quick meal prep option that can brighten up your Easter morning. For those who love a nutritious start to their day, these oats are a fun and tasty choice.

Ingredients

  • 1 cup rolled oats
  • 1 cup milk (dairy or non-dairy)
  • 1/2 cup yogurt (Greek or regular)
  • 1 tablespoon honey or maple syrup (optional)
  • 1/2 cup mixed berries (strawberries, blueberries, raspberries)
  • 1 teaspoon vanilla extract
  • 1 tablespoon chia seeds (optional)

Instructions

  1. In a bowl, combine rolled oats, milk, yogurt, honey (if using), vanilla extract, and chia seeds. Stir until well mixed.
  2. Add the mixed berries, gently folding them into the mixture.
  3. Divide the mixture into jars or containers with lids, sealing them tightly.
  4. Refrigerate overnight (at least 4 hours) to allow the oats to soak up the liquid.
  5. In the morning, give the oats a good stir, and enjoy them cold or warm them up in the microwave if preferred.

5. Banana Bread Overnight Oats

A bowl of banana bread overnight oats topped with bananas and walnuts.

Banana Bread Overnight Oats are a delightful way to enjoy the flavors of banana bread in a healthy breakfast format. They are creamy, sweet, and packed with the goodness of oats and bananas. This recipe is not only simple to prepare but also allows for customization to suit your taste buds.

Perfect for busy mornings, these overnight oats save time while delivering a satisfying start to your day. Just mix your ingredients the night before, refrigerate, and wake up to a delicious, nourishing meal.

Ingredients

  • 1 cup rolled oats
  • 1 banana, mashed
  • 1 cup milk (dairy or non-dairy)
  • 1/2 teaspoon vanilla extract
  • 1/2 teaspoon cinnamon
  • 1 tablespoon maple syrup or honey (optional)
  • 1/4 cup chopped walnuts
  • Additional banana slices for topping

Instructions

  1. In a bowl, combine rolled oats, mashed banana, milk, vanilla extract, cinnamon, and sweetener if using.
  2. Stir well until everything is mixed and the oats are thoroughly coated.
  3. Transfer the mixture into a jar or container with a lid and refrigerate overnight.
  4. In the morning, give the oats a good stir and top with chopped walnuts and banana slices before serving.

6. Lemon Poppy Seed Overnight Oats

Lemon Poppy Seed Overnight Oats offer a refreshing twist to your breakfast routine. Bright and zesty, these oats are a delightful way to start your day, combining the tang of lemon with the subtle crunch of poppy seeds. Plus, they are incredibly easy to prepare—just mix, chill, and enjoy!

This recipe is not only delicious but also nutritious, making it a great option for those busy mornings or a leisurely brunch. The creamy texture of the oats pairs perfectly with the citrus flavor, bringing a taste of spring to your table.

Ingredients

  • 1 cup rolled oats
  • 1 cup almond milk (or any milk of choice)
  • 1/2 cup Greek yogurt
  • 2 tablespoons honey or maple syrup
  • 1 tablespoon lemon juice
  • 1 teaspoon lemon zest
  • 1 tablespoon poppy seeds
  • Fresh fruit for topping (optional)

Instructions

  1. In a mixing bowl, combine rolled oats, almond milk, Greek yogurt, honey, lemon juice, and lemon zest. Stir well to ensure all ingredients are evenly mixed.
  2. Add in the poppy seeds and mix again to distribute them throughout the mixture.
  3. Transfer the mixture to an airtight container or individual jars. Seal and refrigerate overnight, or for at least 4 hours, to allow the oats to absorb the liquid and flavors.
  4. When ready to serve, give the oats a good stir and top with fresh fruit, if desired. Enjoy your zesty breakfast!

7. Peach Cobbler Overnight Oats

Bowl of peach cobbler overnight oats topped with peach slices and granola.

Peach Cobbler Overnight Oats are a delightful twist on a classic dessert, perfect for breakfast or a snack. This recipe combines the sweet and juicy flavors of peaches with the comforting texture of oats, creating a tasty treat that’s both satisfying and nutritious. With just a few simple ingredients, you can whip up this easy dish in no time, making it a great option for busy mornings.

Not only do these overnight oats taste fantastic, but they also provide a wholesome start to your day. The combination of oats, yogurt, and fresh peaches offers a good balance of fiber and protein. Plus, you can easily customize it by adding nuts or seeds for extra crunch.

Ingredients

  • 1 cup rolled oats
  • 1 cup milk (or dairy-free alternative)
  • 1/2 cup yogurt (plain or flavored)
  • 1 ripe peach, sliced
  • 1 tablespoon honey or maple syrup (to taste)
  • 1/2 teaspoon cinnamon
  • 1/4 teaspoon vanilla extract
  • Granola or nuts for topping (optional)

Instructions

  1. In a bowl or jar, combine the rolled oats, milk, yogurt, honey, cinnamon, and vanilla extract. Stir well to combine.
  2. Fold in the sliced peaches, reserving a few for topping later.
  3. Cover the bowl or jar and refrigerate overnight (or at least 4 hours) to let the oats soak up the liquid.
  4. In the morning, give the oats a good stir and top with the reserved peach slices and granola or nuts, if desired.
  5. Enjoy your delicious and healthy Peach Cobbler Overnight Oats!

8. Maple Cinnamon Overnight Oats

Maple Cinnamon Overnight Oats

Maple Cinnamon Overnight Oats are a delightful breakfast that combines the warm flavors of cinnamon and sweet maple syrup. This recipe is not only delicious but also incredibly easy to prepare, making your mornings a breeze. Simply mix the ingredients the night before, and you’ll wake up to a hearty meal that’s ready to eat.

The creamy oats paired with a hint of maple and cinnamon create a comforting dish that feels indulgent without being overly sweet. It’s a great way to start the day, packed with fiber and satisfying enough to keep you going until lunch.

9. Almond Joy Overnight Oats

Easter is the perfect time to enjoy a sweet and satisfying breakfast, and Almond Joy Overnight Oats fit the bill! Combining rich chocolate, crunchy almonds, and coconut, this recipe is a delightful twist on the classic almond joy candy bar. It’s not only delicious but also simple to prepare, making it ideal for busy mornings.

These overnight oats are creamy, nutty, and just the right amount of sweet. With minimal prep time, you can whip them up the night before and wake up to a breakfast that feels like a treat. Whether you’re celebrating Easter or just treating yourself, these oats are sure to please!

Ingredients

  • 1/2 cup rolled oats
  • 1 cup almond milk
  • 2 tablespoons cocoa powder
  • 1 tablespoon maple syrup
  • 1/4 cup shredded coconut
  • 1/4 cup chopped almonds
  • 1/4 cup dark chocolate chips

Instructions

  1. In a bowl, mix rolled oats, almond milk, cocoa powder, and maple syrup until well combined.
  2. Stir in half of the shredded coconut and chocolate chips, reserving the rest for topping.
  3. Cover and refrigerate overnight, allowing the oats to absorb the liquid.
  4. The next morning, top with the remaining coconut, chocolate chips, and chopped almonds before serving.

10. Pumpkin Spice Overnight Oats

A bowl of pumpkin spice overnight oats topped with pumpkin seeds.

These Pumpkin Spice Overnight Oats are a delightful way to start your day, especially during the festive season. With a warm blend of pumpkin, spices, and creamy oats, they offer a cozy flavor that feels like a hug in a bowl. What’s even better is how simple they are to prepare; just mix, refrigerate, and enjoy in the morning.

This recipe is not only tasty but also nutritious, making it a perfect breakfast option for busy mornings or leisurely weekends. You can customize it with your favorite toppings or enjoy it as is.

Ingredients

  • 1 cup rolled oats
  • 1 cup almond milk (or milk of choice)
  • 1/2 cup canned pumpkin puree
  • 1 tablespoon maple syrup
  • 1 teaspoon pumpkin pie spice
  • 1/2 teaspoon vanilla extract
  • Pumpkin seeds and additional spices for topping (optional)

Instructions

  1. In a medium bowl, combine rolled oats, almond milk, pumpkin puree, maple syrup, pumpkin pie spice, and vanilla extract. Stir well to combine.
  2. Transfer the mixture to a jar or airtight container and seal it. Refrigerate overnight, or for at least 4 hours.
  3. In the morning, give the oats a good stir. Add a splash more milk if needed to reach your desired consistency.
  4. Top with pumpkin seeds and a sprinkle of cinnamon before serving. Enjoy!

6 Irresistible Frozen Banana Snacks to Try Today

What makes frozen banana snacks so tasty and good for you? They are packed with nutrients and low in calories. This makes them a top choice for those looking for a healthy treat.

Save now so you can come back and make more!

Frozen banana snacks offer endless possibilities. From classic chocolate-dipped bites to new ideas, there’s something for everyone. Inspired by Trader Joe’s ‘Gone Bananas’, I’ve found frozen banana snacks to be a game-changer. They provide a sweet treat that’s both low in calories and full of nutrients.

In this article, I’ll dive into the world of frozen banana snacks. I’ll share my top picks for you to try today. Each snack is carefully chosen to be both low calorie and healthy.

Why Frozen Banana Snacks Are Your New Favourite Healthy Treat

Frozen banana snacks are perfect for those seeking a healthy, gluten-free option. They are low in calories but packed with nutrients. This makes them a tasty and nutritious choice for snacking.

These snacks are also easy to make and can be tailored to your taste. You can dip them in chocolate or top with caramel, coconut, or nuts. Here are some key benefits:

  • Low in calories, with approximately 128 kcal per serving
  • Good source of potassium, with 166 mg per serving
  • Rich in fiber, with 1 g per serving
  • Gluten-free, making them an excellent option for those with dietary restrictions

Frozen banana snacks are also convenient to prepare and store. They can be made in under 40 minutes and kept in the freezer for weeks. Their health benefits and ease of making make them a great choice for a healthy snack.

1. Classic Chocolate-Dipped Frozen Banana Snacks

To make these tasty treats, I freeze bananas for about 3 hours until they’re firm. This makes the chocolate stick better. Then, I melt 12 ounces of milk chocolate chips over simmering water. I’m careful not to let the chocolate get too hot, as water can make it grainy.

Dipping the bananas in chocolate is easy. I coat each banana slice evenly. The chocolate hardens in 60 to 90 seconds. This makes a snack that’s low in calories but still delicious. Each serving has just 130 kcal, making it a guilt-free choice.

Here’s what you need and some tips:

  • 3 medium ripe bananas (or 2 large)
  • 12 ounces of milk chocolate chips
  • 2 tablespoons of vegetable oil (coconut oil can be used as an alternative)
  • Freeze bananas for at least 3 hours or overnight
  • Store frozen chocolate-covered bananas in an airtight container for up to 3 months

These snacks are not only tasty but also healthy. They’re great for any snack time. With their low calorie count and lots of nutrients, they’re perfect for those who want to enjoy something sweet without ruining their diet.

2. Frozen Banana Nice Cream Bites

To make these bites, you need 6 ripe bananas and 3/4 cup of mini chocolate chips. They’re a healthier ice cream alternative, with about 105 calories per serving. It takes about 1.5 hours to prepare, including 1 hour to freeze the bananas and 5 minutes to soften them before blending.

First, blend the frozen bananas into a creamy mix. Then, add the chocolate chips. You can change this recipe to fit your taste and dietary needs. Try different chocolate chips or add nuts or fruit.

Here are some tips for making these bites:

  • Use ripe bananas for the best flavor and texture.
  • Freeze the banana slices for at least 1 hour to get a firm texture.
  • Let the frozen bananas soften for 5 minutes before processing to get a creamy consistency.
  • Store the banana ice cream bites in an airtight container in the freezer for up to 3 months.

Frozen banana nice cream bites are a healthy and tasty dessert for hot summer days. They’re gluten free and low in calories, making them a great choice for a healthier treat. So, try this recipe and enjoy your delicious and healthy frozen banana nice cream bites!

3. Peanut Butter Banana Frozen Sandwiches

I’m excited to share with you a delicious and healthy snack option – peanut butter banana frozen sandwiches. These sandwiches are not only low calorie but also packed with nutrients. They make a great choice for a quick snack.

To make these sandwiches, you’ll need frozen banana slices, peanut butter, and dark chocolate chips. Spread peanut butter on a frozen banana slice, then sandwich it with another slice. Finally, dip it in melted chocolate. The result is a tasty and healthy treat perfect for any time of day.

Here are some benefits of peanut butter banana frozen sandwiches:

  • Low calorie and healthy, making them a great snack option
  • High in protein and fiber, keeping you full and satisfied
  • Can be customized with different types of peanut butter and chocolate
  • Easy to make and fun to eat

With their high nutritional value and delicious taste, peanut butter banana frozen sandwiches are a great addition to a healthy diet. They’re perfect for a quick snack or as a dessert option. So why not give them a try and enjoy a low calorie and healthy treat that’s sure to satisfy your cravings?

4. Tropical Frozen Banana Pops

To make these tasty treats, you need bananas, yogurt, and honey. It takes about 10 minutes to prepare and 2-3 hours to freeze. Each serving has 126 calories.

Dip frozen banana slices in yogurt and honey mix and freeze until firm. You can change the recipe by using different yogurts and honeys. Make sure the yogurt is gluten-free for a gluten-free option.

Here are some tips for making tropical frozen banana pops:

  • Use ripe bananas for the best flavor.
  • Experiment with different types of yogurt and honey to find your favorite combination.
  • Consider adding other ingredients, such as nuts or seeds, for extra texture and flavor.

These tropical frozen banana pops are not only delicious but also healthy. With only 126 calories per serving, you can enjoy them without guilt. They are gluten-free, making them perfect for those with dietary restrictions. So, why not try them and enjoy a sweet, healthy treat?

5. Chunky Monkey Frozen Banana Clusters

I’m excited to share chunky monkey frozen banana clusters with you. This snack mixes frozen banana slices with nuts and chocolate chips. It’s a tasty, healthy option that’s low in calories and packed with nutrients.

To make it, you’ll need 3-4 cups of ripe banana slices, 1 cup of Greek yogurt, and 1-4 tablespoons of honey or maple syrup. Add 1/2 cup of creamy peanut butter for extra taste. The chocolate coating uses 12 ounces of semi-sweet or dark chocolate and 1 tablespoon of coconut oil. Each serving has about 160 kcal, making it a low-calorie choice.

Here are some key benefits of chunky monkey frozen banana clusters:

  • Low calorie and healthy snack option
  • Rich in nutrients, including potassium and fiber
  • Customizable with different ingredients, such as nuts and chocolate chips
  • Easy to make and store, with a storage duration of up to 3 months
Chunky Monkey Frozen Banana Clusters

This snack is great for anyone wanting a healthy treat. With its low calorie count and nutrient-rich profile, it’s perfect for a quick snack or dessert. Try it out and enjoy the delicious taste and health benefits it offers.

6. Quick and Easy Banana Smoothie Ice Lollies

Try making quick and easy banana smoothie ice lollies for a tasty, healthy snack. They’re perfect for hot summer days and are gluten free. With frozen bananas, yogurt, and honey, you get a refreshing treat that’s low in calories and full of nutrients.

This recipe takes just 5 minutes to prepare and makes 6 medium-sized popsicles. You can add your own twist by using chopped strawberries or mini chocolate chips. For a creamier texture, blend the ingredients well with a high-powered blender.

Here are some tips for making the perfect banana smoothie ice lollies:

  • Use ripe bananas for the best flavor
  • Choose a gluten free yogurt to ensure the snack is gluten free
  • Add a splash of honey for sweetness
  • Experiment with different ingredients, such as peanut butter or vanilla extract, for unique flavors

These ice lollies are not only delicious but also a healthy snack option. With about 184 kcal per serving, they’re great for a quick energy boost. Store them in a freezer-safe bag for up to 1 month. So, why not try them and enjoy a cool, healthy treat on a hot summer day?

Essential Tips for Freezing Bananas Perfectly

Freezing bananas is a fantastic way to enjoy them all year. With the right methods, they stay perfect. They’re also a low calorie, healthy snack for many recipes, like smoothies and baked goods.

To freeze bananas well, pick the right ones and follow a few steps. Here’s how to start:

  • Choose ripe bananas for the best flavor and texture.
  • Peel the bananas and slice them into 1/2-inch thick rounds.
  • Place the banana slices on a baking sheet lined with parchment paper and freeze until solid, about 1-2 hours.
  • Transfer the frozen banana slices to a freezer bag or airtight container to prevent freezer burn.

By following these simple steps, you can enjoy your frozen bananas in many ways. Try blending them into a smoothie or topping oatmeal or yogurt with them.

Transform Your Snacking Journey with These Frozen Treats

Frozen banana snacks are a tasty and healthy way to curb your cravings. They are low in calories but packed with nutrients. You can enjoy them in many ways, like chocolate-dipped or as Chunky Monkey clusters.

Don’t be afraid to try new things with these snacks. You could add peanut butter, crushed nuts, or shredded coconut. Just remember to freeze the bananas until they’re right, and let them set for 2-3 hours.

These snacks are quick and easy to make. They offer a healthier treat option. Enjoy the banana’s sweetness, the yogurt’s creaminess, and the Cheerios’ crunch. Your taste buds and body will love it!