Honey Chipotle Turkey Meatball Meal Prep – Sweet, Smoky, and Perfect for Busy Weeks

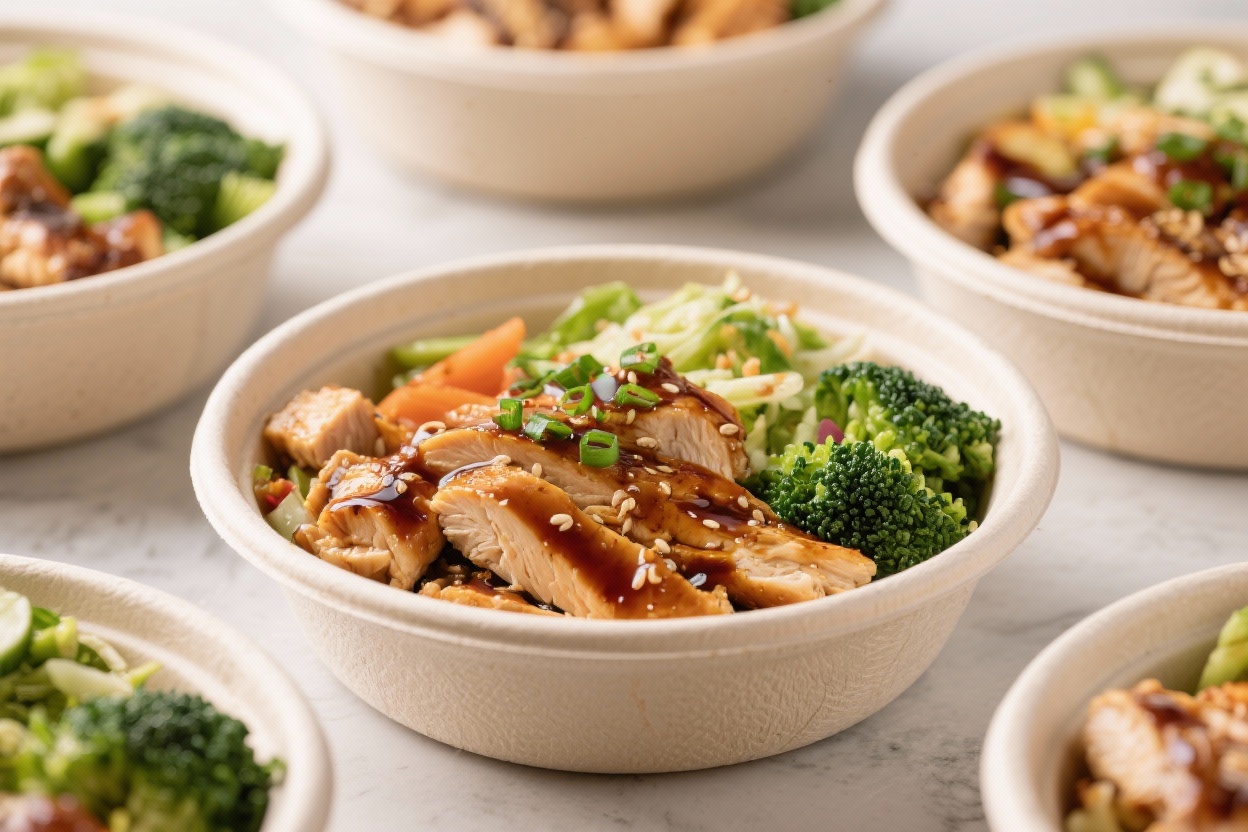
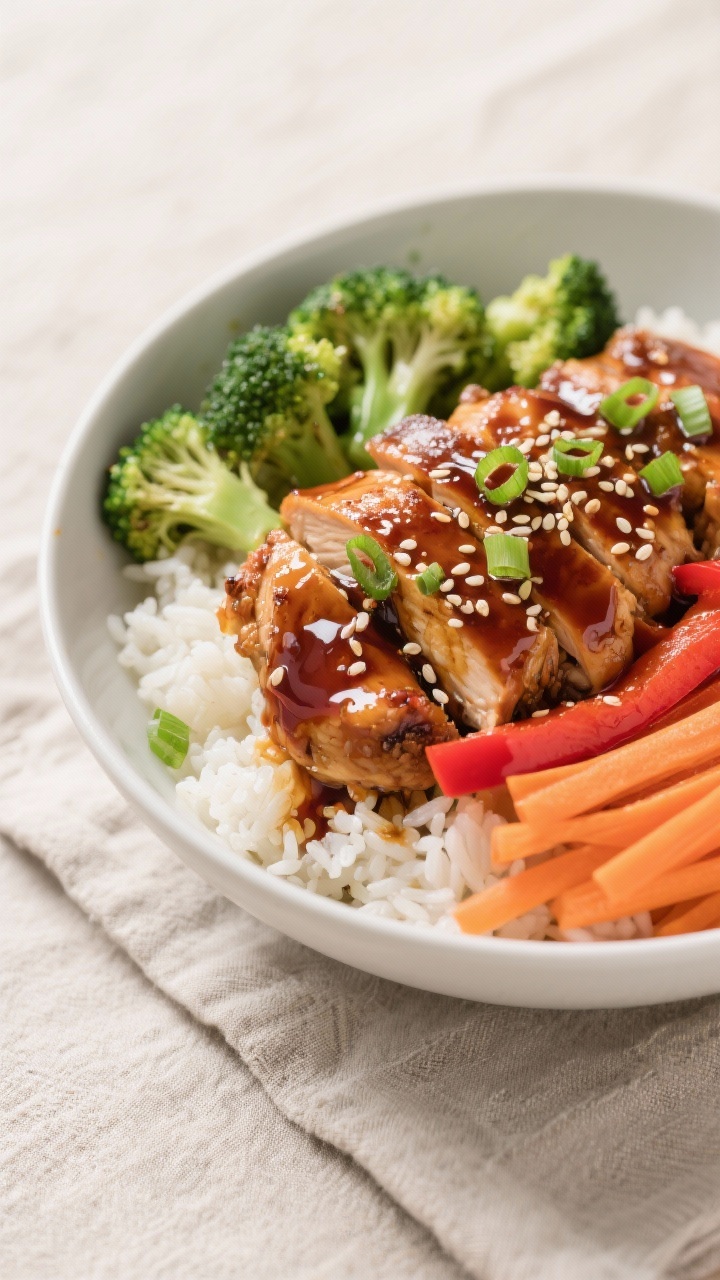
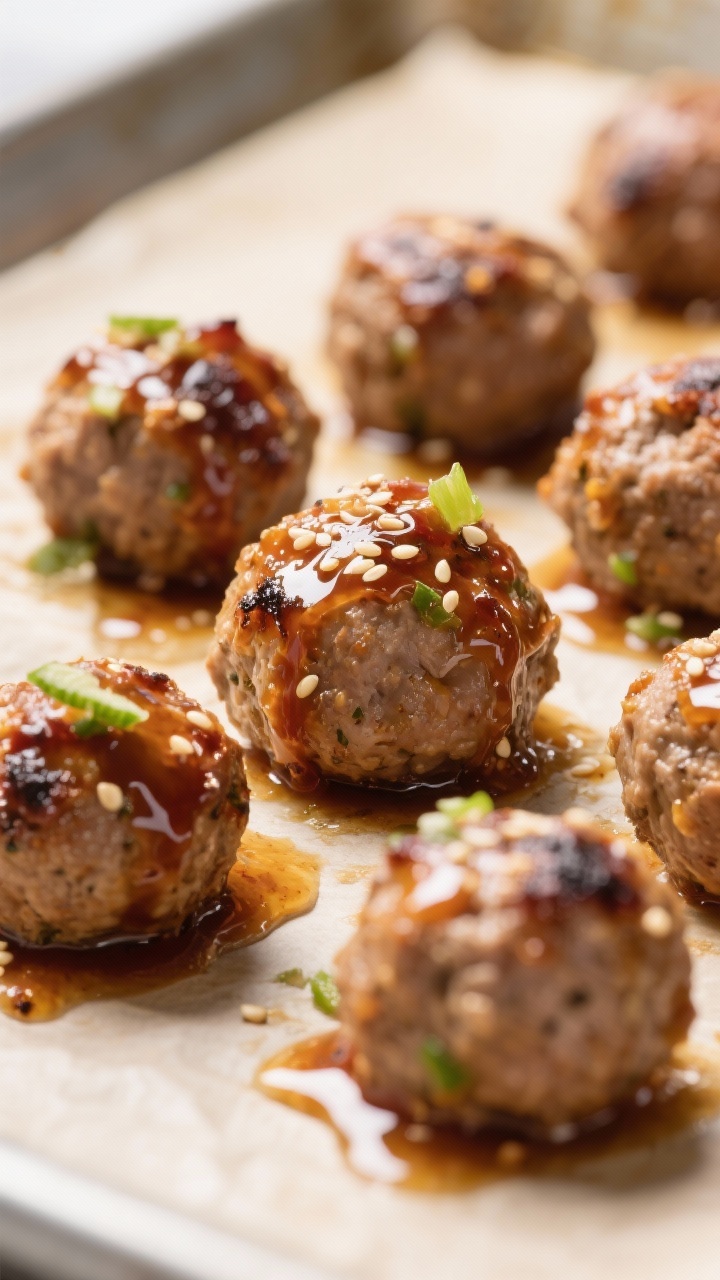
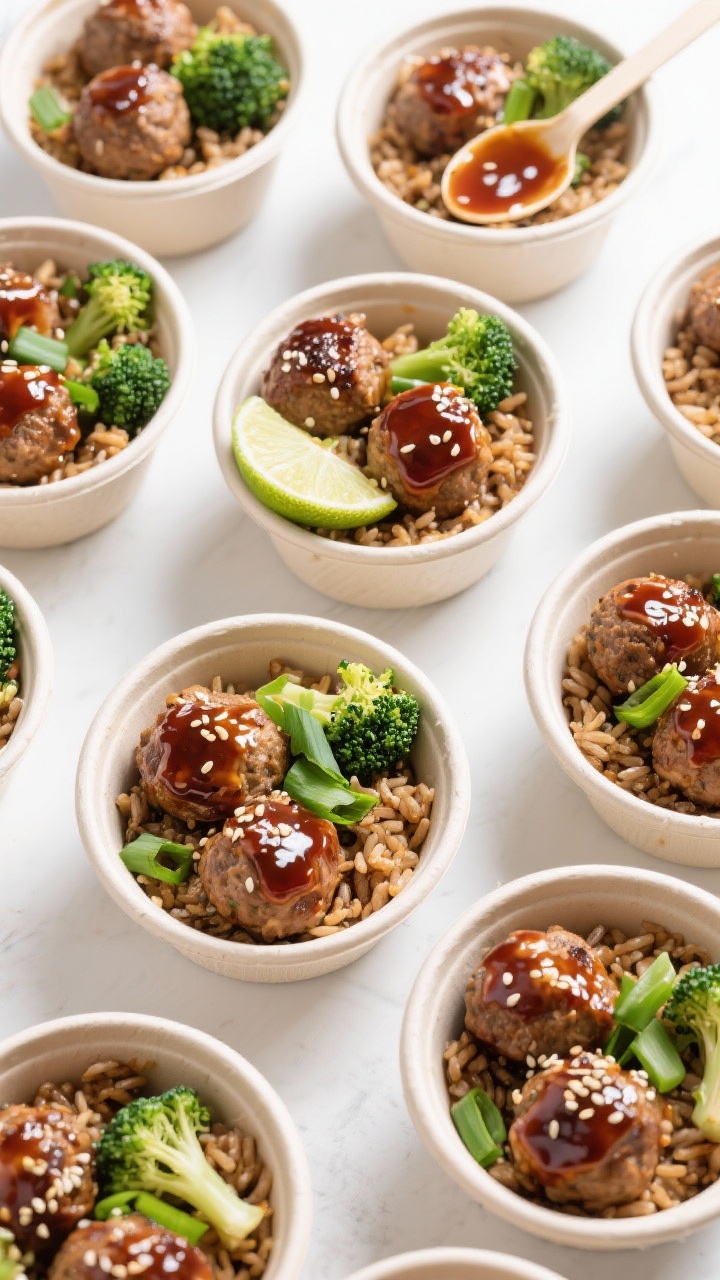
These turkey meatballs hit the sweet spot between comfort food and feel-good eating. They’re tender, flavorful, and coated in a glossy honey chipotle glaze that brings just the right amount of heat. Pair them with rice, roasted veggies, or a simple slaw, and you’ve got a balanced meal that packs well.

If you’re trying to eat better without giving up flavor, this one checks all the boxes. It’s simple, satisfying, and great for prepping ahead.

What Makes This Special

Close-up detail: Glazed honey chipotle turkey meatballs fresh from the oven, tossed in a glossy, sti
  • Balanced flavor: Sweet honey, smoky chipotle, and bright lime keep every bite interesting.
  • Weeknight-friendly: The meatballs bake in the oven while you whisk the glaze on the stove.
  • Protein-packed: Lean ground turkey gives you a lighter option without sacrificing taste.
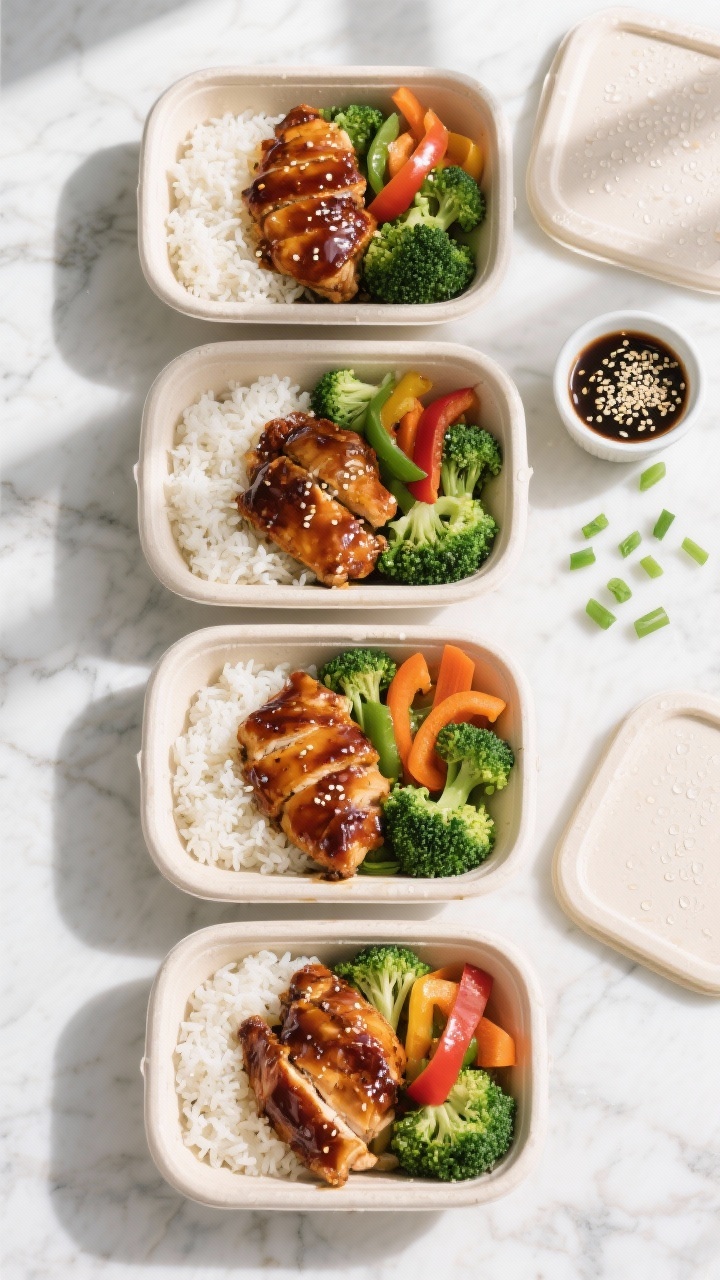
  • Meal prep ready: Reheats beautifully and stays juicy for days.
  • Flexible sides: Works with rice, quinoa, cauliflower rice, or roasted sweet potatoes.

Ingredients

  • 1.5 pounds ground turkey (93% lean works best)
  • 1/2 cup plain breadcrumbs (or almond flour for gluten-free)
  • 1 large egg
  • 1/4 cup finely minced onion
  • 2 cloves garlic, minced
  • 2 tablespoons chopped fresh cilantro (optional but great)
  • 1 teaspoon kosher salt
  • 1/2 teaspoon black pepper
  • 1 teaspoon ground cumin
  • 1 tablespoon olive oil (for brushing)

Honey Chipotle Glaze:

  • 1/3 cup honey
  • 2 tablespoons adobo sauce from a can of chipotle peppers
  • 1 chipotle pepper in adobo, minced (use half for milder heat)
  • 2 tablespoons low-sodium soy sauce (or coconut aminos)
  • 1 tablespoon tomato paste
  • 1 tablespoon apple cider vinegar
  • Zest and juice of 1/2 lime
  • 1/4 cup water

For Serving (optional but recommended):

  • Cooked brown rice or quinoa
  • Roasted broccoli or green beans
  • Sliced green onions and extra lime wedges
  • Sesame seeds for garnish

How to Make It

Cooking process: Overhead shot of baked turkey meatballs being returned to a parchment-lined sheet p
  1. Preheat and prep: Heat the oven to 400°F (200°C). Line a sheet pan with parchment and lightly brush or spray with olive oil.
  2. Mix the meatballs: In a bowl, combine turkey, breadcrumbs, egg, onion, garlic, cilantro, salt, pepper, and cumin.

    Mix gently with a fork or your hands until just combined.

  3. Form the balls: Scoop into 1.5-inch meatballs (about 20–24). Place on the prepared sheet pan, spacing evenly.
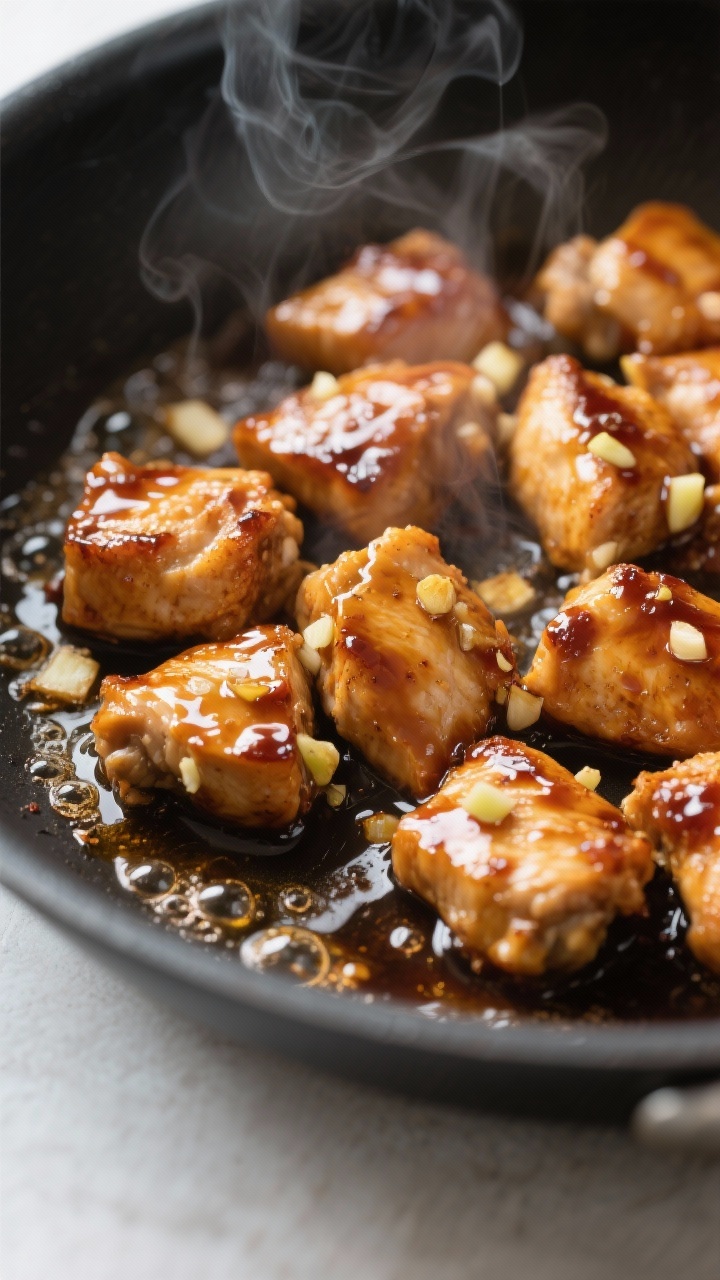
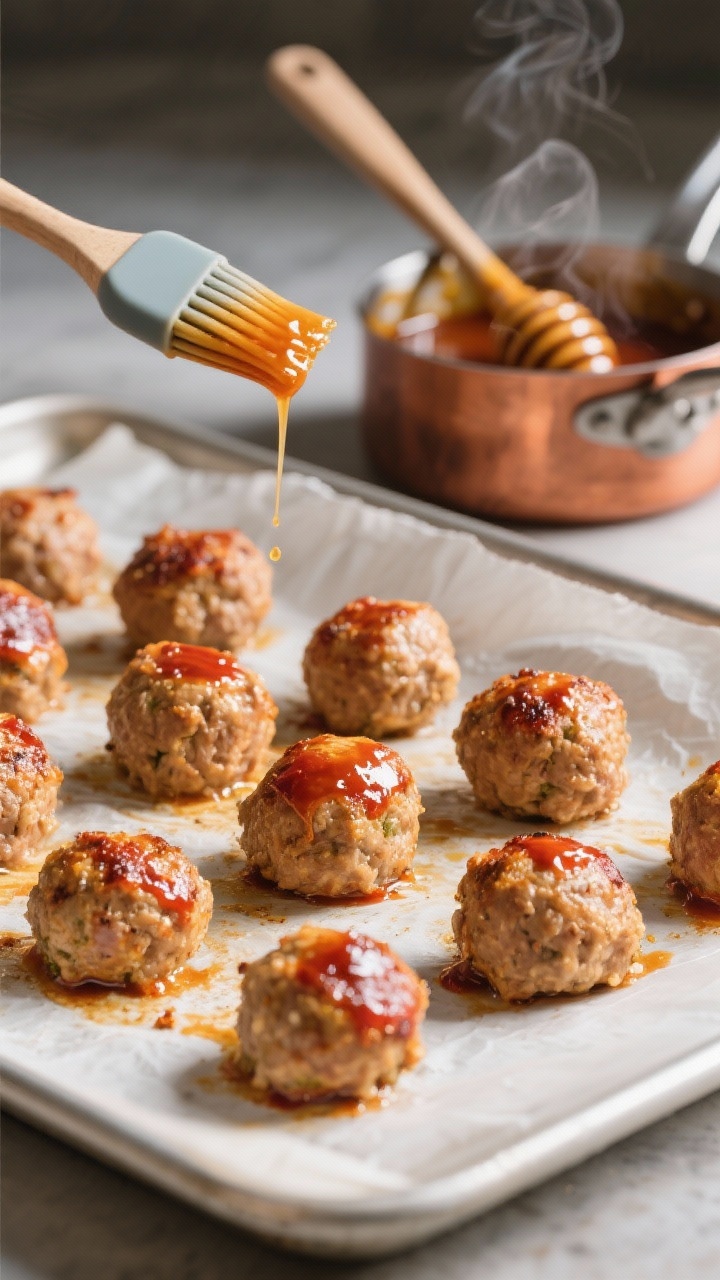
  4. Bake: Brush the tops lightly with olive oil. Bake 14–16 minutes, until the centers reach 165°F and the outsides look lightly browned.
  5. Make the glaze: While they bake, add honey, adobo sauce, minced chipotle, soy sauce, tomato paste, vinegar, lime zest and juice, and water to a small saucepan.

    Simmer over medium heat 3–5 minutes, stirring, until glossy and slightly thickened.

  6. Toss and finish: Add baked meatballs to a large bowl, pour over the glaze, and toss to coat. For extra sticky edges, return them to the sheet pan and broil 1–2 minutes.
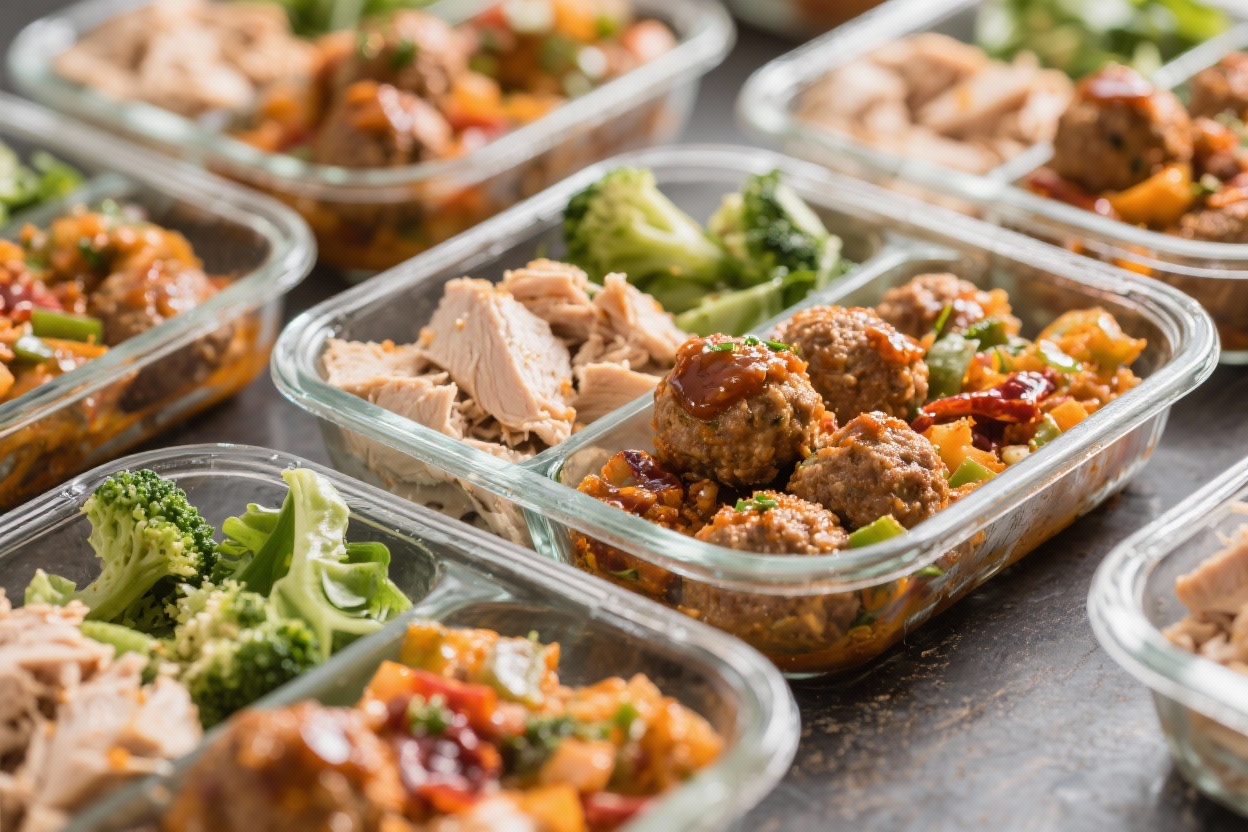
  7. Build your bowls: Divide rice or quinoa and veggies among meal prep containers. Top with meatballs, spoon over extra glaze, and finish with green onions, sesame seeds, and lime.

Storage Instructions

  • Fridge: Store in airtight containers for up to 4 days.
  • Freezer: Freeze meatballs (with glaze) up to 3 months.

    Thaw overnight in the fridge.

  • Reheat: Microwave 60–90 seconds, or warm on the stovetop with a splash of water to loosen the glaze.
  • Keep sides separate: If using crispy veggies, store them apart to maintain texture.
Final dish presentation: Restaurant-quality meal prep bowls arranged neatly in a grid, ; brown rice

Health Benefits

  • Lean protein: Turkey supports muscle recovery and keeps you full.
  • Lower saturated fat: A lighter alternative to beef or pork meatballs.
  • Balanced carbs: Pairing with whole grains or veggies helps steady energy.
  • Customizable sodium and sugar: Using low-sodium soy sauce and adjusting honey lets you control the macros.

Common Mistakes to Avoid

  • Overmixing the meat: This makes meatballs tough. Mix just until combined.
  • Skipping the binder: Breadcrumbs and egg keep meatballs moist and stable.
  • Baking too long: Turkey dries out fast. Pull them at 165°F.
  • Too much chipotle: The heat builds.

    Start small, then adjust.

  • Thin glaze: Let it simmer until it clings to a spoon for best coating.

Alternatives

  • Protein swap: Use ground chicken or lean beef with the same method.
  • Gluten-free: Replace breadcrumbs with almond flour or crushed gluten-free crackers.
  • No soy: Use coconut aminos and add a pinch of salt.
  • Low sugar: Cut honey to 2 tablespoons and add a splash more lime.
  • Air fryer: Cook meatballs at 380°F for 10–12 minutes, shaking once.
  • Side options: Try cauliflower rice, cabbage slaw, or roasted sweet potatoes.

FAQ

How spicy are these meatballs?

They’re medium heat as written. Use half a chipotle pepper for mild, or add an extra pepper for more kick.

Can I make the meatballs ahead of time?

Yes. Shape them, cover, and refrigerate up to 24 hours, then bake.

You can also bake and glaze, then reheat later.

What if I don’t have adobo sauce?

Use smoked paprika and a pinch of cayenne with a little extra tomato paste. The flavor won’t be identical but still tasty.

How do I keep them from drying out?

Use 93% lean turkey, don’t overmix, and pull them from the oven at 165°F. The glaze also helps lock in moisture.

Can I double the recipe?

Absolutely.

Use two sheet pans and rotate halfway through baking. Double the glaze so everything coats evenly.

In Conclusion

Honey Chipotle Turkey Meatball Meal Prep makes busy days easier and more enjoyable. It’s bold, balanced, and simple enough for any weeknight.

With a few pantry staples and flexible sides, you’ll have meals ready that you’ll actually look forward to. Make a batch once, and it’ll quickly become a regular in your rotation.

High Protein Teriyaki Chicken Meal Prep Bowls – Easy, Flavorful, and Filling

These bowls are the kind of meal prep that actually makes you excited to open your container at lunchtime. Juicy teriyaki chicken, fluffy rice, and crisp veggies come together in a simple, satisfying bowl that’s rich in protein and bold in flavor. The sauce is sticky, savory-sweet, and easy to make with pantry staples.

You’ll get balanced macros, lots of texture, and a meal that reheats like a dream. If you’ve been looking for a no-fuss weekly staple, this is it.

What Makes This Recipe So Good

Close-up detail: Glazed teriyaki chicken bites sizzling in a skillet just after the cornstarch slurr
  • High protein: Lean chicken breast packs a serious protein punch without feeling heavy.
  • Meal-prep friendly: Makes 4–5 bowls that store and reheat well for days.
  • Fast and simple: Minimal chopping, quick sauce, and everything cooks in under 40 minutes.
  • Balanced: Carbs from rice, protein from chicken, and fiber from veggies keep you full.
  • Customizable: Swap veggies, change the base, or tweak the sweetness to taste.

Shopping List

  • 1.5–2 pounds boneless, skinless chicken breasts (or thighs)
  • 2 cups uncooked jasmine or brown rice
  • 2 cups broccoli florets
  • 1 large red bell pepper, sliced
  • 1 large carrot, thinly sliced or shredded
  • 2 green onions, sliced (optional)
  • 1 tablespoon sesame seeds (optional)
  • 1–2 tablespoons neutral oil (avocado or canola)

Teriyaki Sauce:

  • 1/2 cup low-sodium soy sauce (or tamari for gluten-free)
  • 1/3 cup water
  • 3 tablespoons honey or maple syrup
  • 2 tablespoons rice vinegar
  • 2 teaspoons toasted sesame oil
  • 2–3 cloves garlic, minced
  • 1 teaspoon fresh grated ginger (or 1/2 teaspoon ground)
  • 1 tablespoon cornstarch mixed with 2 tablespoons water

Instructions

Final dish presentation: Beautifully plated High Protein Teriyaki Chicken Meal Prep Bowl with fluffy
  1. Cook the rice: Rinse rice until the water runs clear. Cook according to package directions.

    Fluff and set aside.

  2. Mix the teriyaki sauce: In a bowl, whisk soy sauce, water, honey, rice vinegar, sesame oil, garlic, and ginger. In a separate small cup, stir cornstarch with water to make a slurry. Set both aside.
  3. Prep the chicken: Pat chicken dry and cut into bite-size pieces.

    Season lightly with salt and pepper.

  4. Sear the chicken: Heat oil in a large skillet over medium-high. Add chicken in a single layer and cook 5–7 minutes, stirring occasionally, until golden and cooked through.
  5. Thicken the sauce: Reduce heat to medium. Pour the teriyaki mixture into the pan and bring to a simmer.

    Stir in the cornstarch slurry and cook 1–2 minutes until glossy and thick. If too thick, add a splash of water.

  6. Steam or sauté veggies: While the sauce simmers, steam broccoli until crisp-tender (about 3–4 minutes). Sauté bell pepper and carrot in a little oil for 2–3 minutes, or leave them raw for extra crunch.
  7. Assemble bowls: Divide rice into 4–5 containers.

    Top with teriyaki chicken and veggies. Spoon extra sauce over the rice.

  8. Finish and garnish: Add green onions and sesame seeds if you like. Let bowls cool 10–15 minutes before sealing.

Storage Instructions

  • Fridge: Store in airtight containers for 4 days.
  • Freezer: Freeze up to 2 months.

    For best texture, freeze chicken and sauce separately from rice and veggies.

  • Reheating: Microwave 1–2 minutes (from fridge) or 3–4 minutes (from frozen, loosely covered), stirring halfway. Add a splash of water to keep the rice soft.
Tasty top view (overhead): Overhead shot of four meal prep containers filled for the week—each div

Benefits of This Recipe

  • Protein-packed: Supports muscle recovery and keeps you satisfied between meals.
  • Portion control: Pre-portioned servings help you stay on track during busy weeks.
  • Budget-friendly: Uses affordable ingredients and pantry staples.
  • Better than takeout: Lower sodium, customizable sweetness, and clean ingredients.

Pitfalls to Watch Out For

  • Overcooking chicken: Dry chicken is the quickest way to ruin a bowl. Pull it as soon as it’s cooked through.
  • Too much sauce saltiness: If using regular soy sauce, reduce to 1/3 cup or add more water to balance.
  • Clumpy sauce: Always mix the cornstarch with water first, then whisk it into a simmering sauce.
  • Soggy veggies: Keep broccoli crisp-tender.

    Over-steaming can make reheating unpleasant.

Recipe Variations

  • High-protein boost: Add edamame or scrambled egg whites to the rice.
  • Low-carb: Swap rice for cauliflower rice or shredded cabbage.
  • Spicy teriyaki: Stir in sriracha, chili flakes, or gochujang.
  • Thighs instead of breasts: Juicier and forgiving—reduce cook time slightly for small pieces.
  • Veggie upgrades: Add snap peas, zucchini, mushrooms, or baby corn.
  • Gluten-free: Use tamari or coconut aminos and confirm cornstarch is GF-certified.

FAQ

How much protein is in each bowl?

Using 1.75 pounds of chicken across 5 servings, each bowl typically lands around 30–35 grams of protein, depending on add-ins like edamame or extra chicken.

Can I make the sauce without cornstarch?

Yes. Use arrowroot powder or reduce the sauce longer to naturally thicken. If using arrowroot, add it off heat to prevent a gummy texture.

What rice works best?

Jasmine is soft and fragrant, while brown rice adds more fiber and a chewier bite.

Both reheat well. For extra protein, try quinoa.

Can I air fry the chicken?

Absolutely. Toss chicken with a little oil, air fry at 400°F (200°C) for 8–10 minutes, shaking once.

Warm the sauce in a skillet and toss the cooked chicken in it.

How do I keep the veggies crisp?

Cook them slightly under your usual doneness and store them separate from the sauce when possible. Add sauce after reheating.

Is this kid-friendly?

Yes, especially if you keep the spice low and lean sweeter on the sauce. Slice chicken smaller for easier bites.

In Conclusion

These High Protein Teriyaki Chicken Meal Prep Bowls are reliable, tasty, and quick to throw together.

You get satisfying protein, colorful veggies, and a sticky-sweet sauce that feels like takeout—only better. Make a batch on Sunday, stack your fridge, and enjoy stress-free lunches all week.

Chocolate Hazelnut Protein Holiday Shake – Cozy, Creamy, and Satisfying

This shake tastes like a festive dessert but packs the kind of nutrition that keeps you going through busy holiday days. It’s rich, chocolatey, lightly nutty, and naturally sweet—no weird aftertaste or overly complicated steps. Whether you’re craving an afternoon treat or need a quick breakfast, this blend hits the spot.

Think of it as a seasonal upgrade to your usual protein shake, with a little cozy magic in every sip.

What Makes This Recipe So Good

Close-up detail shot of the finished Chocolate Hazelnut Protein Holiday Shake being poured from a bl
  • Dessert vibes, balanced macros: You get a chocolate hazelnut flavor that feels indulgent, with solid protein to keep you full.
  • Holiday-friendly flavors: A hint of cinnamon and vanilla brings that warm, seasonal feel without being overpowering.
  • Quick and customizable: Toss everything in a blender and you’re done in minutes. Easy to tweak for dairy-free, low-carb, or higher-calorie needs.
  • Great texture: Frozen banana (or ice) creates a thick, milkshake-like feel—no chalkiness.
  • Better-for-you chocolate taste: Cocoa powder and a little hazelnut butter deliver that “nutty chocolate” experience without loads of sugar.

Ingredients

  • 1 cup unsweetened almond milk (or milk of choice)
  • 1 frozen banana (or 1/2 banana + 1 cup ice for a less sweet version)
  • 1 scoop chocolate protein powder (whey or plant-based)
  • 1 tablespoon hazelnut butter (or 1 tablespoon almond butter + 1/4 teaspoon hazelnut extract)
  • 1 tablespoon unsweetened cocoa powder
  • 1 teaspoon maple syrup or honey (optional, to taste)
  • 1/2 teaspoon vanilla extract
  • 1/4 teaspoon ground cinnamon
  • Pinch of sea salt
  • 2–3 ice cubes (optional, for extra thickness)
  • Optional garnish: shaved dark chocolate, crushed toasted hazelnuts, or a pinch of cocoa

Instructions

Overhead “tasty top view” of the final shake served in a low, wide glass on a matte ceramic plat
  1. Add the milk, banana, protein powder, hazelnut butter, cocoa powder, vanilla, cinnamon, and salt to a blender.
  2. Blend on high until smooth, 30–45 seconds. If it’s too thick, add a splash of milk.

    If it’s too thin, add a couple of ice cubes and blend again.

  3. Taste and adjust sweetness with maple syrup or honey if needed.
  4. Pour into a chilled glass. Top with shaved dark chocolate or crushed hazelnuts if you want a little holiday flair.

Storage Instructions

  • Short-term: Keep in the fridge for up to 24 hours in a sealed jar. Shake well before drinking.
  • Make-ahead tip: Portion the dry ingredients (protein powder, cocoa, cinnamon, salt) in a small jar and keep the wet ingredients ready.

    Blend when needed.

  • Freezer packs: Pre-freeze banana pieces and measured hazelnut butter in small bags. Add to the blender with milk and powders straight from the freezer.
Process shot showing the blended shake at perfect consistency inside a transparent blender jar, post

Why This is Good for You

  • Protein for satiety: Helps keep you full and supports muscle repair, especially useful during busy, snack-heavy holidays.
  • Healthy fats: Hazelnut butter adds monounsaturated fats that support heart health and a steady energy curve.
  • Antioxidants: Cocoa is rich in flavanols that can support circulation and mood.
  • Balanced sweetness: Banana and optional maple syrup offer natural sweetness without relying on heavy sugars.

Pitfalls to Watch Out For

  • Over-sweetening: Start with no added sweetener and taste. Protein powders vary in sweetness.
  • Wrong texture: If it’s icy or watery, add more banana or a few nuts to boost creaminess.

    If it’s too thick, add milk a little at a time.

  • Strong hazelnut extract: If using extract, go light—1/4 teaspoon is plenty. Too much can taste artificial.
  • Chalky protein: If your shake tastes chalky, try a different brand or add a few ice cubes to smooth it out.

Alternatives

  • Dairy-free: Use almond, oat, or coconut milk and a plant-based protein powder.
  • Low-sugar: Skip the banana and use 1–1.5 cups ice. Add 1–2 dates or a zero-calorie sweetener if needed.
  • Extra protein: Add 2 tablespoons Greek yogurt or a splash of pasteurized egg whites (if you’re comfortable and they’re safe to consume).
  • No hazelnuts: Use almond butter plus a tiny bit of hazelnut extract, or go full almond-chocolate for a “ferrero-adjacent” flavor.
  • Festive boost: Add a pinch of nutmeg, a splash of peppermint extract, or a shot of espresso for a holiday mocha vibe.

FAQ

Can I make this without a banana?

Yes.

Replace the banana with 1–1.5 cups ice and add 1–2 pitted dates or a touch of sweetener to balance the cocoa. You’ll get a colder, slightly lighter texture.

What protein powder works best?

Whey blends usually create the smoothest texture. For dairy-free, choose a plant blend with pea protein and rice or hemp for better mouthfeel.

Chocolate flavor works best here.

Can I use Nutella instead of hazelnut butter?

You can, but it will add more sugar and less protein. If you use Nutella, reduce or skip the added sweetener and keep the cocoa powder for a deeper chocolate taste.

How do I make it thicker?

Use a fully frozen banana, add more ice, or mix in 1–2 tablespoons of oats. Blend a little longer to aerate and thicken.

Is this good post-workout?

Yes.

It offers protein for recovery and carbs from banana for glycogen replenishment. If you need extra carbs post-workout, add half a banana or a few oats.

In Conclusion

This Chocolate Hazelnut Protein Holiday Shake feels like a treat, but it’s built to fuel your day. It’s quick, customizable, and cozy enough to match the season without weighing you down.

Keep the ingredients on hand, tweak the sweetness to your taste, and enjoy a festive shake that actually fits your goals.

Gingerbread Latte Protein Smoothie – Cozy Flavor, Energizing Protein

This Gingerbread Latte Protein Smoothie brings holiday coffee shop vibes to your kitchen in five minutes. It’s creamy, warmly spiced, and just sweet enough—like a gingerbread cookie met your morning latte. You get a gentle caffeine lift, a solid hit of protein, and that nostalgic gingerbread aroma.

It’s a great pre-workout breakfast, a mid-afternoon pick-me-up, or a smarter dessert swap. No complicated steps, no odd ingredients—just simple, craveable flavor.

Why This Recipe Works

Close-up detail shot: A freshly blended Gingerbread Latte Protein Smoothie being poured in a silky r
  • Balanced flavor: Real coffee plus classic gingerbread spices creates a cozy, latte-like taste without being overly sweet.
  • Protein-packed: A scoop of protein powder makes it satisfying and steadying, so you’re full longer.
  • Creamy texture: Frozen banana or ice cubes add body, while milk (dairy or non-dairy) keeps it smooth.
  • Quick and flexible: You can use cold brew, leftover coffee, or even instant espresso. Adjust sweetness and spices to your liking.

Ingredients

  • 3/4 cup strong cold brew or chilled leftover coffee
  • 1/2–3/4 cup milk of choice (almond, oat, dairy, or soy)
  • 1 scoop vanilla or unflavored protein powder
  • 1 small frozen banana (or 1 cup ice cubes for a lower-sugar option)
  • 1–2 teaspoons maple syrup or honey, to taste
  • 1/2 teaspoon ground ginger
  • 1/2 teaspoon ground cinnamon
  • 1/8 teaspoon ground nutmeg
  • 1/8 teaspoon ground cloves (a pinch goes a long way)
  • 1 teaspoon blackstrap molasses (optional, for classic gingerbread depth)
  • 1/2 teaspoon vanilla extract
  • Pinch of salt
  • Ice, as needed, for thickness

Step-by-Step Instructions

Overhead “tasty top view” shot: Final smoothie served in two chilled glasses on a matte charcoal
  1. Brew and chill: If you don’t have cold brew on hand, brew strong coffee and let it cool completely.

    Cold coffee prevents a watery smoothie.

  2. Load the blender: Add coffee, milk, protein powder, frozen banana (or ice), maple syrup, spices, molasses, vanilla, and a pinch of salt.
  3. Blend until smooth: Start low, then increase speed until creamy. If it’s too thick, add a splash of milk; too thin, add ice.
  4. Taste and tweak: Adjust sweetness or spice. Add more ginger for zing, more cinnamon for warmth, or a touch more molasses for deeper flavor.
  5. Serve right away: Pour into a chilled glass.

    Top with a sprinkle of cinnamon or crushed ginger snaps if you like.

How to Store

For best texture, drink immediately. If needed, refrigerate up to 24 hours in a sealed jar. Shake well before drinking, as separation is normal.

To prep ahead, freeze smoothie in ice cube trays and blend with a splash of fresh milk and coffee when ready.

Process-action shot: “Blend and tweak” moment—blender jar on a countertop mid-whirl with the s

Why This is Good for You

  • Steady energy: Protein plus a bit of caffeine gives focus without the crash of sugary drinks.
  • Spice benefits: Ginger and cinnamon may support digestion and healthy blood sugar response.
  • Minerals in molasses: Blackstrap molasses offers trace minerals like iron and potassium.
  • Customizable nutrition: Choose a protein powder and milk that fit your goals—higher protein, lower sugar, or dairy-free.

Pitfalls to Watch Out For

  • Too much clove: Cloves are potent. Start with a pinch and increase only if needed.
  • Warm coffee issue: Using warm coffee melts the ice and thins the smoothie. Chill it first.
  • Gritty texture: Some protein powders get chalky.

    Blend longer or add a little more banana for creaminess.

  • Over-sweetening: Taste before adding more sweetener. The banana and vanilla protein may already be sweet enough.

Variations You Can Try

  • Dairy-free café vibe: Use oat milk for extra creaminess and a barista-style texture.
  • Extra protein: Add 2 tablespoons Greek yogurt or silken tofu. Adjust ice for thickness.
  • Low-sugar swap: Skip banana, use ice and a few cauliflower florets (frozen) for body, and sweeten lightly.
  • Mocha gingerbread: Add 1 teaspoon cocoa powder for a chocolatey edge.
  • Decaf evening treat: Use decaf cold brew and keep the spices generous.
  • Cookie crumble topping: Finish with crushed ginger snaps or a dusting of cinnamon sugar for dessert vibes.

FAQ

Can I make this without coffee?

Yes.

Replace coffee with strong black tea, chai concentrate, or extra milk. The spices still deliver that gingerbread feel, and you can add a touch more molasses for depth.

Which protein powder works best?

Vanilla whey blends smoothly and tastes like a latte. For dairy-free, pea or soy protein works well—just blend a bit longer and consider adding a splash more milk for smoothness.

Do I need the molasses?

No, but it adds that unmistakable gingerbread flavor and a hint of bitterness that balances sweetness.

If you skip it, increase cinnamon slightly and keep the sweetener modest.

How can I make it thicker?

Use more frozen banana, add extra ice, or toss in a few frozen milk cubes. A tablespoon of rolled oats can also add body and creaminess.

Is it good before a workout?

Yes. It offers quick carbs, protein for muscle support, and a mild caffeine boost.

If you’re sensitive to caffeine, go decaf or halve the coffee.

In Conclusion

This Gingerbread Latte Protein Smoothie gives you cozy coffee shop flavor with real nourishment and zero fuss. It’s flexible, fast, and easy to tailor to your diet and taste. Keep the spices balanced, chill your coffee, and you’ll have a creamy, energizing smoothie that feels special any day of the week.

Gingerbread Protein Banana Bread – Cozy Flavor Meets Everyday Fuel

This gingerbread protein banana bread brings warm, cozy spices together with everyday, feel-good ingredients. It tastes like a holiday treat, but it’s built for busy mornings and post-workout snacks. The texture is moist and tender, with a sweet banana base and deep gingerbread notes.

You get plenty of protein without the chalky taste. Bake it once, slice it for the week, and enjoy a flavorful, better-for-you loaf that actually satisfies.

What Makes This Special

Close-up detail shot: A freshly baked slice of gingerbread protein banana bread on a small stoneware

This recipe blends the comfort of classic banana bread with the festive spice of gingerbread. It uses protein powder to boost nutrition while keeping the crumb soft and cake-like.

We swap some of the oil for Greek yogurt to add moisture and extra protein without heaviness. The loaf is sweetened naturally with ripe bananas and a touch of maple syrup or molasses. It’s a simple, wholesome bake that smells incredible and fits your routine.

What You’ll Need

  • 3 very ripe bananas (about 1 1/4 cups mashed)
  • 2 large eggs, room temperature
  • 1/3 cup plain Greek yogurt (2% or whole milk works best)
  • 2 tablespoons melted coconut oil or butter
  • 1/4 cup maple syrup or 3 tablespoons molasses (for deeper gingerbread flavor)
  • 1 teaspoon vanilla extract
  • 1 cup white whole wheat flour or all-purpose flour
  • 1/2 cup oat flour (store-bought or blended oats)
  • 1/2 cup vanilla or unflavored whey protein powder (plant protein works; see notes)
  • 1 teaspoon baking powder
  • 1/2 teaspoon baking soda
  • 1/2 teaspoon fine sea salt
  • 2 teaspoons ground ginger
  • 1 teaspoon ground cinnamon
  • 1/4 teaspoon ground cloves or allspice
  • Optional add-ins: 1/3 cup dark chocolate chips, chopped pecans, or crystallized ginger

Instructions

Overhead “tasty top view” shot: The full loaf cooled and sliced on a parchment-lined cooling rac
  1. Prep your pan and oven. Heat oven to 350°F (175°C).

    Line a 9×5-inch loaf pan with parchment and lightly grease the sides.

  2. Mash the bananas. In a large bowl, mash bananas until mostly smooth with a few small lumps.
  3. Whisk wet ingredients. Add eggs, Greek yogurt, melted oil or butter, maple syrup or molasses, and vanilla. Whisk until combined and creamy.
  4. Combine dry ingredients. In a separate bowl, whisk flour(s), protein powder, baking powder, baking soda, salt, ginger, cinnamon, and cloves.
  5. Bring it together. Add dry ingredients to wet. Stir gently with a spatula until just combined.

    If using add-ins, fold them in now. Do not overmix.

  6. Fill the pan. Spread batter into the prepared pan, smoothing the top.
  7. Bake. Bake for 45–55 minutes, or until a toothpick comes out with a few moist crumbs. If the top browns too quickly, tent with foil for the last 10 minutes.
  8. Cool. Let the loaf cool in the pan for 10 minutes, then lift out and cool completely on a rack before slicing. This sets the crumb.

Storage Instructions

  • Room temperature: Store sliced in an airtight container for up to 2 days.
  • Refrigerator: Keeps well for 5–6 days.

    Warm slices in the toaster oven or microwave for best texture.

  • Freezer: Wrap individual slices and freeze up to 3 months. Thaw overnight in the fridge or reheat from frozen.

Benefits of This Recipe

  • Higher protein: Protein powder and Greek yogurt help keep you fuller longer.
  • Nourishing ingredients: Bananas add natural sweetness, moisture, and potassium.
  • Balanced flavor: Gingerbread spices bring warmth without overwhelming the banana.
  • Meal prep friendly: One bake sets you up for several breakfasts or snacks.
  • Flexible: Works with different flours and protein types with minor tweaks.

Pitfalls to Watch Out For

  • Overmixing the batter: This can make the loaf dense or rubbery, especially with protein powder.
  • Using too much protein powder: Stick to the listed amount; more can dry out the bread.
  • Underbaking: A gooey center can collapse. Check with a toothpick in the middle.
  • Too little spice: If your spices are old, the flavor will be flat.

    Use fresh, aromatic spices.

Recipe Variations

  • Plant-based protein: Use pea or brown rice protein, but reduce to 1/3 cup and add 2–3 tablespoons extra milk for moisture.
  • Dairy-free: Swap Greek yogurt for a thick coconut yogurt and use coconut oil.
  • Gluten-free: Use a 1:1 gluten-free baking blend and certified gluten-free oat flour.
  • No refined sugar: Choose maple syrup and skip chocolate chips, or use 85% dark chocolate.
  • Extra ginger snap: Add 1 tablespoon finely chopped crystallized ginger to the batter.
  • Nutty crunch: Fold in chopped pecans or walnuts and sprinkle a few on top before baking.

FAQ

Can I make this into muffins?

Yes. Divide the batter into a lined 12-cup muffin tin and bake at 350°F (175°C) for 16–20 minutes, or until a toothpick comes out clean.

What type of protein powder works best?

Whey or whey-casein blends bake up tender and moist. Plant proteins are fine but more absorbent; reduce the amount slightly and add a splash of milk if the batter is very thick.

Do I have to use molasses?

No, but molasses gives classic gingerbread depth.

If you skip it, use maple syrup and consider adding an extra 1/4 teaspoon each of ginger and cinnamon.

Why is my banana bread dry?

Overbaking, too much protein powder, or not enough banana can dry it out. Check your oven temperature, measure ingredients accurately, and pull the loaf when a toothpick shows moist crumbs.

Can I reduce the sweetener?

You can. Use very ripe bananas and drop the maple syrup or molasses by 1–2 tablespoons.

The loaf will be less sweet but still flavorful.

Final Thoughts

This gingerbread protein banana bread is a cozy, practical bake that fits real life. It’s simple to make, easy to customize, and tastes great warm or cold. Keep a few slices on hand for busy mornings, a mid-afternoon pick-me-up, or a pre-gym snack.

One loaf brings comfort, spice, and steady energy to your week.

Apple Cinnamon Protein Overnight Oats – A Cozy, Make-Ahead Breakfast

Start your morning with something hearty, comforting, and ready when you are. Apple Cinnamon Protein Overnight Oats bring together sweet apples, warm spice, and a creamy texture that feels like dessert but fuels like a balanced meal. It’s the kind of breakfast that tastes like fall yet works all year long.

Best of all, you assemble it in minutes the night before, so mornings feel easier. Whether you’re heading to the gym or the office, this bowl has your back.

Why This Recipe Works

Close-up detail: A spoon sinking into creamy Apple Cinnamon Protein Overnight Oats after chilling, s
  • Balanced nutrition: Protein powder plus oats and yogurt give you a solid mix of protein, complex carbs, and fiber.
  • Great texture: Rolled oats soften overnight, soaking up the liquid for a thick, spoonable result.
  • Flavor that satisfies: Cinnamon, vanilla, and apple make it cozy without being heavy.
  • Meal prep friendly: Make one jar or several, and you’re set for days.
  • Customizable: Works with dairy or non-dairy milk, different protein powders, and your favorite toppings.

What You’ll Need

  • 1/2 cup rolled oats (old-fashioned; not quick or steel-cut)
  • 1/2 cup milk (dairy or unsweetened almond, oat, or soy)
  • 1/3 cup Greek yogurt (or a thick dairy-free yogurt)
  • 1 small apple, diced (about 3/4 cup; Honeycrisp, Gala, or Granny Smith)
  • 1 scoop vanilla protein powder (about 25–30 g; whey or plant-based)
  • 1–1 1/2 teaspoons ground cinnamon
  • 1–2 teaspoons maple syrup or honey (optional, to taste)
  • 1 teaspoon chia seeds (optional, for thickness and fiber)
  • 1/2 teaspoon vanilla extract (optional)
  • Pinch of salt (enhances flavor)
  • Toppings: extra diced apple, chopped walnuts or pecans, a sprinkle of cinnamon, nut butter drizzle

Step-by-Step Instructions

Cooking process: Overhead shot of the mixture just after stirring in milk and Greek yogurt, showing
  1. Mix the dry base: In a jar or bowl, combine rolled oats, protein powder, cinnamon, chia seeds, and a small pinch of salt. Stir to distribute evenly.
  2. Add wet ingredients: Pour in milk, Greek yogurt, vanilla extract, and sweetener if using.

    Stir until smooth with no dry pockets. It should look pourable but thick.

  3. Fold in the apple: Stir in the diced apple. For extra flavor, reserve a few pieces for topping in the morning.
  4. Adjust texture: If it seems too thick, add 1–2 tablespoons more milk.

    Remember it will thicken as it chills.

  5. Chill: Cover and refrigerate for at least 4 hours, ideally overnight, to let the oats hydrate.
  6. Finish and serve: In the morning, give it a stir. Add a splash of milk if needed. Top with more apple, a sprinkle of cinnamon, and 1–2 tablespoons chopped nuts for crunch.

Storage Instructions

  • Refrigerator: Keeps well for 3–4 days in an airtight container.

    The apple will soften over time.

  • Make-ahead tip: Prep dry “oat packs” (oats, protein, cinnamon, chia, salt) in small containers. Add milk, yogurt, and apple the night before.
  • Freezer: Not recommended once mixed. The texture suffers.

    Freeze pressed apple slices separately if needed.

Final dish presentation: Beautifully plated Apple Cinnamon Protein Overnight Oats served in a matte

Why This is Good for You

  • Protein for satiety: Protein powder and Greek yogurt help keep you full and support muscle recovery.
  • Fiber-rich carbs: Oats and apple provide soluble fiber for steady energy and digestive health.
  • Healthy add-ins: Chia seeds offer omega-3s, while nuts add heart-healthy fats and satisfying crunch.
  • Lower added sugar: Natural sweetness from apple and vanilla means you can use less sweetener.

Pitfalls to Watch Out For

  • Using the wrong oats: Quick oats can turn mushy; steel-cut won’t soften enough. Rolled oats are best.
  • Too much protein powder: Overloading can make it chalky. One standard scoop is plenty.
  • Not enough liquid: If it’s dry in the morning, add milk and stir.

    Aim for a pudding-like consistency.

  • Overly sweet protein powder: Taste before adding maple or honey; you may not need extra.
  • Skipping the salt: A tiny pinch brightens flavor and balances sweetness.

Recipe Variations

  • Caramel Apple: Add a drizzle of date syrup and a pinch of sea salt; top with toasted pecans.
  • Apple Pie: Stir in a dash of nutmeg and allspice; add crushed graham cracker or granola on top.
  • High-Fiber Boost: Add 1 tablespoon ground flaxseed and an extra 2 tablespoons milk.
  • Dairy-Free: Use almond or soy milk and a coconut or almond milk yogurt; choose plant-based protein.
  • Warm and Cozy: Heat gently on the stove or microwave in short bursts, adding milk to loosen.

FAQ

Can I make this without protein powder?

Yes. Increase Greek yogurt to 1/2 cup and reduce milk slightly to keep the same thickness. You can also add 1 tablespoon nut butter for extra protein and creaminess.

Which apples work best?

Crisp varieties like Honeycrisp, Gala, Pink Lady, or Granny Smith hold texture and provide bright flavor.

Use what you enjoy—sweeter apples need less added sweetener.

How do I prevent chalky texture?

Whisk the protein powder with the milk and yogurt first until smooth, then add oats. If it still tastes chalky, add a splash more milk and a bit more cinnamon.

Can I eat it warm?

Absolutely. Warm in a microwave-safe bowl in 20–30 second bursts, stirring and adding milk as needed until creamy and heated through.

Is this good for kids?

Yes, but consider using a half scoop of protein or skipping it, depending on their needs.

Keep added sweetener light and cut the apples small.

Final Thoughts

Apple Cinnamon Protein Overnight Oats make busy mornings easier without sacrificing flavor or nutrition. With a few pantry staples and a chopped apple, you get a creamy, satisfying breakfast that feels like a treat and performs like fuel. Tweak the texture, sweetness, and toppings to match your routine, and you’ll have a go-to meal prep you actually look forward to eating.

Pumpkin Pie Protein Overnight Oats – A Cozy, Make-Ahead Breakfast

Pumpkin Pie Protein Overnight Oats taste like dessert but work like a balanced breakfast. They’re creamy, cozy, and ready when you are—no stove required. Mix everything the night before, and you’ll have a fall-inspired bowl waiting in the fridge.

It’s a simple way to add more protein and fiber without fuss. Whether you’re rushing out the door or easing into the morning, this one checks all the boxes.

Why This Recipe Works

Close-up detail: A jar of Pumpkin Pie Protein Overnight Oats just stirred after chilling, creamy and
  • Protein-packed and satisfying: Protein powder and Greek yogurt keep you full longer and support muscle recovery.
  • Perfect texture: Rolled oats soak up milk and pumpkin for a thick, spoonable consistency.
  • Warm spice flavor: Pumpkin pie spice brings those nostalgic fall notes without needing a pie crust.
  • Make-ahead convenience: Stir it together in minutes, then let the fridge do the work.
  • Customizable: Adjust sweetness, add toppings, or switch milks to fit your preferences.

What You’ll Need

  • Old-fashioned rolled oats (1/2 cup)
  • Milk of choice (1/2–3/4 cup; dairy, almond, oat, or soy)
  • Pumpkin puree (1/3 cup; not pumpkin pie filling)
  • Vanilla or unflavored protein powder (1 scoop; about 20–25 g protein)
  • Plain Greek yogurt (1/4 cup; optional for extra creaminess and protein)
  • Chia seeds (1 tablespoon; helps thicken and adds omega-3s)
  • Pumpkin pie spice (1 teaspoon) or a mix of cinnamon, nutmeg, ginger, and cloves
  • Vanilla extract (1/2 teaspoon)
  • Maple syrup or honey (1–2 tablespoons, to taste)
  • Pinch of salt (brings out the flavors)
  • Toppings (optional): chopped pecans or walnuts, pumpkin seeds, a spoonful of almond butter, raisins, a drizzle of maple syrup, or a sprinkle of cinnamon

Step-by-Step Instructions

Cooking process: Overhead shot of the oats mixture being whisked smooth in a clear glass bowl—show
  1. Mix the base: In a jar or bowl, add oats, chia seeds, protein powder, pumpkin pie spice, and a pinch of salt. Stir to combine.
  2. Add the wet ingredients: Pour in milk, pumpkin puree, Greek yogurt (if using), maple syrup, and vanilla.

    Stir until smooth and no dry pockets remain.

  3. Adjust consistency: If it looks very thick, add a bit more milk. It should be pourable but not watery.
  4. Chill: Cover and refrigerate for at least 4 hours, ideally overnight.
  5. Finish and serve: In the morning, give it a stir. Add a splash of milk if needed.

    Top with nuts, seeds, or a drizzle of maple syrup and enjoy cold—or warm it gently in the microwave if you like.

Keeping It Fresh

  • Storage: Keep in an airtight container in the fridge for up to 3 days.
  • Batch prep: Make 2–3 jars at once for an easy weekday breakfast rotation.
  • Stir before eating: Oats and chia thicken as they sit; a quick stir and a splash of milk refresh the texture.
  • Add toppings last: Nuts and seeds stay crisp if added right before serving.
Final dish presentation: Restaurant-quality plated Pumpkin Pie Protein Overnight Oats served in a lo

Why This is Good for You

  • Protein for energy and satiety: Protein powder and Greek yogurt help keep you full and support muscle health.
  • Fiber-rich: Oats, pumpkin, and chia provide fiber for digestion and steady energy.
  • Vitamins and minerals: Pumpkin is rich in vitamin A and potassium; chia adds omega-3s and calcium.
  • Balanced macros: Carbs from oats, protein from dairy and powder, and healthy fats from chia create a steady, satisfying breakfast.

What Not to Do

  • Don’t use pumpkin pie filling: It’s pre-sweetened and spiced, which can make the oats cloying and throw off the texture.
  • Don’t skip the salt: A tiny pinch brightens the pumpkin and spice flavors.
  • Don’t add toppings too early: Nuts and seeds get soft if they sit overnight in the jar.
  • Don’t guess the liquid: Too little milk leads to chalky oats; too much makes them soupy. Start with 1/2 cup and adjust.

Alternatives

  • Dairy-free: Use almond, oat, or soy milk; swap Greek yogurt for a coconut or almond yogurt.
  • No protein powder: Add an extra 1/4 cup Greek yogurt and 1 tablespoon nut butter for protein and creaminess.
  • Gluten-free: Choose certified gluten-free oats.
  • Lower sugar: Skip maple syrup and sweeten with mashed banana or a few drops of liquid stevia.
  • Extra crunch: Add toasted pecans or pumpkin seeds just before serving.
  • Spice swap: Use cinnamon only, or add cardamom for a twist.

FAQ

Can I heat these oats?

Yes. Warm them in a microwave-safe bowl in 20–30 second bursts, stirring between each, until they’re just heated through.

Add a splash of milk if they thicken too much.

What type of protein powder works best?

A smooth, mild whey or plant-based vanilla powder works well. If your powder is very sweet or thick, reduce the maple syrup or add a bit more milk.

Can I make this without chia seeds?

Yes. The oats will still set, but they’ll be slightly looser.

Reduce milk by 1–2 tablespoons or add a bit more yogurt to keep it creamy.

How do I prevent clumps from the protein powder?

Whisk the dry ingredients together first, then add liquids. If needed, use a small whisk or shake everything in a jar with a tight lid.

Is canned pumpkin the same as pumpkin pie filling?

No. Use 100% pumpkin puree.

Pumpkin pie filling has added sugar and spices, which can overpower the recipe.

Wrapping Up

Pumpkin Pie Protein Overnight Oats give you a cozy, fall-flavored breakfast without any morning hassle. They’re creamy, nourishing, and easy to customize with your favorite toppings. Mix a jar tonight, and wake up to something that tastes like dessert but fuels your day.

Holiday Turkey & Cranberry Protein Bowls – A Bright, Balanced Meal Prep Favorite

These bowls bring the best parts of a holiday feast into a simple, everyday meal. Tender turkey, tangy cranberries, hearty grains, and crisp veggies meet in a bowl that tastes festive but feels light. It’s the kind of dish that works after a big holiday, especially if you’ve got leftover turkey.

Or make it fresh for a week of easy lunches. Either way, it’s satisfying, colorful, and packed with protein.

What Makes This Special

Close-up detail: Tender cooked turkey breast tossed with a glossy apple-cider-Dijon vinaigrette, min

This bowl balances sweet, savory, and tart flavors in a way that feels fresh, not heavy. You get a good mix of textures: juicy turkey, chewy grains, crunchy greens, and a bright cranberry kick.

It’s also flexible—use what you have on hand and swap ingredients based on taste or dietary needs. Meal prep friendly, high-protein, and holiday-inspired without the fuss.

Ingredients

  • 2 cups cooked turkey breast, shredded or cubed (rotisserie or leftover turkey works)
  • 1 cup cooked quinoa or farro (brown rice works too)
  • 1 cup baby spinach or chopped kale
  • 1/2 cup shredded Brussels sprouts or thinly sliced cabbage
  • 1/2 cup roasted sweet potato cubes
  • 1/3 cup dried cranberries or fresh cranberry relish (low-sugar if preferred)
  • 1/4 cup chopped pecans or walnuts (optional for crunch)
  • 1/4 cup crumbled feta or goat cheese (optional)
  • 1 small apple, diced (Honeycrisp or Gala)
  • 2 tbsp chopped red onion (optional)
  • Fresh parsley, chopped, for garnish

Dressing:

  • 3 tbsp extra-virgin olive oil
  • 2 tbsp apple cider vinegar
  • 1 tbsp Dijon mustard
  • 1 tsp honey or maple syrup
  • 1 tsp orange zest (optional but great with cranberry)
  • Salt and black pepper to taste

Instructions

Cooking process: Warm grains and greens being assembled for meal prep—steaming quinoa spread in a
  1. Cook your base: Prepare quinoa, farro, or brown rice according to package directions. Let it cool slightly so it doesn’t wilt the greens.
  2. Mix the dressing: Whisk olive oil, apple cider vinegar, Dijon, honey, orange zest, salt, and pepper until emulsified.
  3. Prep the veggies: Chop the spinach or kale, shred Brussels sprouts, dice the apple, and slice red onion if using.
  4. Build the bowls: Divide grains among 4 bowls or containers. Top with turkey, greens, Brussels sprouts, sweet potato, apple, cranberries, nuts, and cheese.
  5. Dress and toss: Drizzle with dressing right before eating.

    If meal prepping, portion the dressing separately to keep everything crisp.

  6. Garnish: Sprinkle with parsley and a crack of black pepper. Taste and adjust salt or acidity as needed.

Keeping It Fresh

  • Store components separately for best texture: grains and turkey in one container, veggies in another, dressing on the side.
  • Refrigerate up to 4 days. Add apple the day you eat to prevent browning, or toss with a little lemon juice.
  • Heat selectively: Warm turkey and grains if you like, then add cool crunchy elements and dressing.
  • Use low-moisture greens like kale or cabbage if prepping several days ahead.
Tasty top view (final presentation): Overhead shot of Holiday Turkey & Cranberry Protein Bowl neatly

Health Benefits

  • High protein from turkey supports muscle repair and steady energy.
  • Fiber-rich grains and veggies help with digestion and keep you full longer.
  • Healthy fats from olive oil and nuts support heart health and vitamin absorption.
  • Antioxidants from cranberries, kale, and apple may help reduce inflammation.

Pitfalls to Watch Out For

  • Overly sweet cranberries: Many dried cranberries are heavy on sugar.

    Choose low-sugar or use a small scoop of cranberry relish.

  • Watery bowls: Don’t add dressing too early. Keep it separate for meal prep.
  • Bland grains: Cook grains in low-sodium broth and season lightly for more flavor.
  • Dry turkey: Toss turkey with a teaspoon of olive oil or a spoon of dressing to keep it juicy.

Variations You Can Try

  • Swap the protein: Use rotisserie chicken, roasted tofu, or chickpeas.
  • Change the base: Farro for chew, wild rice for nuttiness, cauliflower rice for lower carbs.
  • Bright citrus twist: Add orange segments and extra zest in the dressing.
  • Warm and cozy: Serve with warmed grains, sautéed kale, and hot roasted sweet potatoes.
  • Dairy-free: Skip the cheese and add avocado for creaminess.
  • Nut-free: Use roasted pumpkin seeds or sunflower seeds for crunch.

FAQ

Can I use leftover stuffing instead of grains?

You can, but keep portion sizes small since stuffing is richer and often higher in sodium. Pair with extra greens to balance it out.

What if I don’t have cranberry sauce?

Use dried cranberries, a handful of pomegranate arils, or a quick stir of chopped dried cherries.

For a tart edge, add a splash of lemon to the dressing.

How do I make this lower carb?

Swap grains for cauliflower rice or a big bed of shredded cabbage and kale. Keep the apples and cranberries modest, and add extra turkey and greens.

Can I freeze these bowls?

Freeze the turkey and grains separately if needed. Don’t freeze greens, apples, or dressing—they lose texture.

Assemble fresh after thawing.

How much protein is in a bowl?

With 1/2 cup turkey and a grain base, you’ll generally get around 25–35 grams of protein, depending on portions and add-ins like nuts or cheese.

In Conclusion

Holiday Turkey & Cranberry Protein Bowls are a smart, satisfying way to enjoy seasonal flavors without the heaviness. They pack protein, fiber, and crunch, and they’re easy to prep for the week. Customize them to match your pantry and your goals, and you’ll have a bright, balanced meal ready whenever hunger hits.

Gingerbread Protein Pancake Prep Stack – Cozy, High-Protein Breakfast You Can Make Ahead

These pancakes bring warm gingerbread flavor to your weekday mornings without the sugar crash. They’re soft, gently spiced, and pack a solid protein punch so you actually stay full. The batter blends up fast, cooks cleanly, and reheats well for meal prep.

Pair them with Greek yogurt or a drizzle of maple for a balanced breakfast. If you love holiday flavors but want something practical, this stack hits the sweet spot.

Why This Recipe Works

Close-up detail: A stack of gingerbread protein pancakes fresh off the griddle, close-up on the cut
  • Protein-forward and satisfying: Whey or plant protein helps keep you full and supports muscle recovery.
  • Warm, cozy flavor: Gingerbread spices and molasses add classic holiday depth without overdoing the sugar.
  • Meal-prep friendly: The pancakes hold up in the fridge or freezer and reheat beautifully.
  • Balanced texture: Oats and egg whites create tender pancakes that aren’t dry or rubbery.
  • One-bowl simplicity: Minimal cleanup and straightforward steps.

Ingredients

  • 1 cup rolled oats (or oat flour)
  • 1 scoop vanilla or unflavored whey protein (about 25–30 g) or plant protein
  • 2 large eggs (or 1 egg + 1/3 cup liquid egg whites)
  • 3/4 cup milk of choice (dairy or unsweetened almond)
  • 2 tablespoons molasses
  • 1–2 tablespoons maple syrup or honey (to taste)
  • 1 teaspoon baking powder
  • 1/2 teaspoon baking soda
  • 1 teaspoon ground cinnamon
  • 3/4 teaspoon ground ginger
  • 1/4 teaspoon ground nutmeg
  • 1/8 teaspoon ground cloves (optional, strong)
  • Pinch of salt
  • 1 teaspoon vanilla extract
  • Cooking oil or butter for the pan
  • Optional add-ins: 2 tablespoons mini chocolate chips, 2 tablespoons chopped pecans, or a handful of raisins

How to Make It

Cooking process: Overhead shot of evenly sized 1/4-cup pancakes cooking on a nonstick griddle; batte
  1. Make oat flour: If using rolled oats, blitz them in a blender until fine. You want a flour-like texture with no big flakes.
  2. Build the batter: Add protein powder, baking powder, baking soda, spices, and salt to the blender.

    Pulse to mix. Add eggs, milk, molasses, maple syrup, and vanilla. Blend until smooth, about 20–30 seconds.

  3. Rest the batter: Let it sit for 5 minutes so the oats hydrate and the batter thickens slightly.

    If it gets too thick, splash in 1–2 tablespoons milk.

  4. Heat the pan: Warm a nonstick skillet or griddle over medium heat. Lightly grease with oil or butter.
  5. Cook: Pour 1/4-cup scoops for evenly sized pancakes. Cook 2–3 minutes until bubbles form and edges look set.

    Flip and cook 1–2 minutes more. Lower the heat if they brown too fast.

  6. Finish and stack: Repeat with remaining batter. Keep cooked pancakes on a low oven (200°F/95°C) tray while you finish.
  7. Serve or prep: Top with Greek yogurt, a drizzle of maple, or berries.

    For meal prep, cool completely before storing.

Storage Instructions

  • Fridge: Store in an airtight container for up to 4 days. Layer with parchment to prevent sticking.
  • Freezer: Freeze on a tray, then bag once solid. Keeps well for 2–3 months.
  • Reheat: Microwave 30–60 seconds, or toast on low.

    For crisp edges, warm in a skillet with a touch of butter.

Final dish plated: Restaurant-quality presentation of the Gingerbread Protein Pancake Prep Stack arr

Why This is Good for You

  • Protein supports satiety and recovery: A scoop of protein plus eggs helps stabilize hunger and maintain muscle.
  • Spice benefits: Ginger and cinnamon bring antioxidants and a comforting aroma.
  • Balanced carbs: Oats provide fiber for steady energy without the mid-morning slump.
  • Smarter sweetness: Molasses adds iron and deep flavor, so you can use less syrup overall.

Pitfalls to Watch Out For

  • Dry or rubbery pancakes: Too much protein powder or overcooking can toughen them. Stick to one scoop and medium heat.
  • Gritty texture: Blend oats until fine and let the batter rest to hydrate.
  • Bitter aftertaste: Don’t overdo cloves or baking soda. Measure carefully.
  • Burning: Molasses browns fast.

    Keep heat moderate and flip when bubbles appear.

Alternatives

  • Gluten-free: Use certified gluten-free oats and a gluten-free baking powder.
  • Dairy-free: Choose almond or oat milk and a dairy-free protein powder.
  • No molasses: Swap 1 tablespoon maple syrup plus 1 teaspoon dark brown sugar. Flavor will be lighter.
  • Extra fiber: Stir in 1 tablespoon ground flax or chia; add a splash more milk if needed.
  • Lower sugar: Skip the maple in the batter and rely on light toppings like berries and Greek yogurt.

FAQ

Can I make the batter the night before?

Yes, but it will thicken. Stir in a little milk in the morning to loosen it.

Cook as usual.

Which protein powder works best?

Whey isolate blends smoothly and keeps the texture light. If using plant protein, add a splash more milk and avoid gritty brands.

How do I keep pancakes fluffy?

Use fresh baking powder and don’t overmix. Let the batter rest 5 minutes and cook on medium heat, not high.

Can I bake these as sheet pan pancakes?

Yes.

Spread the batter on a greased, parchment-lined quarter sheet pan and bake at 400°F (205°C) for 10–12 minutes, until set and lightly golden.

What toppings pair well with gingerbread flavor?

Greek yogurt, bananas, pears, toasted pecans, a light drizzle of maple, or a smear of almond butter all work great.

In Conclusion

Gingerbread Protein Pancake Prep Stack gives you a cozy, spiced breakfast that’s practical for busy mornings. It’s easy to make, stores well, and delivers balanced nutrition without sacrificing flavor. Keep a batch in the fridge or freezer, and you’ll have a warm, satisfying start whenever you need it.

Salted Caramel Thumbprint Cookies – Buttery, Chewy, and Perfectly Sweet

These Salted Caramel Thumbprint Cookies are the kind of treat that makes people hover around the cookie plate. They’re buttery, soft, and filled with silky caramel, finished with a sprinkle of flaky sea salt. Each bite balances sweet and salty in the best way.

They look special enough for holidays but are easy enough for a weeknight bake. If you love caramel and a little crunch of salt, this is your cookie.

What Makes This Special

Close-up detail: Freshly baked salted caramel thumbprint cookies just out of the oven with shallow w

These cookies blend a classic shortbread-style base with a rich, glossy caramel center. The dough is simple, so the flavors shine.

A light hand with the salt elevates the caramel without overpowering it. They hold their shape well, bake evenly, and stay tender for days. It’s a bakery-worthy result with minimal fuss.

Ingredients

  • 1 cup (226 g) unsalted butter, softened
  • 2/3 cup (135 g) granulated sugar
  • 1 large egg, room temperature
  • 1 tsp vanilla extract
  • 2 cups (250 g) all-purpose flour
  • 1/4 tsp fine sea salt
  • 1 cup soft caramels (about 20–24 pieces), unwrapped
  • 2–3 tbsp heavy cream
  • Flaky sea salt, for topping
  • Optional: 1/2 cup finely chopped pecans or almonds for rolling

Step-by-Step Instructions

Cooking process: Warm caramel being spooned into the thumbprint wells on a tray of cooled cookies, g
  1. Preheat and prep: Heat the oven to 350°F (175°C).

    Line two baking sheets with parchment paper.

  2. Cream the butter and sugar: In a large bowl, beat the butter and sugar until light and fluffy, about 2–3 minutes. This creates a soft, tender cookie.
  3. Add egg and vanilla: Mix in the egg and vanilla until just combined. Scrape the bowl so everything blends evenly.
  4. Add dry ingredients: Whisk flour and fine sea salt in a separate bowl.

    Add to the butter mixture and mix on low until a soft dough forms. Don’t overmix.

  5. Shape the cookies: Scoop 1-tablespoon portions and roll into smooth balls. If using nuts, roll the dough balls in chopped nuts to coat.
  6. Make the “thumbprint”: Place balls on the sheet, spacing 2 inches apart.

    Use your thumb or the back of a 1/2-teaspoon measuring spoon to press a shallow well in the center. If cracks form, gently pinch them closed for a neater look.

  7. Bake: Bake 10–12 minutes until the edges are set but not browned. The cookies should stay pale and soft. If the centers puff, press the wells again gently right out of the oven.
  8. Make the caramel: While cookies cool slightly, melt caramels with heavy cream in a small saucepan over low heat, stirring until smooth. If too thick, add a splash more cream; if too thin, let it cool a minute to thicken.
  9. Fill: Spoon warm caramel into each well, about 1 teaspoon per cookie.

    Tap the sheet gently to level the caramel.

  10. Finish with salt: Sprinkle a pinch of flaky sea salt on top while the caramel is still warm so it adheres.
  11. Set and serve: Let cookies cool until the caramel firms slightly. They’re perfect when the centers are set but still soft and chewy.

Keeping It Fresh

Store cookies in an airtight container at room temperature for up to 4 days. Place parchment between layers to prevent sticking.

For longer storage, freeze in a single layer until solid, then transfer to a bag or container for up to 2 months. Thaw at room temperature—no reheating needed.

Final dish top view: Overhead shot of a platter of finished Salted Caramel Thumbprint Cookies arrang

Why This is Good for You

While these are a treat, there are still a few wins. Portion control is built in—one cookie satisfies a sweet craving. A touch of sea salt helps balance sweetness, making each bite feel more satisfying.

Serve them with fruit or tea for a mindful treat moment.

What Not to Do

  • Don’t overbake. Browning means the cookies will turn dry and crumbly.
  • Don’t skip the salt. A tiny sprinkle brings the caramel to life.
  • Don’t overfill the wells. Too much caramel will spill and harden on the sides.
  • Don’t rush the caramel. High heat scorches. Keep it low and stir.
  • Don’t use cold butter. Softened butter creates the right texture and lift.

Alternatives

  • Chocolate center: Fill with warm ganache (chocolate + cream) and top with sea salt.
  • Dulce de leche swap: Use canned dulce de leche instead of melted caramels for a deeper flavor.
  • Gluten-free: Use a 1:1 gluten-free baking flour blend. Chill dough 20 minutes for easier shaping.
  • Nutty coating: Roll dough balls in finely chopped pecans, almonds, or hazelnuts for crunch.
  • Spiced dough: Add 1/2 tsp cinnamon or cardamom to the flour for warmth.

FAQ

Can I make the dough ahead?

Yes.

Wrap and chill the dough for up to 48 hours. Let it sit at room temperature for 15–20 minutes before shaping so it softens slightly.

My caramel hardened too much—what can I do?

Warm it gently with another teaspoon of cream, stirring until smooth. Refill as needed.

Avoid overheating, which makes it grainy.

How do I keep the cookies from cracking?

Roll dough into very smooth balls and press the wells slowly. If cracks appear, pinch them closed before baking. Slight cracks are normal and still look charming.

Can I use homemade caramel sauce?

Absolutely.

Use a thicker sauce so it sets in the center. If it’s runny, cook it a bit longer to reduce, or chill the sauce briefly before filling.

Do these travel well?

Yes. Let them set completely, then layer with parchment in a snug container.

Avoid heat so the caramel doesn’t soften and smear.

In Conclusion

Salted Caramel Thumbprint Cookies bring together buttery dough, smooth caramel, and a kiss of flaky salt for a treat that feels special and tastes irresistible. They’re simple to make, pretty on a platter, and always a crowd favorite. Keep this recipe on hand for holidays, bake sales, or any time you want something sweet and satisfying.