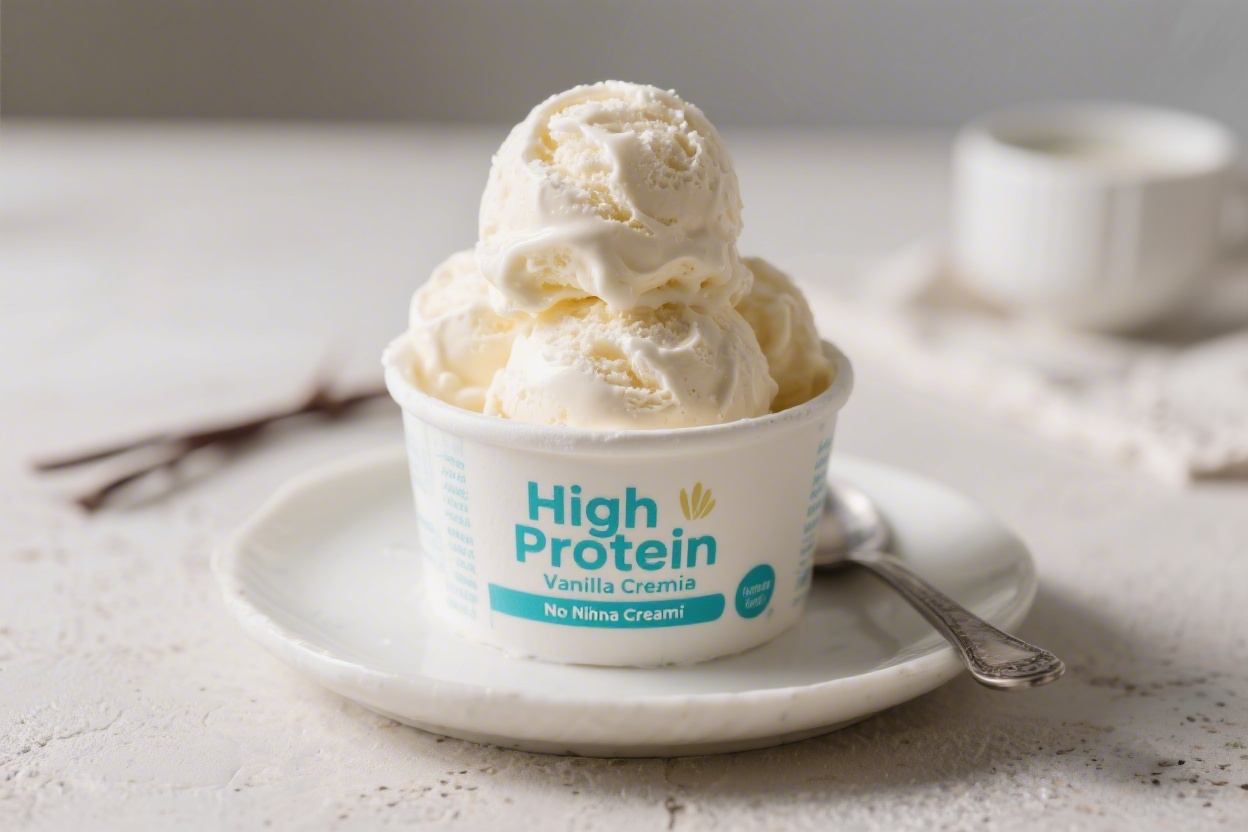
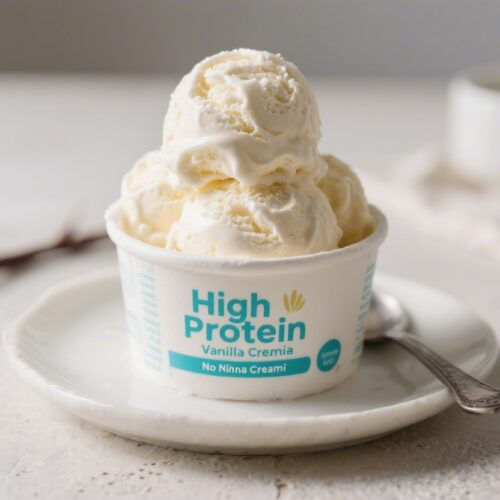
High Protein Vanilla Ice Cream (No Ninja Creami Required)
You don’t need a fancy machine to make spoonable, creamy, high-protein ice cream at home. This vanilla version uses everyday ingredients and a blender, and it sets up in your freezer with a few smart tricks. It tastes like the real deal, not a chalky protein shake.
If you love a classic vanilla scoop after dinner or post-workout, this one hits both cravings. It’s budget-friendly, customizable, and easy enough for a weeknight.
What Makes This Recipe So Good
- No special equipment: A blender and a freezer are all you need—no Ninja Creami or ice cream maker.
- Creamy texture: A little instant pudding mix and cottage cheese keep it smooth, not icy.
- High protein: Around 25–35 grams of protein per serving, depending on your protein powder.
- Light but satisfying: Sweet, vanilla-forward flavor without heavy cream.
- Customizable: Easy to tweak for dairy-free, low sugar, or different flavors.
What You’ll Need
- 1 cup (240 ml) unsweetened vanilla or plain almond milk (or dairy milk for richer texture)
- 1 cup (225 g) low-fat cottage cheese (or Greek yogurt; cottage cheese blends smoother)
- 1 scoop (25–35 g) vanilla whey or whey–casein blend protein powder (plant-based works but sets firmer)
- 2 tablespoons sugar or sweetener of choice (maple syrup, honey, or 1–2 tablespoons granulated sweetener)
- 1 teaspoon vanilla extract
- 1–2 teaspoons instant vanilla pudding mix (regular or sugar-free; helps prevent iciness)
- Pinch of salt
- Optional: 1 tablespoon almond butter or coconut cream for extra richness
How to Make It

- Blend the base: Add milk, cottage cheese, protein powder, sweetener, vanilla, pudding mix, salt, and any optional fat to a high-speed blender. Blend until completely smooth and glossy, 30–60 seconds.
Taste and adjust sweetness.
- Chill the mixture: Pour into a bowl, cover, and refrigerate 30–60 minutes. This helps the pudding mix hydrate and improves texture.
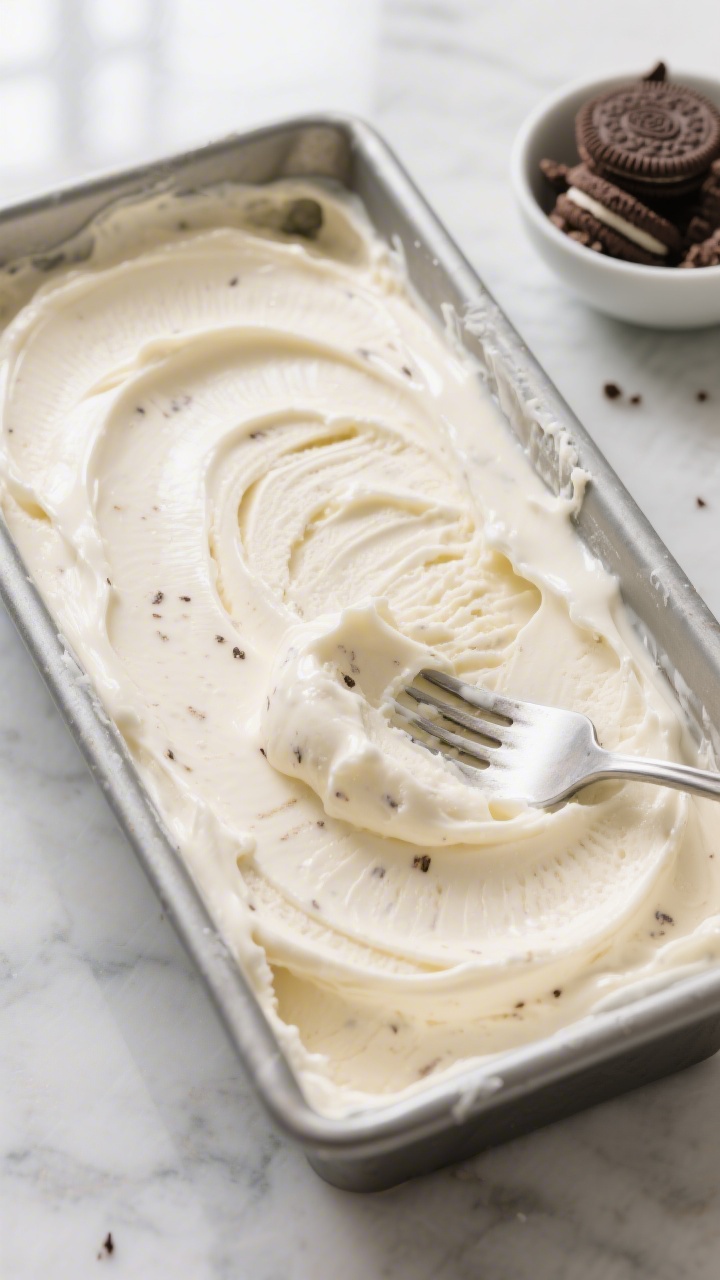
- Freeze shallow: Transfer to a shallow freezer-safe container (metal loaf pan or wide glass dish works best). Spread evenly for a thin layer.
- Stir as it sets: Freeze for 2–3 hours, stirring with a fork every 30–45 minutes to break up ice crystals.
Scrape the edges into the center each time.
- Scoop and serve: When thick and scoopable like soft serve, enjoy right away. For firmer scoops, freeze an additional 1–2 hours, then let it sit at room temp 5–10 minutes before scooping.
How to Store
- Store in a lidded, shallow container for up to 2 weeks.
- Press parchment or plastic wrap directly onto the surface to reduce ice crystals.
- Let it thaw on the counter for 5–15 minutes before scooping for the best texture.
Benefits of This Recipe
- High protein per serving: Supports recovery and keeps you full.
- Lower in fat and calories than traditional ice cream, yet still creamy.
- Budget-friendly: Uses pantry staples instead of pricier specialty desserts.
- Flexible for diets: Works with low sugar, gluten-free, and can be made dairy-free.
Pitfalls to Watch Out For
- Grainy texture: Blend thoroughly. If using Greek yogurt, blend a little longer.
- Too icy: Use the instant pudding mix, freeze in a shallow layer, and stir while freezing.
- Overly sweet or not sweet enough: Protein powders vary.
Taste and adjust before freezing.
- Rock-hard after overnight freezing: Let it sit at room temp 10–15 minutes or splash in a tablespoon of vodka or glycerin next time to soften.
Recipe Variations
- Dairy-Free: Use coconut milk beverage or almond milk, a thick dairy-free yogurt or silken tofu (1 cup), and plant-based protein powder. Add 1–2 tablespoons coconut cream for creaminess.
- Low Sugar: Use a zero-calorie sweetener and sugar-free pudding mix. A few drops of liquid stevia can boost sweetness without aftertaste.
- Cookies and Cream: Stir in 2–3 crushed chocolate sandwich cookies during the last stir in the freezer.
- Strawberry Swirl: Ripple in 1/4 cup mashed sweetened strawberries before the final freeze.
- Peanut Butter Cup: Add 1 tablespoon peanut butter to the base and fold in a few chopped dark chocolate chips.
- Espresso Vanilla: Blend in 1–2 teaspoons instant espresso powder.
FAQ
Can I make it without instant pudding mix?
Yes.
Replace it with 1/2 teaspoon xanthan gum or 1 tablespoon powdered milk. Texture may be slightly less creamy, but still good.
What protein powder works best?
A whey–casein blend gives the creamiest texture. Pure whey works well too.
Plant-based powders can freeze firmer, so add a bit more milk or a tablespoon of coconut cream.
Can I double the recipe?
Absolutely. Use a wider container so it freezes evenly, and be sure to stir during freezing to avoid large ice crystals.
Do I need to strain the cottage cheese?
No. A good blender will make it silky.
If your blender is weaker, blend longer or use Greek yogurt for a smoother start.
How much protein is in a serving?
It depends on your protein powder, but most batches yield about 50–70 grams total. Split into two servings for roughly 25–35 grams each.
Why is it hard after a full freeze?
Homemade, lower-fat ice cream freezes solid. Let it sit out 10–15 minutes before scooping, or add 1 tablespoon vodka or vegetable glycerin to keep it softer.
Final Thoughts
This High Protein Vanilla Ice Cream is simple, creamy, and made with ingredients you probably have.
No Ninja Creami required—just a blender, a shallow pan, and a little patience. Keep the base recipe handy, then riff with your favorite mix-ins. It’s a sweet treat that actually supports your goals, and it tastes like dessert, not a compromise.
High Protein Vanilla Ice Cream (No Ninja Creami Required) - Creamy, Simple, and Satisfying
Ingredients
- 1 cup (240 ml) unsweetened vanilla or plain almond milk (or dairy milk for richer texture)
- 1 cup (225 g) low-fat cottage cheese (or Greek yogurt; cottage cheese blends smoother)
- 1 scoop (25–35 g) vanilla whey or whey–casein blend protein powder (plant-based works but sets firmer)
- 2 tablespoons sugar or sweetener of choice (maple syrup, honey, or 1–2 tablespoons granulated sweetener)
- 1 teaspoon vanilla extract
- 1–2 teaspoons instant vanilla pudding mix (regular or sugar-free; helps prevent iciness)
- Pinch of salt
- Optional: 1 tablespoon almond butter or coconut cream for extra richness
Instructions
- Blend the base: Add milk, cottage cheese, protein powder, sweetener, vanilla, pudding mix, salt, and any optional fat to a high-speed blender. Blend until completely smooth and glossy, 30–60 seconds.Taste and adjust sweetness.
- Chill the mixture: Pour into a bowl, cover, and refrigerate 30–60 minutes. This helps the pudding mix hydrate and improves texture.
- Freeze shallow: Transfer to a shallow freezer-safe container (metal loaf pan or wide glass dish works best). Spread evenly for a thin layer.
- Stir as it sets: Freeze for 2–3 hours, stirring with a fork every 30–45 minutes to break up ice crystals.Scrape the edges into the center each time.
- Scoop and serve: When thick and scoopable like soft serve, enjoy right away. For firmer scoops, freeze an additional 1–2 hours, then let it sit at room temp 5–10 minutes before scooping.
Printable Recipe Card
Want just the essential recipe details without scrolling through the article? Get our printable recipe card with just the ingredients and instructions.