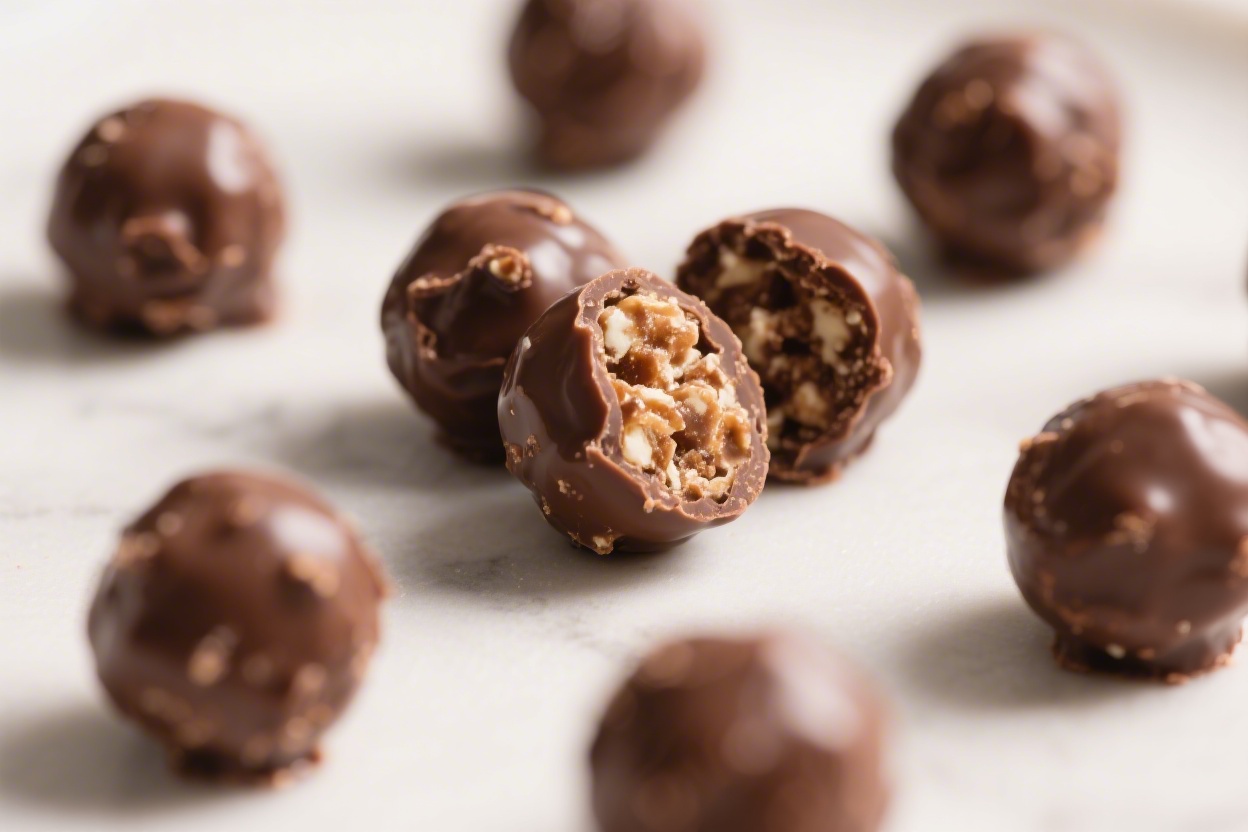
Gluten Free Crunchie Chocolate Balls – Easy, No-Bake Treat With a Satisfying Snap
These little bites bring together creamy chocolate and a honeycomb-style crunch in one easy, no-bake treat. They’re sweet, snackable, and naturally gluten free with the right ingredients. Make a batch for parties, lunchboxes, or a late-night craving—no oven or fancy tools needed.
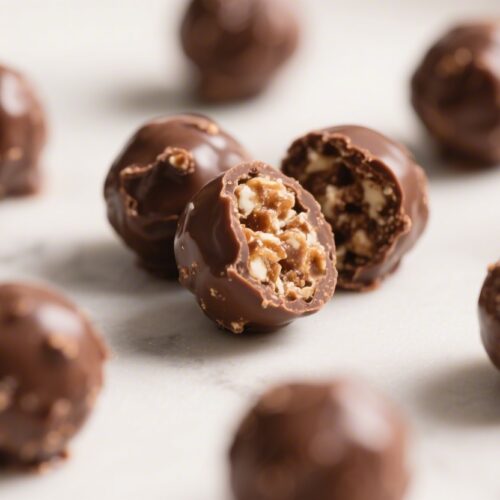
The best part? That crisp “crunch” in the center wrapped in smooth chocolate. You’ll get the feel of a candy bar, but in a simple, homemade ball.
Why This Recipe Works
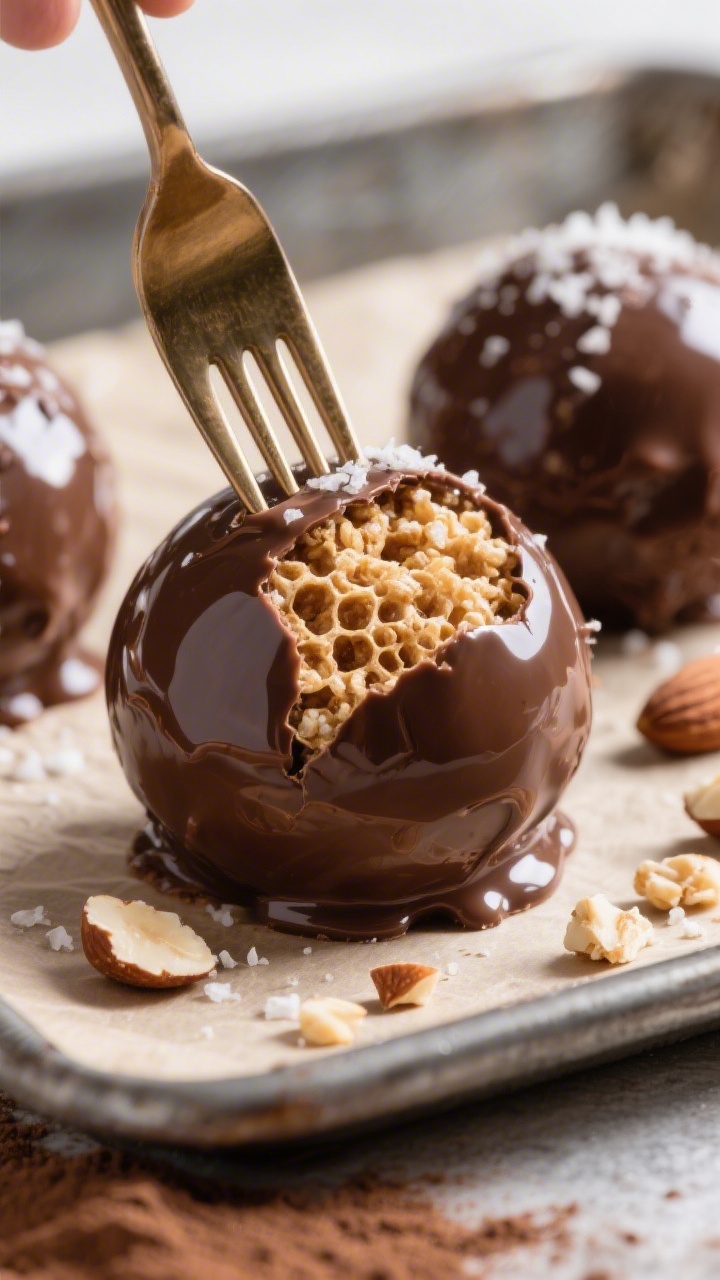
These chocolate balls deliver contrast: a snappy, airy center and a silky chocolate shell.
The crunch comes from a gluten free honeycomb-style candy or crispy puffed rice, so you get texture without using wheat. A touch of nut or seed butter helps everything bind together while adding richness. Finally, chilling sets the shape fast, so you can enjoy them within the hour.
What You’ll Need
- Gluten free honeycomb candy (store-bought “crunchie” style) or gluten free puffed rice cereal for the center
- Dark or milk chocolate chips (about 1 1/2 cups)
- Coconut oil or butter (1–2 teaspoons) to smooth the melt
- Nut or seed butter (3 tablespoons; almond, peanut, cashew, or sunflower seed butter)
- Honey or maple syrup (1–2 tablespoons), optional for extra sweetness
- Vanilla extract (1/2 teaspoon)
- Pinch of salt to balance sweetness
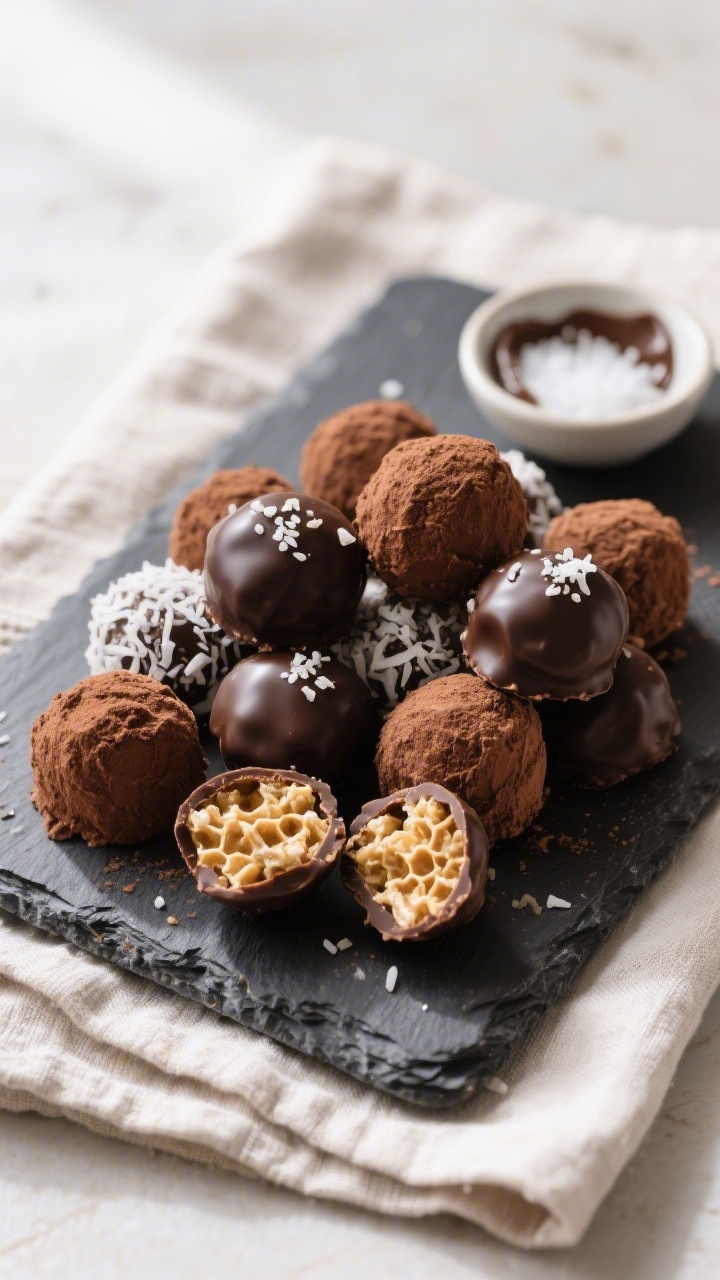
- Optional coatings: cocoa powder, finely chopped nuts, shredded coconut, or flaky sea salt
How to Make It
- Prep your tray. Line a baking sheet with parchment paper.
Clear a space in your fridge or freezer.
- Crush the crunch. Place the gluten free honeycomb candy in a zip-top bag and lightly crush with a rolling pin until you have small chunks (not dust). If using puffed rice, keep it whole for extra airiness.
- Make the base. In a bowl, mix nut or seed butter, vanilla, salt, and honey or maple syrup (if using). Stir in the crushed honeycomb or puffed rice until coated and clumping.
- Shape the balls. Scoop a tablespoon of mixture and press gently into a ball.
If it’s too loose, add a bit more nut/seed butter; if it’s too sticky, fold in a few more crunchy bits. Place balls on the lined tray.
- Chill to set. Refrigerate for 15–20 minutes (or freeze for 8–10) until firm.
- Melt the chocolate. In a microwave-safe bowl, combine chocolate chips and coconut oil. Heat in 20–30 second bursts, stirring between each, until smooth.
Or melt over a gentle double boiler.
- Dip and coat. Using a fork, dip each chilled ball into the melted chocolate. Tap off excess and return to the tray. Sprinkle with flaky salt, nuts, or coconut if you like.
- Final chill. Refrigerate 20 minutes, until the chocolate shell hardens.
Enjoy right away or store for later.
Storage Instructions
Keep the balls in an airtight container in the fridge for up to 1 week. For longer storage, freeze them for up to 2 months; thaw in the fridge for 15 minutes before serving. If your kitchen runs warm, serve straight from the fridge so the chocolate stays snappy.
Separate layers with parchment to avoid sticking.
Why This is Good for You
These treats are gluten free, so they fit celiac and gluten-sensitive diets when you choose certified ingredients. Nut or seed butter brings healthy fats and a touch of protein, which helps with satiety. Dark chocolate adds antioxidants and a deeper flavor that can reduce the need for extra sugar.
Portion-controlled balls also make it easy to enjoy a sweet without going overboard.
What Not to Do
- Don’t skip label checks. Make sure honeycomb candy, puffed rice, and chocolate are certified gluten free to avoid cross-contamination.
- Don’t over-crush the honeycomb. Powdery crumbs lose the signature crunch; aim for small chunks.
- Don’t overheat chocolate. Burnt chocolate turns grainy. Short bursts and stirring are key.
- Don’t skip chilling before dipping. Warm centers will crumble in the chocolate bath.
- Don’t store at room temp in hot weather. The shell can bloom or melt and lose its snap.
Alternatives
- Dairy free: Use dairy free chocolate chips and coconut oil. Check that your honeycomb candy is dairy free, or choose puffed rice.
- Nut free: Swap nut butter for sunflower seed or tahini.
Choose nut-free coatings like cocoa or coconut.
- No refined sugar: Use 85–90% dark chocolate and sweeten the base with maple or date syrup. Puffed rice works well here.
- Flavor twists: Add orange zest, a pinch of cinnamon, instant espresso powder, or peppermint extract to the chocolate.
- Protein boost: Stir 1–2 tablespoons of your favorite gluten free protein powder into the base; add a splash more nut butter if dry.
FAQ
How do I make gluten free honeycomb at home?
Combine sugar, honey, and a little water, cook to a deep amber, then whisk in baking soda to create bubbles. Pour onto parchment to cool and harden.
Make sure all ingredients and tools are clean and gluten free, and store the candy airtight so it stays crisp.
Why did my balls fall apart when dipping?
They likely weren’t chilled enough or the base was too dry. Chill longer, and add a teaspoon more nut or seed butter to help bind. Handle with a fork and support the bottom as you tap off excess chocolate.
Can I use white chocolate?
Yes, but it’s sweeter and melts faster.
Add a teaspoon of coconut oil for smoother dipping and watch the heat closely to prevent scorching.
Do I need a candy thermometer?
Not for this recipe if using store-bought honeycomb or puffed rice. A thermometer is only necessary if you decide to make honeycomb from scratch.
How big should each ball be?
About 1 tablespoon of mixture per ball works well—roughly 1 to 1.25 inches. This size gives a good crunch-to-chocolate ratio and sets quickly.
Final Thoughts
Gluten Free Crunchie Chocolate Balls are simple to make, easy to customize, and guaranteed to please anyone who loves a crisp bite under smooth chocolate.
Keep a batch in the fridge for stress-free snacks or last-minute dessert trays. Once you lock in your favorite crunch and chocolate combo, this will be a repeat recipe you’ll whip up without thinking.
Gluten Free Crunchie Chocolate Balls - Easy, No-Bake Treat With a Satisfying Snap
Ingredients
- Gluten free honeycomb candy (store-bought “crunchie” style) or gluten free puffed rice cereal for the center
- Dark or milk chocolate chips (about 1 1/2 cups)
- Coconut oil or butter (1–2 teaspoons) to smooth the melt
- Nut or seed butter (3 tablespoons; almond, peanut, cashew, or sunflower seed butter)
- Honey or maple syrup (1–2 tablespoons), optional for extra sweetness
- Vanilla extract (1/2 teaspoon)
- Pinch of salt to balance sweetness
- Optional coatings: cocoa powder, finely chopped nuts, shredded coconut, or flaky sea salt
Instructions
- Prep your tray. Line a baking sheet with parchment paper.Clear a space in your fridge or freezer.
- Crush the crunch. Place the gluten free honeycomb candy in a zip-top bag and lightly crush with a rolling pin until you have small chunks (not dust). If using puffed rice, keep it whole for extra airiness.
- Make the base. In a bowl, mix nut or seed butter, vanilla, salt, and honey or maple syrup (if using). Stir in the crushed honeycomb or puffed rice until coated and clumping.
- Shape the balls. Scoop a tablespoon of mixture and press gently into a ball.If it’s too loose, add a bit more nut/seed butter; if it’s too sticky, fold in a few more crunchy bits. Place balls on the lined tray.
- Chill to set. Refrigerate for 15–20 minutes (or freeze for 8–10) until firm.
- Melt the chocolate. In a microwave-safe bowl, combine chocolate chips and coconut oil. Heat in 20–30 second bursts, stirring between each, until smooth.Or melt over a gentle double boiler.
- Dip and coat. Using a fork, dip each chilled ball into the melted chocolate. Tap off excess and return to the tray. Sprinkle with flaky salt, nuts, or coconut if you like.
- Final chill. Refrigerate 20 minutes, until the chocolate shell hardens.Enjoy right away or store for later.
Printable Recipe Card
Want just the essential recipe details without scrolling through the article? Get our printable recipe card with just the ingredients and instructions.