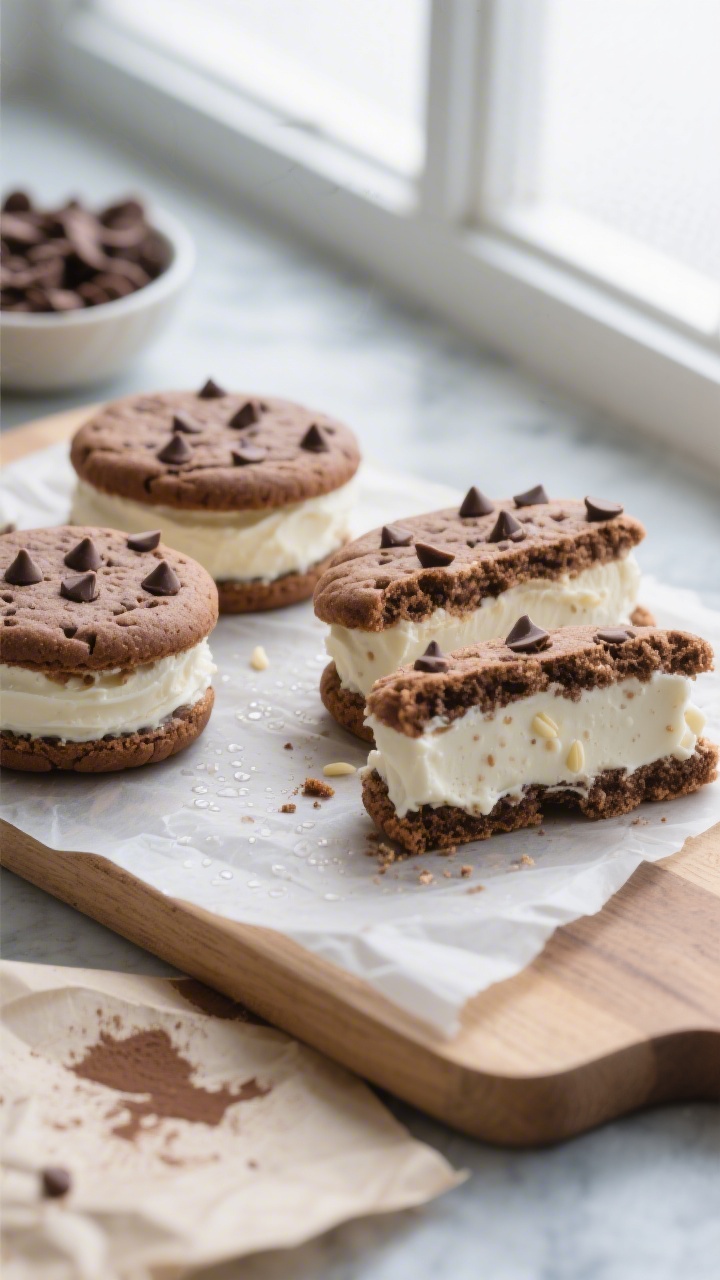
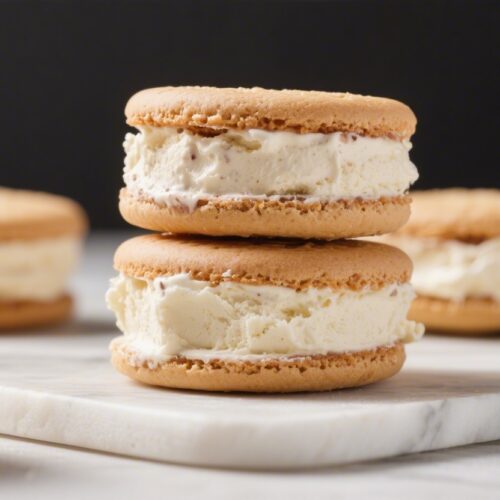
Protein Ice Cream Sandwiches – A Fun, High-Protein Treat
Love the idea of an ice cream sandwich but want something a little more nourishing? These protein ice cream sandwiches hit that sweet spot. They taste like dessert, pack a solid dose of protein, and you can make them with simple, everyday ingredients.
No fancy equipment beyond a freezer and a mixing bowl. They’re great for meal prep, post-workout snacks, or a late-night craving that won’t derail your goals.
What Makes This Recipe So Good
- High in protein, low in fuss: You’ll get balanced macros without complicated steps.
- Customizable flavors: Switch up the protein, sweetener, and mix-ins to match your cravings.
- Freezer-friendly: Make a batch on Sunday and enjoy all week.
- Actually tastes like dessert: Soft cookie base, creamy protein filling, satisfying bite.
- Gluten-free or dairy-free friendly: Easy swaps make it fit your needs.
Shopping List
- For the cookie layers:
- Almond flour (or oat flour)
- Vanilla or chocolate protein powder (whey or plant-based)
- Cocoa powder (if making chocolate cookies)
- Baking powder
- Pinch of salt
- Unsweetened applesauce (or Greek yogurt)
- Nut butter (peanut, almond, or cashew)
- Maple syrup or honey (or a zero-cal sweetener, to taste)
- Vanilla extract
- Mini chocolate chips (optional)
- For the “ice cream” filling:
- Greek yogurt (2% or whole for creamier texture) or a thick dairy-free yogurt
- Vanilla or chocolate protein powder
- Maple syrup, honey, or sweetener of choice
- Vanilla extract
- Pinch of salt
- Mix-ins: crushed berries, cacao nibs, mini chips, or peanut butter swirls (optional)
- Extras: Parchment paper and an 8×8-inch pan
Instructions

- Prep the pan: Line an 8×8-inch pan with parchment, leaving overhang for easy lifting.
- Make the cookie dough: In a bowl, whisk 1 cup almond flour, 1/2 cup protein powder, 1 tablespoon cocoa powder (optional), 1/2 teaspoon baking powder, and a pinch of salt.
- Add wet ingredients: Stir in 1/3 cup applesauce, 2 tablespoons nut butter, 2–3 tablespoons maple syrup, and 1 teaspoon vanilla. Fold in mini chips if using.
The dough should be soft but not sticky; add a spoonful of flour if needed.
- Form the bottom layer: Press half the dough evenly into the pan. Use damp hands or a spatula to smooth it.
- Chill briefly: Freeze the bottom layer for 10 minutes to firm up.
- Mix the filling: In a clean bowl, combine 1 1/2 cups Greek yogurt, 1/2 cup protein powder, 2–3 tablespoons sweetener, 1 teaspoon vanilla, and a pinch of salt. Stir until thick and smooth.
Adjust sweetness and thickness to taste.
- Add mix-ins: Fold in berries, chips, or a swirl of nut butter if you like.
- Assemble: Spread the filling over the chilled bottom layer. Crumble the remaining cookie dough over the top and gently press to form an even upper layer.
- Freeze: Cover and freeze for 3–4 hours, or until set and sliceable.
- Slice and serve: Lift out using the parchment, cut into 8–12 sandwiches, and enjoy slightly softened for best texture.
How to Store
- Freeze: Wrap each sandwich individually in parchment or plastic wrap, then store in an airtight container or freezer bag for up to 2 months.
- Serve: Let a sandwich sit at room temperature for 5–10 minutes before eating for a creamy bite.
- Avoid freezer burn: Squeeze out extra air from bags and keep the container well sealed.
Benefits of This Recipe
- Protein-packed: Helps support satiety and muscle recovery.
- Balanced treat: Includes healthy fats and fiber for better satisfaction.
- Lower sugar potential: You control the sweetness and ingredients.
- Versatile: Works for post-workout, dessert, or a quick snack.
What Not to Do
- Don’t skip chilling: Assembling on a warm base leads to messy layers.
- Don’t add too much liquid: Overly runny filling won’t set well. Keep it thick.
- Don’t use gritty protein powder: Choose one that blends smoothly for a creamy texture.
- Don’t cut too early: Let it freeze fully to get clean slices.
Alternatives
- Flour swap: Use oat flour instead of almond for a cake-like bite.
- Dairy-free: Use coconut or almond yogurt and a plant protein like pea or rice.
- Flavor twists: Mint extract with chocolate chips; strawberry yogurt with vanilla cookies; mocha with espresso powder in the filling.
- Lower carb: Use a monk fruit or allulose sweetener and stick with almond flour.
- No-bake cookie layer: As written is no-bake, but you can briefly bake the layers at 325°F for 8–10 minutes for a firmer, brownie-like texture.
Cool completely before assembling.
FAQ
Can I use casein or a blend instead of whey?
Yes. Casein makes the filling extra thick and creamy. If using only casein, you may need a splash more liquid.
Blends also work well.
How much protein is in each sandwich?
It depends on your ingredients and size. As a ballpark, an 8-sandwich batch with yogurt and whey typically lands around 12–18 grams of protein per sandwich.
My filling is too thin. How do I fix it?
Whisk in a bit more protein powder or a spoonful of almond flour.
Chill for 15 minutes to thicken before assembling.
Can I make these without sweetener?
You can, but they’ll taste more tangy from the yogurt. Consider adding vanilla and a few dark chocolate chips for balance.
What if I don’t have an 8×8 pan?
Use a loaf pan for thicker sandwiches, or a 9×9 for thinner ones. You can also shape them in silicone molds for easy release.
In Conclusion
Protein ice cream sandwiches are a simple way to enjoy a nostalgic dessert with a boost of nutrition.
They’re easy to customize, freezer-friendly, and genuinely satisfying. Keep a stash on hand, and you’ll have a go-to treat that fits your routine without feeling like a compromise.
Protein Ice Cream Sandwiches - A Fun, High-Protein Treat
Ingredients
- For the cookie layers:
- Almond flour (or oat flour)
- Vanilla or chocolate protein powder (whey or plant-based)
- Cocoa powder (if making chocolate cookies)
- Baking powder
- Pinch of salt
- Unsweetened applesauce (or Greek yogurt)
- Nut butter (peanut, almond, or cashew)
- Maple syrup or honey (or a zero-cal sweetener, to taste)
- Vanilla extract
- Mini chocolate chips (optional)
- For the “ice cream” filling:
- Greek yogurt (2% or whole for creamier texture) or a thick dairy-free yogurt
- Vanilla or chocolate protein powder
- Maple syrup, honey, or sweetener of choice
- Vanilla extract
- Pinch of salt
- Mix-ins: crushed berries, cacao nibs, mini chips, or peanut butter swirls (optional)
- Extras: Parchment paper and an 8x8-inch pan
Instructions
- Prep the pan: Line an 8x8-inch pan with parchment, leaving overhang for easy lifting.
- Make the cookie dough: In a bowl, whisk 1 cup almond flour, 1/2 cup protein powder, 1 tablespoon cocoa powder (optional), 1/2 teaspoon baking powder, and a pinch of salt.
- Add wet ingredients: Stir in 1/3 cup applesauce, 2 tablespoons nut butter, 2–3 tablespoons maple syrup, and 1 teaspoon vanilla. Fold in mini chips if using.The dough should be soft but not sticky; add a spoonful of flour if needed.
- Form the bottom layer: Press half the dough evenly into the pan. Use damp hands or a spatula to smooth it.
- Chill briefly: Freeze the bottom layer for 10 minutes to firm up.
- Mix the filling: In a clean bowl, combine 1 1/2 cups Greek yogurt, 1/2 cup protein powder, 2–3 tablespoons sweetener, 1 teaspoon vanilla, and a pinch of salt. Stir until thick and smooth.Adjust sweetness and thickness to taste.
- Add mix-ins: Fold in berries, chips, or a swirl of nut butter if you like.
- Assemble: Spread the filling over the chilled bottom layer. Crumble the remaining cookie dough over the top and gently press to form an even upper layer.
- Freeze: Cover and freeze for 3–4 hours, or until set and sliceable.
- Slice and serve: Lift out using the parchment, cut into 8–12 sandwiches, and enjoy slightly softened for best texture.
Printable Recipe Card
Want just the essential recipe details without scrolling through the article? Get our printable recipe card with just the ingredients and instructions.