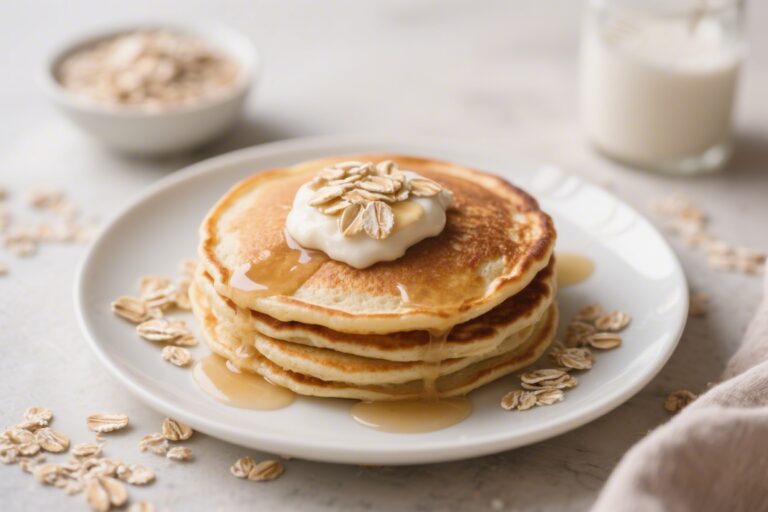
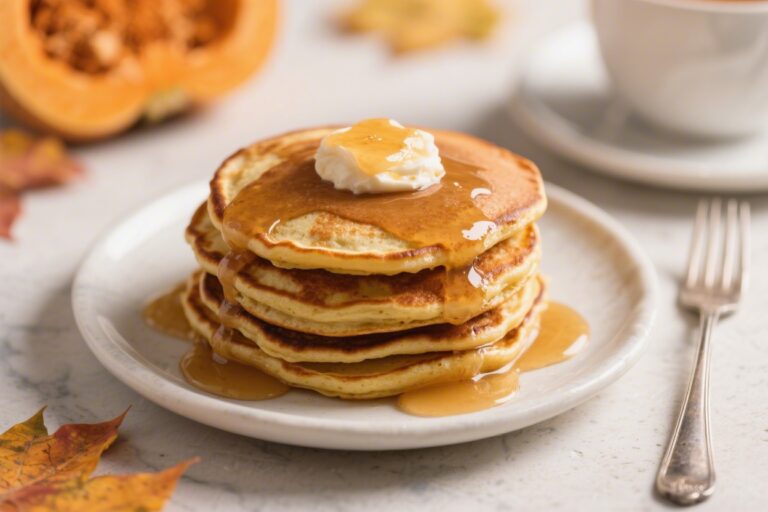
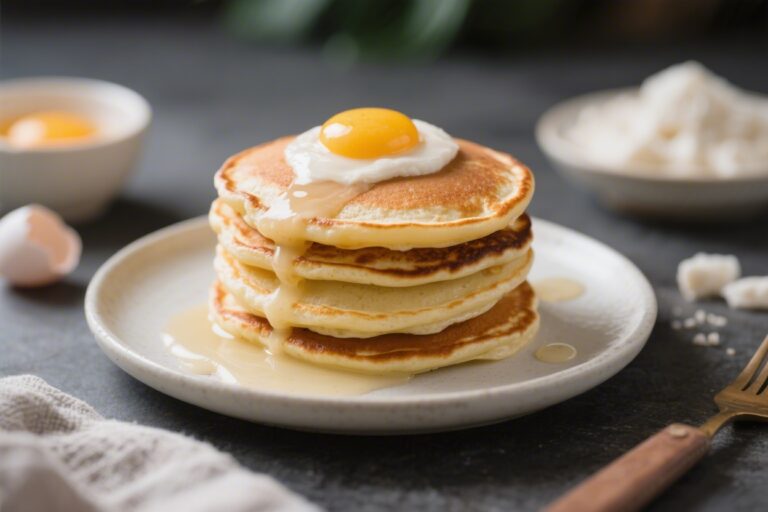
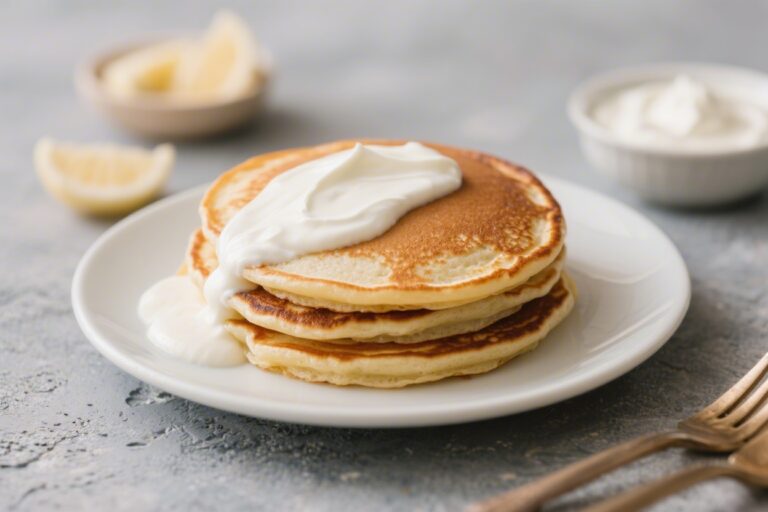
Keto Eggnog Protein Pudding – Creamy, Festive, and Low-Carb

This Keto Eggnog Protein Pudding brings all the cozy holiday vibes without the sugar crash. It’s creamy, lightly spiced, and surprisingly filling thanks to a boost of protein. You can whip it up in minutes with simple ingredients you probably have on hand.

Whether you’re craving a festive dessert or an upgraded snack, this one hits the sweet spot. It’s perfect for meal prep, too—make a batch and enjoy it chilled throughout the week.

What Makes This Special

Close-up detail shot of chilled Keto Eggnog Protein Pudding just after setting, spoon carving a silk

This pudding tastes like classic eggnog but skips the heavy sugar and carbs. It uses keto-friendly sweetener and protein powder to deliver flavor and nutrition in one bowl.

The texture is rich and silky, and the warm spices make it feel like a treat. Best of all, you don’t need to cook anything—just blend, chill, and enjoy.

What You’ll Need

  • 1 cup unsweetened almond milk (or macadamia/cashew milk)
  • 1/2 cup heavy cream (or full-fat coconut cream for dairy-free)
  • 1 scoop vanilla whey or egg white protein powder (about 25–30 g)
  • 2 large egg yolks (pasteurized recommended)
  • 2–3 tablespoons powdered erythritol or allulose (to taste)
  • 1 teaspoon vanilla extract
  • 1/2 teaspoon ground nutmeg (plus extra for topping)
  • 1/2 teaspoon ground cinnamon
  • Pinch of sea salt
  • Optional: 1/4 teaspoon rum extract for classic eggnog flavor
  • Optional thickener: 1/2 teaspoon xanthan gum or 1 tablespoon chia seeds
  • Optional topping: whipped cream and a sprinkle of nutmeg

Step-by-Step Instructions

Overhead “meal prep” scene of multiple portions of Keto Eggnog Protein Pudding set and ready in
  1. Blend the base: Add almond milk, heavy cream, egg yolks, sweetener, vanilla, nutmeg, cinnamon, salt, and rum extract (if using) to a blender. Blend until smooth and frothy.
  2. Add protein: Sprinkle in the protein powder.

    Blend on low, then medium, until fully incorporated. Avoid over-blending to keep it creamy and not foamy.

  3. Thicken (optional): If you prefer a thicker pudding, add xanthan gum while blending on low, or stir in chia seeds by hand. Let chia sit 10 minutes, then blend again briefly.
  4. Taste and adjust: Sweetness can vary by sweetener and protein brand.

    Add a little more sweetener or spice if needed.

  5. Chill: Pour into jars or bowls. Refrigerate for at least 1–2 hours, or overnight for a firmer set.
  6. Serve: Top with a dollop of whipped cream and a dusting of nutmeg. Enjoy cold.

Storage Instructions

  • Refrigerate: Store covered for up to 4 days.
  • Stir before serving: A quick whisk refreshes the texture.
  • Do not freeze: Freezing can cause separation and a grainy texture.

Benefits of This Recipe

  • Low carb and keto-friendly: Uses zero- or low-glycemic sweeteners and high-fat dairy.
  • Protein-packed: Keeps you satisfied longer and supports muscle recovery.
  • No cooking required: Quick to make, easy to scale for meal prep.
  • Holiday flavor, everyday ease: All the eggnog taste without the sugar overload.

What Not to Do

  • Don’t use granulated sweetener without powdering it: It can make the pudding gritty.

    Choose powdered or blend granulated sweetener first.

  • Don’t overuse xanthan gum: A little goes a long way. Too much leads to a slimy texture.
  • Don’t skip chilling: The flavors meld and the pudding sets as it cools.
  • Don’t choose a chalky protein: Poor-quality powders can dominate the taste. Vanilla whey isolate or egg white protein works best.

Recipe Variations

  • Dairy-free: Swap heavy cream for coconut cream and use egg white protein or a smooth unflavored pea protein.

    Add extra vanilla to balance.

  • Extra thick: Reduce almond milk to 3/4 cup and use 3/4 teaspoon xanthan gum, blending lightly.
  • Spiked flavor: A drop or two of rum extract or bourbon extract delivers classic eggnog notes without alcohol or carbs.
  • Mocha twist: Add 1 teaspoon espresso powder and a dash of cocoa for a cozy coffee-chocolate vibe.
  • Gingerbread: Add 1/4 teaspoon ground ginger and a pinch of clove.
  • Low-calorie version: Replace heavy cream with half-and-half and reduce sweetener slightly. Texture will be lighter.

FAQ

Can I make this without egg yolks?

Yes. Replace the yolks with an extra 1/4 cup heavy cream and add 1/4 teaspoon additional xanthan gum or 1 tablespoon chia seeds for body.

The flavor will be slightly less custardy but still delicious.

Which sweetener works best?

Powdered allulose gives the smoothest texture and no cooling effect. Powdered erythritol blends well too but can be slightly cooling. Adjust to taste either way.

Is this safe to eat with raw egg yolks?

Use pasteurized eggs to minimize risk.

If you prefer, you can gently heat the milk, cream, sweetener, and yolks on low until it reaches 160°F, whisking constantly, then cool before blending in the protein.

Can I use collagen instead of whey?

You can, but collagen won’t thicken as much and the texture will be lighter. Add a small amount of xanthan gum or chia to compensate.

How do I avoid clumps with protein powder?

Blend the liquid base first, then add protein while blending on low. Avoid hot liquids, which can cause curdling or clumping with whey.

What’s the carb count?

Exact macros vary by brand, but most versions come in around 4–6g net carbs per serving (out of 2–3 servings) when using unsweetened almond milk, heavy cream, and allulose.

Wrapping Up

This Keto Eggnog Protein Pudding delivers classic holiday flavor with a smart, macro-friendly twist.

It’s creamy, satisfying, and easy to customize to your diet. Keep a batch in the fridge for a festive snack or a simple dessert that feels special anytime. Top with whipped cream and a sprinkle of nutmeg, and enjoy the season in a spoon.

Keto Eggnog Protein Pudding - Creamy, Festive, and Low-Carb

Prep Time 10 minutes
Total Time 10 minutes
Servings 4 servings

Ingredients
  

  • 1 cup unsweetened almond milk (or macadamia/cashew milk)
  • 1/2 cup heavy cream (or full-fat coconut cream for dairy-free)
  • 1 scoop vanilla whey or egg white protein powder (about 25–30 g)
  • 2 large egg yolks (pasteurized recommended)
  • 2–3 tablespoons powdered erythritol or allulose (to taste)
  • 1 teaspoon vanilla extract
  • 1/2 teaspoon ground nutmeg (plus extra for topping)
  • 1/2 teaspoon ground cinnamon
  • Pinch of sea salt
  • Optional: 1/4 teaspoon rum extract for classic eggnog flavor
  • Optional thickener: 1/2 teaspoon xanthan gum or 1 tablespoon chia seeds
  • Optional topping: whipped cream and a sprinkle of nutmeg

Instructions
 

  • Blend the base: Add almond milk, heavy cream, egg yolks, sweetener, vanilla, nutmeg, cinnamon, salt, and rum extract (if using) to a blender. Blend until smooth and frothy.
  • Add protein: Sprinkle in the protein powder.Blend on low, then medium, until fully incorporated. Avoid over-blending to keep it creamy and not foamy.
  • Thicken (optional): If you prefer a thicker pudding, add xanthan gum while blending on low, or stir in chia seeds by hand. Let chia sit 10 minutes, then blend again briefly.
  • Taste and adjust: Sweetness can vary by sweetener and protein brand.Add a little more sweetener or spice if needed.
  • Chill: Pour into jars or bowls. Refrigerate for at least 1–2 hours, or overnight for a firmer set.
  • Serve: Top with a dollop of whipped cream and a dusting of nutmeg. Enjoy cold.

Honey Mustard Turkey & Brie Puff Pastry Stars – Festive, Flaky, and Easy

These golden, flaky puff pastry stars bring together salty turkey, creamy Brie, and a sweet-tangy honey mustard drizzle. They’re simple to make, yet they look like something you’d find at a fancy holiday party. Serve them warm for a crowd-pleasing appetizer, or pair a few with a salad for a quick lunch.

Either way, they deliver that perfect mix of buttery, melty, and slightly sweet in every bite.

What Makes This Special

Close-up detail and cooking process: A parchment-lined baking sheet sliding into a 400°F oven, fill

There’s something magical about Brie meeting honey mustard—it’s rich, mellow, and bright all at once. Add flaky puff pastry and savory turkey, and you’ve got a bite-sized win for any occasion. These stars are easy to assemble, bake up fast, and feel festive without extra fuss.

Plus, they’re a great way to use leftover turkey without it feeling like leftovers.

What You’ll Need

  • Puff pastry sheets (store-bought, thawed in the fridge)
  • Cooked turkey, thinly sliced or shredded
  • Brie cheese, rind on or off, cut into small cubes
  • Dijon mustard
  • Honey
  • Fresh thyme leaves (optional, but lovely)
  • Egg (for egg wash)
  • Sea salt and black pepper
  • Flour (for dusting the surface)
  • Optional finish: flaky sea salt, crushed pecans, or a touch of hot honey

How to Make It

Final dish, : Overhead shot of a platter of baked Honey Mustard Turkey & Brie Puff Pastry Stars, dee
  1. Prep the oven and tray. Preheat your oven to 400°F (200°C). Line a baking sheet with parchment paper.
  2. Stir the sauce. In a small bowl, mix 2 parts honey to 1 part Dijon. Season with a pinch of pepper and a few thyme leaves.
  3. Roll and cut. Lightly flour your surface.

    Gently roll the puff pastry to smooth seams and slightly thin it. Use a star-shaped cookie cutter (about 2.5–3 inches) to cut out stars. Gather scraps, re-roll once, and cut more.

  4. Egg wash base. Whisk the egg with a splash of water.

    Brush the tops of the stars lightly to encourage browning.

  5. Layer the filling. Add a small dab of the honey mustard to the center of each star. Top with a bit of turkey and a cube of Brie. Don’t overfill—leave a small border so the pastry can puff.
  6. Optional garnish. Sprinkle with thyme leaves and a tiny pinch of sea salt.
  7. Bake. Transfer to the baking sheet and bake 12–15 minutes, until puffed and deep golden around the edges.
  8. Finish and serve. Drizzle with a little extra honey (or hot honey) and a few crushed pecans if you like.

    Serve warm.

How to Store

These are best fresh, but you can store leftovers in an airtight container in the fridge for up to 2 days. Reheat in a 350°F (175°C) oven for 6–8 minutes to crisp them back up. Avoid the microwave—it makes the pastry soggy.

You can also freeze unbaked stars on a tray, then bag them and bake from frozen, adding 3–5 minutes to the time.

Benefits of This Recipe

  • Minimal prep: Store-bought puff pastry keeps it quick.
  • Great for leftovers: Puts leftover turkey to delicious use.
  • Elegant but easy: Impressive presentation with simple steps.
  • Balanced flavor: Creamy, savory, sweet, and slightly tangy in one bite.
  • Versatile: Works for parties, brunch, or cozy snacks.

Pitfalls to Watch Out For

  • Overfilling: Too much Brie or turkey prevents proper puffing and can cause leaks.
  • Warm pastry: If pastry gets soft, it won’t rise well. Keep it chilled and work quickly.
  • Skipping egg wash: You’ll miss that glossy, golden finish.
  • Undercooked centers: Bake until the edges are deep golden, not pale.
  • Watery Brie: Very ripe Brie can ooze. Keep cubes small and centered.

Variations You Can Try

  • Cranberry twist: Swap honey mustard for a mix of Dijon and cranberry sauce.
  • Apple note: Add a thin slice of apple or a dab of apple butter under the Brie.
  • Herb upgrade: Use rosemary or sage instead of thyme.
  • Spicy kick: Stir a little sriracha or chili crisp into the honey.
  • Ham or chicken: Replace turkey with deli ham or shredded rotisserie chicken.
  • Mini pinwheels: Roll, fill, and slice into spirals if you don’t have a star cutter.

FAQ

Can I make these ahead?

Yes.

Assemble the stars on a baking sheet, cover, and refrigerate for up to 6 hours. Bake just before serving. Or freeze unbaked and bake from frozen.

Do I need to remove the Brie rind?

No.

The rind is edible and melts nicely. If you prefer a smoother texture, trim it off, but it’s not required.

What if I don’t have Dijon?

Use whole-grain mustard or yellow mustard with a touch of apple cider vinegar for tang. Adjust honey to taste.

How do I keep the pastry from getting soggy?

Keep fillings modest, brush the pastry with egg wash, and bake on a preheated sheet if your oven runs cool.

Reheat in the oven, not the microwave.

Can I make them larger?

Absolutely. Use a bigger cutter and increase the baking time by a few minutes, watching for a deep golden color.

Wrapping Up

Honey Mustard Turkey & Brie Puff Pastry Stars are the kind of bite that disappears fast—flaky, melty, and just sweet enough. They’re easy to pull off with pantry staples and look party-ready straight from the oven.

Keep puff pastry on hand, and you’ve always got a crowd-pleaser in your back pocket.

Honey Mustard Turkey & Brie Puff Pastry Stars - Festive, Flaky, and Easy

Prep Time 15 minutes
Cook Time 20 minutes
Total Time 35 minutes
Servings 12 servings

Ingredients
  

  • Puff pastry sheets (store-bought, thawed in the fridge)
  • Cooked turkey, thinly sliced or shredded
  • Brie cheese, rind on or off, cut into small cubes
  • Dijon mustard
  • Honey
  • Fresh thyme leaves (optional, but lovely)
  • Egg (for egg wash)
  • Sea salt and black pepper
  • Flour (for dusting the surface)
  • Optional finish: flaky sea salt, crushed pecans, or a touch of hot honey

Instructions
 

  • Prep the oven and tray. Preheat your oven to 400°F (200°C). Line a baking sheet with parchment paper.
  • Stir the sauce. In a small bowl, mix 2 parts honey to 1 part Dijon. Season with a pinch of pepper and a few thyme leaves.
  • Roll and cut. Lightly flour your surface.Gently roll the puff pastry to smooth seams and slightly thin it. Use a star-shaped cookie cutter (about 2.5–3 inches) to cut out stars. Gather scraps, re-roll once, and cut more.
  • Egg wash base. Whisk the egg with a splash of water.Brush the tops of the stars lightly to encourage browning.
  • Layer the filling. Add a small dab of the honey mustard to the center of each star. Top with a bit of turkey and a cube of Brie. Don’t overfill—leave a small border so the pastry can puff.
  • Optional garnish. Sprinkle with thyme leaves and a tiny pinch of sea salt.
  • Bake. Transfer to the baking sheet and bake 12–15 minutes, until puffed and deep golden around the edges.
  • Finish and serve. Drizzle with a little extra honey (or hot honey) and a few crushed pecans if you like.Serve warm.

Garlic Parmesan Christmas Tree Pull-Apart Bites – Festive, Cheesy, and Easy

These Garlic Parmesan Christmas Tree Pull-Apart Bites are the kind of appetizer that makes everyone smile before they’ve even had a bite. Warm, buttery, and loaded with cheese, they’re shaped into a simple Christmas tree that looks impressive but is surprisingly easy to make. You can use store-bought dough to keep things quick, and the garnish brings that holiday sparkle.

Serve them with marinara or pesto, and you’re set for any holiday gathering. It’s a crowd-pleaser that feels cozy and celebratory without fuss.

Why This Recipe Works

Close-up cooking process: Golden-brown pull-apart bites just out of the oven, still in a Christmas t

Simple ingredients, big flavor: Garlic, butter, and Parmesan create a rich, savory base that everyone loves. – Easy-to-assemble tree shape: Rolling dough into small balls makes it painless to form the tree, even for beginners. – Golden, pull-apart texture: The bites bake up fluffy inside with a crisp, buttery crust. – Make-ahead friendly: Assemble ahead and bake just before guests arrive for fresh-from-the-oven results.

What You’ll Need

  • 2 cans refrigerated pizza dough (or 1 pound fresh pizza dough)
  • 24–30 small mozzarella cubes (about 1/2-inch each), or shredded mozzarella
  • 1/2 cup grated Parmesan
  • 4 tablespoons unsalted butter, melted
  • 2–3 cloves garlic, finely minced
  • 2 tablespoons fresh parsley, finely chopped (plus more for garnish)
  • 1 teaspoon Italian seasoning (optional)
  • 1/2 teaspoon kosher salt
  • 1/4 teaspoon black pepper
  • Red pepper flakes (optional, for a little heat)
  • Olive oil, for the pan
  • Marinara or pesto, for dipping

Step-by-Step Instructions

Tasty top view final presentation: Overhead shot of the finished Garlic Parmesan Christmas Tree Pull
  1. Preheat and prep: Heat your oven to 375°F (190°C). Line a large baking sheet with parchment and lightly brush with olive oil.
  2. Make the garlic butter: In a small bowl, combine melted butter, minced garlic, parsley, Italian seasoning, salt, and pepper.

    Set aside.

  3. Cut the dough: Unroll pizza dough and cut into 24–30 equal squares. Aim for about 2-inch pieces so they wrap neatly around the cheese.
  4. Add the cheese: Place a mozzarella cube in the center of each dough square. Pull the corners up and pinch to seal, forming a tight ball so the cheese doesn’t leak.
  5. Form the tree: Arrange the balls seam-side down on the baking sheet in a Christmas tree shape: start with one at the top, then two beneath it, then three, and so on, finishing with a short “trunk” of 2–3 balls.
  6. Brush and sprinkle: Brush the dough generously with the garlic butter.

    Sprinkle Parmesan over the entire tree. Reserve a little butter for after baking.

  7. Bake: Bake for 18–22 minutes, until puffed and golden brown. Rotate the pan once for even color.
  8. Finish and garnish: Brush with remaining garlic butter.

    Add extra Parmesan, chopped parsley, and a pinch of red pepper flakes if you like.

  9. Serve warm: Transfer to a platter and serve with warm marinara or pesto for dipping.

How to Store

Fridge: Cool completely, then store in an airtight container for up to 3 days. – Reheat: Warm in a 325°F (165°C) oven for 8–10 minutes to revive the crisp edges. – Freeze: Freeze baked bites on a sheet until firm, then bag for up to 1 month. Reheat from frozen at 350°F (175°C) for 12–15 minutes. – Make-ahead: Assemble the tree, cover, and refrigerate up to 6 hours. Bake just before serving.

Why This is Good for You

Protein and calcium: Mozzarella and Parmesan add satisfying protein and bone-friendly calcium. – Portion control made simple: The pull-apart format helps guests take a small bite instead of a heavy slice. – Flavorful herbs: Garlic and parsley bring antioxidants and fresh flavor, reducing the need for extra salt. – Customizable: You can lighten it up with part-skim mozzarella or use whole-wheat dough for more fiber.

Common Mistakes to Avoid

Under-sealing the dough: If the seams aren’t tight, cheese leaks out.

Pinch firmly and place seam-side down. – Overfilling with cheese: Too much cheese can burst the dough. Stick to small cubes. – Skipping parchment: Without it, the bites can stick and tear. Parchment or a silicone mat is key. – Over-browning: Check at 15 minutes and tent with foil if the top darkens too quickly. – Using cold dough: Let dough sit at room temp for 15–20 minutes so it stretches without snapping.

Recipe Variations

Stuffed with spinach-artichoke: Add a teaspoon of creamy spinach-artichoke dip instead of mozzarella. – Everything bagel twist: Swap Parmesan for shredded mozzarella and sprinkle everything bagel seasoning on top. – Pepperoni pockets: Tuck a small slice of pepperoni under the cheese for a pizza-style bite. – Herb and lemon: Add lemon zest to the butter and use fresh thyme and rosemary for a brighter profile. – Gluten-free: Use a gluten-free pizza dough and check your seasonings and sauces for GF labeling.

FAQ

Can I use biscuit dough instead of pizza dough?

Yes.

Biscuit dough works and bakes up fluffier and a bit sweeter. Reduce baking time slightly and check for golden edges around 15–17 minutes.

How do I keep the bites soft after baking?

Brush with extra butter right out of the oven and avoid leaving them uncovered for too long. If holding, tent loosely with foil to keep moisture in.

What dipping sauces pair best?

Marinara is classic, but pesto, garlic butter, or a creamy ranch also pair well.

For a kick, try a spicy arrabbiata.

Can I assemble the tree the night before?

Assemble up to 6 hours ahead and refrigerate. For overnight, it’s better to prep the balls and shape right before baking to prevent the dough from over-proofing.

How do I make the star on top?

Cut a small star from a slice of provolone or cheddar and place it on the top bite just after baking so it softens slightly without melting away.

In Conclusion

These Garlic Parmesan Christmas Tree Pull-Apart Bites deliver festive looks with minimal effort. They’re buttery, cheesy, and perfect for sharing around a holiday table.

With simple steps, easy make-ahead options, and fun variations, this recipe earns a permanent spot in your seasonal rotation. Warm tray, happy crowd—holiday magic made simple.

Garlic Parmesan Christmas Tree Pull-Apart Bites - Festive, Cheesy, and Easy

Prep Time 15 minutes
Cook Time 20 minutes
Total Time 35 minutes
Servings 8 servings

Ingredients
  

  • 2 cans refrigerated pizza dough (or 1 pound fresh pizza dough)
  • 24–30 small mozzarella cubes (about 1/2-inch each), or shredded mozzarella
  • 1/2 cup grated Parmesan
  • 4 tablespoons unsalted butter, melted
  • 2–3 cloves garlic, finely minced
  • 2 tablespoons fresh parsley, finely chopped (plus more for garnish)
  • 1 teaspoon Italian seasoning (optional)
  • 1/2 teaspoon kosher salt
  • 1/4 teaspoon black pepper
  • Red pepper flakes (optional, for a little heat)
  • Olive oil, for the pan
  • Marinara or pesto, for dipping

Instructions
 

  • Preheat and prep: Heat your oven to 375°F (190°C). Line a large baking sheet with parchment and lightly brush with olive oil.
  • Make the garlic butter: In a small bowl, combine melted butter, minced garlic, parsley, Italian seasoning, salt, and pepper.Set aside.
  • Cut the dough: Unroll pizza dough and cut into 24–30 equal squares. Aim for about 2-inch pieces so they wrap neatly around the cheese.
  • Add the cheese: Place a mozzarella cube in the center of each dough square. Pull the corners up and pinch to seal, forming a tight ball so the cheese doesn’t leak.
  • Form the tree: Arrange the balls seam-side down on the baking sheet in a Christmas tree shape: start with one at the top, then two beneath it, then three, and so on, finishing with a short “trunk” of 2–3 balls.
  • Brush and sprinkle: Brush the dough generously with the garlic butter.Sprinkle Parmesan over the entire tree. Reserve a little butter for after baking.
  • Bake: Bake for 18–22 minutes, until puffed and golden brown. Rotate the pan once for even color.
  • Finish and garnish: Brush with remaining garlic butter.Add extra Parmesan, chopped parsley, and a pinch of red pepper flakes if you like.
  • Serve warm: Transfer to a platter and serve with warm marinara or pesto for dipping.

Healthy High Protein Mac & Cheese (Greek Yogurt) – Creamy, Comforting, and Satisfying

If you love mac and cheese but want something lighter and more nutritious, this version will hit the spot. It’s creamy, cheesy, and comforting without being heavy. Greek yogurt boosts the protein and adds a tangy richness that blends beautifully with sharp cheddar.

You’ll get the classic flavor you want with a smarter nutrition profile. It’s a quick weeknight win that tastes like a treat.

Why This Recipe Works

Cooking process close-up: A glossy, creamy Greek-yogurt cheddar sauce being whisked off-heat in a ma

This mac and cheese leans on Greek yogurt for creaminess and protein, so you don’t need heavy cream or a ton of butter. Using sharp cheddar delivers big flavor from a smaller amount of cheese.

A touch of starchy pasta water helps bind the sauce and keep it silky. The method is simple: cook pasta, make a quick yogurt-cheese sauce off the heat, then combine. It’s fast, flexible, and deeply satisfying.

Shopping List

  • Dry pasta (8 oz): elbows, shells, or cavatappi
  • Plain Greek yogurt (3/4 to 1 cup, 2% or 5%)
  • Sharp cheddar cheese, finely shredded (1 to 1 1/2 cups)
  • Parmesan, finely grated (2 tablespoons, optional for extra umami)
  • Unsalted butter (1 tablespoon)
  • Dijon mustard (1 teaspoon)
  • Garlic powder (1/2 teaspoon)
  • Onion powder (1/2 teaspoon)
  • Smoked paprika (1/4 teaspoon, optional)
  • Salt and black pepper, to taste

Instructions

Final dish overhead: High-protein Greek yogurt mac and cheese, elbows coated in a glossy, silky ched
  1. Boil the pasta: Cook pasta in well-salted water until just al dente.

    Before draining, reserve 1 cup of starchy pasta water. Drain the pasta.

  2. Warm the base: Return the empty pot to low heat. Add butter and let it melt.

    Turn the heat off.

  3. Build the sauce off heat: Whisk in Greek yogurt, Dijon, garlic powder, onion powder, and smoked paprika. Add 1/4 cup hot pasta water and whisk until smooth and loose.
  4. Add the cheese: Sprinkle in cheddar (and Parmesan, if using) in small handfuls, whisking between additions. If it’s too thick, add more pasta water a splash at a time until creamy.
  5. Season: Taste and add salt and pepper.

    The cheddar and pasta water add saltiness, so adjust slowly.

  6. Combine: Fold in the drained pasta, tossing to coat. If the sauce tightens, loosen again with a bit more pasta water until glossy and silky.
  7. Serve: Enjoy immediately while hot and creamy. Top with a pinch of paprika or extra pepper if you like.

Keeping It Fresh

Store leftovers in an airtight container in the fridge for up to 3 days.

Reheat gently on the stovetop over low heat, adding a splash of water or milk to loosen the sauce. The yogurt can thicken as it cools, so stir patiently. Avoid high heat to keep the sauce smooth and prevent curdling.

Benefits of This Recipe

  • High in protein: Greek yogurt boosts protein without heavy cream.
  • Lighter than classic: Less butter and no roux, but still creamy and rich.
  • Quick and easy: Comes together in about 20 minutes.
  • Family-friendly: Familiar cheesy flavor with a better nutrition profile.
  • Flexible: Works with different cheeses and add-ins.

Common Mistakes to Avoid

  • Overheating the yogurt: High heat can cause it to separate.

    Make the sauce off heat.

  • Skipping the pasta water: It’s key for a smooth, clingy sauce.
  • Adding cheese all at once: Add gradually to prevent clumping or graininess.
  • Undersalting the pasta water: Properly salted water seasons the whole dish.
  • Using pre-shredded cheese only: It can contain anti-caking agents. Freshly grated melts better.

Variations You Can Try

  • Protein boost: Stir in cooked chicken breast, tuna, or turkey sausage.
  • Veggie add-ins: Fold in steamed broccoli, peas, spinach, or roasted cauliflower.
  • Different cheeses: Try a mix of cheddar and Gruyère, or add a little Monterey Jack for extra melt.
  • Spicy version: Add a pinch of cayenne, hot sauce, or diced pickled jalapeños.
  • Whole-grain or chickpea pasta: Increase fiber or protein while keeping the same method.
  • Baked finish: Transfer to a dish, top with whole-wheat breadcrumbs and Parmesan, and broil for 2–3 minutes.

FAQ

Can I use nonfat Greek yogurt?

Yes, but 2% or 5% yogurt gives a creamier texture and better flavor. If using nonfat, be extra careful with heat and add a little more pasta water to keep it silky.

What if my sauce looks grainy?

Remove from heat, whisk in a splash of warm pasta water, and keep stirring.

Graininess often comes from overheating or adding cheese too quickly.

Is there a gluten-free option?

Use your favorite gluten-free pasta and confirm your mustard and spices are gluten-free. The sauce itself is naturally gluten-free.

Can I make it ahead?

It’s best fresh, but you can cook the pasta and grate the cheese ahead. Reheat gently with added liquid to refresh the sauce.

What cheeses melt best for this?

Sharp cheddar is ideal.

Combine with a bit of mozzarella or Monterey Jack for extra melt, and a spoon of Parmesan for depth.

How can I add more protein?

Use chickpea pasta, add diced chicken or tuna, or stir in cottage cheese blended smooth with the yogurt.

In Conclusion

Healthy High Protein Mac & Cheese with Greek yogurt gives you comfort food vibes with a smarter twist. It’s creamy, flavorful, and easy enough for any weeknight. Keep the heat gentle, lean on pasta water, and add cheese slowly for the best texture.

Customize it with veggies or protein, and enjoy a bowl that feels good and tastes great.

Healthy High Protein Mac & Cheese (Greek Yogurt) - Creamy, Comforting, and Satisfying

Prep Time 10 minutes
Cook Time 20 minutes
Total Time 30 minutes
Servings 4 servings

Ingredients
  

  • Dry pasta (8 oz): elbows, shells, or cavatappi
  • Plain Greek yogurt (3/4 to 1 cup, 2% or 5%)
  • Sharp cheddar cheese, finely shredded (1 to 1 1/2 cups)
  • Parmesan, finely grated (2 tablespoons, optional for extra umami)
  • Unsalted butter (1 tablespoon)
  • Dijon mustard (1 teaspoon)
  • Garlic powder (1/2 teaspoon)
  • Onion powder (1/2 teaspoon)
  • Smoked paprika (1/4 teaspoon, optional)
  • Salt and black pepper, to taste

Instructions
 

  • Boil the pasta: Cook pasta in well-salted water until just al dente.Before draining, reserve 1 cup of starchy pasta water. Drain the pasta.
  • Warm the base: Return the empty pot to low heat. Add butter and let it melt.Turn the heat off.
  • Build the sauce off heat: Whisk in Greek yogurt, Dijon, garlic powder, onion powder, and smoked paprika. Add 1/4 cup hot pasta water and whisk until smooth and loose.
  • Add the cheese: Sprinkle in cheddar (and Parmesan, if using) in small handfuls, whisking between additions. If it’s too thick, add more pasta water a splash at a time until creamy.
  • Season: Taste and add salt and pepper.The cheddar and pasta water add saltiness, so adjust slowly.
  • Combine: Fold in the drained pasta, tossing to coat. If the sauce tightens, loosen again with a bit more pasta water until glossy and silky.
  • Serve: Enjoy immediately while hot and creamy. Top with a pinch of paprika or extra pepper if you like.

Healthy Carrot Cake Protein Smoothie – Simple, Creamy, and Satisfying

This smoothie tastes like a slice of carrot cake, but it’s light, refreshing, and packed with protein. It’s an easy breakfast you can blend in minutes or a satisfying afternoon snack that keeps cravings in check. The flavor is warm and cozy, with cinnamon, vanilla, and a hint of natural sweetness.

You’ll get plenty of fiber from carrots and oats, plus creaminess without heavy ingredients. If you love dessert-inspired smoothies, this one’s going to be a new favorite.

What Makes This Recipe So Good

Close-up detail shot: a thick, creamy carrot cake protein smoothie being poured from a blender into
  • Balanced and filling: Protein, fiber, and healthy fats keep you full and energized.
  • Dessert vibes without the sugar crash: Naturally sweetened with banana and dates or maple syrup.
  • Easy to customize: Works with dairy or dairy-free milk and your favorite protein powder.
  • No fancy equipment: A regular blender handles it if you grate the carrots first.
  • Meal-prep friendly: Freeze smoothie packs and blend when you’re ready.

Ingredients

  • 1 cup unsweetened almond milk (or milk of choice)
  • 1 small ripe banana, frozen in chunks
  • 3/4 cup finely grated raw carrots (about 1 medium carrot), lightly packed
  • 1/4 cup plain Greek yogurt or dairy-free yogurt
  • 1 scoop vanilla protein powder (whey or plant-based)
  • 2 tablespoons rolled oats
  • 1 tablespoon almond butter (or cashew/peanut butter)
  • 1–2 teaspoons pure maple syrup or 1 pitted Medjool date (optional, to taste)
  • 1/2 teaspoon ground cinnamon
  • 1/8 teaspoon ground nutmeg
  • 1/8 teaspoon ground ginger
  • 1/2 teaspoon vanilla extract
  • Pinch of sea salt
  • Handful of ice (optional, for a thicker texture)

How to Make It

Overhead final presentation: two glasses of the carrot cake protein smoothie on a matte white plate,
  1. Prep the carrots: Finely grate the carrot so it blends smooth. If your blender is powerful, you can roughly chop instead.
  2. Layer the blender: Add milk first, then yogurt, protein powder, oats, almond butter, banana, carrots, spices, vanilla, and salt.

    Add maple syrup or a date if you want it sweeter.

  3. Blend until creamy: Start low, then increase to high for 30–45 seconds. Add a handful of ice for extra thickness and chill.
  4. Taste and adjust: Add more milk if it’s too thick, more cinnamon for warmth, or another splash of sweetener if needed.
  5. Serve: Pour into a chilled glass. Top with a sprinkle of cinnamon or a dusting of grated nutmeg for that carrot cake finish.

Storage Instructions

  • Fridge: Store in a sealed jar for up to 24 hours.

    Shake well before drinking.

  • Freezer packs: Portion banana, grated carrots, oats, and spices into freezer bags. Add milk, yogurt, and protein when blending.
  • Frozen smoothie: Freeze in a jar with room at the top. Thaw in the fridge overnight and re-blend with a splash of milk.

Why This is Good for You

  • Protein supports recovery: Keeps you full and helps maintain muscle after workouts.
  • Carrots bring beta-carotene: Great for skin and eye health, plus natural sweetness.
  • Oats and banana add fiber: Support digestion and steady energy.
  • Healthy fats: Nut butter helps with vitamin absorption and satiety.
  • Spices matter: Cinnamon and ginger add flavor and may support blood sugar balance.

What Not to Do

  • Don’t skip liquid: Too little milk makes it chalky and hard to blend.
  • Don’t overload the sweetener: The banana and carrots already add sweetness.
  • Don’t toss in big carrot chunks with a weak blender: You’ll get gritty bits.

    Grate first.

  • Don’t use unflavored or strongly flavored protein without tasting: Adjust spices and sweetener so it still tastes like carrot cake.

Recipe Variations

  • Nut-free: Use sunflower seed butter and oat or soy milk.
  • No banana: Replace with 1/2 cup frozen pineapple or mango and add a few extra ice cubes.
  • Extra veggie boost: Add a handful of frozen cauliflower rice for creaminess without changing the flavor much.
  • High-calorie version: Add 1 tablespoon chia seeds and 1 tablespoon coconut flakes.
  • Low-sugar version: Skip added sweetener and use unsweetened protein powder; rely on banana and carrots.
  • Spice swap: Use pumpkin pie spice instead of individual spices for convenience.
  • Dessert-style: Top with a spoonful of Greek yogurt “frosting” sweetened with a bit of maple syrup and vanilla.

FAQ

Can I use cooked carrots instead of raw?

Yes. Cooked and cooled carrots blend ultra smooth and taste slightly sweeter. Start with 1/2 cup and add more to taste.

What protein powder works best?

Vanilla whey blends super creamy, while pea or a plant blend also works well.

If yours is unsweetened, you may want a touch more maple syrup.

How do I make it thicker?

Use a frozen banana, add ice, or toss in 1–2 tablespoons of oats or chia seeds. Reduce the milk slightly and blend longer.

Can I make it dairy-free?

Absolutely. Use almond, oat, or soy milk and a dairy-free yogurt.

Choose a plant-based protein powder.

Is this good post-workout?

Yes. It has protein for muscle repair and carbs for glycogen. Add a pinch of salt if you’ve had a sweaty session.

What if I don’t like bananas?

Swap with frozen pineapple or mango for sweetness and body.

Adjust spices if needed to keep the carrot cake vibe.

Wrapping Up

This Healthy Carrot Cake Protein Smoothie delivers the cozy flavor you love with a feel-good nutrient boost. It’s quick, flexible, and easy to fit into your routine. Keep grated carrots and frozen banana on hand, and you’re minutes away from a creamy, satisfying sip any time you want it.

Healthy Carrot Cake Protein Smoothie - Simple, Creamy, and Satisfying

Prep Time 5 minutes
Total Time 5 minutes
Servings 2 servings

Ingredients
  

  • 1 cup unsweetened almond milk (or milk of choice)
  • 1 small ripe banana, frozen in chunks
  • 3/4 cup finely grated raw carrots (about 1 medium carrot), lightly packed
  • 1/4 cup plain Greek yogurt or dairy-free yogurt
  • 1 scoop vanilla protein powder (whey or plant-based)
  • 2 tablespoons rolled oats
  • 1 tablespoon almond butter (or cashew/peanut butter)
  • 1–2 teaspoons pure maple syrup or 1 pitted Medjool date (optional, to taste)
  • 1/2 teaspoon ground cinnamon
  • 1/8 teaspoon ground nutmeg
  • 1/8 teaspoon ground ginger
  • 1/2 teaspoon vanilla extract
  • Pinch of sea salt
  • Handful of ice (optional, for a thicker texture)

Instructions
 

  • Prep the carrots: Finely grate the carrot so it blends smooth. If your blender is powerful, you can roughly chop instead.
  • Layer the blender: Add milk first, then yogurt, protein powder, oats, almond butter, banana, carrots, spices, vanilla, and salt.Add maple syrup or a date if you want it sweeter.
  • Blend until creamy: Start low, then increase to high for 30–45 seconds. Add a handful of ice for extra thickness and chill.
  • Taste and adjust: Add more milk if it’s too thick, more cinnamon for warmth, or another splash of sweetener if needed.
  • Serve: Pour into a chilled glass. Top with a sprinkle of cinnamon or a dusting of grated nutmeg for that carrot cake finish.

High Protein Ferrero Rocher Smoothie – Chocolate Hazelnut Power Breakfast

Love the taste of Ferrero Rocher but want something that actually fuels your day? This smoothie brings those chocolate-hazelnut vibes with a protein-packed twist. It’s creamy, rich, and tastes like dessert, but it’s balanced enough for breakfast or a satisfying post-workout drink.

You’ll get a silky blend of cocoa, hazelnut, and a hint of sweetness—without the sugar crash. Best part: you can make it in five minutes with pantry staples.

What Makes This Recipe So Good

Close-up detail shot: A thick, creamy High Protein Ferrero Rocher Smoothie mid-blend being poured fr
  • Great flavor without the junk: Real cocoa and roasted hazelnuts deliver that classic Ferrero taste, minus the candy fillers.
  • High protein: Whey or plant-based protein keeps you full and supports recovery.
  • Thick and creamy: Frozen banana and Greek yogurt create a milkshake-like texture.
  • Easy to customize: Dairy-free, low-carb, and nut-free options are simple swaps.
  • Fast: Blend-and-go in under five minutes with minimal cleanup.

What You’ll Need

  • 1 cup unsweetened milk (almond, oat, or dairy)
  • 1 scoop chocolate or vanilla protein powder (whey or plant-based)
  • 1/2 frozen banana (for creaminess and natural sweetness)
  • 1/4 cup plain Greek yogurt (or dairy-free yogurt)
  • 1 tablespoon unsweetened cocoa powder
  • 1–2 tablespoons roasted hazelnuts or 1 tablespoon hazelnut butter
  • 1 teaspoon vanilla extract
  • 1–2 teaspoons maple syrup, honey, or 1–2 pitted dates (optional, to taste)
  • Pinch of sea salt
  • Ice cubes as needed (for a thicker, colder smoothie)
  • Optional add-ins: 1 teaspoon chia seeds, a dash of espresso, or 1 square dark chocolate (70%+) for extra richness

How to Make It

Overhead final presentation: of the finished High Protein Ferrero Rocher Smoothie in a chilled glass
  1. Prep the base: Add milk, protein powder, cocoa, vanilla, and salt to the blender first so they mix evenly.
  2. Build the creaminess: Add frozen banana, Greek yogurt, and hazelnuts or hazelnut butter.
  3. Sweeten smartly: Add maple syrup, honey, or dates only if needed. Start with less and adjust after blending.
  4. Blend smooth: Blend on high for 30–45 seconds.

    Add ice for thickness and blend again until silky.

  5. Taste and tweak: If it’s too thick, splash in more milk. If you want a stronger chocolate hit, add a little more cocoa.
  6. Serve: Pour into a chilled glass. Top with a sprinkle of crushed hazelnuts or shaved dark chocolate if you want a “truffle” finish.

How to Store

  • Short term: Refrigerate in a sealed jar for up to 24 hours.

    Give it a good shake before drinking.

  • Meal prep: Freeze portions in smoothie cups or ice cube trays for up to 2 months. Blend with a splash of fresh milk when ready.
  • Prevent browning: If using banana, a squeeze of lemon can help keep the color brighter.

Why This is Good for You

  • Protein for satiety and muscle repair: A full scoop of protein powder plus yogurt can deliver 25–40g protein.
  • Healthy fats from hazelnuts: Support brain health and help keep you full longer.
  • Antioxidants from cocoa: Unsweetened cocoa adds flavanols without extra sugar.
  • Balanced macros: Carbs from banana, protein from powder and yogurt, and fats from nuts make a satisfying, steady-energy meal.

Pitfalls to Watch Out For

  • Too much sweetness: Protein powders can be sweet. Taste before adding extra sweeteners.
  • Watery texture: Add ice slowly and use frozen banana for body.

    If it’s thin, blend in more ice or a few oats.

  • Overpowering bitterness: Cocoa can be strong. Balance with a small pinch of salt and a touch of sweetener.
  • Allergies: Hazelnuts are tree nuts. Swap with sunflower seed butter if needed.

Variations You Can Try

  • Dairy-free: Use almond or oat milk and coconut yogurt; choose a plant-based protein.
  • Low-carb: Skip the banana; use 1/4 avocado and extra ice.

    Sweeten with a zero-cal sweetener if desired.

  • Extra-crunch “truffle” version: Fold in crushed hazelnuts after blending.
  • Mocha twist: Add a shot of cooled espresso or 1 teaspoon instant coffee.
  • Greens boost: Blend in a handful of spinach; it won’t change the flavor much.
  • Gut-friendly: Add 1 teaspoon chia seeds or 1 tablespoon ground flax for fiber and omega-3s.

FAQ

Can I make this without protein powder?

Yes. Use 3/4 cup Greek yogurt and add 1–2 tablespoons peanut or hazelnut butter for extra protein. The total protein will be lower than with powder, but still solid.

What if I don’t have hazelnuts?

Use almond butter or peanut butter.

The flavor won’t be exactly Ferrero Rocher, but chocolate and nuts always work.

Is cocoa powder the same as cacao?

They’re similar. Cacao is less processed and slightly more bitter. Either works here—just taste and adjust sweetness.

How can I make it thicker?

Use more ice, add a few extra frozen banana slices, or blend in 2–3 tablespoons of quick oats.

Start small; it thickens fast.

What’s the best time to drink this?

It’s great as breakfast or within an hour after a workout when your body benefits from fast protein and carbs.

Wrapping Up

This High Protein Ferrero Rocher Smoothie brings dessert-level flavor with real nourishment. It’s quick, customizable, and seriously satisfying. Keep the ingredients on hand, and you’ve got a go-to breakfast or recovery drink that feels indulgent but works hard for you.

Blend, sip, and enjoy that chocolate-hazelnut goodness any day of the week.

High Protein Ferrero Rocher Smoothie - Chocolate Hazelnut Power Breakfast

Prep Time 5 minutes
Total Time 5 minutes
Servings 2 servings

Ingredients
  

  • 1 cup unsweetened milk (almond, oat, or dairy)
  • 1 scoop chocolate or vanilla protein powder (whey or plant-based)
  • 1/2 frozen banana (for creaminess and natural sweetness)
  • 1/4 cup plain Greek yogurt (or dairy-free yogurt)
  • 1 tablespoon unsweetened cocoa powder
  • 1–2 tablespoons roasted hazelnuts or 1 tablespoon hazelnut butter
  • 1 teaspoon vanilla extract
  • 1–2 teaspoons maple syrup, honey, or 1–2 pitted dates (optional, to taste)
  • Pinch of sea salt
  • Ice cubes as needed (for a thicker, colder smoothie)
  • Optional add-ins: 1 teaspoon chia seeds, a dash of espresso, or 1 square dark chocolate (70%+) for extra richness

Instructions
 

  • Prep the base: Add milk, protein powder, cocoa, vanilla, and salt to the blender first so they mix evenly.
  • Build the creaminess: Add frozen banana, Greek yogurt, and hazelnuts or hazelnut butter.
  • Sweeten smartly: Add maple syrup, honey, or dates only if needed. Start with less and adjust after blending.
  • Blend smooth: Blend on high for 30–45 seconds.Add ice for thickness and blend again until silky.
  • Taste and tweak: If it’s too thick, splash in more milk. If you want a stronger chocolate hit, add a little more cocoa.
  • Serve: Pour into a chilled glass. Top with a sprinkle of crushed hazelnuts or shaved dark chocolate if you want a “truffle” finish.

High Protein Creamy Chicken Pot Pie Soup – Cozy, Filling, and Easy

This is the kind of soup that makes a cold evening feel like a warm hug. You get all the flavors of classic chicken pot pie—tender chicken, soft vegetables, and a creamy, savory broth—without the fuss of a crust. It’s rich, comforting, and surprisingly light thanks to smart ingredient swaps.

Plus, it’s high in protein, so it keeps you full and satisfied. One pot, simple steps, and leftovers that taste even better the next day.

What Makes This Recipe So Good

  • High protein and filling: Greek yogurt and chicken breast add extra protein without heavy cream.
  • Classic pot pie flavor: Herbs, veggies, and a creamy base deliver that nostalgic taste.
  • Weeknight friendly: Simple ingredients and one pot mean less cleanup.
  • Flexible: Use rotisserie chicken, frozen veggies, or dairy-free swaps if needed.
  • Meal prep winner: Stores and reheats well for quick lunches.

Ingredients

  • 1 tablespoon olive oil or butter
  • 1 medium onion, diced
  • 2 carrots, peeled and diced
  • 2 celery stalks, diced
  • 3 cloves garlic, minced
  • 2 cups diced potatoes (Yukon Gold or red), 1/2-inch cubes
  • 1 cup frozen peas
  • 1 cup frozen corn (optional)
  • 1 1/2 pounds cooked chicken breast, shredded or cubed (rotisserie works great)
  • 4 cups low-sodium chicken broth
  • 1 cup milk (2% or whole)
  • 3/4 cup plain Greek yogurt (2% or 5%)
  • 2 tablespoons all-purpose flour (or cornstarch for gluten-free)
  • 1 teaspoon dried thyme
  • 1 teaspoon dried parsley (or 1 tablespoon fresh)
  • 1 bay leaf
  • Salt and black pepper, to taste
  • Optional: 1/2 teaspoon poultry seasoning or a pinch of nutmeg

Step-by-Step Instructions

  1. Sauté the aromatics: Heat olive oil or butter in a large pot over medium heat. Add onion, carrots, and celery.Cook 5–6 minutes until softened. Stir in garlic and cook 30 seconds.
  2. Add potatoes and seasonings: Stir in thyme, parsley, bay leaf, salt, pepper, and poultry seasoning if using. Cook 1 minute to bloom the spices.
  3. Pour in broth and simmer: Add chicken broth and bring to a gentle boil.Reduce heat and simmer 10–12 minutes until potatoes are fork-tender.
  4. Thicken the base: In a small bowl, whisk flour with milk until smooth. Slowly pour into the pot, stirring constantly. Simmer 3–4 minutes until slightly thickened.
  5. Add chicken and veggies: Stir in shredded chicken, peas, and corn.Reduce heat to low and cook 3–5 minutes until everything is hot.
  6. Make it creamy and high protein: Turn off the heat. Whisk Greek yogurt in a bowl to loosen, then stir it into the soup. Taste and adjust salt and pepper.
  7. Finish and serve: Remove the bay leaf.Ladle into bowls and garnish with fresh parsley or cracked pepper. Serve with a slice of toasted bread or crackers if you like.

How to Store

  • Refrigerator: Store in an airtight container for 3–4 days. The flavor deepens overnight.
  • Freezer: Freeze up to 2 months.For best texture, add the Greek yogurt after reheating rather than before freezing.
  • Reheat: Warm on the stove over low heat, stirring often. If it thickens too much, add a splash of broth or milk.

Why This is Good for You

  • Protein-packed: Chicken and Greek yogurt boost satiety and support muscle recovery.
  • Balanced comfort: Veggies add fiber and micronutrients without piling on calories.
  • Lighter creaminess: You get a rich texture without heavy cream, keeping it heart-friendlier.

What Not to Do

  • Don’t boil after adding Greek yogurt: High heat can cause curdling. Stir it in off the heat.
  • Don’t skip seasoning: Taste as you go.Potatoes and dairy mute flavors, so adjust salt and pepper.
  • Don’t overcook the potatoes: Mushy potatoes make the soup pasty. Aim for just tender.
  • Don’t add flour directly to the pot: Always whisk it with milk first to avoid lumps.

Recipe Variations

  • Dairy-free: Use unsweetened almond or oat milk and stir in plain dairy-free yogurt or cashew cream at the end.
  • Gluten-free: Swap flour for cornstarch (1 tablespoon mixed with 2 tablespoons cold milk or water).
  • Extra veggies: Add mushrooms, green beans, or spinach in the last few minutes.
  • Herby twist: Finish with fresh thyme, dill, or chives for brightness.
  • Pot pie topping: Serve with buttery croutons or puff pastry squares baked separately for that pie feel.
  • Slow cooker: Add everything except milk, flour, peas, corn, and yogurt. Cook on Low 6–7 hours.Stir in milk-flour slurry, then peas, corn, and yogurt in the last 30 minutes.

FAQ

Can I use raw chicken instead of cooked?

Yes. Dice 1 1/2 pounds raw chicken breast and add it after the broth. Simmer until cooked through before thickening the soup.

Then proceed with the milk mixture and yogurt.

How can I make it even higher in protein?

Use 5% Greek yogurt, add 1/2 cup canned white beans, or stir in 1–2 scoops unflavored collagen peptides. You can also increase chicken to 2 pounds.

Will it curdle with Greek yogurt?

Not if you stir it in off the heat and avoid boiling. Whisking the yogurt first helps create a smooth finish.

Can I make this ahead?

Absolutely.

Cook the soup without the yogurt, cool, and refrigerate. Reheat gently and stir in the yogurt right before serving for the best texture.

What can I use instead of potatoes?

Try cauliflower florets for fewer carbs or diced sweet potatoes for a slightly sweet, hearty twist.

Final Thoughts

This High Protein Creamy Chicken Pot Pie Soup brings cozy flavor with a lighter, smarter approach. It’s satisfying, easy to customize, and perfect for busy nights or meal prep.

Keep a batch in the fridge, and you’ve got comfort food ready whenever you need it. Simple steps, wholesome ingredients, and that classic pot pie taste—no crust required.

High Protein Christmas Morning French Toast Bake – Cozy, Festive, and Filling

Christmas morning calls for something special, but it doesn’t have to be complicated. This high protein French toast bake is cozy, festive, and easy to assemble the night before. It bakes up golden and custardy with a hint of cinnamon and vanilla, and it’s packed with protein to keep everyone full through gift opening.

No stovetop flipping, no stress—just slice, serve, and enjoy. It’s the kind of tradition you’ll want to repeat every year.

Why This Recipe Works

  • High protein without sacrificing flavor: Greek yogurt, eggs, and protein powder boost the protein while keeping the texture rich and creamy.
  • No-fuss for busy mornings: Assemble ahead, refrigerate overnight, and bake in the morning. It’s perfect for hosting.
  • Comforting holiday flavors: Cinnamon, vanilla, and a touch of nutmeg deliver classic French toast warmth.
  • Great texture: Thick bread cubes soak up the custard without getting soggy, so you get tender centers and crisp tops.
  • Easy to customize: Swap milk, bread, spices, or toppings to fit your family’s tastes and dietary needs.

What You’ll Need

  • 1 loaf sturdy bread (brioche, challah, or thick whole-grain; about 14–16 ounces), cut into 1-inch cubes
  • 8 large eggs
  • 1 3/4 cups milk (dairy or unsweetened almond milk)
  • 1 cup plain Greek yogurt (2% or 0%)
  • 1/2 cup vanilla or unflavored whey or plant-based protein powder
  • 1/4 cup pure maple syrup (plus more for serving)
  • 2 teaspoons pure vanilla extract
  • 1 1/2 teaspoons ground cinnamon
  • 1/4 teaspoon ground nutmeg
  • 1/4 teaspoon fine sea salt
  • 2 tablespoons melted butter or coconut oil (for greasing and drizzling)
  • Optional add-ins: 1/2 cup chopped pecans or walnuts, 1/2 cup fresh or frozen berries, zest of 1 orange
  • Optional toppings: powdered sugar, extra Greek yogurt, fruit, or a high-protein yogurt drizzle

Step-by-Step Instructions

  1. Prep the pan: Grease a 9×13-inch baking dish with melted butter or coconut oil.
  2. Dry the bread slightly: Use day-old bread if possible.

    If fresh, toast cubes on a sheet pan at 300°F (150°C) for 8–10 minutes to remove some moisture.

  3. Make the custard: In a large bowl, whisk eggs, milk, Greek yogurt, protein powder, maple syrup, vanilla, cinnamon, nutmeg, and salt until smooth with no protein powder lumps.
  4. Assemble: Add bread cubes to the dish. Pour the custard evenly over the top. Gently press the bread down so every piece gets coated.

    Sprinkle nuts or berries if using. Drizzle with remaining melted butter.

  5. Rest: Cover and refrigerate for at least 30 minutes, ideally overnight. This helps the bread absorb the custard.
  6. Bake: Preheat oven to 350°F (175°C).

    Uncover and bake for 35–45 minutes, until the center is set and the top is golden with crisp edges.

  7. Finish and serve: Let rest 10 minutes. Dust with powdered sugar if desired, slice, and serve warm with maple syrup, fruit, or a dollop of Greek yogurt.

Storage Instructions

  • Refrigerator: Cool completely, then store in an airtight container for up to 4 days.
  • Freezer: Wrap individual portions tightly and freeze for up to 2 months. Thaw overnight in the fridge.
  • Reheat: Warm in a 325°F (165°C) oven for 10–15 minutes or microwave in 30-second bursts until heated through.

Health Benefits

  • Protein for staying power: Eggs, Greek yogurt, and protein powder support satiety and stable energy.
  • Balanced macros: Carbs from bread, protein from dairy and powder, and a little fat help curb cravings and prevent blood sugar spikes.
  • Calcium and probiotics: Greek yogurt adds calcium and gut-friendly cultures (check labels if heating-sensitive cultures matter to you).
  • Smarter sweetness: Maple syrup offers flavor with less total sugar than traditional French toast bakes drowning in syrup.

Common Mistakes to Avoid

  • Using very soft bread: It can turn mushy.

    Choose sturdy loaves or lightly toast the cubes first.

  • Skipping the rest time: The soak is key for even texture. Aim for at least 30 minutes, preferably overnight.
  • Overbaking: This dries it out. Pull it when the center is set but still tender.
  • Not whisking the protein powder well: Lumps can form.

    Whisk thoroughly or blend the custard for a few seconds.

  • Too much liquid with delicate add-ins: Frozen berries add moisture; decrease milk by 2–3 tablespoons if using a lot.

Alternatives

  • Dairy-free: Use almond or oat milk, a dairy-free Greek-style yogurt, and plant-based protein powder.
  • Gluten-free: Choose a gluten-free brioche or sandwich bread that’s thick and sturdy.
  • No added sugar: Skip maple syrup in the custard and serve with fruit or a light drizzle at the table.
  • Flavor twists: Add orange zest and cranberries, or swap cinnamon for pumpkin pie spice. A splash of almond extract is lovely.
  • Extra-crisp topping: Mix 2 tablespoons oats with 1 tablespoon chopped nuts and 1 teaspoon coconut sugar; sprinkle on top before baking.

Can I assemble this two days ahead?

Yes, but for best texture, bake within 24 hours. If prepping 48 hours ahead, keep the bread and custard separate and combine the night before.

What protein powder works best?

Whey isolates blend smoothly and bake well.

For dairy-free, use a fine plant-based blend like pea or rice. Choose vanilla or unflavored to control sweetness.

How do I know it’s done?

The center should be set with no visible liquid when you nudge it, and a knife inserted in the middle should come out mostly clean. The top will be golden and lightly crisp.

Can I reduce the eggs?

You can drop to 6 eggs and add 1/4 cup more Greek yogurt, but the bake will be slightly less firm and lower in protein.

How can I make it sweeter?

Increase maple syrup to 1/3–1/2 cup or serve with a vanilla Greek yogurt drizzle.

You can also add a few chocolate chips on top before baking.

Final Thoughts

This High Protein Christmas Morning French Toast Bake brings comfort, convenience, and nourishment to your holiday table. It’s simple to prep, easy to customize, and hearty enough to keep everyone satisfied. Make it once, and it just might become your new Christmas tradition.

Enjoy the cozy flavors, the crisp edges, and the time you get back with the people you love.

Crunchy Protein Snickers Bites (Under 100 Calories) – A Fun, Better-For-You Treat

These little bites taste like a mini Snickers, but with a protein boost and a satisfying crunch. Each piece stays under 100 calories, so you can enjoy a sweet treat without going overboard. They’re easy to make, no baking required, and great for meal prep.

The texture hits all the right notes: creamy center, nutty crunch, chewy caramel, and a crisp chocolate shell. Keep a batch in the freezer for when your sweet tooth kicks in.

What Makes This Special

  • High-protein snack: A simple way to satisfy cravings while supporting your goals.
  • Under 100 calories each: Portion-friendly without feeling tiny or unsatisfying.
  • No-bake and quick: Minimal steps, pantry-friendly ingredients.
  • Crunch factor: Crispy rice cereal adds a fun texture that mimics a candy bar bite.
  • Customizable: Easy to swap nuts, protein flavors, or coatings based on what you have.

Shopping List

  • Natural peanut butter (or almond butter), creamy
  • Vanilla or chocolate whey or plant-based protein powder
  • Honey or pure maple syrup
  • Unsweetened almond milk (or any milk)
  • Crispy rice cereal
  • Roasted peanuts, roughly chopped (or almonds/cashews)
  • Soft caramels or date caramel (pitted medjool dates + a splash of warm water)
  • Dark chocolate chips (60–70%) or no-sugar-added chocolate
  • Coconut oil
  • Fine sea salt (optional)
  • Vanilla extract (optional)

How to Make It

  1. Mix the base: In a bowl, stir 1/2 cup peanut butter with 1 scoop protein powder, 1–2 tablespoons honey, and a splash of almond milk. You want a thick, dough-like texture that’s not sticky.

    Add vanilla if you like.

  2. Fold in the crunch: Stir in 1 cup crispy rice cereal and 2 tablespoons chopped peanuts. Don’t overmix or you’ll crush the cereal.
  3. Shape the bites: Line a tray with parchment. Scoop the mixture into 16 small mounds (about 1 tablespoon each) and press into compact squares or balls.

    Freeze for 15 minutes.

  4. Add the “caramel”: If using soft caramels, warm slightly and flatten tiny pieces onto each bite. For date caramel, blend 3 pitted medjool dates with 1–2 teaspoons warm water until thick and spreadable, then dab a pea-sized amount on top of each bite. Freeze 10 more minutes.
  5. Coat in chocolate: Melt 3/4 cup dark chocolate chips with 1 teaspoon coconut oil until smooth.

    Dip or spoon chocolate over the bites to coat. Tap off excess.

  6. Finish and set: Sprinkle a pinch of sea salt on top if desired. Chill until the chocolate sets, about 15–20 minutes in the fridge or 10 in the freezer.
  7. Portion check: For under 100 calories, aim for 16 bites from the batch and keep the chocolate layer thin.

How to Store

  • Fridge: Store in an airtight container for up to 1 week.
  • Freezer: Freeze for up to 2 months.

    Let sit at room temperature for 5–10 minutes before eating.

  • Separate layers with parchment to prevent sticking.

Why This is Good for You

  • Protein helps keep you full: The protein powder and nuts support satiety and muscle recovery.
  • Better fats: Nut butter and peanuts offer heart-friendly monounsaturated fats.
  • Portion control built in: Bite-sized treats curb cravings without a sugar crash.
  • Fiber boost: Dates (if using) add natural sweetness and a little fiber.

Common Mistakes to Avoid

  • Over-wetting the base: Add milk a splash at a time. Too much makes it sticky and hard to shape.
  • Heavy chocolate coating: A thick shell pushes calories over 100. Keep it thin.
  • Crushing the cereal: Fold gently to maintain crunch.
  • Skipping the chill time: Warm bites fall apart in the chocolate.

    A short freeze keeps them firm.

  • Using only super dark chocolate: Anything above 80% can taste harsh here. Aim for 60–70% for balance.

Alternatives

  • Nut butter swap: Almond or cashew butter for a milder flavor; sunflower seed butter for nut-free.
  • Protein options: Whey mixes creamier; plant protein may need an extra splash of milk.
  • Sweetener: Maple syrup, agave, or a zero-cal sweetener plus a bit more milk to balance texture.
  • Crunch: Use chopped roasted nuts or high-fiber cereal if you don’t have crispy rice.
  • Caramel: Date caramel is the lighter option; soft caramel candies are closer to classic Snickers.
  • Chocolate: Sugar-free chocolate chips or milk chocolate if you prefer sweeter (adjust calories).

FAQ

How many calories are in each bite?

When you make 16 bites with a thin chocolate coating, each comes in under 100 calories. Exact numbers depend on your brands and how much chocolate you use.

Can I make these without protein powder?

Yes.

Replace the scoop of protein with 2–3 tablespoons oat flour and adjust sweetness and milk as needed. The bites will be slightly less filling.

Do they taste like real Snickers?

They’re inspired by the flavor and texture: nutty, caramel-like, and chocolatey with crunch. They’re not identical, but they hit the same craving with a lighter profile.

What’s the best way to melt chocolate?

Microwave in 20–30 second bursts, stirring between each, or use a double boiler.

Add a little coconut oil for a smooth, snappy coat.

Can I make them gluten-free or dairy-free?

Yes. Use gluten-free crispy rice cereal and a dairy-free protein powder and chocolate. Check labels to be sure.

How can I boost the protein even more?

Add an extra half scoop of protein and a tiny bit more milk to keep the texture workable, or sprinkle crushed high-protein cereal into the mix.

Final Thoughts

These Crunchy Protein Snickers Bites are a smart answer to candy cravings—sweet, nutty, and satisfying with less fuss and fewer calories.

They’re easy to customize, easy to store, and perfect for a quick snack or dessert. Make a batch on Sunday, and you’ll have a better-for-you treat ready all week. Keep it simple, keep it crunchy, and enjoy every bite.

Chocolate Hazelnut Protein Holiday Shake – Cozy, Creamy, and Satisfying

This shake tastes like a festive dessert but packs the kind of nutrition that keeps you going through busy holiday days. It’s rich, chocolatey, lightly nutty, and naturally sweet—no weird aftertaste or overly complicated steps. Whether you’re craving an afternoon treat or need a quick breakfast, this blend hits the spot.

Think of it as a seasonal upgrade to your usual protein shake, with a little cozy magic in every sip.

What Makes This Recipe So Good

Close-up detail shot of the finished Chocolate Hazelnut Protein Holiday Shake being poured from a bl
  • Dessert vibes, balanced macros: You get a chocolate hazelnut flavor that feels indulgent, with solid protein to keep you full.
  • Holiday-friendly flavors: A hint of cinnamon and vanilla brings that warm, seasonal feel without being overpowering.
  • Quick and customizable: Toss everything in a blender and you’re done in minutes. Easy to tweak for dairy-free, low-carb, or higher-calorie needs.
  • Great texture: Frozen banana (or ice) creates a thick, milkshake-like feel—no chalkiness.
  • Better-for-you chocolate taste: Cocoa powder and a little hazelnut butter deliver that “nutty chocolate” experience without loads of sugar.

Ingredients

  • 1 cup unsweetened almond milk (or milk of choice)
  • 1 frozen banana (or 1/2 banana + 1 cup ice for a less sweet version)
  • 1 scoop chocolate protein powder (whey or plant-based)
  • 1 tablespoon hazelnut butter (or 1 tablespoon almond butter + 1/4 teaspoon hazelnut extract)
  • 1 tablespoon unsweetened cocoa powder
  • 1 teaspoon maple syrup or honey (optional, to taste)
  • 1/2 teaspoon vanilla extract
  • 1/4 teaspoon ground cinnamon
  • Pinch of sea salt
  • 2–3 ice cubes (optional, for extra thickness)
  • Optional garnish: shaved dark chocolate, crushed toasted hazelnuts, or a pinch of cocoa

Instructions

Overhead “tasty top view” of the final shake served in a low, wide glass on a matte ceramic plat
  1. Add the milk, banana, protein powder, hazelnut butter, cocoa powder, vanilla, cinnamon, and salt to a blender.
  2. Blend on high until smooth, 30–45 seconds. If it’s too thick, add a splash of milk.

    If it’s too thin, add a couple of ice cubes and blend again.

  3. Taste and adjust sweetness with maple syrup or honey if needed.
  4. Pour into a chilled glass. Top with shaved dark chocolate or crushed hazelnuts if you want a little holiday flair.

Storage Instructions

  • Short-term: Keep in the fridge for up to 24 hours in a sealed jar. Shake well before drinking.
  • Make-ahead tip: Portion the dry ingredients (protein powder, cocoa, cinnamon, salt) in a small jar and keep the wet ingredients ready.

    Blend when needed.

  • Freezer packs: Pre-freeze banana pieces and measured hazelnut butter in small bags. Add to the blender with milk and powders straight from the freezer.
Process shot showing the blended shake at perfect consistency inside a transparent blender jar, post

Why This is Good for You

  • Protein for satiety: Helps keep you full and supports muscle repair, especially useful during busy, snack-heavy holidays.
  • Healthy fats: Hazelnut butter adds monounsaturated fats that support heart health and a steady energy curve.
  • Antioxidants: Cocoa is rich in flavanols that can support circulation and mood.
  • Balanced sweetness: Banana and optional maple syrup offer natural sweetness without relying on heavy sugars.

Pitfalls to Watch Out For

  • Over-sweetening: Start with no added sweetener and taste. Protein powders vary in sweetness.
  • Wrong texture: If it’s icy or watery, add more banana or a few nuts to boost creaminess.

    If it’s too thick, add milk a little at a time.

  • Strong hazelnut extract: If using extract, go light—1/4 teaspoon is plenty. Too much can taste artificial.
  • Chalky protein: If your shake tastes chalky, try a different brand or add a few ice cubes to smooth it out.

Alternatives

  • Dairy-free: Use almond, oat, or coconut milk and a plant-based protein powder.
  • Low-sugar: Skip the banana and use 1–1.5 cups ice. Add 1–2 dates or a zero-calorie sweetener if needed.
  • Extra protein: Add 2 tablespoons Greek yogurt or a splash of pasteurized egg whites (if you’re comfortable and they’re safe to consume).
  • No hazelnuts: Use almond butter plus a tiny bit of hazelnut extract, or go full almond-chocolate for a “ferrero-adjacent” flavor.
  • Festive boost: Add a pinch of nutmeg, a splash of peppermint extract, or a shot of espresso for a holiday mocha vibe.

FAQ

Can I make this without a banana?

Yes.

Replace the banana with 1–1.5 cups ice and add 1–2 pitted dates or a touch of sweetener to balance the cocoa. You’ll get a colder, slightly lighter texture.

What protein powder works best?

Whey blends usually create the smoothest texture. For dairy-free, choose a plant blend with pea protein and rice or hemp for better mouthfeel.

Chocolate flavor works best here.

Can I use Nutella instead of hazelnut butter?

You can, but it will add more sugar and less protein. If you use Nutella, reduce or skip the added sweetener and keep the cocoa powder for a deeper chocolate taste.

How do I make it thicker?

Use a fully frozen banana, add more ice, or mix in 1–2 tablespoons of oats. Blend a little longer to aerate and thicken.

Is this good post-workout?

Yes.

It offers protein for recovery and carbs from banana for glycogen replenishment. If you need extra carbs post-workout, add half a banana or a few oats.

In Conclusion

This Chocolate Hazelnut Protein Holiday Shake feels like a treat, but it’s built to fuel your day. It’s quick, customizable, and cozy enough to match the season without weighing you down.

Keep the ingredients on hand, tweak the sweetness to your taste, and enjoy a festive shake that actually fits your goals.