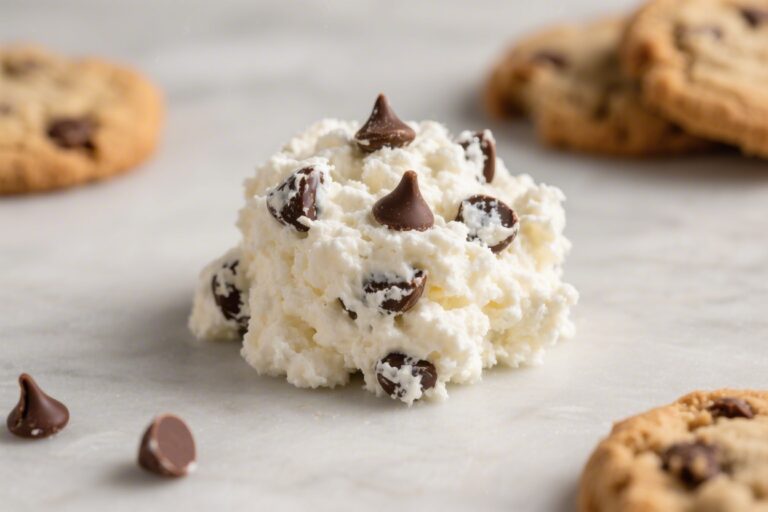
Tropical Mango Smoothie Bowl with Protein (Thick, Bright & Filling)

This smoothie bowl tastes like a mini vacation and keeps you full for hours. It’s cold, creamy, and naturally sweet, with a bold mango flavor that shines. The texture is thick enough to hold your favorite crunchy toppings.

Best of all, it uses simple ingredients and blends up in minutes. If you’ve been wanting a breakfast that feels fresh but still satisfies, this one checks every box.

What Makes This Recipe So Good

Overhead shot of a thick, spoonable Tropical Mango Smoothie Bowl freshly blended and swirled into so
  • Thick, spoonable texture: Frozen fruit and just enough liquid make it ultra-creamy without turning soupy.
  • High-protein boost: Protein powder and yogurt help keep you full and steady your energy.
  • Bright tropical flavor: Mango, pineapple, and lime deliver a sunny, tangy-sweet combo.
  • Customizable: Swap your milk, protein, or toppings based on what you like or have on hand.
  • No added sugar needed: Ripe fruit provides plenty of sweetness.

What You’ll Need

  • Frozen mango chunks (1 to 1 1/2 cups)
  • Frozen pineapple (1/2 cup)
  • Banana (1 small, frozen if possible, for creaminess)
  • Unsweetened coconut milk or almond milk (1/3 to 1/2 cup, start low)
  • Greek yogurt (1/4 to 1/2 cup; dairy-free yogurt works too)
  • Vanilla or unflavored protein powder (1 scoop; whey or plant-based)
  • Lime juice (1 to 2 teaspoons) and a little lime zest (optional)
  • Chia seeds or ground flax (1 tablespoon, optional for fiber)
  • Toppings: fresh mango, kiwi, banana slices, toasted coconut flakes, granola, hemp seeds, sliced almonds, or a drizzle of honey if you like it sweeter

How to Make It

Close-up, three-quarter angle of the smoothie bowl being finished: a glossy, moundable scoop held on
  1. Add the frozen mango, pineapple, banana, yogurt, protein powder, lime juice, and chia or flax to a high-powered blender.
  2. Pour in 1/3 cup milk to start. You want as little liquid as possible for a thick bowl.
  3. Blend on low, then increase speed, using a tamper to push the fruit toward the blades.

    If it struggles, add 1 to 2 tablespoons more milk at a time.

  4. Blend until smooth and soft-serve thick. It should mound on a spoon and not run.
  5. Taste and adjust: add more lime for brightness or a tiny drizzle of honey if needed.
  6. Spoon into a bowl and add your favorite toppings. Think crunchy granola, juicy fruit, and a sprinkle of seeds.

Keeping It Fresh

  • Meal prep packs: Portion mango, pineapple, banana, and seeds into freezer bags.

    In the morning, dump in the blender with milk, yogurt, and protein.

  • Short hold: If you must make it ahead, blend and store covered in the coldest part of your fridge for up to 12 hours. Re-blend with a few ice cubes to thicken.
  • Freeze and churn: Freeze leftovers in a shallow container. Break into chunks and re-blend with a splash of milk for a quick mango “nice cream.”

Health Benefits

  • High protein: Supports muscle repair and keeps you satisfied longer.
  • Fiber-rich: Mango, pineapple, banana, and seeds support digestion and steady energy.
  • Vitamins and antioxidants: Mango and pineapple bring vitamin C, vitamin A, and protective plant compounds.
  • Healthy fats (optional): Chia, flax, or hemp add omega-3s and help with satiety.
  • Balanced carbs: Natural fruit sugars paired with protein and fat help manage blood sugar spikes.

What Not to Do

  • Don’t add too much liquid: It will go from scoopable to sippable fast.
  • Don’t skip the protein if you want staying power: The bowl will taste great but won’t keep you full as long.
  • Don’t blend on high right away: Start low to avoid air pockets and get a smoother blend.
  • Don’t use unripe fruit: You’ll lose the natural sweetness and flavor.

Recipe Variations

  • Green tropical: Add a handful of spinach or kale.

    The mango masks the flavor.

  • Creamsicle vibes: Swap pineapple for frozen peaches and add a splash of orange juice.
  • Coconut dream: Use full-fat coconut milk and top with toasted coconut and macadamias.
  • Spiced mango: Add a pinch of ground ginger or turmeric and black pepper.
  • Dairy-free: Use coconut yogurt and a plant-based protein powder.
  • Extra protein: Stir in 2 tablespoons peanut butter or almond butter before blending.

FAQ

Can I use fresh mango instead of frozen?

Yes, but for thickness you’ll need to add more ice or freeze the mango chunks first. Frozen fruit is the key to that scoopable texture.

What kind of protein powder works best?

Vanilla whey blends very creamy. For dairy-free, use a smooth plant-based option like pea or a pea/rice blend.

Avoid gritty powders if texture bothers you.

How do I make it sweeter without sugar?

Use a very ripe banana, add a couple of Medjool dates, or a splash of pineapple juice in place of some milk.

My blender keeps stalling. What should I do?

Start on low, use the tamper, and add liquid a tablespoon at a time. If needed, pause and scrape down the sides.

High-powered blenders make this easiest.

Can I turn this into a drinkable smoothie?

Absolutely. Add more milk until it reaches your ideal sipping consistency and skip the heavy toppings.

In Conclusion

This Tropical Mango Smoothie Bowl with Protein is bright, creamy, and genuinely filling. It uses simple ingredients, blends fast, and leaves room for any toppings you love.

Make a freezer pack tonight, and tomorrow morning breakfast will be as easy as blend, bowl, and enjoy.

Tropical Mango Smoothie Bowl with Protein (Thick, Bright & Filling) - A Sunny Breakfast You Can Eat With a Spoon

Prep Time 10 minutes
Total Time 10 minutes
Servings 2 servings

Ingredients
  

  • Frozen mango chunks (1 to 1 1/2 cups)
  • Frozen pineapple (1/2 cup)
  • Banana (1 small, frozen if possible, for creaminess)
  • Unsweetened coconut milk or almond milk (1/3 to 1/2 cup, start low)
  • Greek yogurt (1/4 to 1/2 cup; dairy-free yogurt works too)
  • Vanilla or unflavored protein powder (1 scoop; whey or plant-based)
  • Lime juice (1 to 2 teaspoons) and a little lime zest (optional)
  • Chia seeds or ground flax (1 tablespoon, optional for fiber)
  • Toppings: fresh mango, kiwi, banana slices, toasted coconut flakes, granola, hemp seeds, sliced almonds, or a drizzle of honey if you like it sweeter

Instructions
 

  • Add the frozen mango, pineapple, banana, yogurt, protein powder, lime juice, and chia or flax to a high-powered blender.
  • Pour in 1/3 cup milk to start. You want as little liquid as possible for a thick bowl.
  • Blend on low, then increase speed, using a tamper to push the fruit toward the blades.If it struggles, add 1 to 2 tablespoons more milk at a time.
  • Blend until smooth and soft-serve thick. It should mound on a spoon and not run.
  • Taste and adjust: add more lime for brightness or a tiny drizzle of honey if needed.
  • Spoon into a bowl and add your favorite toppings. Think crunchy granola, juicy fruit, and a sprinkle of seeds.

BBQ Chicken Ranch Wraps – Easy, Flavor-Packed Lunch or Dinner

These BBQ Chicken Ranch Wraps are fast, filling, and ridiculously tasty. They hit that perfect balance of smoky, tangy, and creamy, with plenty of crunch for good measure. Whether you’re feeding a hungry family or prepping lunches for the week, this recipe keeps things simple without skimping on flavor.

You can use leftover chicken, rotisserie chicken, or quickly cook your own. Make a batch, and you’ll have a crowd-pleasing meal in minutes.

Why This Recipe Works

Cooking process, close-up detail: BBQ chicken ranch wrap being toasted seam-side down in a lightly o

These wraps lean on a proven flavor trio: BBQ sauce, ranch, and chicken. The creamy ranch cools the tangy BBQ while the chicken adds protein and substance.

Fresh veggies bring crunch and color, keeping every bite interesting. And because it’s all rolled into a tortilla, you get a complete meal that’s easy to hold, eat, and pack.

What You’ll Need

  • 2–3 cups cooked chicken (shredded or diced; rotisserie works great)
  • 1/2 cup BBQ sauce (use your favorite brand or homemade)
  • 1/3 cup ranch dressing (thick, not too runny)
  • 4 large flour tortillas (10-inch burrito size)
  • 1–1 1/2 cups shredded cheese (cheddar, Monterey Jack, or a blend)
  • 1 1/2 cups shredded lettuce (romaine or iceberg)
  • 1 cup diced tomatoes (or halved cherry tomatoes)
  • 1/2 red onion, thinly sliced (optional, for zing)
  • 1 avocado, sliced (optional, for creaminess)
  • Fresh cilantro (optional, chopped)
  • Salt and black pepper (to taste)
  • Olive oil or butter (optional, for toasting the wrap)

Step-by-Step Instructions

Final dish, tasty top view: Overhead shot of BBQ Chicken Ranch Wrap sliced on the diagonal and sligh
  1. Prep the chicken: In a bowl, toss the cooked chicken with BBQ sauce until evenly coated. Taste and add a pinch of salt and pepper if needed.
  2. Warm the tortillas: Briefly heat each tortilla in a dry skillet for 10–15 seconds per side to make them more pliable.
  3. Layer the base: Spread 1–2 tablespoons of ranch down the center of each tortilla, leaving space at the edges for rolling.
  4. Add the fillings: Pile on BBQ chicken, then add shredded cheese, lettuce, tomatoes, red onion, avocado, and a bit of cilantro.

    Don’t overfill.

  5. Wrap it up: Fold the sides inward, then roll tightly from the bottom up. Tuck as you go to keep the filling snug.
  6. Toast (optional but recommended): Add a light slick of oil or butter to a skillet over medium heat. Place the wrap seam-side down and toast 1–2 minutes per side until golden and the cheese melts.
  7. Serve: Slice in half on the diagonal.

    Drizzle or serve with extra ranch and BBQ sauce if you like.

Storage Instructions

  • Make-ahead: Store prepped fillings separately for up to 3 days. Assemble just before eating to keep the lettuce crisp.
  • Assembled wraps: Wrap tightly in foil or parchment and refrigerate up to 24 hours. Toast before serving for best texture.
  • Freezing: Not ideal due to fresh veggies and dressing.

    If freezing, omit lettuce, tomato, and avocado; add fresh after reheating.

Benefits of This Recipe

  • Fast and flexible: Works with leftover or rotisserie chicken for a quick meal.
  • Balanced flavors: Smoky, creamy, tangy, and fresh in one bite.
  • Kid-friendly: Easy to adjust the sauce level and skip onions if needed.
  • Portable: Perfect for lunches, picnics, or on-the-go dinners.

Pitfalls to Watch Out For

  • Soggy wraps: Too much ranch or juicy tomatoes can make the tortilla soggy. Pat tomatoes dry and go light on sauces inside.
  • Overfilling: It’s tempting, but too much filling makes wrapping and toasting tricky.
  • Cold tortillas: Stiff tortillas crack. Warm them briefly before assembling.
  • Unbalanced flavor: Taste your BBQ sauce.

    If it’s very sweet, add a squeeze of lime or a dash of hot sauce for balance.

Recipe Variations

  • Grilled chicken: Grill seasoned chicken breasts, slice, and toss with BBQ sauce for extra smokiness.
  • Spicy kick: Add pickled jalapeños, chipotle ranch, or a sprinkle of cayenne.
  • Bacon ranch: Add crisp bacon crumbles for salty crunch.
  • Southwest style: Add black beans, corn, and a squeeze of lime.
  • Lighter option: Use whole wheat tortillas, Greek yogurt ranch, and extra lettuce.
  • Cheese swap: Pepper Jack for heat, smoked cheddar for depth.
  • Vegetarian: Swap chicken for roasted cauliflower, crispy tofu, or chickpeas tossed in BBQ sauce.

FAQ

Can I use canned chicken?

Yes. Drain it well, shred with a fork, and mix with BBQ sauce. Toast the wrap to improve texture and flavor.

What’s the best BBQ sauce for this?

Use one you love.

For balance, choose a sauce that’s not overly sweet. A smoky or hickory style pairs well with ranch.

Can I make these gluten-free?

Use certified gluten-free tortillas and ensure your BBQ sauce and ranch are gluten-free. Warm GF tortillas a bit longer to prevent cracking.

How do I keep the wrap from falling apart?

Warm the tortilla, don’t overfill, layer ranch first to “glue” ingredients, and toast seam-side down to seal.

What sides go well with these wraps?

Try a simple side salad, coleslaw, sweet potato fries, chips and salsa, or corn on the cob.

Wrapping Up

BBQ Chicken Ranch Wraps deliver big flavor with minimal effort.

They’re flexible, fast, and easy to customize for picky eaters or busy schedules. Keep cooked chicken and a good BBQ sauce on hand, and you’re always a few minutes away from a satisfying meal. Make one today and save the extras for tomorrow’s lunch—if there are any left.

BBQ Chicken Ranch Wraps – Easy, Flavor-Packed Lunch or Dinner

Prep Time 15 minutes
Cook Time 10 minutes
Total Time 25 minutes
Servings 4 servings

Ingredients
  

  • 2–3 cups cooked chicken (shredded or diced; rotisserie works great)
  • 1/2 cup BBQ sauce (use your favorite brand or homemade)
  • 1/3 cup ranch dressing (thick, not too runny)
  • 4 large flour tortillas (10-inch burrito size)
  • 1–1 1/2 cups shredded cheese (cheddar, Monterey Jack, or a blend)
  • 1 1/2 cups shredded lettuce (romaine or iceberg)
  • 1 cup diced tomatoes (or halved cherry tomatoes)
  • 1/2 red onion, thinly sliced (optional, for zing)
  • 1 avocado, sliced (optional, for creaminess)
  • Fresh cilantro (optional, chopped)
  • Salt and black pepper (to taste)
  • Olive oil or butter (optional, for toasting the wrap)

Instructions
 

  • Prep the chicken: In a bowl, toss the cooked chicken with BBQ sauce until evenly coated. Taste and add a pinch of salt and pepper if needed.
  • Warm the tortillas: Briefly heat each tortilla in a dry skillet for 10–15 seconds per side to make them more pliable.
  • Layer the base: Spread 1–2 tablespoons of ranch down the center of each tortilla, leaving space at the edges for rolling.
  • Add the fillings: Pile on BBQ chicken, then add shredded cheese, lettuce, tomatoes, red onion, avocado, and a bit of cilantro.Don’t overfill.
  • Wrap it up: Fold the sides inward, then roll tightly from the bottom up. Tuck as you go to keep the filling snug.
  • Toast (optional but recommended): Add a light slick of oil or butter to a skillet over medium heat. Place the wrap seam-side down and toast 1–2 minutes per side until golden and the cheese melts.
  • Serve: Slice in half on the diagonal.Drizzle or serve with extra ranch and BBQ sauce if you like.

Spicy Buffalo Chickpea Wraps With Crunchy Slaw (Vegan & Filling)

These wraps taste like your favorite game-day snack, but they’re plant-based, quick to make, and surprisingly satisfying. Tender chickpeas get tossed in a fiery, tangy Buffalo sauce, then tucked into warm tortillas with a crisp, creamy slaw. It’s the kind of weekday lunch that feels special without being fussy.

Make them for meal prep or a fast dinner when you want bold flavor with minimal effort.

What Makes This Recipe So Good

Cooking process close-up: Buffalo-glossed chickpeas sizzling in a dark cast-iron skillet, lightly cr
  • Big flavor, minimal effort: Canned chickpeas and pantry staples turn into a craveable, saucy filling in minutes.
  • Crunch meets creamy: A cool slaw balances the heat and adds texture so every bite is satisfying.
  • Fully vegan and protein-packed: Chickpeas bring plant protein and fiber, keeping you full longer.
  • Customizable heat level: Adjust the Buffalo sauce and spice to match your taste.
  • Meal-prep friendly: Make components ahead and assemble fresh for quick lunches.

Shopping List

  • 2 cans chickpeas (15 oz each), drained and rinsed
  • Large flour tortillas or whole-wheat wraps (8–10 inches)
  • Buffalo hot sauce (Frank’s-style)
  • Vegan butter or olive oil
  • Smoked paprika
  • Garlic powder
  • Onion powder
  • Salt and black pepper
  • Red cabbage (or green), thinly sliced
  • Carrots, shredded
  • Green onions, thinly sliced (optional)
  • Fresh cilantro or parsley, chopped (optional)
  • Vegan mayo
  • Apple cider vinegar or lemon juice
  • Maple syrup (or agave)
  • Celery, finely sliced (optional, for that Buffalo “feel”)
  • Avocado (optional, for extra creaminess)

Step-by-Step Instructions

Final wrap presentation, overhead: Sliced Buffalo chickpea wraps on a matte white plate, cut-side up
  1. Make the slaw: In a large bowl, combine 3 cups thinly sliced cabbage, 1 cup shredded carrots, and optional celery and green onions. In a small bowl, whisk 1/3 cup vegan mayo, 1 tablespoon apple cider vinegar or lemon juice, 1 teaspoon maple syrup, a pinch of salt, and pepper. Toss with the veggies.

    Chill while you cook the chickpeas.

  2. Season the chickpeas: Pat chickpeas dry. In a bowl, mix them with 1 teaspoon smoked paprika, 1/2 teaspoon garlic powder, 1/2 teaspoon onion powder, 1/2 teaspoon salt, and a few grinds of black pepper.
  3. Crisp them up: Warm a large skillet over medium-high heat. Add 1 tablespoon olive oil.

    Cook chickpeas 6–8 minutes, shaking the pan occasionally, until lightly browned and a bit crisp.

  4. Buffalo it up: Reduce heat to medium-low. Stir in 2–4 tablespoons Buffalo hot sauce (to taste) and 1 tablespoon vegan butter (or a drizzle of oil). Cook 1–2 minutes, stirring, until the chickpeas are glossy and coated.
  5. Warm the wraps: Heat tortillas in a dry skillet for 20–30 seconds per side or wrap in a damp towel and microwave 20–30 seconds until pliable.
  6. Assemble: Add a generous scoop of slaw to the center of each tortilla.

    Spoon Buffalo chickpeas on top. Add avocado slices and chopped herbs if you like.

  7. Wrap and serve: Fold the sides in, roll tightly from the bottom, and slice in half. Drizzle extra hot sauce if you’re feeling bold.

Keeping It Fresh

  • Store components separately: Keep Buffalo chickpeas, slaw, and tortillas apart in the fridge.

    Assemble right before eating to avoid soggy wraps.

  • Fridge life: Chickpeas keep 4 days. Slaw stays crisp 2–3 days. Tortillas last a week sealed.
  • Reheat smart: Rewarm chickpeas in a skillet over medium heat for the best texture.

    Add a splash of water if they seem dry.

  • Pack for lunch: Layer slaw, then chickpeas, then a barrier like avocado or extra lettuce to keep moisture from the tortilla.

Why This is Good for You

  • Plant protein and fiber: Chickpeas help keep you full and support steady energy.
  • Colorful veg: Cabbage and carrots offer antioxidants, vitamin C, and crunch with few calories.
  • Healthy fats (if using avocado): Adds creaminess and supports absorption of fat-soluble nutrients.
  • Balanced meal: Carbs from the wrap, protein and fiber from chickpeas, and fats from mayo/avocado make a well-rounded plate.

What Not to Do

  • Don’t skip drying the chickpeas: Excess moisture prevents browning and crisping.
  • Don’t over-sauce too early: Add Buffalo sauce after crisping or you’ll end up with mushy chickpeas.
  • Don’t overload the wrap: Too much filling makes rolling messy and the tortilla more likely to tear.
  • Don’t store assembled wraps overnight: They’ll get soggy. Assemble just before eating.

Recipe Variations

  • Air fryer chickpeas: Toss seasoned chickpeas with a little oil, air-fry at 390°F (200°C) for 10–12 minutes, then toss with Buffalo sauce.
  • Gluten-free: Use gluten-free tortillas and ensure your hot sauce is GF.
  • Extra protein: Add baked tofu strips or tempeh alongside the chickpeas.
  • Ranch vibe: Stir dried dill and parsley into the slaw, or use vegan ranch instead of plain mayo dressing.
  • Add-ins: Diced pickles, thin-sliced red onion, or shredded lettuce for extra crunch.
  • Low-heat version: Swap half the Buffalo sauce for tomato sauce or mild salsa for a gentler kick.

FAQ

Can I use dried chickpeas instead of canned?

Yes. Cook them until tender but not falling apart, then dry well before crisping.

You’ll need about 3 cups cooked chickpeas to replace two cans.

What’s the best Buffalo sauce to use?

Use a classic cayenne pepper hot sauce (like Frank’s) mixed with a little vegan butter or oil. This combo gives that signature tangy, buttery Buffalo flavor.

Can I make the slaw without mayo?

Absolutely. Use tahini or a thick vegan yogurt with lemon juice, a touch of maple, salt, and pepper.

It will still be creamy and fresh.

How do I keep my wraps from tearing?

Warm tortillas until flexible, don’t overfill, and tuck the sides in tightly as you roll. If tortillas are dry, a quick steam in a damp towel helps.

Are these good cold?

Yes. They’re tasty at room temperature, but for the best texture, warm the chickpeas and keep the slaw cold before assembling.

Wrapping Up

These Spicy Buffalo Chickpea Wraps bring heat, crunch, and comfort without a ton of prep.

They’re easy to customize, quick to assemble, and perfect for lunch or a light dinner. Keep the components on hand, and you’ve got a reliable, flavor-packed meal any day of the week.

Spicy Buffalo Chickpea Wraps With Crunchy Slaw (Vegan & Filling) - Easy, Flavor-Packed Lunch

Prep Time 15 minutes
Cook Time 10 minutes
Total Time 25 minutes
Servings 4 servings

Ingredients
  

  • 2 cans chickpeas (15 oz each), drained and rinsed
  • Large flour tortillas or whole-wheat wraps (8–10 inches)
  • Buffalo hot sauce (Frank’s-style)
  • Vegan butter or olive oil
  • Smoked paprika
  • Garlic powder
  • Onion powder
  • Salt and black pepper
  • Red cabbage (or green), thinly sliced
  • Carrots, shredded
  • Green onions, thinly sliced (optional)
  • Fresh cilantro or parsley, chopped (optional)
  • Vegan mayo
  • Apple cider vinegar or lemon juice
  • Maple syrup (or agave)
  • Celery, finely sliced (optional, for that Buffalo “feel”)
  • Avocado (optional, for extra creaminess)

Instructions
 

  • Make the slaw: In a large bowl, combine 3 cups thinly sliced cabbage, 1 cup shredded carrots, and optional celery and green onions. In a small bowl, whisk 1/3 cup vegan mayo, 1 tablespoon apple cider vinegar or lemon juice, 1 teaspoon maple syrup, a pinch of salt, and pepper. Toss with the veggies.Chill while you cook the chickpeas.
  • Season the chickpeas: Pat chickpeas dry. In a bowl, mix them with 1 teaspoon smoked paprika, 1/2 teaspoon garlic powder, 1/2 teaspoon onion powder, 1/2 teaspoon salt, and a few grinds of black pepper.
  • Crisp them up: Warm a large skillet over medium-high heat. Add 1 tablespoon olive oil.Cook chickpeas 6–8 minutes, shaking the pan occasionally, until lightly browned and a bit crisp.
  • Buffalo it up: Reduce heat to medium-low. Stir in 2–4 tablespoons Buffalo hot sauce (to taste) and 1 tablespoon vegan butter (or a drizzle of oil). Cook 1–2 minutes, stirring, until the chickpeas are glossy and coated.
  • Warm the wraps: Heat tortillas in a dry skillet for 20–30 seconds per side or wrap in a damp towel and microwave 20–30 seconds until pliable.
  • Assemble: Add a generous scoop of slaw to the center of each tortilla.Spoon Buffalo chickpeas on top. Add avocado slices and chopped herbs if you like.
  • Wrap and serve: Fold the sides in, roll tightly from the bottom, and slice in half. Drizzle extra hot sauce if you’re feeling bold.

Southwest Chicken Wraps With Cilantro Lime Yogurt Sauce (Meal Prep Ready)

These wraps bring bold Southwest flavor to your weekly routine without a lot of fuss. Juicy spiced chicken, crunchy veggies, and a tangy cilantro lime yogurt sauce come together in a hearty wrap that actually keeps well. They’re perfect for meal prep, office lunches, or a quick family dinner.

The ingredients are simple, the steps are easy, and the result tastes like something you’d order at a café. Make a batch on Sunday and you’re set for the week.

Why This Recipe Works

Close-up detail: Sliced chili-lime chicken fresh off the grill pan, glistening with olive oil and sm
  • Balanced flavors: Chili-lime chicken, sweet corn, creamy avocado, and cool yogurt sauce deliver a satisfying bite.
  • Great texture: Crisp romaine and peppers contrast the tender chicken and soft tortilla.
  • Meal prep friendly: The sauce is yogurt-based, which holds up better than mayo in the fridge.
  • Fast cooking: Chicken cooks quickly on the stovetop or grill, and the rest is just assembly.
  • Customizable: Swap proteins, adjust heat, or use what you have on hand.

Shopping List

  • Chicken: 1.5 pounds boneless, skinless chicken breasts or thighs
  • Tortillas: 6–8 large flour tortillas (10-inch) or whole wheat wraps
  • Veggies: 2 cups chopped romaine, 1 red bell pepper (thinly sliced), 1 cup canned corn (drained), 1/2 small red onion (thinly sliced), 1 avocado (sliced)
  • Cheese (optional): 1 cup shredded pepper jack or cheddar
  • Black beans (optional): 1 cup cooked or canned, rinsed and drained
  • Fresh cilantro: 1 bunch
  • Limes: 2–3, plus extra wedges for serving
  • Greek yogurt: 1 cup (plain, full-fat or 2%)
  • Pantry spices: Chili powder, ground cumin, smoked paprika, garlic powder, onion powder, salt, black pepper, red pepper flakes (optional)
  • Olive oil: For cooking and sauce
  • Honey or agave: 1–2 teaspoons for the sauce
  • Garlic: 1 clove for the sauce

How to Make It

Tasty top view: Overhead shot of a tightly rolled Southwest chicken wrap, café-style seared with go
  1. Make the spice rub: In a small bowl, mix 1.5 teaspoons chili powder, 1 teaspoon ground cumin, 1 teaspoon smoked paprika, 1/2 teaspoon garlic powder, 1/2 teaspoon onion powder, 3/4 teaspoon salt, and 1/4 teaspoon black pepper. Add a pinch of red pepper flakes if you like heat.
  2. Season the chicken: Pat chicken dry.

    Drizzle with 1 tablespoon olive oil and coat evenly with the spice rub.

  3. Cook the chicken: Heat a skillet or grill pan over medium-high. Cook 5–6 minutes per side (thighs may need a touch longer) until the internal temperature reaches 165°F (74°C). Rest for 5 minutes, then slice into thin strips.
  4. Mix the cilantro lime yogurt sauce: In a bowl, combine 1 cup Greek yogurt, 1/2 cup chopped cilantro, zest and juice of 1 lime, 1 small grated or minced garlic clove, 1 teaspoon honey, 1 tablespoon olive oil, and 1/4 teaspoon salt.

    Adjust lime and salt to taste.

  5. Prep the fillings: Chop romaine, slice bell pepper and onion, drain corn and beans, and slice avocado. Keep components separate if meal prepping.
  6. Warm the tortillas: Briefly heat each tortilla in a dry skillet for 15–20 seconds per side to make them pliable.
  7. Assemble: Spread 2 tablespoons of sauce on each tortilla. Layer romaine, chicken, peppers, corn, onion, black beans (if using), avocado, and a sprinkle of cheese.
  8. Wrap it tight: Fold in the sides, then roll from the bottom into a snug wrap.

    For meal prep, wrap in parchment and then foil, or place seam-side down in containers.

  9. Optional crisp: For a café-style finish, sear the wrapped tortilla seam-side down in a lightly oiled skillet 1–2 minutes per side.

How to Store

  • Meal prep containers: Store wraps in airtight containers up to 3 days in the fridge. For best texture, add avocado the day you eat.
  • Keep sauce separate: If storing more than 24 hours, pack the yogurt sauce in a small container and add just before eating.
  • Reheating: Enjoy cold, or warm in a skillet over medium heat 3–4 minutes per side. Avoid microwaving with avocado inside.
  • Freezing: Not recommended due to fresh veggies and yogurt-based sauce.

Benefits of This Recipe

  • High protein, balanced carbs: Keeps you full without feeling heavy.
  • Lighter sauce: Greek yogurt adds creaminess and protein with less fat than mayo or sour cream.
  • Budget-friendly: Uses everyday ingredients and stretches into multiple meals.
  • Quick cleanup: One pan for chicken, one bowl for sauce.

What Not to Do

  • Don’t skip resting the chicken: Slicing too soon leads to dry, tough meat.
  • Don’t overload the wrap: Too much filling makes it messy and likely to tear.
  • Don’t add soggy ingredients early: Wet lettuce or overripe avocado can make the tortilla soggy.

    Pat veggies dry.

  • Don’t under-season: The flavors should pop. Taste and adjust salt, lime, and spices.

Variations You Can Try

  • Spicy chipotle: Blend a chipotle pepper in adobo into the yogurt sauce for heat and smokiness.
  • Vegetarian: Swap chicken for roasted sweet potato or grilled portobello and extra black beans.
  • Low-carb: Use low-carb tortillas or large collard greens/romaine leaves as wraps.
  • Steak or shrimp: Use the same spice mix on flank steak or shrimp; adjust cooking time.
  • Corn salsa twist: Mix corn, cilantro, lime, and a pinch of salt for a quick salsa layer.
  • Dairy-free: Use a dairy-free yogurt for the sauce or a simple olive oil-lime vinaigrette.

FAQ

Can I cook the chicken in the oven?

Yes. Bake at 425°F (220°C) for 16–20 minutes depending on thickness, until the internal temperature reaches 165°F.

Let it rest before slicing.

What tortillas work best?

Large flour tortillas are the easiest to fold and hold up well for meal prep. Whole wheat or spinach wraps are great alternatives. Avoid thin corn tortillas for this build.

How can I make it spicier?

Add cayenne to the rub, use pepper jack cheese, or stir minced jalapeño or chipotle into the yogurt sauce.

A drizzle of hot sauce also works.

Can I make the sauce ahead?

Absolutely. The yogurt sauce keeps 3–4 days in the fridge. The flavors deepen after a few hours, so it’s perfect for meal prep.

What can I use instead of Greek yogurt?

Try skyr for a similar texture, or use sour cream thinned with a little lime juice.

For dairy-free, use a plain coconut or almond milk yogurt.

How do I keep the wrap from getting soggy?

Dry your lettuce and peppers well, spread sauce in a thin layer, and place sturdy ingredients like chicken and beans closest to the sauce. Avocado is best added the day you eat.

In Conclusion

Southwest Chicken Wraps with Cilantro Lime Yogurt Sauce are a reliable, tasty option for busy days. They pack bold flavor, solid nutrition, and easy prep into a grab-and-go format.

Make the components once, then mix and match all week. Simple steps, fresh ingredients, and big payoff—exactly what weeknight cooking needs.

Southwest Chicken Wraps With Cilantro Lime Yogurt Sauce (Meal Prep Ready) - Fresh, Fast, and Flavor-Packed

Prep Time 15 minutes
Cook Time 20 minutes
Total Time 35 minutes
Servings 6 servings

Ingredients
  

  • Chicken: 1.5 pounds boneless, skinless chicken breasts or thighs
  • Tortillas: 6–8 large flour tortillas (10-inch) or whole wheat wraps
  • Veggies: 2 cups chopped romaine, 1 red bell pepper (thinly sliced), 1 cup canned corn (drained), 1/2 small red onion (thinly sliced), 1 avocado (sliced)
  • Cheese (optional): 1 cup shredded pepper jack or cheddar
  • Black beans (optional): 1 cup cooked or canned, rinsed and drained
  • Fresh cilantro: 1 bunch
  • Limes: 2–3, plus extra wedges for serving
  • Greek yogurt: 1 cup (plain, full-fat or 2%)
  • Pantry spices: Chili powder, ground cumin, smoked paprika, garlic powder, onion powder, salt, black pepper, red pepper flakes (optional)
  • Olive oil: For cooking and sauce
  • Honey or agave: 1–2 teaspoons for the sauce
  • Garlic: 1 clove for the sauce

Instructions
 

  • Make the spice rub: In a small bowl, mix 1.5 teaspoons chili powder, 1 teaspoon ground cumin, 1 teaspoon smoked paprika, 1/2 teaspoon garlic powder, 1/2 teaspoon onion powder, 3/4 teaspoon salt, and 1/4 teaspoon black pepper. Add a pinch of red pepper flakes if you like heat.
  • Season the chicken: Pat chicken dry.Drizzle with 1 tablespoon olive oil and coat evenly with the spice rub.
  • Cook the chicken: Heat a skillet or grill pan over medium-high. Cook 5–6 minutes per side (thighs may need a touch longer) until the internal temperature reaches 165°F (74°C). Rest for 5 minutes, then slice into thin strips.
  • Mix the cilantro lime yogurt sauce: In a bowl, combine 1 cup Greek yogurt, 1/2 cup chopped cilantro, zest and juice of 1 lime, 1 small grated or minced garlic clove, 1 teaspoon honey, 1 tablespoon olive oil, and 1/4 teaspoon salt.Adjust lime and salt to taste.
  • Prep the fillings: Chop romaine, slice bell pepper and onion, drain corn and beans, and slice avocado. Keep components separate if meal prepping.
  • Warm the tortillas: Briefly heat each tortilla in a dry skillet for 15–20 seconds per side to make them pliable.
  • Assemble: Spread 2 tablespoons of sauce on each tortilla. Layer romaine, chicken, peppers, corn, onion, black beans (if using), avocado, and a sprinkle of cheese.
  • Wrap it tight: Fold in the sides, then roll from the bottom into a snug wrap.For meal prep, wrap in parchment and then foil, or place seam-side down in containers.
  • Optional crisp: For a café-style finish, sear the wrapped tortilla seam-side down in a lightly oiled skillet 1–2 minutes per side.

Gluten Free Almond Butter Sugar Cookies – Soft, Chewy, and Simple

These cookies hit that sweet spot between soft and chewy, with rich almond flavor and a light sugar sparkle. They’re an easy win for gluten-free baking—no complicated steps or hard-to-find ingredients. If you love a classic sugar cookie but want something a bit nuttier and naturally gluten free, this recipe is for you.

They’re great for holidays, after-school treats, or a quick bake when you’re craving something cozy. You can keep them simple or dress them up with a drizzle or sprinkle.

Why This Recipe Works

Overhead shot of freshly baked gluten-free almond butter sugar cookies cooling on a wire rack, each
  • Almond butter adds structure and richness, replacing some of the fat and helping the dough hold together without gluten.
  • Gluten-free flour blend keeps things light and tender, avoiding the crumbly texture some GF cookies get.
  • Chilling the dough prevents spreading and helps the cookies bake up thick and chewy.
  • A touch of cornstarch (or arrowroot) makes the crumb soft and bakery-style.
  • Rolling in sugar gives a classic crackled finish with a delicate crunch.

What You’ll Need

  • 1/2 cup unsalted butter, softened (room temperature)
  • 1/2 cup creamy almond butter (well-stirred, not dry or oily)
  • 3/4 cup granulated sugar (plus 1/4 cup for rolling)
  • 1/4 cup light brown sugar, packed
  • 1 large egg, room temperature
  • 1 1/2 teaspoons pure vanilla extract
  • 1 1/2 cups gluten-free all-purpose flour blend (with xanthan gum)
  • 1 tablespoon cornstarch (or arrowroot)
  • 1/2 teaspoon baking powder
  • 1/4 teaspoon baking soda
  • 1/2 teaspoon fine sea salt
  • Optional: 1/2 teaspoon almond extract for extra almond flavor

Step-by-Step Instructions

Close-up detail of a stack of three gluten-free almond butter sugar cookies on a matte white dessert
  1. Prep the basics: Line two baking sheets with parchment. Set the oven to 350°F (175°C).

    Make sure butter and egg are at room temperature.

  2. Cream the fats and sugars: In a large bowl, beat butter, almond butter, granulated sugar, and brown sugar until light and fluffy, about 2 minutes.
  3. Add the egg and flavor: Mix in the egg, vanilla, and almond extract (if using) until smooth.
  4. Combine dry ingredients: In a separate bowl, whisk the gluten-free flour, cornstarch, baking powder, baking soda, and salt.
  5. Bring it together: Add dry ingredients to wet and mix on low until just combined. The dough should be soft but not sticky.
  6. Chill: Cover and refrigerate for 30–45 minutes. This helps the cookies keep their shape and improves texture.
  7. Form and coat: Scoop dough into 1 1/2-tablespoon balls.

    Roll each in granulated sugar and place on the baking sheets, leaving about 2 inches between cookies.

  8. Bake: Bake 9–11 minutes, until edges are set and tops are slightly cracked. The centers should look just a bit underdone.
  9. Cool: Let cookies rest on the sheet for 5 minutes, then transfer to a wire rack to cool completely.

Storage Instructions

  • Room temperature: Store in an airtight container for 3–4 days with a small piece of bread or a marshmallow to keep them soft.
  • Freezer (baked): Freeze cooled cookies for up to 2 months. Thaw at room temperature.
  • Freezer (dough): Scoop, roll in sugar, and freeze balls on a tray.

    Transfer to a bag and bake from frozen, adding 1–2 minutes.

Benefits of This Recipe

  • Gluten free without compromise: Tender, chewy texture that tastes like a classic bakery cookie.
  • Naturally flavorful: Almond butter adds depth, so you don’t need fancy mix-ins.
  • Simple pantry ingredients: No special gums or flours beyond a standard GF blend.
  • Customizable: Easy to adjust sweetness, add spices, or finish with a glaze.

Pitfalls to Watch Out For

  • Using dry almond butter: If it’s separated or stiff, your dough can crumble. Stir well and use a creamy variety.
  • Skipping the chill: Warm dough spreads too much and bakes thin.
  • Overbaking: Pull them when edges are set. They firm up as they cool.
  • Wrong flour blend: Use a 1:1 gluten-free blend with xanthan gum for best structure.

Alternatives

  • Dairy-free: Swap butter for vegan butter sticks (not tubs).

    Chill time may need a few extra minutes.

  • Refined sugar reduced: Use 1/2 cup granulated sugar and 2 tablespoons maple syrup; add 1 tablespoon extra flour if dough is soft.
  • Almond-free: Use sunflower seed butter. Note: It may turn green with baking soda due to chlorophyll—harmless and normal.
  • Flavor twists: Add 1/2 teaspoon cinnamon, or finish with a simple almond glaze (powdered sugar + almond milk + almond extract).
  • Sparkle sugar: Roll in coarse sugar for extra crunch and shine.

FAQ

Can I make these cookies egg-free?

Yes. Use a flax egg (1 tablespoon ground flaxseed + 3 tablespoons water, rested 10 minutes).

The cookies will be slightly denser but still tasty.

Do I need xanthan gum?

If your gluten-free flour blend already includes xanthan gum, you’re set. If not, add 1/4 teaspoon to the dry ingredients for better structure.

Can I reduce the sweetness?

You can cut the total sugar by about 2 tablespoons without hurting the texture. Keep the rolling sugar for the classic sugar-cookie finish.

How do I know they’re done?

Look for set edges and soft centers with faint cracks.

If the tops are glossy and very soft, give them another minute.

Can I use almond flour instead of a GF blend?

Not 1:1. Almond flour lacks binders and will change the texture. If you want almond flour cookies, use a recipe formulated for it.

Wrapping Up

These Gluten Free Almond Butter Sugar Cookies are simple, cozy, and reliably delicious.

They bake up soft and chewy, with just the right sweetness and a gentle nutty note. Keep this recipe handy for weeknights, cookie swaps, and anytime you want an easy gluten-free treat that tastes like the real deal.

Gluten Free Almond Butter Sugar Cookies - Soft, Chewy, and Simple

Prep Time 10 minutes
Cook Time 10 minutes
Total Time 20 minutes
Servings 24 servings

Ingredients
  

  • 1/2 cup unsalted butter, softened (room temperature)
  • 1/2 cup creamy almond butter (well-stirred, not dry or oily)
  • 3/4 cup granulated sugar (plus 1/4 cup for rolling)
  • 1/4 cup light brown sugar, packed
  • 1 large egg, room temperature
  • 1 1/2 teaspoons pure vanilla extract
  • 1 1/2 cups gluten-free all-purpose flour blend (with xanthan gum)
  • 1 tablespoon cornstarch (or arrowroot)
  • 1/2 teaspoon baking powder
  • 1/4 teaspoon baking soda
  • 1/2 teaspoon fine sea salt
  • Optional: 1/2 teaspoon almond extract for extra almond flavor

Instructions
 

  • Prep the basics: Line two baking sheets with parchment. Set the oven to 350°F (175°C).Make sure butter and egg are at room temperature.
  • Cream the fats and sugars: In a large bowl, beat butter, almond butter, granulated sugar, and brown sugar until light and fluffy, about 2 minutes.
  • Add the egg and flavor: Mix in the egg, vanilla, and almond extract (if using) until smooth.
  • Combine dry ingredients: In a separate bowl, whisk the gluten-free flour, cornstarch, baking powder, baking soda, and salt.
  • Bring it together: Add dry ingredients to wet and mix on low until just combined. The dough should be soft but not sticky.
  • Chill: Cover and refrigerate for 30–45 minutes. This helps the cookies keep their shape and improves texture.
  • Form and coat: Scoop dough into 1 1/2-tablespoon balls.Roll each in granulated sugar and place on the baking sheets, leaving about 2 inches between cookies.
  • Bake: Bake 9–11 minutes, until edges are set and tops are slightly cracked. The centers should look just a bit underdone.
  • Cool: Let cookies rest on the sheet for 5 minutes, then transfer to a wire rack to cool completely.

Make-Ahead Creamy Mashed Potatoes for a Crowd (Reheat Perfectly) – Easy, Fluffy, and Foolproof

Mashed potatoes are the unsung hero of any holiday or gathering, but the last-minute mashing can be stressful. This make-ahead version lets you prep your potatoes a day or two early and reheat them so they taste freshly made. They’re extra creamy, hold well, and stay silky—not gluey or dry.

Whether you’re feeding eight or eighteen, this method keeps things easy and delicious.

What Makes This Recipe So Good

Close-up detail shot of ultra-creamy mashed potatoes being gently folded with warm melted butter-mil
  • Make-ahead friendly: Prepare up to 48 hours in advance and reheat without losing creaminess.
  • Ultra-creamy texture: A blend of butter, cream cheese, and milk makes them rich and smooth.
  • Perfect for a crowd: Scales up easily, reheats evenly, and holds well on a buffet.
  • No last-minute chaos: Free up stovetop space and focus on the main course.
  • Foolproof reheating: Oven, slow cooker, or stovetop—all yield soft, steamy potatoes.

Shopping List

  • 5 pounds russet or Yukon Gold potatoes (Yukon Golds are naturally creamy; russets are fluffy)
  • 1 cup whole milk (or half-and-half for richer potatoes)
  • 8 tablespoons (1 stick) unsalted butter
  • 4 ounces cream cheese (softened; adds tang and stability)
  • 1 teaspoon kosher salt (plus more to taste)
  • 1/2 teaspoon black pepper
  • Optional add-ins: garlic (2–3 cloves), chives, sour cream, grated Parmesan

How to Make It

Overhead final presentation of make-ahead mashed potatoes reheated in a buttered 9x13 casserole: smo
  1. Prep the potatoes: Peel and cut potatoes into 1 1/2-inch chunks. Rinse in cold water to remove excess starch.
  2. Boil until tender: Place in a large pot, cover with cold water by 1 inch, add 1 tablespoon kosher salt, and bring to a boil. Simmer 15–20 minutes until a knife slides in easily.
  3. Warm the dairy: In a small saucepan, gently heat milk, butter, and cream cheese until melted and warm.

    Don’t boil. Warm dairy blends more smoothly.

  4. Drain well: Drain potatoes thoroughly, then return them to the hot pot. Let them sit 2–3 minutes on low heat to steam off excess moisture.
  5. Mash: Mash with a potato masher or ricer.

    Avoid a food processor or blender, which can make them gluey.

  6. Add dairy: Pour in warm dairy gradually, stirring gently until creamy. Season with salt and pepper to taste.
  7. Transfer for make-ahead: Spread into a buttered 9×13-inch baking dish or a large oven-safe casserole. Dot the top with a little butter.
  8. Cool and cover: Let cool 20–30 minutes, then cover tightly and refrigerate up to 48 hours.

Keeping It Fresh

  • Refrigeration: Store covered in the baking dish for up to 2 days.
  • Reheating in the oven: Add a splash of milk (2–4 tablespoons), cover with foil, and bake at 325°F for 30–45 minutes, stirring once midway.

    Uncover for the last 5–10 minutes if you like a lightly set top.

  • Slow cooker option: Spoon into a warm slow cooker with a splash of milk. Heat on Low 2–3 hours, stirring occasionally. Hold on Warm for serving.
  • Stovetop refresh: Reheat gently over low heat in a large pot with a bit of milk or cream, stirring often.
  • Freezing: Not ideal for maximum creaminess, but possible.

    Cool completely, freeze up to 1 month, thaw in the fridge, then reheat with extra milk and butter.

Benefits of This Recipe

  • Time-saver: Do the work ahead and keep the day-of stress low.
  • Reliable results: Cream cheese stabilizes the mash, so it reheats beautifully.
  • Flexible serving: Works for family dinners, potlucks, or big holiday spreads.
  • Customizable: Simple base that welcomes flavors like garlic, herbs, or cheese.

Common Mistakes to Avoid

  • Overworking the potatoes: Mixing too much or using a food processor makes them gummy.
  • Skipping the warm dairy: Cold milk or butter can seize the potatoes and dull the texture.
  • Under-salting the water: Season the boiling water so the potatoes are flavorful from the inside out.
  • Not draining well: Excess water leads to watery mash that won’t reheat as nicely.
  • Reheating dry: Always add a little milk or cream when reheating to restore silkiness.

Recipe Variations

  • Garlic-Parmesan: Simmer 3–4 smashed garlic cloves in the milk, then strain. Stir in 1/2 cup grated Parmesan.
  • Buttery Herb: Fold in chopped chives, parsley, or dill just before serving.
  • Extra Tangy: Swap half the cream cheese for sour cream.
  • Brown Butter: Brown the butter until nutty, then add to the warm dairy for deeper flavor.
  • Dairy-Free: Use olive oil or vegan butter and warm unsweetened oat milk; skip cream cheese and add a spoonful of mayo for body.

FAQ

How many people does this serve?

For 5 pounds of potatoes, plan on 10–12 servings as a side. For big appetites or fewer sides, expect closer to 8–10 servings.

Can I make it without cream cheese?

Yes.

Use more butter and a splash of half-and-half. For stability, add 2–3 tablespoons of sour cream or Greek yogurt.

What’s the best potato for creamy mash?

Yukon Golds are naturally creamy and flavorful. Russets are fluffier and lighter.

A 50/50 mix delivers the best of both.

Can I keep these warm for a buffet?

Yes. Use a slow cooker on Warm and stir occasionally. Add a splash of milk if they thicken over time.

How do I fix dry mashed potatoes?

Warm a bit more milk and butter, then stir it in gently until they’re soft and creamy again.

Can I add roasted garlic?

Absolutely.

Mash in 1–2 heads of roasted garlic for sweet, mellow flavor.

In Conclusion

These make-ahead creamy mashed potatoes are a stress-free win for holidays and gatherings. They reheat beautifully, taste rich and silky, and keep well on a buffet. Prep them early, reheat with a splash of milk, and enjoy one less thing to worry about when the doorbell rings.

Make-Ahead Creamy Mashed Potatoes for a Crowd (Reheat Perfectly) - Easy, Fluffy, and Foolproof

Prep Time 20 minutes
Cook Time 45 minutes
Total Time 1 hour 5 minutes
Servings 12 servings

Ingredients
  

  • 5 pounds russet or Yukon Gold potatoes (Yukon Golds are naturally creamy; russets are fluffy)
  • 1 cup whole milk (or half-and-half for richer potatoes)
  • 8 tablespoons (1 stick) unsalted butter
  • 4 ounces cream cheese (softened; adds tang and stability)
  • 1 teaspoon kosher salt (plus more to taste)
  • 1/2 teaspoon black pepper
  • Optional add-ins: garlic (2–3 cloves), chives, sour cream, grated Parmesan

Instructions
 

  • Prep the potatoes: Peel and cut potatoes into 1 1/2-inch chunks. Rinse in cold water to remove excess starch.
  • Boil until tender: Place in a large pot, cover with cold water by 1 inch, add 1 tablespoon kosher salt, and bring to a boil. Simmer 15–20 minutes until a knife slides in easily.
  • Warm the dairy: In a small saucepan, gently heat milk, butter, and cream cheese until melted and warm.Don’t boil. Warm dairy blends more smoothly.
  • Drain well: Drain potatoes thoroughly, then return them to the hot pot. Let them sit 2–3 minutes on low heat to steam off excess moisture.
  • Mash: Mash with a potato masher or ricer.Avoid a food processor or blender, which can make them gluey.
  • Add dairy: Pour in warm dairy gradually, stirring gently until creamy. Season with salt and pepper to taste.
  • Transfer for make-ahead: Spread into a buttered 9x13-inch baking dish or a large oven-safe casserole. Dot the top with a little butter.
  • Cool and cover: Let cool 20–30 minutes, then cover tightly and refrigerate up to 48 hours.

Honey Mustard Turkey & Brie Puff Pastry Bites – Easy, Elegant, and Crowd-Pleasing

These little puff pastry bites hit that perfect sweet-savory balance without any fuss. Buttery pastry, creamy brie, tender turkey, and a swipe of honey mustard come together in a few simple steps. They’re ideal for holiday gatherings, game days, or a cozy night in with a glass of wine.

You get big flavor from simple ingredients, and the presentation looks instantly impressive. Make a small batch for snacks or double it for a party tray—either way, they disappear fast.

What Makes This Recipe So Good

Close-up detail, cooking process: Honey Mustard Turkey & Brie Puff Pastry bites just out of the oven
  • Balanced flavors: The brie’s creaminess and the turkey’s savory bite play perfectly with tangy-sweet honey mustard.
  • Minimal prep: Store-bought puff pastry keeps things quick and reliable.
  • Flexible and forgiving: Works with leftover turkey or deli slices, and brie can be swapped if needed.
  • Great for entertaining: Bite-sized, handheld, and easy to serve warm or at room temperature.
  • Freezer-friendly: Assemble and freeze ahead for stress-free hosting.

Shopping List

  • Puff pastry: 1 sheet, thawed (from a 14–16 oz package)
  • Brie cheese: 6–8 oz, rind on is fine
  • Cooked turkey: About 1 to 1 1/2 cups, diced or sliced (leftover or deli)
  • Honey mustard: 1/4 cup (store-bought or homemade)
  • Egg: 1 large, for egg wash
  • Honey: Optional, for drizzling
  • Fresh thyme or rosemary: Optional, finely chopped, for garnish
  • Flaky sea salt and black pepper: Optional, to finish
  • Flour: A little, for dusting the work surface
  • Nonstick spray or parchment paper: For lining the pan

How to Make It

Tasty top view, final presentation: Overhead shot of a dark slate serving board arranged with folded
  1. Preheat and prep: Heat the oven to 400°F (200°C). Line a baking sheet with parchment and lightly spray it.
  2. Roll the pastry: On a lightly floured surface, roll the puff pastry into a 10×12-inch rectangle.

    Trim edges if needed for clean lines.

  3. Cut into squares: Slice into 16–20 squares, about 2 to 2.5 inches each, depending on how big you want the bites.
  4. Make the egg wash: Beat the egg with 1 tablespoon water. Brush the borders of each square lightly.
  5. Add honey mustard: Spread a small dot (about 1/2 teaspoon) of honey mustard in the center of each square. Don’t overdo it.
  6. Top with turkey and brie: Add a bite-size piece of turkey and a small cube or slice of brie to each square.
  7. Shape the bites: You have two options:
    • Open-faced: Leave as-is for a rustic tartlet look.
    • Folded: Bring two opposite corners together and pinch to seal, creating a little parcel.
  8. Brush and season: Brush tops with more egg wash.

    Sprinkle with a pinch of black pepper and flaky salt if you like.

  9. Bake: Bake for 14–18 minutes, until puffed and deep golden. Rotate the pan halfway if your oven has hot spots.
  10. Finish and serve: Let cool 5 minutes. Drizzle with a little honey and add chopped thyme or rosemary.

    Serve warm or at room temperature.

How to Store

  • Refrigerate: Store leftovers in an airtight container for up to 3 days. Reheat at 350°F for 6–8 minutes to re-crisp.
  • Freeze unbaked: Assemble bites on a tray, freeze until solid, then transfer to a bag. Bake from frozen at 400°F, adding 3–5 extra minutes.
  • Freeze baked: Cool completely, freeze in a single layer, then bag.

    Reheat at 350°F for 10–12 minutes.

Benefits of This Recipe

  • Smart use of leftovers: A delicious way to use extra turkey after the holidays.
  • Entertaining made easy: Scales well, looks fancy, and tastes comforting.
  • Customizable: Swap cheeses, sauces, or herbs to match your mood.
  • Make-ahead friendly: Prep early and bake when guests arrive.

Common Mistakes to Avoid

  • Overfilling: Too much brie or sauce can leak and prevent the pastry from puffing properly.
  • Warm pastry: If puff pastry gets soft and sticky, chill it 10 minutes before baking for better rise.
  • Skipping the egg wash: It helps with color, shine, and sealing edges on folded bites.
  • Underbaking: Pale pastry equals soggy pastry. Bake until deep golden brown.

Variations You Can Try

  • Cranberry twist: Swap honey mustard for cranberry sauce and a touch of Dijon.
  • Apple and brie: Add a thin slice of apple with the turkey for a sweet crunch.
  • Pesto and brie: Use basil pesto instead of honey mustard and finish with pine nuts.
  • Spicy honey: Drizzle with hot honey for a gentle kick.
  • Ham and brie: Replace turkey with thin-sliced ham for a classic combo.

FAQ

Do I need to remove the brie rind?

No. The rind is edible and helps the cheese hold its shape as it bakes.

If you prefer a milder flavor, trim some off, but it’s not necessary.

Can I make these in a mini muffin tin?

Yes. Press small pastry squares into a greased mini muffin tin, add fillings, and bake. They hold their shape well and look neat for parties.

What kind of turkey works best?

Leftover roasted turkey is great, but quality deli turkey works too.

Aim for small, bite-size pieces so the pastry can puff without heavy pockets.

How can I keep the bottoms from getting soggy?

Don’t overload with sauce, bake on parchment, and make sure the oven is fully preheated. A hot oven sets the layers fast, keeping them crisp.

Can I prepare them earlier in the day?

Yes. Assemble and refrigerate on a sheet pan for up to 6 hours.

Brush with egg wash just before baking for the best color.

Final Thoughts

Honey Mustard Turkey & Brie Puff Pastry Bites are simple to make, elegant to serve, and always a hit. With just a handful of ingredients, you get layers of flaky pastry, creamy cheese, and bright, tangy sweetness. Keep puff pastry in the freezer and you’re halfway to a beautiful appetizer any night of the week.

Serve them warm, add a drizzle of honey, and watch them disappear.

Honey Mustard Turkey & Brie Puff Pastry Bites - Easy, Elegant, and Crowd-Pleasing

Prep Time 15 minutes
Cook Time 20 minutes
Total Time 35 minutes
Servings 12 servings

Ingredients
  

  • Puff pastry: 1 sheet, thawed (from a 14–16 oz package)
  • Brie cheese: 6–8 oz, rind on is fine
  • Cooked turkey: About 1 to 1 1/2 cups, diced or sliced (leftover or deli)
  • Honey mustard: 1/4 cup (store-bought or homemade)
  • Egg: 1 large, for egg wash
  • Honey: Optional, for drizzling
  • Fresh thyme or rosemary: Optional, finely chopped, for garnish
  • Flaky sea salt and black pepper: Optional, to finish
  • Flour: A little, for dusting the work surface
  • Nonstick spray or parchment paper: For lining the pan

Instructions
 

  • Preheat and prep: Heat the oven to 400°F (200°C). Line a baking sheet with parchment and lightly spray it.
  • Roll the pastry: On a lightly floured surface, roll the puff pastry into a 10x12-inch rectangle.Trim edges if needed for clean lines.
  • Cut into squares: Slice into 16–20 squares, about 2 to 2.5 inches each, depending on how big you want the bites.
  • Make the egg wash: Beat the egg with 1 tablespoon water. Brush the borders of each square lightly.
  • Add honey mustard: Spread a small dot (about 1/2 teaspoon) of honey mustard in the center of each square. Don’t overdo it.
  • Top with turkey and brie: Add a bite-size piece of turkey and a small cube or slice of brie to each square.
  • Shape the bites: You have two options: Open-faced: Leave as-is for a rustic tartlet look.
  • Folded: Bring two opposite corners together and pinch to seal, creating a little parcel.
  • Brush and season: Brush tops with more egg wash.Sprinkle with a pinch of black pepper and flaky salt if you like.
  • Bake: Bake for 14–18 minutes, until puffed and deep golden. Rotate the pan halfway if your oven has hot spots.
  • Finish and serve: Let cool 5 minutes. Drizzle with a little honey and add chopped thyme or rosemary.Serve warm or at room temperature.

Garlic Herb Make-Ahead Mashed Potatoes (Fluffy & Flavorful) – Comfort Side Made Easy

These mashed potatoes are everything you want on a busy holiday or weeknight: fluffy, creamy, and bright with garlic and fresh herbs. The best part? You can make them ahead, stash them in the fridge, and simply reheat when it’s go time.

No last-minute boiling, no rushing the mash. Just smooth, savory comfort with a little lift from butter, sour cream, and herb-infused milk.

Why This Recipe Works

Close-up detail/cooking process: Fluffy mashed potatoes being folded with warm herb-infused milk and
  • Starch control: Using starchy potatoes (like Russets or Yukon Golds) keeps the mash light and fluffy instead of gluey.
  • Infused flavor: Warming the milk and butter with garlic and herbs infuses deep, even flavor without raw garlic bite.
  • Make-ahead friendly: A little sour cream keeps the potatoes creamy after chilling and reheating.
  • Steam-dry technique: Letting the cooked potatoes dry out briefly concentrates flavor and prevents watery mash.
  • Flexible reheating: Reheats beautifully in the oven, slow cooker, or microwave with a splash of milk.

Ingredients

  • 3 pounds Russet or Yukon Gold potatoes, peeled and cut into 1.5-inch chunks
  • 1 cup whole milk (or half-and-half for richer)
  • 6 tablespoons unsalted butter, plus more for topping
  • 4 cloves garlic, smashed
  • 2 tablespoons chopped fresh parsley
  • 1 tablespoon chopped fresh chives
  • 1 teaspoon chopped fresh thyme (or 1/2 teaspoon dried)
  • 1/2 cup sour cream (or full-fat Greek yogurt)
  • 1 to 1.5 teaspoons kosher salt, plus more to taste
  • 1/2 teaspoon black pepper
  • Optional: 1/4 cup grated Parmesan for extra savoriness

Instructions

Final dish/overhead presentation: Tasty top view of Garlic Herb Make-Ahead Mashed Potatoes in a butt
  1. Prep the potatoes: Place potato chunks in a large pot and cover with cold water by about 1 inch. Stir in 1 tablespoon kosher salt.

    Bring to a gentle boil, then simmer until fork-tender, 12–15 minutes.

  2. Infuse the dairy: While potatoes cook, add milk, butter, smashed garlic, and thyme to a small saucepan. Warm over low heat until butter melts and small bubbles appear at the edges. Remove from heat and let steep.
  3. Drain and steam-dry: Drain potatoes well and return to the hot pot.

    Set over low heat for 1–2 minutes, stirring occasionally, to evaporate excess moisture.

  4. Mash: Remove garlic cloves from the milk mixture. Mash potatoes with a potato masher or ricer. Slowly pour in the warm infused milk-butter, mixing gently until smooth and fluffy.
  5. Finish the flavor: Fold in sour cream, parsley, chives, pepper, and Parmesan if using.

    Taste and adjust salt. The texture should be creamy but hold soft peaks.

  6. Make ahead: Transfer to a buttered baking dish. Dot the top with a few small pieces of butter.

    Cool, then cover tightly and refrigerate up to 2 days.

  7. Reheat to serve: Bake covered at 350°F (175°C) for 25–35 minutes until hot, stirring once and adding a splash of milk if needed. Finish uncovered for 5 minutes for a lightly golden top.

Storage Instructions

  • Refrigerate: Up to 2 days in an airtight container or covered baking dish.
  • Freeze: Up to 1 month. Cool completely, wrap well, and freeze.

    Thaw overnight in the fridge, then reheat with added milk.

  • Reheat options: Oven at 350°F, microwave in short bursts with splashes of milk, or slow cooker on Low for 2–3 hours with a bit of butter.

Why This is Good for You

  • Real ingredients: Potatoes, dairy, and fresh herbs provide energy, calcium, and flavor without artificial additives.
  • Portion-friendly: Making ahead makes it easier to portion and balance with protein and vegetables.
  • Herb benefits: Garlic and herbs add antioxidants, aroma, and satisfaction, helping you enjoy a smaller serving.

Common Mistakes to Avoid

  • Overmixing: Using a stand mixer or food processor can turn potatoes gluey. Stick to a masher or ricer.
  • Starting with hot water: Always start potatoes in cold water for even cooking and better texture.
  • Skipping the dry-out step: Not steam-drying leads to watery mash that won’t reheat well.
  • Adding cold dairy: Cold milk and butter seize the starch and create a gummy texture. Warm them first.
  • Under-seasoning: Potatoes need salt.

    Taste at the end and adjust.

Alternatives

  • Dairy-free: Use unsweetened oat milk and olive oil or vegan butter; add a spoonful of dairy-free yogurt for creaminess.
  • Roasted garlic: Swap smashed garlic for 1 head of roasted garlic for a sweet, mellow flavor.
  • Herb swap: Try dill, rosemary (use sparingly), or tarragon to change the vibe.
  • Extra-rich: Replace part of the milk with cream and add cream cheese for ultra-smooth potatoes.
  • Lighter: Use chicken or vegetable broth for part of the milk and reduce butter slightly.

FAQ

Can I leave the skins on?

Yes. Yukon Golds are great with skins for extra texture and nutrients. Just scrub well and cut into even chunks.

What’s the best potato for fluffy mash?

Russets give the fluffiest texture.

Yukon Golds are naturally creamy and buttery. A 50/50 mix is a great balance.

How do I fix potatoes that seem too thick?

Warm a bit more milk and fold it in a little at a time until the texture loosens. Avoid vigorous stirring.

How do I prevent lumps?

Cut potatoes evenly, cook until fully tender, and use a ricer if you want ultra-smooth results.

Warm dairy also helps.

Can I keep these warm for a party?

Yes. Transfer to a slow cooker on Warm with a splash of milk and a few butter pats. Stir occasionally to keep them silky.

Is sour cream necessary?

It’s optional but helpful.

Sour cream adds tang and a creamy texture that holds up well when reheated.

Can I make them the same day without baking?

Absolutely. Serve right after mashing, or keep warm on low heat with a lid and a splash of milk to prevent drying.

Final Thoughts

These Garlic Herb Make-Ahead Mashed Potatoes deliver classic comfort with a bright, fresh twist. They’re easy to prep, reliable to reheat, and consistently creamy.

Make them once and you’ll keep them in your back pocket for holidays, potlucks, and weeknights alike. Simple, flavorful, and stress-free—just how a great side should be.

Garlic Herb Make-Ahead Mashed Potatoes (Fluffy & Flavorful) - Comfort Side Made Easy

Prep Time 20 minutes
Cook Time 40 minutes
Total Time 1 hour
Servings 8 servings

Ingredients
  

  • 3 pounds Russet or Yukon Gold potatoes, peeled and cut into 1.5-inch chunks
  • 1 cup whole milk (or half-and-half for richer)
  • 6 tablespoons unsalted butter, plus more for topping
  • 4 cloves garlic, smashed
  • 2 tablespoons chopped fresh parsley
  • 1 tablespoon chopped fresh chives
  • 1 teaspoon chopped fresh thyme (or 1/2 teaspoon dried)
  • 1/2 cup sour cream (or full-fat Greek yogurt)
  • 1 to 1.5 teaspoons kosher salt, plus more to taste
  • 1/2 teaspoon black pepper
  • Optional: 1/4 cup grated Parmesan for extra savoriness

Instructions
 

  • Prep the potatoes: Place potato chunks in a large pot and cover with cold water by about 1 inch. Stir in 1 tablespoon kosher salt.Bring to a gentle boil, then simmer until fork-tender, 12–15 minutes.
  • Infuse the dairy: While potatoes cook, add milk, butter, smashed garlic, and thyme to a small saucepan. Warm over low heat until butter melts and small bubbles appear at the edges. Remove from heat and let steep.
  • Drain and steam-dry: Drain potatoes well and return to the hot pot.Set over low heat for 1–2 minutes, stirring occasionally, to evaporate excess moisture.
  • Mash: Remove garlic cloves from the milk mixture. Mash potatoes with a potato masher or ricer. Slowly pour in the warm infused milk-butter, mixing gently until smooth and fluffy.
  • Finish the flavor: Fold in sour cream, parsley, chives, pepper, and Parmesan if using.Taste and adjust salt. The texture should be creamy but hold soft peaks.
  • Make ahead: Transfer to a buttered baking dish. Dot the top with a few small pieces of butter.Cool, then cover tightly and refrigerate up to 2 days.
  • Reheat to serve: Bake covered at 350°F (175°C) for 25–35 minutes until hot, stirring once and adding a splash of milk if needed. Finish uncovered for 5 minutes for a lightly golden top.

5-Ingredient Greek Yogurt Protein Flatbread (No Yeast) – Quick, Soft, and High-Protein

This flatbread comes together fast, uses pantry staples, and packs in extra protein thanks to thick Greek yogurt. There’s no yeast, no long rise, and no special equipment. You’ll get soft, flexible rounds that work for wraps, pizzas, and dipping.

Make a batch for the week, or cook them fresh in minutes when you need a quick base for dinner.

What Makes This Recipe So Good

Overhead cooking process shot: A single Greek yogurt flatbread puffing in a preheated cast-iron skil
  • Only five ingredients: Simple, affordable, and easy to keep on hand.
  • No yeast needed: Baking powder provides lift, so you can cook right away.
  • High in protein: Greek yogurt adds body, tenderness, and extra protein.
  • Versatile: Use it for wraps, mini pizzas, quesadillas, or as a side to soup and salad.
  • Ready in minutes: Mix, roll, and cook on a hot pan—no oven required.

What You’ll Need

  • 1 1/2 cups (190 g) all-purpose flour (plus extra for dusting; see Alternatives for swaps)
  • 1 cup (240 g) thick Greek yogurt (2% or 5% for best texture)
  • 1 1/2 teaspoons baking powder
  • 1/2 teaspoon fine salt
  • 1–2 teaspoons olive oil (plus a little more for cooking)

Step-by-Step Instructions

Final plated presentation: Stack of warm, cooked Greek yogurt protein flatbreads wrapped in a soft l
  1. Whisk the dry ingredients. In a mixing bowl, combine flour, baking powder, and salt until evenly distributed.
  2. Add yogurt and oil. Spoon in the Greek yogurt and add 1–2 teaspoons olive oil. Mix with a spoon until shaggy, then switch to your hands to bring it together.
  3. Knead briefly. Turn the dough onto a lightly floured surface. Knead for 1–2 minutes until smooth and slightly tacky but not sticky.

    If it’s sticky, dust in a tablespoon of flour at a time. If it’s dry, add a teaspoon of yogurt.

  4. Rest the dough (optional but helpful). Cover and let sit 5–10 minutes. This relaxes the gluten and makes rolling easier.
  5. Divide and shape. Cut into 6 equal pieces for small flatbreads or 4 for larger wraps.

    Roll each piece into a ball.

  6. Roll it out. Dust your surface and rolling pin. Roll each ball into a round or oval, about 1/8-inch thick (2–3 mm). Don’t stress about perfect circles.
  7. Preheat the pan. Heat a large cast-iron or nonstick skillet over medium to medium-high.

    Lightly brush with olive oil.

  8. Cook the flatbread. Lay a rolled dough onto the hot pan. Cook 1–2 minutes until bubbles form and the underside has golden spots. Flip and cook another 1–2 minutes.

    Adjust heat to prevent burning.

  9. Keep warm. Stack cooked flatbreads in a clean kitchen towel to stay soft while you finish the batch.
  10. Serve. Brush with a touch of olive oil, sprinkle with sea salt or herbs, and enjoy warm.

How to Store

  • Room temperature: Keep in an airtight container for up to 24 hours.
  • Refrigerator: Store up to 4 days. Reheat in a hot skillet for 30–60 seconds per side or in the microwave wrapped in a slightly damp paper towel.
  • Freezer: Freeze with parchment between pieces in a zip-top bag for up to 2 months. Thaw at room temp or warm directly from frozen in a skillet.

Why This is Good for You

  • Protein-rich: Greek yogurt bumps up protein, helping keep you fuller longer.
  • Balanced carbs: Provides a satisfying base without heavy oils or sugar.
  • Calcium and probiotics: Yogurt contributes calcium and live cultures (some survive cooking minimally; overall, it’s a nutrient-dense swap for butter-heavy doughs).
  • Customizable: Whole-grain or higher-protein flour options can increase fiber and nutrients.

What Not to Do

  • Don’t use runny yogurt. Thin yogurt will make the dough sticky.

    If yours is loose, strain it or add a bit more flour.

  • Don’t overwork the dough. Knead just until smooth; over-kneading makes it tough.
  • Don’t roll too thick. Thick rounds won’t cook through before the outside browns.
  • Don’t overcrowd the pan. Cook one or two at a time for even heat and better browning.
  • Don’t skip salt. A small amount makes a big difference in flavor.

Alternatives

  • Flour swaps: Use white whole wheat or half whole wheat, half all-purpose for more fiber. For higher protein, try bread flour (adds chew). For gluten-free, use a 1:1 gluten-free baking blend with xanthan gum.
  • Dairy-free: Use a thick, unsweetened dairy-free Greek-style yogurt.

    If it’s very thick, you may need a teaspoon or two of water to bring the dough together.

  • Flavor add-ins: Mix in 1–2 teaspoons dried herbs, garlic powder, or everything bagel seasoning. Finish with a brush of garlic butter or olive oil and herbs.
  • Cooking method: Bake at 450°F (230°C) on a preheated sheet for 4–6 minutes, flipping halfway, if you prefer the oven.

FAQ

Can I make the dough ahead of time?

Yes. Wrap tightly and refrigerate for up to 24 hours.

Bring to room temperature for 15–20 minutes before rolling for easier handling.

How do I prevent the dough from sticking?

Use a lightly floured surface and keep your rolling pin dusted. Add flour in small amounts as needed, but avoid adding too much or the flatbread will be dry.

Why isn’t my flatbread puffing?

The pan may not be hot enough, or the dough may be too thick. Make sure the skillet is properly preheated and roll the dough thin.

Can I add more protein?

You can swap up to 1/4 cup of the flour with unflavored whey or pea protein.

Add a teaspoon or two of water if the dough feels dry.

What’s the best pan for cooking?

A cast-iron skillet gives the best color and heat retention. A good nonstick pan also works well for easy release.

Wrapping Up

This 5-ingredient Greek yogurt protein flatbread is quick, soft, and flexible enough for anything you’re making. It’s an easy weeknight staple that tastes great fresh off the pan and holds up well in the fridge or freezer.

Keep the ingredients on hand, and you’ll always have a reliable base for wraps, pizzas, and simple meals.

5-Ingredient Greek Yogurt Protein Flatbread (No Yeast) - Quick, Soft, and High-Protein

Prep Time 10 minutes
Cook Time 10 minutes
Total Time 20 minutes
Servings 4 servings

Ingredients
  

  • 1 1/2 cups (190 g) all-purpose flour (plus extra for dusting; see Alternatives for swaps)
  • 1 cup (240 g) thick Greek yogurt (2% or 5% for best texture)
  • 1 1/2 teaspoons baking powder
  • 1/2 teaspoon fine salt
  • 1–2 teaspoons olive oil (plus a little more for cooking)

Instructions
 

  • Whisk the dry ingredients. In a mixing bowl, combine flour, baking powder, and salt until evenly distributed.
  • Add yogurt and oil. Spoon in the Greek yogurt and add 1–2 teaspoons olive oil. Mix with a spoon until shaggy, then switch to your hands to bring it together.
  • Knead briefly. Turn the dough onto a lightly floured surface. Knead for 1–2 minutes until smooth and slightly tacky but not sticky.If it’s sticky, dust in a tablespoon of flour at a time. If it’s dry, add a teaspoon of yogurt.
  • Rest the dough (optional but helpful). Cover and let sit 5–10 minutes. This relaxes the gluten and makes rolling easier.
  • Divide and shape. Cut into 6 equal pieces for small flatbreads or 4 for larger wraps.Roll each piece into a ball.
  • Roll it out. Dust your surface and rolling pin. Roll each ball into a round or oval, about 1/8-inch thick (2–3 mm). Don’t stress about perfect circles.
  • Preheat the pan. Heat a large cast-iron or nonstick skillet over medium to medium-high.Lightly brush with olive oil.
  • Cook the flatbread. Lay a rolled dough onto the hot pan. Cook 1–2 minutes until bubbles form and the underside has golden spots. Flip and cook another 1–2 minutes.Adjust heat to prevent burning.
  • Keep warm. Stack cooked flatbreads in a clean kitchen towel to stay soft while you finish the batch.
  • Serve. Brush with a touch of olive oil, sprinkle with sea salt or herbs, and enjoy warm.

Warm Apple Cinnamon Protein Mug Cake (Gluten Free & Cozy) – A Quick, Comforting Treat

This warm apple cinnamon protein mug cake tastes like apple pie met a fluffy pancake, and it comes together in minutes. It’s perfect for a chilly morning, an afternoon pick-me-up, or a late-night sweet tooth moment. You get the cozy apple-cinnamon vibe with a satisfying boost of protein, all without turning on the oven.

It’s gluten free, easy to customize, and gentle on your schedule. Add a splash of maple, a few chopped apples, and you’re set.

Why This Recipe Works

Overhead shot of a freshly microwaved apple cinnamon protein mug cake resting in a large ceramic mug
  • Fast and fuss-free: Mix in one mug, microwave, and eat. No bowls to clean.
  • Moist and fluffy texture: Applesauce and a touch of fat keep it tender, not rubbery.
  • Protein-packed: Protein powder turns a snack into a satisfying mini meal.
  • Gluten free by design: Uses almond flour and certified gluten-free oats.
  • Balanced flavor: Cinnamon, vanilla, and a hint of maple make it taste like a cozy fall dessert.

What You’ll Need

  • 1 small egg (or 3 tablespoons liquid egg whites)
  • 2 tablespoons unsweetened applesauce
  • 1 tablespoon milk (dairy or almond/oat milk)
  • 1 tablespoon maple syrup (or honey, or sugar substitute to taste)
  • 1/2 teaspoon vanilla extract
  • 2 tablespoons almond flour
  • 2 tablespoons oat flour (use certified gluten-free; or blitz oats in a blender)
  • 1 scoop (about 20–30 g) vanilla or unflavored whey or plant protein
  • 1/2 teaspoon ground cinnamon
  • 1/4 teaspoon baking powder (gluten free)
  • Pinch of salt
  • 2 tablespoons finely diced apple (peeled if you like)
  • 1 teaspoon butter or coconut oil (melted; optional but recommended for moisture)
  • Optional toppings: extra cinnamon, a drizzle of maple, Greek yogurt, or a few chopped nuts

How to Make It

Close-up, three-quarter angle process shot showing the mug cake just after microwaving, spoon breaki
  1. Prep your mug: Use a large microwave-safe mug and lightly grease it to prevent sticking.
  2. Whisk wet ingredients: Add egg, applesauce, milk, maple syrup, vanilla, and melted butter/oil.

    Whisk with a fork until smooth.

  3. Add dry ingredients: Stir in almond flour, oat flour, protein powder, cinnamon, baking powder, and salt. Mix until just combined.
  4. Fold in apple: Gently stir in the diced apple so it’s evenly distributed.
  5. Microwave: Cook on high for 60–90 seconds. Start checking at 60 seconds.

    The top should look set but still moist. Avoid overcooking.

  6. Rest: Let it stand for 30–60 seconds to finish steaming and become fluffy.
  7. Top and enjoy: Add a sprinkle of cinnamon, a spoon of Greek yogurt, or a drizzle of maple. Serve warm.

Storage Instructions

  • Same-day best: Mug cakes are at their peak right after cooking.
  • Short-term: Cover and refrigerate for up to 24 hours.

    Reheat 10–15 seconds in the microwave.

  • Make-ahead tip: Pre-mix dry ingredients in small jars or bags. When ready, add wet ingredients and cook.

Why This is Good for You

  • Protein helps satiety: Keeps you full longer and supports muscle recovery.
  • Fiber from oats and apple: Supports digestion and steady energy.
  • Lower sugar potential: Sweeten to taste or use a zero-calorie sweetener.
  • Healthy fats: Almond flour and a touch of butter or coconut oil improve texture and satisfaction.

Common Mistakes to Avoid

  • Overcooking: Dry, rubbery mug cakes happen fast. Stop when the center is just set.
  • Too much protein powder: It can make the cake dense.

    Stick to one scoop.

  • Skipping fat: A small amount keeps the crumb tender and flavorful.
  • Wrong mug size: A small mug can cause overflow. Use a large mug or small bowl.
  • Not adjusting for protein type: Plant protein can absorb more liquid. Add 1–2 extra teaspoons of milk if needed.

Alternatives

  • Dairy free: Use plant milk and a plant-based protein powder.
  • Egg free: Swap the egg for 3 tablespoons aquafaba or 1 tablespoon ground flax + 2.5 tablespoons water (rest 5 minutes).
  • No oats: Replace oat flour with more almond flour and add 1 teaspoon coconut flour to balance moisture.
  • Flavor twists: Add a pinch of nutmeg, ginger, or cardamom.

    Stir in raisins or chopped walnuts for texture.

  • Lower sugar: Use half the maple syrup and add a few drops of liquid stevia or monk fruit.

FAQ

Can I bake this in the oven?

Yes. Bake at 350°F (175°C) in an oven-safe ramekin for 12–15 minutes, or until the center is just set.

Which protein powder works best?

Whey isolate or a whey blend usually yields the softest texture. If using pea or brown rice protein, add a teaspoon or two more milk.

How do I make it sweeter without more sugar?

Use a few drops of stevia or monk fruit, and keep a small amount of maple syrup for flavor depth.

Can I use coconut flour?

Use it sparingly.

If swapping, start with 1 teaspoon coconut flour and add a bit more milk. Coconut flour absorbs a lot of moisture.

What if I don’t have applesauce?

Mash a few spoonfuls of ripe banana or use plain Greek yogurt. The flavor will change slightly but the texture stays moist.

Is it truly gluten free?

Yes, as long as you use certified gluten-free oats/oat flour and gluten-free baking powder.

Always check labels.

Final Thoughts

This warm apple cinnamon protein mug cake delivers comfort in minutes, with the bonus of a solid protein boost. It’s simple, cozy, and adaptable to your pantry and preferences. Keep a jar of the dry mix ready and you’re never more than a minute or two away from a steaming, cinnamon-spiced treat.

Top it with a dollop of yogurt or a drizzle of maple and settle in.

Warm Apple Cinnamon Protein Mug Cake (Gluten Free & Cozy) - A Quick, Comforting Treat

Prep Time 5 minutes
Cook Time 2 minutes
Total Time 7 minutes
Servings 1 servings

Ingredients
  

  • 1 small egg (or 3 tablespoons liquid egg whites)
  • 2 tablespoons unsweetened applesauce
  • 1 tablespoon milk (dairy or almond/oat milk)
  • 1 tablespoon maple syrup (or honey, or sugar substitute to taste)
  • 1/2 teaspoon vanilla extract
  • 2 tablespoons almond flour
  • 2 tablespoons oat flour (use certified gluten-free; or blitz oats in a blender)
  • 1 scoop (about 20–30 g) vanilla or unflavored whey or plant protein
  • 1/2 teaspoon ground cinnamon
  • 1/4 teaspoon baking powder (gluten free)
  • Pinch of salt
  • 2 tablespoons finely diced apple (peeled if you like)
  • 1 teaspoon butter or coconut oil (melted; optional but recommended for moisture)
  • Optional toppings: extra cinnamon, a drizzle of maple, Greek yogurt, or a few chopped nuts

Instructions
 

  • Prep your mug: Use a large microwave-safe mug and lightly grease it to prevent sticking.
  • Whisk wet ingredients: Add egg, applesauce, milk, maple syrup, vanilla, and melted butter/oil.Whisk with a fork until smooth.
  • Add dry ingredients: Stir in almond flour, oat flour, protein powder, cinnamon, baking powder, and salt. Mix until just combined.
  • Fold in apple: Gently stir in the diced apple so it’s evenly distributed.
  • Microwave: Cook on high for 60–90 seconds. Start checking at 60 seconds.The top should look set but still moist. Avoid overcooking.
  • Rest: Let it stand for 30–60 seconds to finish steaming and become fluffy.
  • Top and enjoy: Add a sprinkle of cinnamon, a spoon of Greek yogurt, or a drizzle of maple. Serve warm.