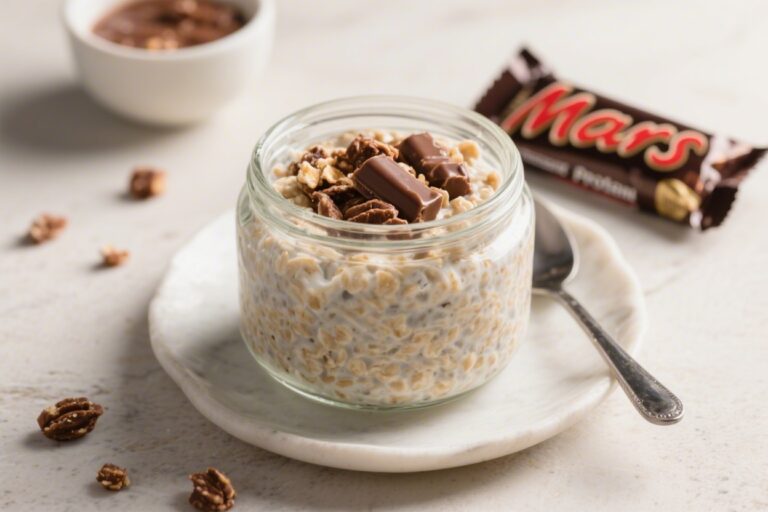
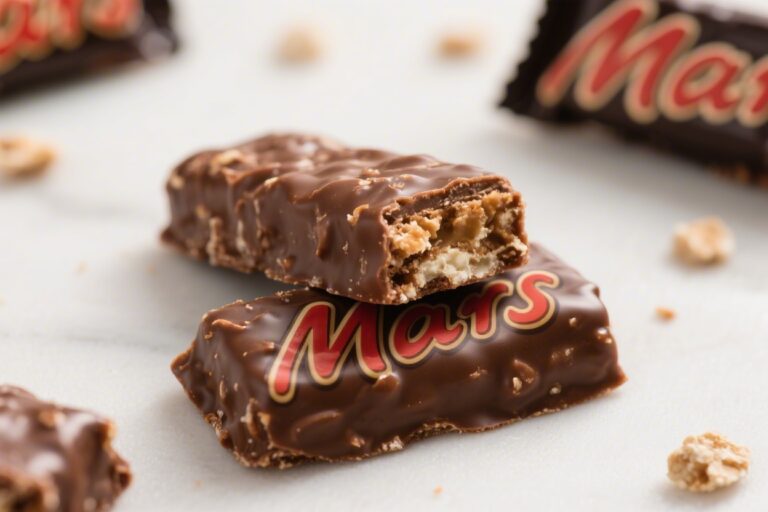
Savory Cottage Cheese Egg Muffins (High Protein, Meal Prep Friendly) – Simple, Satisfying, and Quick

These egg muffins hit the sweet spot between convenience and real food. They’re fluffy, cheesy, and loaded with protein, thanks to cottage cheese and eggs. Make a batch on Sunday, and you’ve got breakfast (or a snack) for the next few days.

They reheat well, pack easily, and feel like a mini frittata you can eat on the go. If you’re trying to start your day with something hearty and satisfying, this is a winner.

What Makes This Special

Close-up detail, cooking process: Cottage cheese egg muffin batter being poured from a spouted bowl
  • High protein without dryness: Cottage cheese melts into the eggs for a tender, moist texture.
  • Customizable: Swap veggies, cheeses, or herbs based on what you have.
  • Meal prep magic: They hold up well in the fridge or freezer and reheat in seconds.
  • Low effort, big payoff: One bowl, minimal chopping, and minimal cleanup.

What You’ll Need

  • 8 large eggs
  • 1 cup cottage cheese (2% or full-fat for best texture)
  • 1/2 cup shredded cheese (cheddar, mozzarella, or pepper jack)
  • 1 cup chopped vegetables (bell peppers, spinach, onion, or broccoli)
  • 1/2 cup cooked protein (optional: diced ham, turkey sausage, bacon, or tofu)
  • 2 tablespoons chopped fresh herbs (chives, parsley, or basil)
  • 1/2 teaspoon kosher salt
  • 1/4 teaspoon black pepper
  • 1/4 teaspoon garlic powder (optional)
  • 1/4 teaspoon smoked paprika or chili flakes (optional, for a kick)
  • Olive oil or cooking spray (for the pan)

How to Make It

Final dish, tasty top view: Overhead shot of a rustic platter piled with golden, baked cottage chees
  1. Prep the pan: Heat the oven to 350°F (175°C). Grease a standard 12-cup muffin tin well or line with silicone liners.
  2. Blend the base: In a large bowl, whisk eggs, cottage cheese, salt, pepper, and spices until smooth.

    For an ultra-smooth texture, blend with an immersion blender.

  3. Add mix-ins: Stir in shredded cheese, vegetables, cooked protein, and herbs. Keep the mix-ins small and evenly chopped.
  4. Fill the cups: Divide the mixture among the 12 cups, filling about 3/4 full. Give the tin a gentle tap to level.
  5. Bake: Bake for 18–22 minutes, until the centers are just set and the tops are lightly golden.
  6. Cool: Let muffins cool in the pan for 5 minutes, then loosen edges with a knife and transfer to a rack.
  7. Serve or store: Enjoy warm, or cool completely before storing.

How to Store

  • Refrigerate: Store in an airtight container for 4–5 days.
  • Freeze: Wrap individually and freeze up to 2 months.

    Thaw overnight in the fridge.

  • Reheat: Microwave 20–40 seconds per muffin, or warm in a 300°F (150°C) oven for 8–10 minutes.

Why This is Good for You

  • Protein-packed: Eggs and cottage cheese deliver a steady, satisfying source of protein.
  • >Nutrient-dense:
  • Balanced: Add veggies and a bit of fat for a filling, balanced bite that supports energy and focus.
  • Portion-controlled: Handy single servings help prevent overeating.

Pitfalls to Watch Out For

  • Sticking to the pan: Grease well or use silicone liners. Egg muffins love to cling.
  • Watery veggies: Sauté high-water veggies (mushrooms, zucchini) first, or squeeze thawed spinach dry.
  • Overbaking: Pull them when the centers are just set. Overbaked muffins turn rubbery.
  • Salt overload: If using salty meats or cheese, reduce the added salt slightly.

Recipe Variations

  • Greek Style: Spinach, sun-dried tomatoes, olives, dill, and feta.
  • Southwest: Bell pepper, green onion, black beans, corn, pepper jack, and a pinch of cumin.
  • Veggie-Heavy: Broccoli, mushrooms, and zucchini (pre-cooked), plus mozzarella.
  • Herb & Goat Cheese: Chives, parsley, and crumbled goat cheese.
  • Turkey Sausage & Cheddar: Classic, hearty, and great for kids.
  • Low-Lactose: Use lactose-free cottage cheese and cheese, or swap in nutritional yeast.

FAQ

Can I use egg whites instead of whole eggs?

Yes.

Replace some or all yolks with liquid egg whites. The texture will be lighter and slightly less rich. Add an extra tablespoon of oil or a bit more cheese for moisture if going yolk-free.

Do I have to blend the cottage cheese?

No.

Whisking is enough, but blending makes the muffins extra smooth with no curds visible. It’s a texture preference.

Why did my muffins collapse?

They likely needed a bit more bake time or had too much moisture. Bake until just set, and pre-cook watery veggies.

Cooling them in the pan for a few minutes also helps.

Can I make these dairy-free?

Use a dairy-free cottage cheese alternative and skip or replace the shredded cheese with a dairy-free option. The texture will vary slightly but still works.

How many muffins is a serving?

For breakfast, plan on 2 muffins for most adults. As a snack, 1 muffin usually does the job.

What’s the best pan to use?

A nonstick muffin tin with silicone liners is the easiest for release and cleanup.

Avoid paper liners unless they’re parchment-style.

Final Thoughts

These savory cottage cheese egg muffins are a small effort with a big payoff. They’re flexible, protein-rich, and built for busy mornings. Tweak the fillings to match your cravings and what’s in the fridge, and you’ll have a reliable, tasty meal prep staple ready all week.

Savory Cottage Cheese Egg Muffins (High Protein, Meal Prep Friendly) - Simple, Satisfying, and Quick

Prep Time 10 minutes
Cook Time 20 minutes
Total Time 30 minutes
Servings 12 servings

Ingredients
  

  • 8 large eggs
  • 1 cup cottage cheese (2% or full-fat for best texture)
  • 1/2 cup shredded cheese (cheddar, mozzarella, or pepper jack)
  • 1 cup chopped vegetables (bell peppers, spinach, onion, or broccoli)
  • 1/2 cup cooked protein (optional: diced ham, turkey sausage, bacon, or tofu)
  • 2 tablespoons chopped fresh herbs (chives, parsley, or basil)
  • 1/2 teaspoon kosher salt
  • 1/4 teaspoon black pepper
  • 1/4 teaspoon garlic powder (optional)
  • 1/4 teaspoon smoked paprika or chili flakes (optional, for a kick)
  • Olive oil or cooking spray (for the pan)

Instructions
 

  • Prep the pan: Heat the oven to 350°F (175°C). Grease a standard 12-cup muffin tin well or line with silicone liners.
  • Blend the base: In a large bowl, whisk eggs, cottage cheese, salt, pepper, and spices until smooth.For an ultra-smooth texture, blend with an immersion blender.
  • Add mix-ins: Stir in shredded cheese, vegetables, cooked protein, and herbs. Keep the mix-ins small and evenly chopped.
  • Fill the cups: Divide the mixture among the 12 cups, filling about 3/4 full. Give the tin a gentle tap to level.
  • Bake: Bake for 18–22 minutes, until the centers are just set and the tops are lightly golden.
  • Cool: Let muffins cool in the pan for 5 minutes, then loosen edges with a knife and transfer to a rack.
  • Serve or store: Enjoy warm, or cool completely before storing.

One-Pan Lemon Garlic Salmon & Veggies (Whole Foods Meal Prep) – Simple, Fresh, and Fast

This is the kind of weeknight meal that feels restaurant-worthy, but it’s easy enough for a Tuesday. Everything cooks on one pan, so cleanup is a breeze. The flavors are bright, fresh, and comforting: zesty lemon, mellow garlic, and tender salmon with crisp-tender veggies.

It’s perfect for meal prep, too—just portion it out and you’re set for days. Simple ingredients, minimal effort, great results.

What Makes This Recipe So Good

Overhead shot of a one-pan roasted lemon-garlic salmon dinner just out of the oven: four glistening
  • One-pan convenience: Fewer dishes, less stress, and everything cooks at the same time.
  • Balanced and satisfying: Protein, fiber-rich veggies, and healthy fats keep you full and energized.
  • Bright, clean flavors: Lemon and garlic make the salmon and vegetables shine without heavy sauces.
  • Meal prep friendly: Holds up well in the fridge and reheats nicely for lunch or dinner.
  • Whole-food ingredients: Nothing weird—just real, fresh food you can feel good about.

Shopping List

  • 4 salmon fillets (about 5–6 oz each), skin-on or skinless
  • 1 lb small baby potatoes, halved
  • 1 bunch asparagus, trimmed (or green beans if preferred)
  • 1 red bell pepper, sliced
  • 1 small red onion, cut into wedges
  • 3 tbsp extra-virgin olive oil
  • 3 cloves garlic, finely minced
  • 1 large lemon (zest and juice), plus extra slices for topping
  • 1 tsp Dijon mustard
  • 1 tsp honey or maple syrup (optional, for balance)
  • 1 tsp kosher salt, plus more to taste
  • 1/2 tsp black pepper
  • 1/2 tsp smoked paprika (optional)
  • 1/2 tsp crushed red pepper flakes (optional)
  • Fresh parsley or dill, chopped, for garnish

How to Make It

Close-up detail of a plated serving: flaky salmon fillet brushed with lemon-garlic sauce, visibly mo
  1. Heat the oven: Preheat to 425°F (220°C). Line a large sheet pan with parchment for easy cleanup.
  2. Make the lemon-garlic sauce: In a small bowl, whisk olive oil, minced garlic, lemon zest, lemon juice, Dijon, honey, salt, pepper, and smoked paprika.
  3. Start the potatoes: Toss potatoes with about a third of the sauce.

    Spread on the pan cut side down. Roast 12–15 minutes until they start to soften.

  4. Add the veggies: Toss asparagus, bell pepper, and red onion with another third of the sauce. Push potatoes to one side, add veggies to the other.

    Roast 8 minutes.

  5. Season the salmon: Pat salmon dry. Brush with the remaining sauce. Add lemon slices on top if you like.
  6. Finish roasting: Nestle salmon on the pan, skin side down if using.

    Roast 10–12 minutes, until the salmon flakes easily and the veggies are tender-crisp. Thicker fillets may need an extra 2–3 minutes.

  7. Rest and garnish: Let salmon rest 3 minutes. Sprinkle with fresh parsley or dill.

    Taste and add a pinch more salt or a squeeze of lemon if needed.

  8. Serve or portion: Serve immediately, or divide into meal prep containers with equal portions of salmon and veggies.

How to Store

  • Fridge: Store in airtight containers for up to 3–4 days.
  • Reheat: Warm gently in the microwave (50% power) or in a 300°F oven until just heated through. Avoid overcooking the salmon.
  • Freezer: Salmon can be frozen up to 2 months, but veggies may soften. Freeze portions tightly wrapped, then thaw overnight in the fridge.

Why This is Good for You

  • Omega-3s: Salmon is rich in EPA and DHA, which support heart and brain health.
  • Fiber and micronutrients: Asparagus, peppers, onions, and potatoes bring fiber, vitamin C, folate, and potassium.
  • Stable energy: The combo of protein, complex carbs, and healthy fats keeps blood sugar steadier.
  • Low on additives: Whole, recognizable ingredients with big flavor and no fuss.

Common Mistakes to Avoid

  • Overcrowding the pan: If ingredients are piled up, they steam instead of roast.

    Use a large sheet pan or two smaller ones.

  • Skipping the pat-dry step: Wet salmon won’t sear or caramelize nicely.
  • Overcooking the fish: Pull salmon when it flakes easily or hits 125–130°F in the thickest part.
  • Adding everything at once: Potatoes need a head start, or they’ll be underdone when the salmon is ready.
  • Not enough seasoning: Taste and finish with lemon and salt to brighten everything up.

Alternatives

  • Protein swaps: Use trout, cod, or chicken thighs (adjust time: chicken takes 20–25 minutes after the potatoes start).
  • Veggie swaps: Try broccoli, zucchini, cherry tomatoes, carrots, or Brussels sprouts. Roast hard veggies longer, delicate ones shorter.
  • Dairy-free “buttery” finish: Add a teaspoon of olive oil after cooking for a silky finish.
  • Herb variations: Dill for classic salmon flavor, oregano for Mediterranean vibes, or cilantro with a lime twist.
  • Low-carb option: Use cauliflower florets instead of potatoes.

FAQ

How do I know when the salmon is done?

It should flake easily with a fork and look just opaque in the center. A quick-read thermometer should read about 125–130°F for moist, medium doneness.

Can I use frozen salmon?

Yes.

Thaw it overnight in the fridge, then pat very dry before seasoning. If cooking from frozen, add 5–7 minutes and watch closely.

What if I don’t like asparagus?

Swap in green beans, broccoli, or zucchini. Keep an eye on cook times—broccoli takes longer, zucchini cooks faster.

Is the honey necessary?

No, but a small amount balances the lemon’s acidity.

You can omit it or use a pinch of sugar if preferred.

Can I make this on the stovetop?

Yes. Sauté the potatoes (parboil first to speed it up), cook the veggies until crisp-tender, and pan-sear the salmon. Finish with the sauce and a squeeze of lemon.

In Conclusion

This One-Pan Lemon Garlic Salmon & Veggies hits all the marks: fresh, fast, and nourishing.

With a simple sauce and smart timing, you get perfectly cooked salmon and flavorful veggies every time. Make it once for dinner, or batch it for easy meal prep that actually tastes great by day three. Simple food, done well.

One-Pan Lemon Garlic Salmon & Veggies (Whole Foods Meal Prep) - Simple, Fresh, and Fast

Prep Time 10 minutes
Cook Time 15 minutes
Total Time 25 minutes
Servings 4 servings

Ingredients
  

  • 4 salmon fillets (about 5–6 oz each), skin-on or skinless
  • 1 lb small baby potatoes, halved
  • 1 bunch asparagus, trimmed (or green beans if preferred)
  • 1 red bell pepper, sliced
  • 1 small red onion, cut into wedges
  • 3 tbsp extra-virgin olive oil
  • 3 cloves garlic, finely minced
  • 1 large lemon (zest and juice), plus extra slices for topping
  • 1 tsp Dijon mustard
  • 1 tsp honey or maple syrup (optional, for balance)
  • 1 tsp kosher salt, plus more to taste
  • 1/2 tsp black pepper
  • 1/2 tsp smoked paprika (optional)
  • 1/2 tsp crushed red pepper flakes (optional)
  • Fresh parsley or dill, chopped, for garnish

Instructions
 

  • Heat the oven: Preheat to 425°F (220°C). Line a large sheet pan with parchment for easy cleanup.
  • Make the lemon-garlic sauce: In a small bowl, whisk olive oil, minced garlic, lemon zest, lemon juice, Dijon, honey, salt, pepper, and smoked paprika.
  • Start the potatoes: Toss potatoes with about a third of the sauce.Spread on the pan cut side down. Roast 12–15 minutes until they start to soften.
  • Add the veggies: Toss asparagus, bell pepper, and red onion with another third of the sauce. Push potatoes to one side, add veggies to the other.Roast 8 minutes.
  • Season the salmon: Pat salmon dry. Brush with the remaining sauce. Add lemon slices on top if you like.
  • Finish roasting: Nestle salmon on the pan, skin side down if using.Roast 10–12 minutes, until the salmon flakes easily and the veggies are tender-crisp. Thicker fillets may need an extra 2–3 minutes.
  • Rest and garnish: Let salmon rest 3 minutes. Sprinkle with fresh parsley or dill.Taste and add a pinch more salt or a squeeze of lemon if needed.
  • Serve or portion: Serve immediately, or divide into meal prep containers with equal portions of salmon and veggies.

Whole Foods Lemon Garlic Chicken Meal Prep – Bright, Easy, and Ready All Week

This lemon garlic chicken meal prep is all about clean flavors and simple steps. It’s bright, zesty, and the kind of food you actually look forward to eating by day four. Think juicy chicken, fresh lemon, and plenty of garlic with crisp-tender veggies on the side.

It’s a Whole Foods–style meal you can make at home without fuss. If you’re aiming for healthy, budget-friendly, and repeatable, this one hits all three.

Why This Recipe Works

Cooking process, close-up detail: Sizzling lemon-garlic chicken thighs searing in a cast-iron skille
  • Short ingredient list, big flavor: Lemon, garlic, and olive oil do all the heavy lifting.
  • Fast to cook: Boneless chicken cooks quickly and stays juicy with a simple marinade.
  • Meal-prep friendly: The flavors develop over a few days, so leftovers taste even better.
  • Balanced plate: Protein, fiber-rich veggies, and optional complex carbs keep you full.

What You’ll Need

  • Chicken: 2 pounds boneless, skinless chicken breasts or thighs
  • Lemon: Zest and juice of 2 lemons
  • Garlic: 4–6 cloves, finely minced
  • Olive oil: 3 tablespoons
  • Fresh herbs: 2 tablespoons chopped parsley (optional: thyme or oregano)
  • Spices: 1 teaspoon sea salt, 1/2 teaspoon black pepper, 1/2 teaspoon smoked paprika, 1/4 teaspoon red pepper flakes (optional)
  • Vegetables: 1 pound broccoli florets, 1 red bell pepper (sliced), 1 red onion (sliced), 1 cup cherry tomatoes
  • Carb option (optional): 2 cups cooked quinoa, brown rice, or roasted potatoes
  • Finishing touches: Extra lemon wedges, a drizzle of olive oil, and flaky salt

How to Make It

Final dish, top view: Overhead shot of meal-prep containers neatly arranged, each filled with sliced
  1. Prep the chicken: Pat chicken dry. If using breasts, slice horizontally to create thin cutlets for even cooking.
  2. Make the marinade: In a bowl, combine lemon zest, lemon juice, garlic, olive oil, parsley, salt, pepper, smoked paprika, and red pepper flakes.
  3. Marinate: Add chicken to the bowl and toss to coat.

    Chill for at least 30 minutes, up to 8 hours. Do not marinate overnight; too much acid can make the texture mushy.

  4. Prep the veggies: Toss broccoli, bell pepper, onion, and tomatoes with olive oil, salt, and pepper.
  5. Roast the veggies: Spread on a sheet pan and roast at 425°F (220°C) for 15–20 minutes, until crisp-tender with a little char.
  6. Cook the chicken: Heat a large skillet over medium-high. Sear chicken 4–5 minutes per side (thighs may need a bit longer) until cooked through and browned. Internal temp should reach 165°F (74°C).
  7. Rest and slice: Let chicken rest 5 minutes, then slice against the grain.

    Squeeze extra lemon over the top.

  8. Assemble: Divide chicken, veggies, and your carb of choice into 4–5 meal prep containers. Add a light drizzle of olive oil and a pinch of flaky salt.

How to Store

  • Refrigerate: Store in airtight containers for up to 4 days.
  • Freeze: Freeze portions without the tomatoes for up to 2 months. Thaw overnight in the fridge.
  • Reheat: Microwave 60–90 seconds until warm, or reheat in a skillet with a splash of water or broth.
  • Fresh finish: Add a squeeze of lemon after reheating to wake up the flavors.

Health Benefits

  • Lean protein: Chicken supports muscle repair and helps keep you full.
  • Antioxidants: Lemon and garlic bring vitamin C and allicin, known for immune and heart support.
  • Fiber from veggies: Broccoli, peppers, and onions support digestion and steady energy.
  • Healthy fats: Olive oil adds heart-healthy monounsaturated fats that boost flavor and satiety.

Pitfalls to Watch Out For

  • Over-marinating: Too long in lemon can toughen or mush the chicken.

    Cap it at 8 hours.

  • Dry chicken: Thin cutlets cook fast. Pull them at 165°F and rest before slicing.
  • Soggy veggies: Don’t crowd the pan. Use two sheet pans if needed for better roasting.
  • Under-seasoning: Taste and adjust salt, especially after reheating.

Alternatives

  • Protein swaps: Use turkey cutlets, firm tofu, or chickpeas.

    For tofu, press, marinate, and roast or pan-sear.

  • Veggie swaps: Try asparagus, green beans, zucchini, or cauliflower. Adjust roast times as needed.
  • Carb swaps: Farro, couscous, cauliflower rice, or roasted sweet potatoes all work.
  • Dairy add-ons: Crumbled feta or a dollop of Greek yogurt sauce pairs well with lemon and garlic.

FAQ

Can I use bottled lemon juice?

Fresh lemon gives the best flavor and aroma, but bottled works in a pinch. If you use bottled, still add fresh lemon zest for brightness.

Breasts or thighs—what’s better for meal prep?

Thighs stay juicier over several days, but thinly sliced breasts work well if you avoid overcooking.

Choose based on your preference.

How do I keep the chicken tender?

Don’t over-marinade, cook over medium-high heat, and rest before slicing. A quick sear and proper internal temperature are key.

Is this recipe gluten-free?

Yes, as written it’s gluten-free. Just ensure any sides (like grains or sauces) are certified gluten-free if needed.

Can I cook everything on one sheet pan?

You can, but results are better if you roast veggies separately and pan-sear the chicken for better browning and texture.

What sauce can I add?

Try a quick yogurt-lemon-garlic sauce, tahini lemon drizzle, or a light chimichurri for a fresh kick.

Final Thoughts

This Whole Foods Lemon Garlic Chicken Meal Prep is the kind of recipe that fits real life—fast to make, satisfying to eat, and easy to customize.

Keep lemons and garlic on hand, swap in whatever veggies you have, and you’re set for the week. Simple, bright, and reliably tasty. That’s a win for weekday meals.

Whole Foods Lemon Garlic Chicken Meal Prep - Bright, Easy, and Ready All Week

Prep Time 15 minutes
Cook Time 25 minutes
Total Time 40 minutes
Servings 4 servings

Ingredients
  

  • Chicken: 2 pounds boneless, skinless chicken breasts or thighs
  • Lemon: Zest and juice of 2 lemons
  • Garlic: 4–6 cloves, finely minced
  • Olive oil: 3 tablespoons
  • Fresh herbs: 2 tablespoons chopped parsley (optional: thyme or oregano)
  • Spices: 1 teaspoon sea salt, 1/2 teaspoon black pepper, 1/2 teaspoon smoked paprika, 1/4 teaspoon red pepper flakes (optional)
  • Vegetables: 1 pound broccoli florets, 1 red bell pepper (sliced), 1 red onion (sliced), 1 cup cherry tomatoes
  • Carb option (optional): 2 cups cooked quinoa, brown rice, or roasted potatoes
  • Finishing touches: Extra lemon wedges, a drizzle of olive oil, and flaky salt

Instructions
 

  • Prep the chicken: Pat chicken dry. If using breasts, slice horizontally to create thin cutlets for even cooking.
  • Make the marinade: In a bowl, combine lemon zest, lemon juice, garlic, olive oil, parsley, salt, pepper, smoked paprika, and red pepper flakes.
  • Marinate: Add chicken to the bowl and toss to coat.Chill for at least 30 minutes, up to 8 hours. Do not marinate overnight; too much acid can make the texture mushy.
  • Prep the veggies: Toss broccoli, bell pepper, onion, and tomatoes with olive oil, salt, and pepper.
  • Roast the veggies: Spread on a sheet pan and roast at 425°F (220°C) for 15–20 minutes, until crisp-tender with a little char.
  • Cook the chicken: Heat a large skillet over medium-high. Sear chicken 4–5 minutes per side (thighs may need a bit longer) until cooked through and browned. Internal temp should reach 165°F (74°C).
  • Rest and slice: Let chicken rest 5 minutes, then slice against the grain.Squeeze extra lemon over the top.
  • Assemble: Divide chicken, veggies, and your carb of choice into 4–5 meal prep containers. Add a light drizzle of olive oil and a pinch of flaky salt.

Cookies & Cream Protein Overnight Oats – A Creamy, High-Protein Breakfast

If you love cookies and cream but want a breakfast that actually keeps you full, these overnight oats are the perfect fix. They’re creamy, satisfying, and taste like dessert while packing in a solid dose of protein. You can prep them in five minutes at night and wake up to a ready-to-eat meal.

The texture is thick and pudding-like, with just the right amount of crunch from cookie crumbles. It’s an easy win for busy mornings, post-workout fuel, or a midday snack.

What Makes This Recipe So Good

Close-up detail, process shot: Thick, creamy cookies & cream protein overnight oats being stirred in
  • Protein-packed and filling: With Greek yogurt and protein powder, these oats keep you satisfied for hours.
  • Balanced flavor: Vanilla, cocoa, and a few crushed chocolate sandwich cookies create the classic cookies-and-cream vibe without being overly sweet.
  • Quick to prep: Five minutes of work at night saves you stress in the morning.
  • Customizable: Adjust sweetness, dairy options, and toppings to fit your diet and taste.
  • Meal-prep friendly: Make multiple jars at once for the week.

What You’ll Need

  • Old-fashioned rolled oats: The best texture for overnight oats.
  • Milk: Dairy or non-dairy (almond, oat, soy). Use what you like.
  • Plain or vanilla Greek yogurt: Adds creaminess and extra protein.
  • Vanilla protein powder: Complements the cookies-and-cream flavor.
  • Chia seeds: For thickness and healthy fats.
  • Maple syrup or honey: Optional, for sweetness.
  • Vanilla extract: Boosts flavor.
  • Pinch of salt: Rounds out the taste.
  • Cocoa powder (optional): A little adds chocolate depth.
  • Chocolate sandwich cookies: Crushed; for that cookies-and-cream crunch and flavor.
  • Mini chocolate chips or cacao nibs (optional): For texture on top.

Instructions

Tasty top view, final presentation: Overhead shot of cookies & cream protein overnight oats served i
  1. Mix the base: In a jar or bowl, combine 1/2 cup rolled oats, 2/3 cup milk, 1/3 cup Greek yogurt, 1 tablespoon chia seeds, and 1 scoop vanilla protein powder.
  2. Flavor it: Stir in 1/2 teaspoon vanilla extract, a pinch of salt, 1–2 teaspoons cocoa powder (optional), and 1–2 teaspoons maple syrup or honey if you like it sweeter.
  3. Add the cookies: Gently fold in 1–2 crushed chocolate sandwich cookies.

    Save a little for topping.

  4. Adjust texture: If the mixture seems too thick, add a splash more milk. It should be pourable but not watery.
  5. Chill: Cover and refrigerate at least 4 hours, ideally overnight, to let the oats soften and thicken.
  6. Finish and serve: In the morning, give it a stir. Top with remaining cookie crumbles and a few mini chocolate chips or cacao nibs if you like.

    Enjoy cold.

How to Store

  • Refrigerator: Store in an airtight jar for up to 4 days. The texture thickens over time; add a splash of milk before serving if needed.
  • Meal prep: Multiply the recipe and portion into single-serve jars for grab-and-go breakfasts.
  • Toppings: Add cookie crumbles right before eating to keep them crisp.

Health Benefits

  • High protein: Greek yogurt and protein powder support muscle repair and steady energy.
  • Fiber-rich: Oats and chia seeds help with digestion and keep you fuller longer.
  • Healthy fats: Chia seeds provide omega-3s for heart and brain health.
  • Balanced macros: Carbs, protein, and fat work together for stable blood sugar and fewer mid-morning crashes.

Common Mistakes to Avoid

  • Using quick oats: They can turn mushy. Stick with old-fashioned rolled oats.
  • Too much protein powder: Overdoing it can make the oats chalky.

    One standard scoop is enough.

  • Skipping the pinch of salt: It makes the cookies-and-cream flavor pop.
  • Adding all cookies overnight: They’ll get soggy. Fold some in and save the rest for topping.
  • Not adjusting liquid: Protein powder and chia thicken as they sit. Add a splash of milk before serving if it’s too dense.

Alternatives

  • Dairy-free: Use coconut, almond, oat, or soy milk and swap Greek yogurt for a thick dairy-free yogurt.
  • Gluten-free: Choose certified gluten-free oats and gluten-free sandwich cookies.
  • Lower sugar: Skip the maple syrup and use stevia or monk fruit.

    Use high-protein, low-sugar cookies or reduce cookie amount.

  • No protein powder: Increase Greek yogurt to 1/2 cup and reduce milk slightly to keep it thick.
  • Flavor spins: Add a spoon of peanut butter for a peanut butter Oreo vibe, or swap vanilla extract for almond extract.

FAQ

Can I eat these warm?

Yes. Heat gently in the microwave for 30–60 seconds, stirring halfway. Add a splash of milk so it doesn’t dry out.

What protein powder works best?

A smooth vanilla whey or a neutral-tasting plant-based blend works well.

Avoid overly sweet or gritty powders, which can throw off the texture.

Can I make it without chia seeds?

You can. Reduce the milk slightly or add an extra tablespoon of yogurt to keep the oats thick.

How many cookies should I use?

One to two standard sandwich cookies per serving gives good flavor without overpowering the oats. Add more if you want a dessert-leaning bowl.

How long do overnight oats need to set?

At least 4 hours, but overnight gives the best texture.

Can I prep a batch for the whole week?

Yes.

Make 3–4 jars at a time for best freshness. Add cookie toppings the day you eat them.

Wrapping Up

Cookies & Cream Protein Overnight Oats deliver that nostalgic flavor with the staying power of a balanced breakfast. They’re quick to prep, easy to customize, and perfect for busy mornings.

Keep a few jars in the fridge, and you’ll have a creamy, satisfying meal ready whenever you are.

Cookies & Cream Protein Overnight Oats - A Creamy, High-Protein Breakfast

Prep Time 10 minutes
Total Time 10 minutes
Servings 2 servings

Ingredients
  

  • Old-fashioned rolled oats: The best texture for overnight oats.
  • Milk: Dairy or non-dairy (almond, oat, soy). Use what you like.
  • Plain or vanilla Greek yogurt: Adds creaminess and extra protein.
  • Vanilla protein powder: Complements the cookies-and-cream flavor.
  • Chia seeds: For thickness and healthy fats.
  • Maple syrup or honey: Optional, for sweetness.
  • Vanilla extract: Boosts flavor.
  • Pinch of salt: Rounds out the taste.
  • Cocoa powder (optional): A little adds chocolate depth.
  • Chocolate sandwich cookies: Crushed; for that cookies-and-cream crunch and flavor.
  • Mini chocolate chips or cacao nibs (optional): For texture on top.

Instructions
 

  • Mix the base: In a jar or bowl, combine 1/2 cup rolled oats, 2/3 cup milk, 1/3 cup Greek yogurt, 1 tablespoon chia seeds, and 1 scoop vanilla protein powder.
  • Flavor it: Stir in 1/2 teaspoon vanilla extract, a pinch of salt, 1–2 teaspoons cocoa powder (optional), and 1–2 teaspoons maple syrup or honey if you like it sweeter.
  • Add the cookies: Gently fold in 1–2 crushed chocolate sandwich cookies.Save a little for topping.
  • Adjust texture: If the mixture seems too thick, add a splash more milk. It should be pourable but not watery.
  • Chill: Cover and refrigerate at least 4 hours, ideally overnight, to let the oats soften and thicken.
  • Finish and serve: In the morning, give it a stir. Top with remaining cookie crumbles and a few mini chocolate chips or cacao nibs if you like.Enjoy cold.

Chocolate Peanut Butter Cup Protein Oats – A Cozy, High-Protein Breakfast

If you’re the kind of person who thinks breakfast should taste like dessert, these Chocolate Peanut Butter Cup Protein Oats are your sweet spot. They’re creamy, chocolatey, and packed with protein to keep you full for hours. No fancy ingredients, no fussy steps—just a bowl that feels like a treat and fuels your morning.

You can make them hot in minutes or prep them overnight for an easy grab-and-go meal. Either way, they deliver that classic chocolate-peanut butter combo you know and love.

What Makes This Special

Cooking process close-up: A small saucepan of creamy chocolate protein oats simmering on medium heat

This recipe combines the comfort of warm oats with the indulgence of a peanut butter cup—minus the sugar crash. It uses simple pantry staples and a scoop of protein powder to level up the nutrition.

You can tailor the thickness, sweetness, and toppings to fit your taste. It’s fast, flexible, and seriously satisfying.

Ingredients

  • 1/2 cup old-fashioned rolled oats
  • 1 cup milk of choice (dairy, almond, oat, or soy)
  • 1 scoop chocolate protein powder (whey or plant-based)
  • 1 tablespoon unsweetened cocoa powder
  • 1–2 teaspoons maple syrup or honey (optional, to taste)
  • 1 tablespoon natural peanut butter (smooth or crunchy)
  • 1/2 teaspoon vanilla extract
  • Pinch of salt
  • Optional mix-ins: 1 tablespoon chia seeds or ground flaxseed
  • Optional toppings: sliced banana, mini chocolate chips, crushed peanuts, cacao nibs, extra peanut butter drizzle

Step-by-Step Instructions

Final dish overhead: A bowl of Chocolate Peanut Butter Cup Protein Oats plated thick and creamy, top
  1. Heat the base: In a small pot over medium heat, combine oats, milk, cocoa powder, and a pinch of salt. Stir well to dissolve the cocoa.
  2. Simmer: Cook for 3–5 minutes, stirring often, until the oats are creamy and the mixture thickens. Add a splash more milk if it gets too thick.
  3. Protein boost: Remove from heat.

    Stir in the chocolate protein powder and vanilla. If needed, add 1–2 tablespoons of warm water or milk to help it blend smoothly.

  4. Sweeten and swirl: Taste and add maple syrup or honey if you want it sweeter. Swirl in the peanut butter until marbled or fully combined—your call.
  5. Power up (optional): Stir in chia seeds or ground flaxseed for extra fiber and thickness.
  6. Top and serve: Spoon into a bowl and add sliced banana, a drizzle of peanut butter, and a sprinkle of mini chocolate chips or cacao nibs for crunch.

Keeping It Fresh

These oats store well for meal prep. Refrigerate in a sealed container for up to 3 days.

For reheating, add a splash of milk and warm on the stovetop or in the microwave, stirring halfway. If you prefer overnight oats, mix everything cold (except toppings), refrigerate for at least 4 hours, and add toppings in the morning.

Why This is Good for You

  • High protein: The combo of protein powder, milk, and peanut butter helps with satiety and muscle recovery.
  • Complex carbs: Oats provide steady energy and gut-friendly fiber.
  • Healthy fats: Peanut butter adds creaminess and keeps hunger in check.
  • Micronutrients: Cocoa brings antioxidants, and seeds (if added) boost omega-3s and fiber.

What Not to Do

  • Don’t add protein powder over high heat: It can clump or turn grainy. Stir it in off the heat.
  • Don’t skip the salt: A small pinch makes the chocolate flavor pop.
  • Don’t over-thicken: If your oats tighten up, loosen with milk.

    Thick is good; paste is not.

  • Don’t overload sweeteners: Let the cocoa and peanut butter shine. Taste as you go.

Alternatives

  • Nut-free: Use sunflower seed butter or tahini instead of peanut butter.
  • Dairy-free: Choose almond, oat, or soy milk and a plant-based protein powder.
  • No protein powder: Stir in 1/4 cup Greek yogurt after cooking, or add 1–2 tablespoons powdered peanut butter (PB2) plus extra cocoa.
  • Lower sugar: Skip the syrup and add sliced banana for natural sweetness.
  • Extra rich: Add 1–2 teaspoons dark cocoa and a few chocolate chips on top.
  • Overnight version: Mix all ingredients cold, including protein powder, with 2–3 extra tablespoons milk. Rest overnight and stir before eating.

FAQ

Can I use quick oats?

Yes.

Quick oats cook faster and make a softer texture. Reduce cook time to 1–2 minutes and adjust liquid as needed.

What protein powder works best?

Whey blends smoothly and tastes creamy. Plant-based powders work too, but you may need a splash more milk to avoid thickness or chalkiness.

How do I prevent clumps?

Take the pot off heat before adding protein powder, and whisk while adding small splashes of milk or water until smooth.

Is cocoa powder necessary if I use chocolate protein?

It’s optional, but a little cocoa deepens the chocolate flavor and cuts sweetness.

Start with 1 teaspoon and adjust.

Can I microwave this?

Absolutely. Microwave oats, milk, cocoa, and salt for 1–2 minutes, stirring halfway. Then stir in protein powder, sweetener, and peanut butter.

How can I make it more filling?

Add chia seeds, ground flax, or top with Greek yogurt and banana slices.

A handful of nuts also adds crunch and staying power.

Wrapping Up

Chocolate Peanut Butter Cup Protein Oats are the perfect blend of comfort and performance. They’re quick to make, easy to customize, and taste like a treat while keeping you full. Keep this recipe on hand for busy mornings, post-workout bowls, or anytime you want a warm, chocolatey boost without the fuss.

Chocolate Peanut Butter Cup Protein Oats - A Cozy, High-Protein Breakfast

Prep Time 5 minutes
Cook Time 5 minutes
Total Time 10 minutes
Servings 1 servings

Ingredients
  

  • 1/2 cup old-fashioned rolled oats
  • 1 cup milk of choice (dairy, almond, oat, or soy)
  • 1 scoop chocolate protein powder (whey or plant-based)
  • 1 tablespoon unsweetened cocoa powder
  • 1–2 teaspoons maple syrup or honey (optional, to taste)
  • 1 tablespoon natural peanut butter (smooth or crunchy)
  • 1/2 teaspoon vanilla extract
  • Pinch of salt
  • Optional mix-ins: 1 tablespoon chia seeds or ground flaxseed
  • Optional toppings: sliced banana, mini chocolate chips, crushed peanuts, cacao nibs, extra peanut butter drizzle

Instructions
 

  • Heat the base: In a small pot over medium heat, combine oats, milk, cocoa powder, and a pinch of salt. Stir well to dissolve the cocoa.
  • Simmer: Cook for 3–5 minutes, stirring often, until the oats are creamy and the mixture thickens. Add a splash more milk if it gets too thick.
  • Protein boost: Remove from heat.Stir in the chocolate protein powder and vanilla. If needed, add 1–2 tablespoons of warm water or milk to help it blend smoothly.
  • Sweeten and swirl: Taste and add maple syrup or honey if you want it sweeter. Swirl in the peanut butter until marbled or fully combined—your call.
  • Power up (optional): Stir in chia seeds or ground flaxseed for extra fiber and thickness.
  • Top and serve: Spoon into a bowl and add sliced banana, a drizzle of peanut butter, and a sprinkle of mini chocolate chips or cacao nibs for crunch.

High Protein Blueberry Cheesecake Overnight Oats – A Creamy, Make-Ahead Breakfast

These overnight oats taste like dessert but power your morning like a solid breakfast. You get the creamy tang of cheesecake, the sweetness of blueberries, and a big boost of protein—all without turning on the stove. Everything comes together in minutes the night before, so you can grab and go.

It’s simple, satisfying, and perfect for busy weekdays. If you like breakfast that feels special but takes zero effort at 7 a.m., this one’s for you.

High Protein Blueberry Cheesecake Overnight Oats – A Creamy, Make-Ahead Breakfast

Ingredients
  

  • Old-fashioned rolled oats (not quick oats or steel-cut)
  • Plain Greek yogurt (2% or 0%, your choice)
  • Low-fat cream cheese (softened or whipped)
  • Milk of choice (dairy or unsweetened non-dairy)
  • Vanilla whey or plant-based protein powder
  • Fresh or frozen blueberries
  • Maple syrup or honey
  • Vanilla extract
  • Chia seeds (optional for extra thickness and fiber)
  • Lemon zest (optional, for a cheesecake vibe)
  • Pinch of salt
  • Graham cracker crumbs (optional topping)

Instructions
 

  • Make the cheesecake base: In a bowl, whisk Greek yogurt, softened cream cheese, vanilla extract, sweetener, and a pinch of salt until smooth.
  • Add the protein: Stir in the vanilla protein powder. If it gets too thick, splash in a little milk to loosen.
  • Stir in the oats: Add rolled oats and chia seeds (if using). Pour in the remaining milk and mix until everything looks creamy and well combined.
  • Add blueberries: Fold in blueberries.If using frozen, no need to thaw—they’ll naturally “sauce” the oats overnight.
  • Adjust sweetness and zest: Taste and add more maple syrup or honey if you want. A touch of lemon zest lifts the cheesecake flavor.
  • Chill: Divide into jars, cover, and refrigerate at least 4 hours, ideally overnight.
  • Serve: Stir, then top with extra blueberries and a sprinkle of graham cracker crumbs for that cheesecake finish.

Why This Recipe Works

  • Protein-packed and filling: Greek yogurt and protein powder bring serious staying power.
  • Great texture: Oats soften overnight, cream cheese adds richness, and blueberries brighten every bite.
  • Balanced sweetness: A little maple syrup or honey keeps it just sweet enough without overdoing it.
  • Meal-prep friendly: Mix once, enjoy for days. It stores well and tastes better after a night in the fridge.
  • No cooking required: Stir, chill, eat.

    That’s it.


Shopping List

  • Old-fashioned rolled oats (not quick oats or steel-cut)
  • Plain Greek yogurt (2% or 0%, your choice)
  • Low-fat cream cheese (softened or whipped)
  • Milk of choice (dairy or unsweetened non-dairy)
  • Vanilla whey or plant-based protein powder
  • Fresh or frozen blueberries
  • Maple syrup or honey
  • Vanilla extract
  • Chia seeds (optional for extra thickness and fiber)
  • Lemon zest (optional, for a cheesecake vibe)
  • Pinch of salt
  • Graham cracker crumbs (optional topping)

How to Make It

  1. Make the cheesecake base: In a bowl, whisk Greek yogurt, softened cream cheese, vanilla extract, sweetener, and a pinch of salt until smooth.
  2. Add the protein: Stir in the vanilla protein powder. If it gets too thick, splash in a little milk to loosen.
  3. Stir in the oats: Add rolled oats and chia seeds (if using). Pour in the remaining milk and mix until everything looks creamy and well combined.
  4. Add blueberries: Fold in blueberries.

    If using frozen, no need to thaw—they’ll naturally “sauce” the oats overnight.


  5. Adjust sweetness and zest: Taste and add more maple syrup or honey if you want. A touch of lemon zest lifts the cheesecake flavor.
  6. Chill: Divide into jars, cover, and refrigerate at least 4 hours, ideally overnight.
  7. Serve: Stir, then top with extra blueberries and a sprinkle of graham cracker crumbs for that cheesecake finish.

Keeping It Fresh

Store in airtight jars in the fridge for up to 4 days. If the oats thicken too much, stir in a splash of milk before serving.

Add crunchy toppings like graham crumbs or nuts just before eating to keep them crisp. Keep fruit on top if you prefer a less purple mix and fold it in right before serving.

Why This is Good for You

  • High in protein: Greek yogurt and protein powder support muscle repair and keep you full longer.
  • Fiber-rich: Oats and chia seeds help with digestion and steady energy.
  • Antioxidants: Blueberries bring vitamins and polyphenols that support overall health.
  • Balanced macros: Protein, complex carbs, and healthy fats (if you add chia or nuts) make a well-rounded meal.

Pitfalls to Watch Out For

  • Using quick oats: They can turn mushy. Rolled oats give better texture.
  • Too much protein powder: Overdoing it can make the mix chalky.

    Start with one scoop and adjust.


  • Not enough liquid: Dry oats in the morning are no fun. The mixture should look creamy before chilling.
  • Skipping the salt: A tiny pinch enhances the cheesecake flavor.
  • Adding crunchy toppings too early: They’ll get soggy overnight.

Recipe Variations

  • Lemon Blueberry Cheesecake: Add extra lemon zest and a squeeze of lemon juice.
  • Berry Medley: Swap in raspberries and strawberries, or use a mixed frozen berry blend.
  • Dairy-Free: Use dairy-free yogurt, vegan cream cheese, and plant-based protein powder.
  • Nutty Crunch: Top with chopped almonds or walnuts for healthy fats and texture.
  • Lower Sugar: Skip the sweetener and rely on blueberries, or use a zero-calorie sweetener you like.
  • Cookie Crust Vibe: Add a spoon of graham crumbs or crushed digestive biscuits on top right before serving.

FAQ

Can I use steel-cut oats?

Not for this version. Steel-cut oats won’t soften enough overnight.

Stick with rolled oats for the best texture.

Do I have to use protein powder?

No. You can skip it and add a little extra Greek yogurt to maintain creaminess. The protein count will be lower but still solid.

Can I use frozen blueberries?

Yes.

Add them straight from the freezer. They’ll release juice as they thaw and create a pretty swirl.

How much sweetener should I use?

Start with 1–2 teaspoons of maple syrup or honey per serving, then adjust to taste. If your protein powder is sweetened, you may need less.

What’s the best milk for this?

Any milk works.

Dairy milk makes it creamier, while unsweetened almond or soy milk keeps it lighter.

How long do these last?

They’re best within 3–4 days. The texture stays smooth, and the flavor deepens after the first night.

Can I warm them up?

Yes. Heat gently in the microwave for 30–60 seconds if you prefer them warm.

Stir and add a splash of milk if they thicken.

In Conclusion

High Protein Blueberry Cheesecake Overnight Oats bring dessert flavors to a healthy, no-fuss breakfast. They’re quick to prep, easy to customize, and perfect for busy mornings. Make a batch, chill, and wake up to something creamy, fruity, and genuinely satisfying.

Healthy Chicken & Sweet Potato Power Bowls – A Balanced, Flavor-Packed Meal

These bowls are the kind of weeknight meal you keep coming back to. They’re colorful, hearty, and full of satisfying textures—crispy roasted sweet potatoes, juicy chicken, and fresh greens. Everything cooks on a sheet pan, and the simple dressing ties it all together.

You can customize the toppings and make it your own. It’s an easy, feel-good meal that tastes just as good the next day.

Healthy Chicken & Sweet Potato Power Bowls - A Balanced, Flavor-Packed Meal

Prep Time 15 minutes
Cook Time 30 minutes
Total Time 45 minutes
Servings 4 servings

Ingredients
  

  • Chicken: 1.5 lb boneless, skinless chicken breasts or thighs
  • Sweet potatoes: 2 medium, peeled and cubed
  • Veggies: 1 red onion (sliced), 1 red bell pepper (sliced), 2 cups broccoli florets
  • Greens: 4 cups baby spinach or mixed greens
  • Grain base (optional): 2 cups cooked quinoa, brown rice, or farro
  • Spices: 1.5 tsp smoked paprika, 1 tsp ground cumin, 1 tsp garlic powder, 1/2 tsp chili powder, 1/2 tsp dried oregano, 1/2 tsp salt, black pepper to taste
  • Oil: 3 tbsp extra-virgin olive oil (divided)
  • Lemon-tahini dressing: 1/4 cup tahini, juice of 1 lemon, 1 tbsp maple syrup or honey, 1 small garlic clove (grated), 2–4 tbsp warm water, pinch of salt
  • Toppings: 1 avocado (sliced), 1/4 cup toasted pepitas or almonds, fresh cilantro or parsley, lime or lemon wedges

Instructions
 

  • Preheat and prep: Heat the oven to 425°F (220°C). Line a large sheet pan with parchment for easier cleanup.
  • Season the sweet potatoes: Toss the cubes with 1 tbsp olive oil, half the spice blend, and a pinch of salt.Spread on half the sheet pan.
  • Add the veggies: On the other half, toss onion, bell pepper, and broccoli with 1 tbsp olive oil, a pinch of salt, and black pepper. Roast for 12 minutes.
  • Season the chicken: Pat dry. Drizzle with 1 tbsp olive oil, then coat with the remaining spices.Push the veggies to make space and add the chicken to the pan.
  • Roast to finish: Continue roasting 12–16 minutes, until the chicken reaches an internal temperature of 165°F (74°C) and the sweet potatoes are tender with caramelized edges. Rest chicken for 5 minutes, then slice.
  • Make the dressing: Whisk tahini, lemon juice, maple syrup, garlic, and salt. Add warm water, 1 tbsp at a time, until creamy and pourable.
  • Prep the base: Add a handful of greens to each bowl.If using, spoon in 1/2 cup warm quinoa, rice, or farro.
  • Build the bowls: Divide sweet potatoes, roasted veggies, and sliced chicken. Top with avocado, seeds, and herbs.
  • Finish with sauce: Drizzle with lemon-tahini dressing. Serve with citrus wedges for extra brightness.

Why This Recipe Works

  • Balanced macros: Lean protein, complex carbs, and healthy fats keep you full and energized.
  • Sheet pan convenience: Most of the cooking happens in the oven, so cleanup is simple.
  • Big flavor, simple steps: A quick spice blend and a bright lemon-tahini dressing add tons of taste without extra work.
  • Flexible base: Swap grains, greens, or toppings to match what you have on hand.
  • Great for meal prep: Holds up well in the fridge and reheats nicely.

What You’ll Need

  • Chicken: 1.5 lb boneless, skinless chicken breasts or thighs
  • Sweet potatoes: 2 medium, peeled and cubed
  • Veggies: 1 red onion (sliced), 1 red bell pepper (sliced), 2 cups broccoli florets
  • Greens: 4 cups baby spinach or mixed greens
  • Grain base (optional): 2 cups cooked quinoa, brown rice, or farro
  • Spices: 1.5 tsp smoked paprika, 1 tsp ground cumin, 1 tsp garlic powder, 1/2 tsp chili powder, 1/2 tsp dried oregano, 1/2 tsp salt, black pepper to taste
  • Oil: 3 tbsp extra-virgin olive oil (divided)
  • Lemon-tahini dressing: 1/4 cup tahini, juice of 1 lemon, 1 tbsp maple syrup or honey, 1 small garlic clove (grated), 2–4 tbsp warm water, pinch of salt
  • Toppings: 1 avocado (sliced), 1/4 cup toasted pepitas or almonds, fresh cilantro or parsley, lime or lemon wedges

Step-by-Step Instructions

  1. Preheat and prep: Heat the oven to 425°F (220°C). Line a large sheet pan with parchment for easier cleanup.
  2. Season the sweet potatoes: Toss the cubes with 1 tbsp olive oil, half the spice blend, and a pinch of salt.

    Spread on half the sheet pan.

  3. Add the veggies: On the other half, toss onion, bell pepper, and broccoli with 1 tbsp olive oil, a pinch of salt, and black pepper. Roast for 12 minutes.
  4. Season the chicken: Pat dry. Drizzle with 1 tbsp olive oil, then coat with the remaining spices.

    Push the veggies to make space and add the chicken to the pan.

  5. Roast to finish: Continue roasting 12–16 minutes, until the chicken reaches an internal temperature of 165°F (74°C) and the sweet potatoes are tender with caramelized edges. Rest chicken for 5 minutes, then slice.
  6. Make the dressing: Whisk tahini, lemon juice, maple syrup, garlic, and salt. Add warm water, 1 tbsp at a time, until creamy and pourable.
  7. Prep the base: Add a handful of greens to each bowl.

    If using, spoon in 1/2 cup warm quinoa, rice, or farro.

  8. Build the bowls: Divide sweet potatoes, roasted veggies, and sliced chicken. Top with avocado, seeds, and herbs.
  9. Finish with sauce: Drizzle with lemon-tahini dressing. Serve with citrus wedges for extra brightness.

Storage Instructions

  • Fridge: Store components separately in airtight containers for up to 4 days.

    Keep dressing in a jar.

  • Reheating: Reheat chicken, grains, and roasted veggies in a skillet or microwave until warm. Add greens and avocado fresh.
  • Freezer: Cooked chicken and grains freeze well for up to 2 months. Sweet potatoes also freeze, but skip the fresh toppings until serving.

Why This is Good for You

  • Lean protein: Chicken supports muscle repair and steady energy.
  • Complex carbs: Sweet potatoes offer fiber, potassium, and beta-carotene for eye and immune health.
  • Healthy fats: Tahini and avocado add heart-healthy fats that keep you satisfied.
  • Micronutrient boost: Broccoli, peppers, and greens deliver vitamin C, folate, and antioxidants.
  • Balanced plate: The combo of protein, fiber, and fats helps curb cravings and stabilize blood sugar.

Common Mistakes to Avoid

  • Crowding the pan: Overlapping veggies steam instead of roast.

    Use two pans if needed.

  • Skipping the rest: Resting chicken locks in juices. Slice too soon and it can dry out.
  • Watery dressing: Add water slowly. Tahini thickens first, then loosens—keep whisking.
  • Under-seasoning: Sweet potatoes and chicken need a generous pinch of salt and spice for best flavor.
  • Adding greens too early: Don’t heat delicate greens; add them just before serving so they stay fresh.

Alternatives

  • Protein swaps: Turkey breast, salmon, shrimp, tofu, or chickpeas.
  • Veggie swaps: Cauliflower, zucchini, Brussels sprouts, or carrots work well.
  • Grain-free: Use extra greens or riced cauliflower instead of grains.
  • Spice profile: Try curry powder, shawarma spice, or chili-lime seasoning.
  • Dairy boost: Add a dollop of Greek yogurt or crumbled feta for creaminess.

FAQ

Can I make this bowl ahead for meal prep?

Yes.

Roast the chicken and vegetables, cook your grain, and store the dressing separately. Assemble and add fresh toppings the day you eat.

How do I keep the chicken juicy?

Use an instant-read thermometer and pull the chicken at 165°F. Rest for 5 minutes before slicing to keep the juices in.

What if I don’t like tahini?

Swap with Greek yogurt, hummus thinned with lemon juice and olive oil, or a simple vinaigrette.

Can I air-fry the sweet potatoes?

Absolutely.

Air-fry at 390°F (200°C) for 12–15 minutes, shaking halfway, until crisp-tender.

Is there a spice-free version?

Keep it simple with salt, pepper, and a squeeze of lemon. Add fresh herbs like parsley or dill for flavor without heat.

Final Thoughts

These Healthy Chicken & Sweet Potato Power Bowls are simple to make, big on flavor, and easy to customize. They fit into busy schedules and support a balanced way of eating.

Keep the components on hand, and you’ll always have a nourishing meal ready to go. It’s the kind of recipe that makes healthy eating feel effortless.

Skinny Buffalo Chicken Protein Pasta – Spicy, Creamy, and High-Protein Comfort

Buffalo chicken meets creamy pasta in a lighter, protein-packed spin on a takeout favorite. This Skinny Buffalo Chicken Protein Pasta delivers big flavor with balanced heat, lean chicken, and a velvety sauce that doesn’t weigh you down. It’s quick enough for a weeknight, yet satisfying enough for meal prep.

If you love buffalo wings and cozy bowls of pasta, this recipe gives you the best of both worlds—without the heavy cream. Grab a bowl and a fork; this one’s a keeper.

Skinny Buffalo Chicken Protein Pasta – Spicy, Creamy, and High-Protein Comfort

Prep Time 15 minutes
Cook Time 30 minutes
Total Time 45 minutes
Servings 4 servings

Ingredients
  

  • 8 oz high-protein pasta (chickpea, lentil, or protein-enriched wheat)
  • 1 lb boneless, skinless chicken breast, cut into small bite-size pieces
  • 1 tbsp olive oil (or avocado oil)
  • 1 tsp garlic powder
  • 1 tsp onion powder
  • 1/2 tsp smoked paprika
  • 1/2 tsp kosher salt, plus more to taste
  • 1/4 tsp black pepper
  • 1/2 cup buffalo hot sauce (such as Frank’s RedHot), plus more to taste
  • 2 oz reduced-fat cream cheese, softened
  • 1/2 cup plain nonfat Greek yogurt
  • 1/4 cup low-sodium chicken broth or reserved pasta water
  • 1 tsp ranch seasoning or dried dill + parsley blend
  • 1/4 cup finely grated Parmesan (optional, for extra savoriness)
  • 2 green onions, thinly sliced
  • Optional toppings: crumbled light blue cheese, extra buffalo sauce, chopped cilantro or parsley

Instructions
 

  • Cook the pasta: Bring a large pot of salted water to a boil. Cook the high-protein pasta according to package directions until al dente.Reserve 1/2 cup of the starchy water, then drain.
  • Season the chicken: Pat the chicken dry. Toss with garlic powder, onion powder, smoked paprika, salt, and pepper.
  • Sear the chicken: Heat olive oil in a large nonstick skillet over medium-high. Add chicken in a single layer and cook 5–7 minutes, stirring occasionally, until cooked through and lightly browned.
  • Build the sauce base: Lower heat to medium.Stir in buffalo sauce and broth (or reserved pasta water). Simmer 1–2 minutes so the flavors meld.
  • Add creaminess: Reduce heat to low. Stir in softened cream cheese until smooth.Remove the pan from heat and whisk in Greek yogurt and ranch seasoning. Keep it off direct heat to prevent curdling.
  • Combine with pasta: Add drained pasta to the skillet and toss until every piece is coated. If it looks thick, loosen with a splash of reserved pasta water.
  • Finish and taste: Stir in Parmesan (if using) and half the green onions.Taste and adjust salt, pepper, and buffalo sauce.
  • Serve: Top with remaining green onions. Add blue cheese crumbles or herbs if you like. Serve hot.

Why This Recipe Works

  • High protein, lower fat: Greek yogurt and reduced-fat cream cheese bring creaminess and protein without a heavy sauce.
  • Customizable heat: You control the buffalo sauce level, so it can be mild or fiery.
  • Balanced flavors: Tangy yogurt, savory chicken, and a touch of ranch seasoning deliver that classic buffalo profile.
  • Meal-prep friendly: Holds up well for a few days and reheats nicely with a splash of milk or broth.
  • Fast and simple: Uses pantry staples and comes together in about 30 minutes.

Ingredients

  • 8 oz high-protein pasta (chickpea, lentil, or protein-enriched wheat)
  • 1 lb boneless, skinless chicken breast, cut into small bite-size pieces
  • 1 tbsp olive oil (or avocado oil)
  • 1 tsp garlic powder
  • 1 tsp onion powder
  • 1/2 tsp smoked paprika
  • 1/2 tsp kosher salt, plus more to taste
  • 1/4 tsp black pepper
  • 1/2 cup buffalo hot sauce (such as Frank’s RedHot), plus more to taste
  • 2 oz reduced-fat cream cheese, softened
  • 1/2 cup plain nonfat Greek yogurt
  • 1/4 cup low-sodium chicken broth or reserved pasta water
  • 1 tsp ranch seasoning or dried dill + parsley blend
  • 1/4 cup finely grated Parmesan (optional, for extra savoriness)
  • 2 green onions, thinly sliced
  • Optional toppings: crumbled light blue cheese, extra buffalo sauce, chopped cilantro or parsley

Step-by-Step Instructions

  1. Cook the pasta: Bring a large pot of salted water to a boil. Cook the high-protein pasta according to package directions until al dente.

    Reserve 1/2 cup of the starchy water, then drain.


  2. Season the chicken: Pat the chicken dry. Toss with garlic powder, onion powder, smoked paprika, salt, and pepper.
  3. Sear the chicken: Heat olive oil in a large nonstick skillet over medium-high. Add chicken in a single layer and cook 5–7 minutes, stirring occasionally, until cooked through and lightly browned.
  4. Build the sauce base: Lower heat to medium.

    Stir in buffalo sauce and broth (or reserved pasta water). Simmer 1–2 minutes so the flavors meld.


  5. Add creaminess: Reduce heat to low. Stir in softened cream cheese until smooth.

    Remove the pan from heat and whisk in Greek yogurt and ranch seasoning. Keep it off direct heat to prevent curdling.


  6. Combine with pasta: Add drained pasta to the skillet and toss until every piece is coated. If it looks thick, loosen with a splash of reserved pasta water.
  7. Finish and taste: Stir in Parmesan (if using) and half the green onions.

    Taste and adjust salt, pepper, and buffalo sauce.


  8. Serve: Top with remaining green onions. Add blue cheese crumbles or herbs if you like. Serve hot.

Storage Instructions

  • Refrigerate: Store in an airtight container for 3–4 days.
  • Reheat: Warm gently on the stove or in the microwave with a splash of broth or milk to restore creaminess.
  • Freezing: Not ideal due to the yogurt-based sauce, which can separate.

    If you freeze, thaw slowly and reheat with extra liquid while stirring.


Health Benefits

  • High-quality protein: Chicken and Greek yogurt support muscle repair and satiety.
  • Better carb profile: High-protein pasta offers more fiber and protein than standard pasta, aiding fullness and steady energy.
  • Lighter fats: Reduced-fat dairy keeps calories in check while maintaining flavor and texture.
  • Custom sodium control: Using low-sodium broth and seasoning to taste helps manage overall salt intake.

Pitfalls to Watch Out For

  • Curdling yogurt: Add yogurt off heat and whisk quickly. Avoid boiling after it’s added.
  • Dry chicken: Don’t overcook; pull it as soon as it’s opaque and firm. Small pieces cook fast.
  • Over-thick sauce: Keep reserved pasta water handy.

    A few tablespoons can bring the sauce back to silky.


  • Too salty: Buffalo sauce varies in salt. Taste before adding extra salt and choose low-sodium broth.

Alternatives

  • Protein swaps: Use cooked shredded rotisserie chicken, ground turkey, or sautéed shrimp.
  • Dairy-free: Use dairy-free cream cheese and a thick plain dairy-free yogurt; adjust with extra broth for smoothness.
  • Gluten-free: Pick a certified gluten-free pasta and ensure the buffalo sauce and ranch seasoning are gluten-free.
  • Milder version: Use half buffalo sauce and half broth, then finish with a squeeze of lemon for tang.
  • Extra veggies: Fold in sautéed spinach, roasted cauliflower, or steamed broccoli for volume and fiber.

FAQ

Can I use canned chicken?

Yes. Drain it well and warm it in the sauce after the cream cheese melts.

It won’t sear like fresh chicken, but it still works.

What’s the best buffalo sauce for this?

A classic cayenne-based hot sauce like Frank’s RedHot gives a familiar buffalo flavor. Choose “original” for balanced heat.

How do I keep the sauce silky?

Keep heat low when adding cream cheese and remove from heat before whisking in yogurt. Use pasta water to adjust thickness.

Can I make it ahead?

Yes.

Cook as directed, cool, and refrigerate. Reheat with a splash of broth or milk and stir until creamy again.

Is blue cheese necessary?

No, but a small sprinkle adds that buffalo-wing vibe. For a lighter option, stick to green onions and herbs.

In Conclusion

Skinny Buffalo Chicken Protein Pasta brings heat, tang, and creaminess without the heavy feel of traditional cream sauces.

It’s fast, flexible, and macro-friendly, making it a weeknight staple and a great meal-prep option. Keep the yogurt off direct heat, save some pasta water, and season to taste—you’ll have a satisfying, high-protein dinner that hits every craving.

Lemon Herb Chicken Protein Meal Prep – Simple, Fresh, and Ready for the Week

Looking for a meal prep that tastes bright, stays juicy, and keeps you full? This Lemon Herb Chicken Protein Meal Prep is exactly that. It’s simple, fresh, and packed with flavor without piling on calories.

The marinade does most of the work, and the whole meal comes together with minimal effort. Make it once, and you’ve got a week of balanced, high-protein lunches ready to go.

Why This Recipe Works

This recipe balances flavor and nutrition with a short list of ingredients. Lemon adds freshness and tenderizes the chicken, while herbs and garlic bring depth without heavy sauces.

Roasting everything on a sheet pan saves time and keeps cleanup easy. Plus, it’s customizable—swap the carbs or veggies based on what you like or have on hand.

What You’ll Need

  • Chicken: 2 pounds boneless, skinless chicken breasts (or thighs for juicier results)
  • Lemon: Zest and juice of 2 lemons
  • Olive oil: 3 tablespoons
  • Garlic: 4 cloves, minced
  • Fresh herbs: 2 tablespoons chopped parsley, 1 tablespoon chopped rosemary, 1 tablespoon chopped thyme (or 2 teaspoons dried Italian seasoning)
  • Salt and pepper: 1½ teaspoons kosher salt, 1 teaspoon black pepper
  • Optional heat: ½ teaspoon red pepper flakes
  • Vegetables: 3 cups broccoli florets, 2 cups zucchini or bell peppers, chopped
  • Carb base (choose one): 3 cups cooked quinoa, brown rice, or cauliflower rice
  • Extras: Lemon wedges for serving, a drizzle of extra-virgin olive oil

Instructions

  1. Make the marinade: In a bowl, whisk lemon zest, lemon juice, olive oil, garlic, herbs, salt, pepper, and red pepper flakes.
  2. Prep the chicken: Pat chicken dry. If breasts are thick, slice horizontally into cutlets for even cooking.
  3. Marinate: Add chicken to the bowl and toss to coat.

    Rest for at least 20 minutes at room temperature, or up to 8 hours in the fridge.


  4. Preheat and prep veggies: Heat oven to 425°F (220°C). Toss broccoli and zucchini with 1 tablespoon olive oil, a pinch of salt, and pepper.
  5. Roast: Arrange veggies on a sheet pan. Place chicken on a second pan (or the same pan with space).

    Roast 15–20 minutes for cutlets, 20–25 minutes for whole breasts, until the internal temp reaches 165°F (74°C).


  6. Rest the chicken: Let it sit 5 minutes, then slice against the grain.
  7. Assemble bowls: Add ¾–1 cup of your carb base to each container. Top with roasted veggies and sliced chicken.
  8. Finish: Add a squeeze of fresh lemon and a light drizzle of olive oil. Garnish with parsley if you like.

Storage Instructions

  • Refrigerator: Store in airtight containers for up to 4 days.
  • Freezer: Freeze chicken and rice/quinoa for up to 3 months.

    Add fresh veggies after reheating for best texture.


  • Reheating: Microwave 60–90 seconds, just until warm. Add a splash of water or lemon juice to keep it from drying out.
  • Avoid sogginess: Keep lemon wedges separate until serving.

Why This is Good for You

High protein supports muscle recovery and helps you stay full longer. Lemon and herbs add flavor without heavy sauces, keeping calories in check. Fiber-rich veggies support digestion and steady energy. Choosing whole grains like quinoa or brown rice brings extra protein, minerals, and slow-release carbs.

What Not to Do

  • Don’t skip the marinade time. Even 20 minutes improves flavor and tenderness.
  • Don’t overcrowd the pan. Crowding traps steam and dries out the chicken.
  • Don’t overcook. Use a meat thermometer and pull at 165°F for juicy results.
  • Don’t store wet garnishes on top. Keep lemon wedges and fresh herbs separate until you eat.

Variations You Can Try

  • Greek style: Add 1 teaspoon dried oregano, swap parsley for dill, and serve with cucumber and feta.
  • Garlic-parmesan: Stir 2 tablespoons grated Parmesan into the marinade and roast asparagus instead of broccoli.
  • Spicy citrus: Use lemon and orange zest, add extra chili flakes, and serve with cilantro.
  • Low-carb: Use cauliflower rice and extra veggies; add avocado when serving.
  • Thighs instead of breasts: Juicier and forgiving—roast 22–28 minutes depending on size.

FAQ

Can I cook the chicken on the stovetop instead?

Yes.

Heat a large skillet over medium-high with a bit of oil. Sear chicken 4–6 minutes per side until it reaches 165°F. Let it rest before slicing.

How do I keep the chicken from drying out?

Marinate, don’t overcook, and let it rest.

Cutting breasts into thinner cutlets also helps them cook evenly. A quick squeeze of lemon after reheating brings moisture back.

Can I use bottled lemon juice?

You can, but fresh lemon gives better flavor. If using bottled, add extra zest or a bit more herbs to lift the taste.

What vegetables work best for meal prep?

Sturdy veggies like broccoli, carrots, Brussels sprouts, green beans, and bell peppers hold up well.

Avoid very watery veg like tomatoes or cucumbers when storing hot meals.

Is this recipe good for weight loss?

It can be. It’s high in protein, loaded with veggies, and easy to portion. Choose cauliflower rice or smaller portions of grains if you want to lower calories.

How many servings does this make?

Typically 4 servings.

If you need more, double the recipe and use two sheet pans to avoid crowding.

Final Thoughts

This Lemon Herb Chicken Protein Meal Prep is simple, flexible, and seriously satisfying. It’s the kind of recipe that fits busy weeks without tasting like a compromise. Prep it once, enjoy it all week, and tweak the sides to keep things interesting.

Fresh, bright, and protein-packed—exactly what a good meal prep should be.

Low Cal High Protein Chicken Caesar Wraps – Simple, Satisfying, and Fresh

If you want a lunch that’s quick, filling, and doesn’t weigh you down, these Low Cal High Protein Chicken Caesar Wraps are a solid choice. They pack big flavor with lean protein and crisp greens, and you can assemble them in minutes. Whether you’re meal-prepping for the week or grabbing a fast weeknight bite, this recipe fits easily into your routine.

The textures are spot-on too—juicy chicken, crunchy lettuce, and a creamy Caesar bite. It’s everything you love about a Caesar salad, wrapped up and ready to go.

What Makes This Special

  • High protein, lower calorie: Lean chicken breast, light Caesar dressing, and a high-fiber wrap keep calories in check without skimping on satisfaction.
  • Meal-prep friendly: Cook the chicken once and assemble wraps in minutes all week.
  • Balanced flavors: Bright lemon, tangy Parmesan, and a little crunch from romaine and optional croutons.
  • Customizable: Swap in Greek yogurt dressing, add veggies, or go gluten-free with ease.

What You’ll Need

  • 2 cups cooked chicken breast, chopped or shredded (grilled, roasted, or rotisserie)
  • 4 high-fiber, low-calorie wraps (8–10 inches; look for whole wheat or low-carb)
  • 3 cups chopped romaine lettuce (or a mix of romaine and baby kale)
  • 1/3 cup light Caesar dressing (store-bought or homemade)
  • 1/4 cup finely grated Parmesan cheese
  • 1 tablespoon lemon juice (fresh, optional but brightens it)
  • 1 teaspoon Dijon mustard (optional for extra tang)
  • Freshly ground black pepper, to taste
  • Pinch of salt, to taste
  • Optional add-ins: sliced cherry tomatoes, thin cucumber slices, a few crushed light croutons, or shaved Parmesan

How to Make It

  1. Prep the chicken: If using fresh chicken, season with salt, pepper, and a touch of garlic powder. Grill, bake, or pan-sear until cooked through, then cool and chop.

    Leftover or rotisserie chicken works great too.

  2. Make the Caesar mix: In a bowl, whisk the light Caesar dressing with lemon juice, Dijon, and a few grinds of black pepper. Taste and adjust with a pinch of salt if needed.
  3. Toss the filling: In a large bowl, add romaine, chicken, and Parmesan. Drizzle over the dressing and toss to coat lightly.

    You want everything coated, not soggy.

  4. Warm the wraps: Heat each wrap in a dry skillet for 10–15 seconds per side, or microwave for 10 seconds. This makes them more flexible and less likely to tear.
  5. Assemble: Divide the chicken Caesar mixture among the wraps. Add optional tomatoes, cucumber, or a few crushed light croutons for crunch.
  6. Wrap it up: Fold in the sides and roll tightly from the bottom up.

    Slice in half if you like.

  7. Serve: Enjoy right away, or wrap tightly in foil for a packable lunch.

How to Store

  • Keep components separate: Store chicken, chopped greens, and dressing in separate containers in the fridge for up to 3–4 days.
  • Assemble before eating: This keeps the lettuce crisp and the wrap from getting soggy.
  • Pre-wrapped option: If you must assemble ahead, spread a thin layer of lettuce first to create a barrier, then add dressing. Eat within 24 hours.

Why This is Good for You

  • High-quality protein: Chicken breast supports muscle maintenance and helps you stay full longer.
  • Fiber boost: A high-fiber wrap and crisp greens support digestion and steady energy.
  • Lighter fats: Using a light dressing and measured Parmesan keeps calories in check while preserving flavor.
  • Smart calories: Each wrap can land around the 300–450 calorie range depending on your wrap and dressing choices.

Common Mistakes to Avoid

  • Overdressing the mix: Too much dressing makes the wrap soggy and adds unnecessary calories.
  • Skipping the warming step: Cold wraps crack and tear. Briefly warming prevents messes.
  • Wet lettuce: Wash and dry greens thoroughly.

    Excess moisture waters down the dressing.

  • Using thick croutons: They can pierce the wrap. If you want crunch, use a small amount of crushed croutons.

Alternatives

  • Greek yogurt Caesar: Swap light Caesar for a Greek yogurt-based version to bump protein and cut calories.
  • Grilled turkey or tofu: Use turkey breast or extra-firm tofu for variety; season the same way.
  • Gluten-free: Use a gluten-free wrap or a large collard leaf. Blanch collards for 20 seconds to soften.
  • Extra veggies: Add shaved carrots, bell peppers, or avocado (note: avocado adds calories but great fats).
  • Spicy twist: Mix in a dash of hot sauce or crushed red pepper to the dressing.

FAQ

How many calories are in one wrap?

It depends on your wrap and dressing.

With a high-fiber wrap (around 80–120 calories), 4 ounces of chicken, light dressing, and Parmesan, most wraps land near 350–400 calories.

Can I use rotisserie chicken?

Yes. Remove the skin and use breast meat to keep it lean. Shred and toss with the dressing just before assembling.

What’s the best low-calorie wrap to use?

Look for whole wheat or low-carb wraps with at least 8–12 grams of fiber and under 120 calories per wrap.

They’re sturdy and filling without heavy calories.

How can I make this dairy-free?

Use a dairy-free Caesar dressing and swap Parmesan for a dairy-free Parmesan-style topping or nutritional yeast.

Can I make it ahead?

Yes, but store components separately and assemble right before eating. If pre-assembled, eat within 24 hours and line the wrap with dry lettuce to prevent sogginess.

In Conclusion

These Low Cal High Protein Chicken Caesar Wraps give you a fast, flavorful meal that supports your goals without feeling restrictive. They’re easy to customize, simple to prep, and satisfying enough for lunch or dinner.

Keep a batch of cooked chicken on hand, and you’ll have a go-to wrap that tastes great every time.